A Maintenance Oriented Podcast For Airplane Owners, Pilots, and Mechanics

Month: December 2017

079 – YOU Can Check Your Exhaust System for Leaks With This Simple Technique!

This is the final episode for 2017!  Thank you everyone, for all your emails, messages, ideas, and encouragement.  You all mean so much to me!

A recent email I received, included this link for an article that is worth reading, about exhaust system issues, and carbon monoxide.  There are also a couple videos worth watching as well.

http://www.safetyandhealthmagazine.com/articles/16253-ntsb-warns-pilots-and-airline-mechanics-about-carbon-monoxide-poisoning

Thank you Steve, for providing that information!

As an airplane owner, there is a very simple technique you can use to detect exhaust leaks that might be a problem.  All it takes is a clean shop vac with the capability to BLOW air, a clean spray bottle, and some dish detergent.  (Oh, and maybe some duct tape and some pieces of sponge, or something to seal around the vacuum hose when you put it in the exhaust tailpipe.)

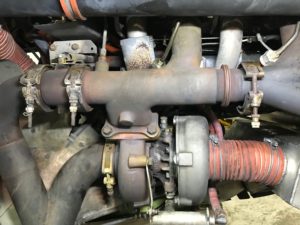
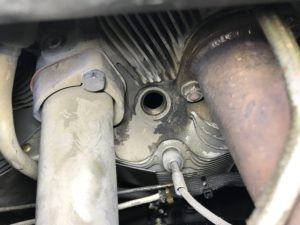
Here are some pictures from a Piper Turbo-Saratoga I’ve been working on at Classic Aviation recently.  The cylinder #3 exhaust flange was leaking at the gasket area, and blowing dust back onto the intake pipe.  This was one issue I needed to fix.  AND, it became really obvious when I did the shop vac pressure test… listen to today’s episode for more details about how to do this.

Here’s another thing I found.  The forward V-band clamp in this picture was loose.  Also, the transition flange going into the exhaust pipe behind the clamp, was seized at the slip joint, and caused the gasket to be loose, and leak exhaust dust.  It took some heat to free up the slip joint, and put some anti-seize on it to allow it to be drawn into proper position for torquing.

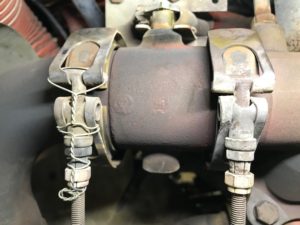
Also, the V-band clamp second from the top left, in the picture above, was leaking exhaust dust for a big reason… the gasket was missing!  Here’s a closer look:

Another indicator is how the two ends of the clamp are almost touching… after the gasket was installed, they were farther apart, as they should be.

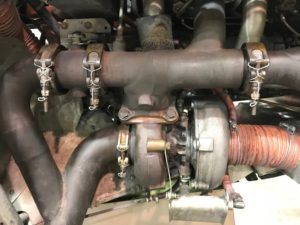
And here’s  how the final installation looks after everything has been reassembled, torqued and safetied:

In light of all this, here are some ideas of what you can do on your airplane engine, to help ensure the exhaust system is safe:

During the oil change, or any time the cowling is removed:

  1. Check for exhaust leaks.
    1. Visual – look for dust.
    2. Pressure test – not complicated – use shop vac, but be careful!
  2. Note any discrepancies and report to your A&P.  How cool if you can say, “I have a little exhaust leak at Cylinder #4 attach flange… please fix it.”
  3. If turbocharged, do a visual check and “wiggle test” on all exhaust clamps… most are V-band clamps.  If there is any play at all, it needs to be retorqued.
  4. If you’re not comfortable doing the pressure test, ask your A&P to do it, including, and especially inside the muffler cover where the cabin heat is picked up.
  5. If you are having exhaust work done, ask your A&P to make sure all slip joints are free to move. 

If you do this and find any leaks, I’d be very interested in hearing about your experience – email me or leave a voice message.  (Click the button on the right side of the page.)

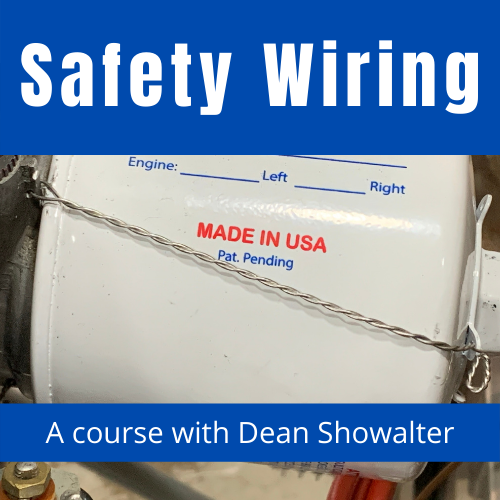
Coming in 2018:  Be looking for information on the new course, “Safety Wire Like A Pro!”  Owner performed preventive maintenance often requires some safety wiring, so if you need to learn how to safety wire oil filters, screens, brake calipers, and other items, OR, you’d like to get better at it, consider taking this video course… it can absolutely help you to make your safety wiring look like it was done by a professional!  More information coming soon.

Merry Christmas everyone!  I’d like to wish you the love, joy, peace, and abundant life of Jesus, as we celebrate Christmas and look forward to a brand new year in 2018.  God bless you all, my friends!
 

078 – A Cylinder Blow-Out, a Blue Fuel Stain, and a Leaking Vacuum Pump Seal

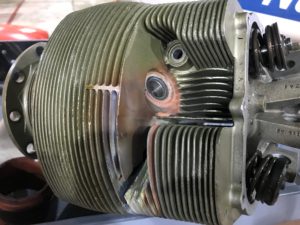
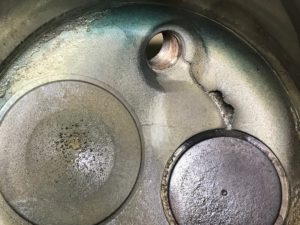
This cylinder definitely has a problem!  And I can’t help but think, could there have been a way to detect what was going on before it got this severe?  I’m not sure, but I do wonder what might have been detected if a borescope inspection had been done at the last annual.  (Perhaps that was done, and nothing showed up at that time.)

Whatever the case, this cylinder is not healthy.  Thankfully, it was found, and removed from that engine.  One complicating factor on this airplane, was that the #1 and #5 EGT probes were swapped, which could  have caused some confusion.


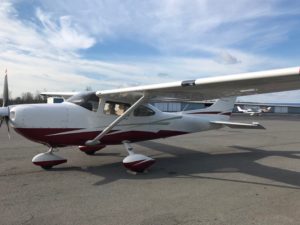
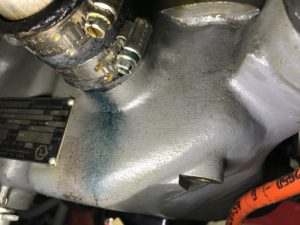
Another thing I saw in the shop this past week, was an area of blue fuel stain below one of the induction couplings on this Cessna 182.  (This is NOT the airplane that had the cylinder problem.)

The induction coupling clamps on this engine needed a little tightening… It’s always a good idea to check these clamps during the annual inspection, both on Lycoming, and Continental engines.

Another good way to check for induction leaks is to do an in-flight induction leak test using different power settings and analyzing information on the engine monitor.  (Thank you Steve, for pointing that out.)  You can google “Mike Busch induction leak test” for more information on that.


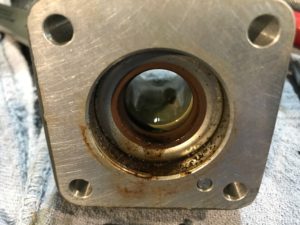
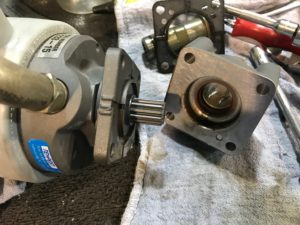
The third item in this week’s episode is about leaking vacuum pump drive seals, commonly known as Garloc seals.  This is the seal that keeps engine oil from leaking past the rotating shaft that drives the vacuum pump.  When this seal leaks, one indicator can be small oil droplets that are slung around in the area surrounding the vacuum pump.

Here is what this seal looked like when the vacuum pump was removed.


Remember, from last week’s episode, make sure your heating system is in good, safe, working condition.  If you have a combustion heater, make sure all checks are up to date, and consider having a pressure test done, even if it’s not “required.”

If your heat is collected from your engine’s exhaust system, make sure it has been thoroughly inspected for any defects that could allow carbon monoxide to enter the cabin.  Use a good quality carbon monoxide detector (Not the spot detectors.)  Get one that has a visual and audible warning.


Reminder:  More information coming soon about Dean’s safety wiring video course, to help airplane owners learn how to do excellent safety wiring, or to help them get better at it.

Fly safely!

077 – Is Your Airplane’s Heater About to Kill You? I Hope Not!


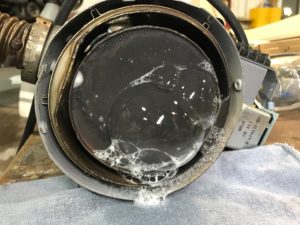
Check out this picture… any idea what’s going on here?

Now that we are into cold weather seasons, it’s a good time to talk about aircraft heaters.  They can be a necessary source of in-flight comfort, but if something goes wrong, they can also be surprising source of in-flight danger.

If your airplane has a combustion heater, make sure it’s maintained in a way that maximizes safety and reliability.  Some heaters have AD’s that mandate certain inspections.  Regardless of the AD’s, aircraft combustion heaters need regular and specific maintenance, to ensure proper and safe operation.

Two new AD’s have recently been issued on Southwind / Stewart Warner heaters.  In the past, these heaters were not required by AD’s to have a pressure test at regular intervals, but one of the new AD’s  DOES require a pressure test.  And it’s a good thing, as you will find out when you listen to this episode.

The new AD’s are these:

AD 2017-15-05 (Replaces AD 69-13-03.)  This AD is a one-time AD as long as the heater exhaust extension is stainless steel.

AD 2017-06-03 (Replaces AD 81-09-09.)  This AD requires fairly extensive inspection, and pressure testing of the old Southwind / Stewart Warner aircraft combustion heaters.  While it could be considered a cumbersome requirement, it really is a good thing, because if these heaters are not in good, safe, working condition, they can be flat-out dangerous!  This is the AD that caused me to pressure test that heater in the picture above.  And those bubbles are because the heater combustion tube has small holes in it, that can allow carbon monoxide gases to flow right into the airplane’s cabin during heater operation.

The interesting thing about this heater, is that unlike other heaters I’ve seen with cracks in them, this one ALMOST passed the pressure test.  It was a slow leak, but I could not get it to meet the requirements of pressurizing the combustion tube with 6 pounds of air pressure, and having it maintain at least 4 pounds after 45 seconds.

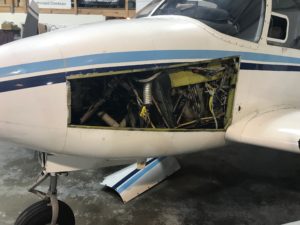
So, it was a very good thing the heater was removed from this Piper Apache.

There are three options for complying with this AD.  The first option is to do the required inspections and have the heater pass.  The second option is to disable the heater in accordance with the AD requirements.  The third option is to remove the heater in accordance with the AD requirements.  We did the third option on this one, which meant revising the weight and balance also.  Time will tell what the owner decides about overhauling the old heater, or buying a new one, or some other option.  I’m just thankful that dangerous heater is out of that airplane!

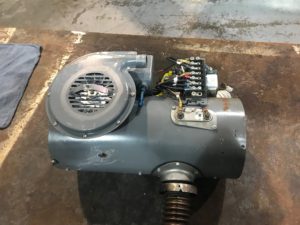
Here’s what that Southwind heater, model 940D, looks like out of the airplane.

How about your airplane?  Does it have a combustion heater?  If so, PLEASE do whatever you need to, to make sure it is safe.  Here is a sad accident report of a Cessna 402 crash back in May of 2012, that was caused by a malfunctioning combustion heater.

https://www.ntsb.gov/_layouts/ntsb.aviation/brief2.aspx?ev_id=20120511X83220&ntsbno=CEN12FA290&akey=1

If you have a combustion heater in your airplane, whether it’s a Janitrol, Southwind / Stewart Warner, or something else, verify that all AD’s are up to date.  In addition, consider having a pressure test done, even if it’s not required by AD.  It just might prevent a very dangerous situation some day.

If you’re just not sure about all this, take a look at the Harold Haskins website, and give Hal a call.  He’s very knowledgeable, helpful, and easy to talk with.

http://www.haroldhaskinsinc.com/

Stay warm, be safe, and keep those aircraft combustion heaters in top-notch condition!

Thank you, Hal Haskins, for all your help and counsel you provided to me in this whole deal!