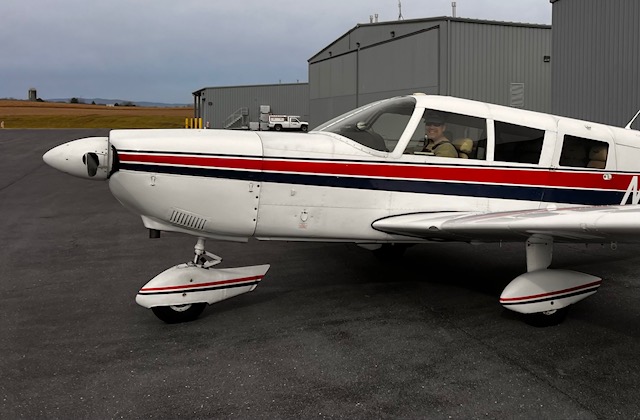
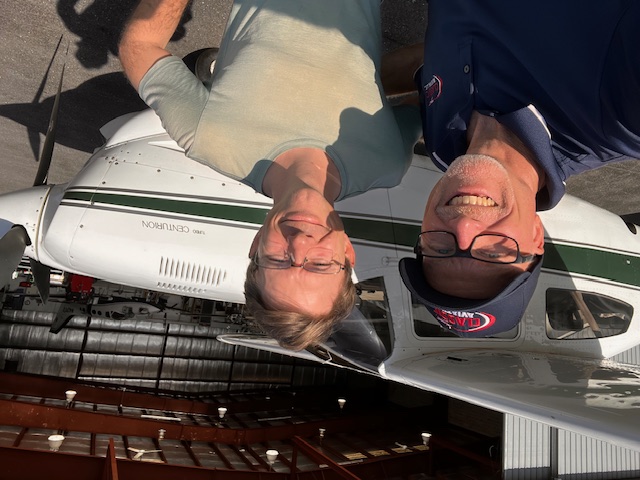
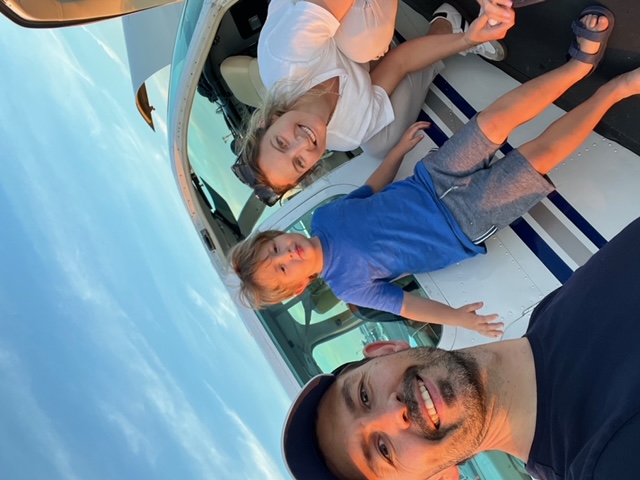
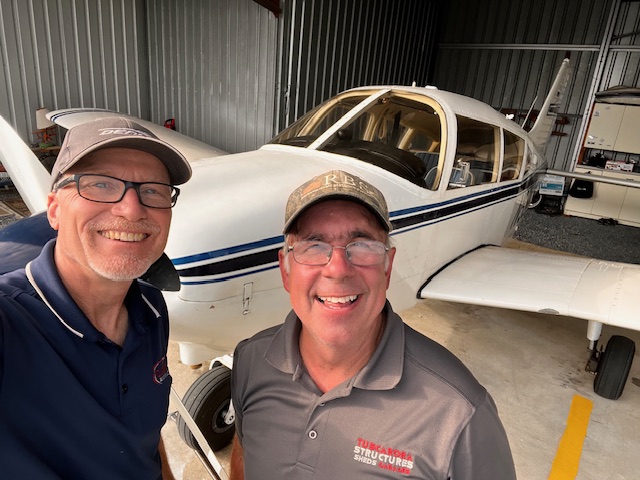
If you look closely in the photo above, you can see my friend Chris, smiling.
It was the day he arrived at Classic Aviation (KSHD) to begin his annual inspection with me.
Chris is not only an airplane owner and pilot, but he’s also a certified airplane mechanic as well.
I was very happy to have him help with the process as much as possible.
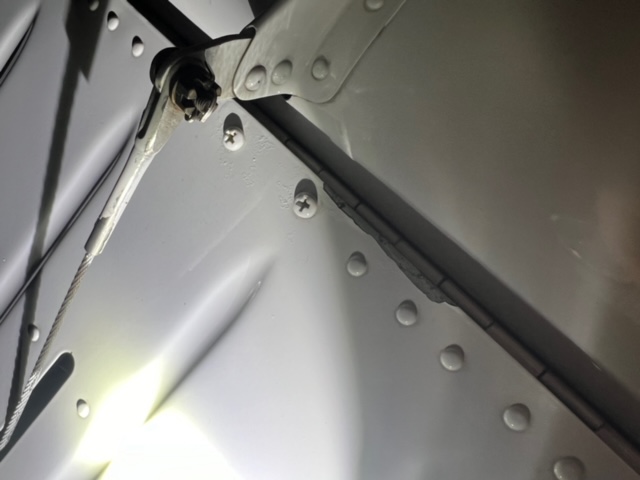
As I worked through the inspection, I found the control cable tensions needed some adjustment, including the rudder cable tensions.
As I began to tighten the left and right rudder cable tensions evenly so as not to disturb the rigging, I encountered a problem.
The left cable turnbuckle bottomed out in the turnbuckle barrel, and there was no more ability to tighten the cable, but I had not yet reached the cable tension spec in the maintenance manual of 85 pounds, plus or minus 5.
Yes, this is a high tension, but it is what the manual says.
You can listen to the audio for details of how we resolved the issue, and how I got help from my friend Kenneth who previously worked at Classic Aviation.
The short story is that we went through extensive rigging of the nose gear steering system, the rudder pedal bars, and the rudder cables, and finally got things set, with 80 pounds on the rudder cables.
When the annual was completed, we had fixed a bunch of other items as well, and hopefully Chris will be good to go for another year with no maintenance interruptions, as much as possible.
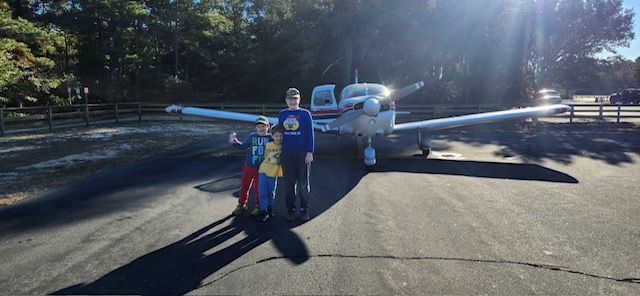
He even sent me some photos of the day he flew his sons down to the Outer Banks of North Carolina and visited the Wright Brothers Memorial! Thanks Chris!
The post “Frustrations with Piper Rudder Cable Tension – Episode 250” appeared first at AirplaneOwnerMaintenance.com
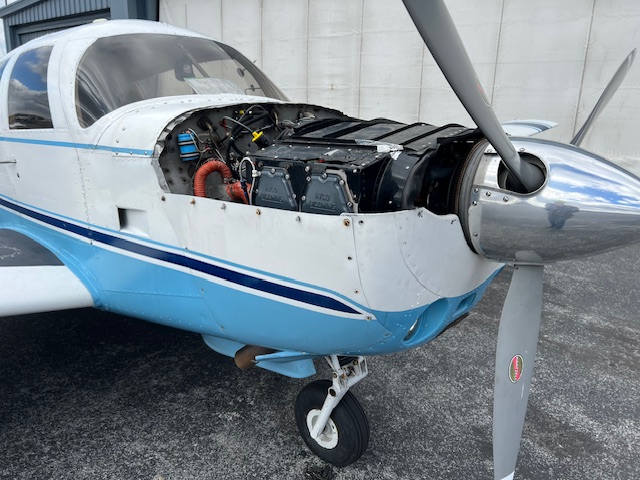
Today’s episode is about Pat’s Mooney, and how we sealed up some exhaust leaks.
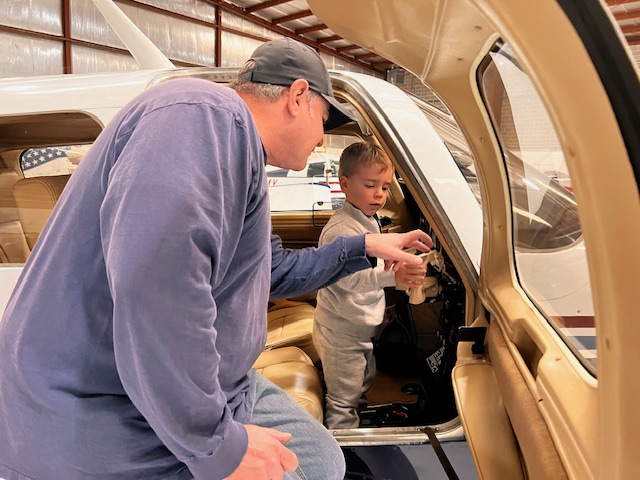
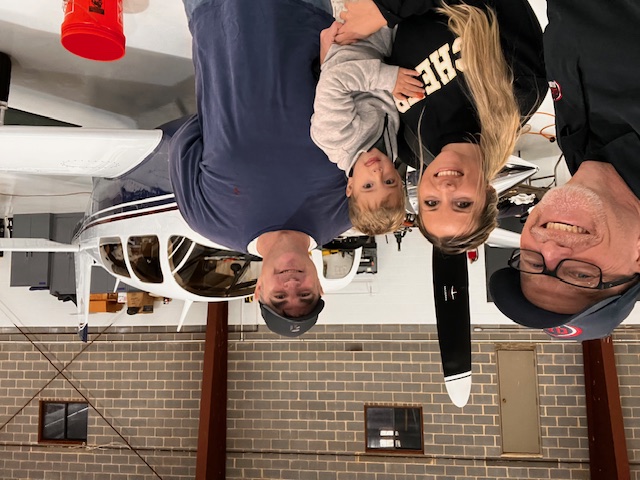
And it’s a fun story because Pat has become a good friend… check out the above photo where he’s showing his airplane to my grandson Spencer 🙂
Spencer and my daughter McKenzie stopped by the shop one day when Pat and I were working on his Mooney 252 (M20K.)
And if you’ve listened to the Airplane Owner Maintenance Podcast, you’ll likely remember that it’s McKenzie’s voice in the podcast intro and outro… thanks McKenzie!
Pat flew his Mooney from Wisconsin to Virginia for his annual inspection, and he hung around for several days to work with me on his airplane… I love airplane owners like Pat!
I love working with the “Pats” of general aviation because they tend to have some or all of the following traits:
They love aviation as a whole.
They are interested in the maintenance side of things.
They want things fixed and working properly.
They are easy to work with and fun to be around.
They care about people and relationships.
And that pretty well describes Pat, so we got off to a good start on his inspection.
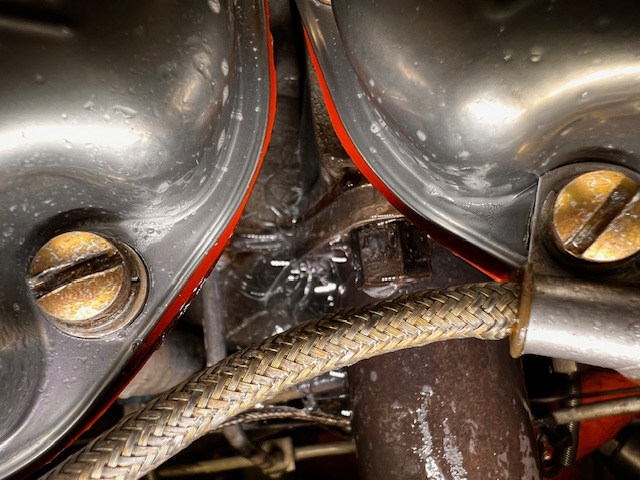
One of the squawks I discovered was 5 of the 6 exhaust flanges had small leaks at the gasket area… we found this while doing a pressure test on the exhaust system. Here’s one of the flanges that was leaking:
This engine is a Continental TSIO-360 and has 2 thin stainless steel gaskets P/N 630365 on each cylinder.
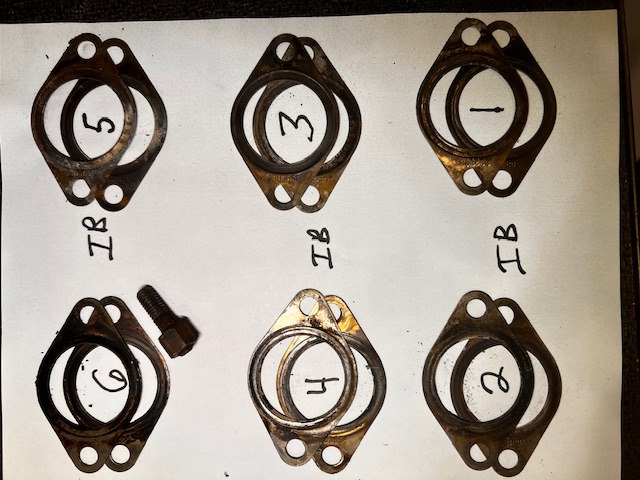
Here are the old gaskets I removed, along with one stud that backed out and had to be replaced with a new one:
I’ve found there is significant confusion out there about how these gaskets should be installed.
One side has a raised area, or a bump on it, and the other side has a recessed, or concave area.
As I’ve researched the internet (sometimes a not-so-good place to get good information,) it seems a fair number of people think these gaskets should be “nested” together for installation.
That is, put both gaskets in the same direction to they fit together, and then install them.
I wanted a definitive answer, so I called Continental.
Vadin was very helpful and explained it to me this way:
“You want to create an air pocket between the two gaskets.”
This means put the concave or recessed side of the two gaskets toward each other and this creates the air pocket.
Then, as you torque the exhaust nuts and squeeze the gaskets together, the bump on the top gasket is up against the cylinder flange, and the bump on the bottom gasket is down against the exhaust riser flange, and in this way you can hopefully seal up any small imperfections on the surfaces and get a perfect (or nearly perfect) seal.
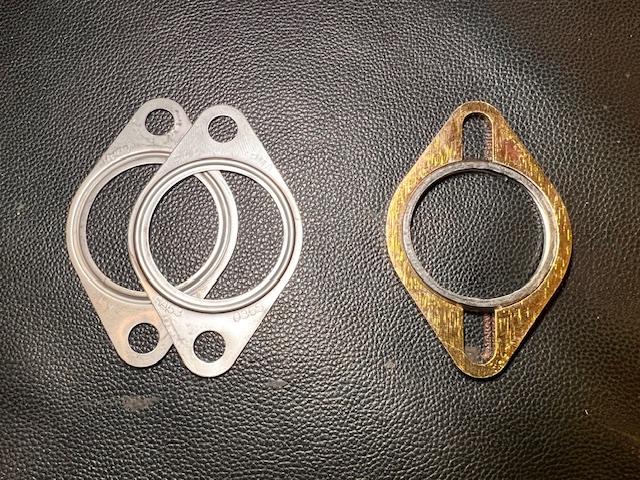
Also, there is another type of gasket that can be installed on this engine… it’s the “blow proof” gasket made my Rapco, P/N RA970.
Here’s the visual difference between the two types of gaskets (the thin ones on the top and the thick, blow proof one on the bottom):
I asked Vadin at Continental about these, and he could not officially endorse them, but he also acknowledged that some people seem to have good success with these thicker gaskets.
So, after discussing the situation with Pat, we decided to go with the thicker, blow proof, RA970 gaskets.
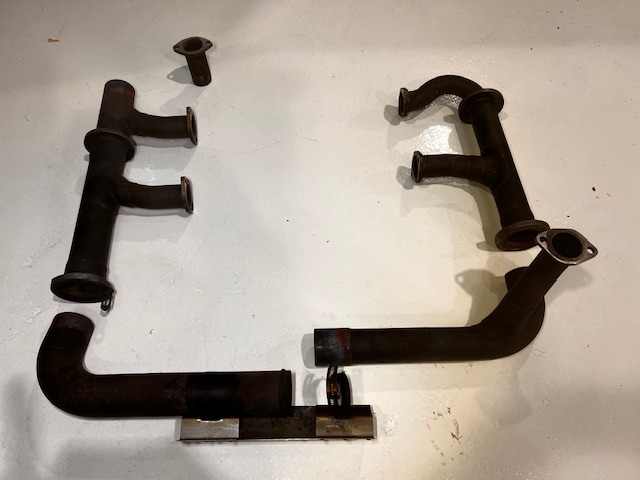
Prior to installing the gaskets, I had carefully sanded all 6 exhaust riser flanges flat and smooth so as to get the best seal possible. Here’s a photo of the exhaust system before sanding the flanges:
I carefully installed the new gaskets, and torqued all the nuts with the studs properly lubed with engine oil.
I was excited to do another pressure test and was confident about the results.
I was sorely disappointed.
Five of the six flanges still had small leaks.
Back to the drawing board.
I texted Pat and notified him that I thought we should try the other type gaskets and see if we could get a better seal.
He agreed.
So, I reluctantly removed the thick RA970 gaskets and installed two each 630365 thin gaskets (properly positioned) on each flange and retorqued everything.
Time for another pressure test.
It wasn’t perfect as I had hoped, but it was very acceptable.
Three of the flanges were perfect with zero leakage.
The other three were nearly perfect with only very small bubbles forming slowly at one side of the flange during the pressure test.
I’m satisfied with this… and as I thought about the whole situation, I suppose you could buy a whole new exhaust system for the engine in hopes of getting a 100% perfect seal, but I don’t think that’s necessary in this situation.
I also realized that if this was my personal airplane, I would feel the same about it, and I would fly my family in it with great confidence.
Be sure to listen to the audio for this episode to hear the whole storyl
And after all that, I’m EXHAUSTED!
But it’s been totally worthwhile, because Pat is such a great guy to work with!
Thanks Pat, and I look forward to returning your airplane to you real soon!
Last Monday, I lapped the #5 exhaust valve on a Continental engine.
But more importantly, I met the owner / pilot of a Turbo Centurion, and now I’m happy to call him a good friend!
Thanks for flying all the way up here Mark!
Here’s the story:
Mark had been a little concerned about the #5 exhaust valve, not because he was having any particular trouble with it, but because the borescope photo showed a slightly irregular appearance.
And being proactive, Mark decided to do some research.
That’s when he found me, and some of the information I’ve published to help airplane owners understand borescoping, exhaust valve lapping, and other useful pieces of information you often won’t find in the “maintenance manual.”
Mark’s local shop had indicated it would be a good idea to keep an eye on the #5 exhaust valve, and if it continued to be a problem, the cylinder may need to be removed for a repair or replacement.
Some years ago, I would have had similar thoughts.
But not today.
In the past 5 years, I’ve rescued many cylinders from premature removal, especially on large bore Continentals… and I was hopeful we could remedy Mark’s situation as well.
Instead of removing cylinders in situations where the exhaust valve is showing beginning signs of burning, or the compression is dropping into the 50’s and 40’s and below, I now consider the first option of LAPPING THE EXHAUST VALVE WITHOUT REMOVING THE CYLINDER, AND INSTALLING A NEW ROTOCOIL.
Mark was interested to learn about this process, so we agreed on a plan for him to fly his airplane from North Carolina to the Shenandoah Valley of Virginia for some not-so-invasive surgery on his airplane engine.
Soon after Mark landed, we rolled his Cessna T210 in the shop and got to work.
I won’t bore you in this post with all the details, but we lapped the exhaust valve and were both pleased with the progress along the way and with the end result.
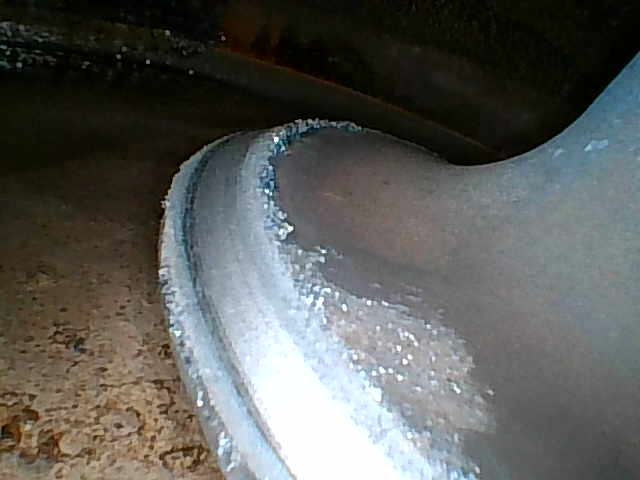
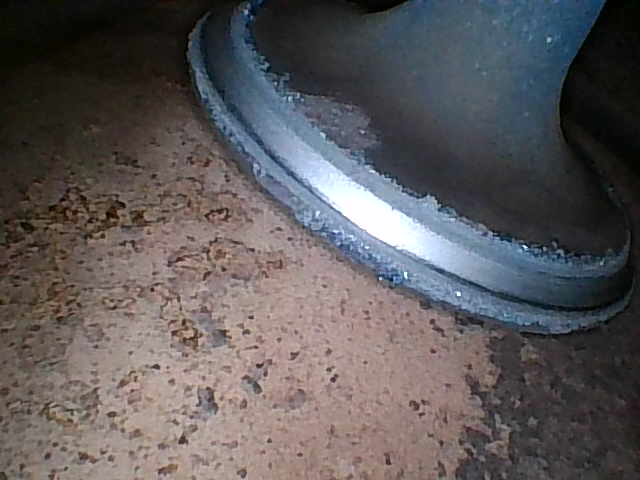
Take a look at some photos showing the lapping compound at work, and the nice, shiny sealing band that’s developing on the edge of the valve.
An excellent sealing surface, along with a new rotocoil on the valve, will help to ensure it rotates properly during operation, thus minimizing the chances for a burning exhaust valve which will shorten it’s lifespan if not remedied.
When the process was completed, we flushed the lapping compound out the bottom spark plug hole and sprayed some LPS-2 in the top spark plug hole and dispersed it with compressed air in an attempt to keep the cylinder wall lubricated during startup, after which the engine lubrication system would take over and do its job.
During reassembly, we installed a new rotocoil P/N 629117-1 on the exhaust valve and reassembled all the parts that had been removed.
You may ask, “Why do we need to install a new rotocoil?”
Great question.
And to answer the question, some photos will help.
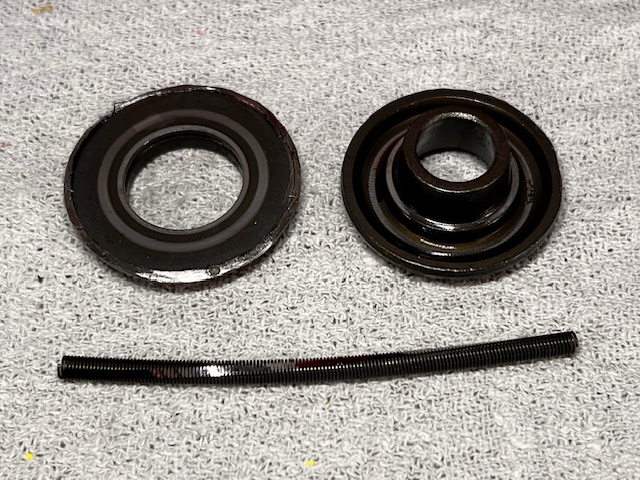
When you cut a rotocoil apart, here’s what you’ll find: two halves, a special washer, and a long spring laying on its side.
Every time the valve stem is pressed down by the rocker arm, the rotocoil makes the valve rotate just a little. This action helps prevent hot spots on the edge of the valve, and keeps the sealing surface in tact between the valve and the valve seat.
Over time, the spring gets a flat spot on it which decreases its ability to make the valve rotate.
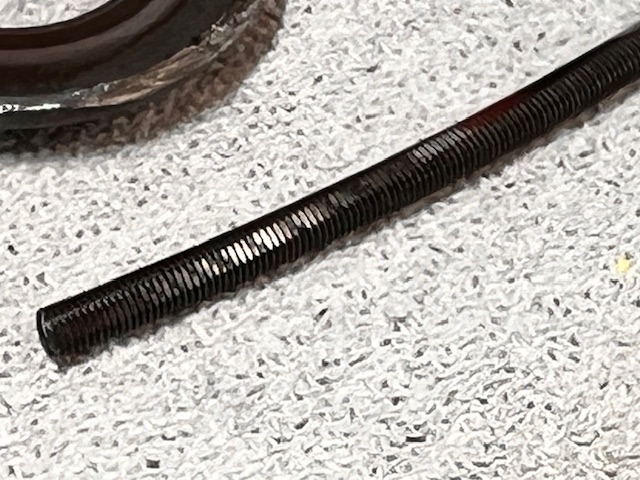
Here’s a close-up photo of the flat spot on the spring:
Eventually, the spring can break into many pieces if the coils get too thin at the flat spot.
For this reason, and because rotocoils are very reasonably priced, I always install a new rotocoil when I lap a Continental exhaust valve.
We completed the project, Mark ran the engine, and we re-checked the compression. It was excellent at 75/80, a stellar number!
I’ve had very dramatic improvements in compression numbers after lapping valves (like from the 30’s or 40’s to the 60’s and 70’s.) This time was not as dramatic as Mark’s #5 compression was 71/80 before lapping. But it was still very worthwhile doing in order to prevent any further irregularity in the sealing capability and appearance of the valve.
Mark was being very proactive and planning ahead, and I applaud that!
Sometimes people let these valves go too far, and then there’s no choice but to remove the cylinder.
But if caught early, most exhaust valves can be saved from further burning.
Mark, it was great to work with you, and although I don’t wish for you to have any airplane troubles, I do hope we can work together on your airplane again sometime soon!
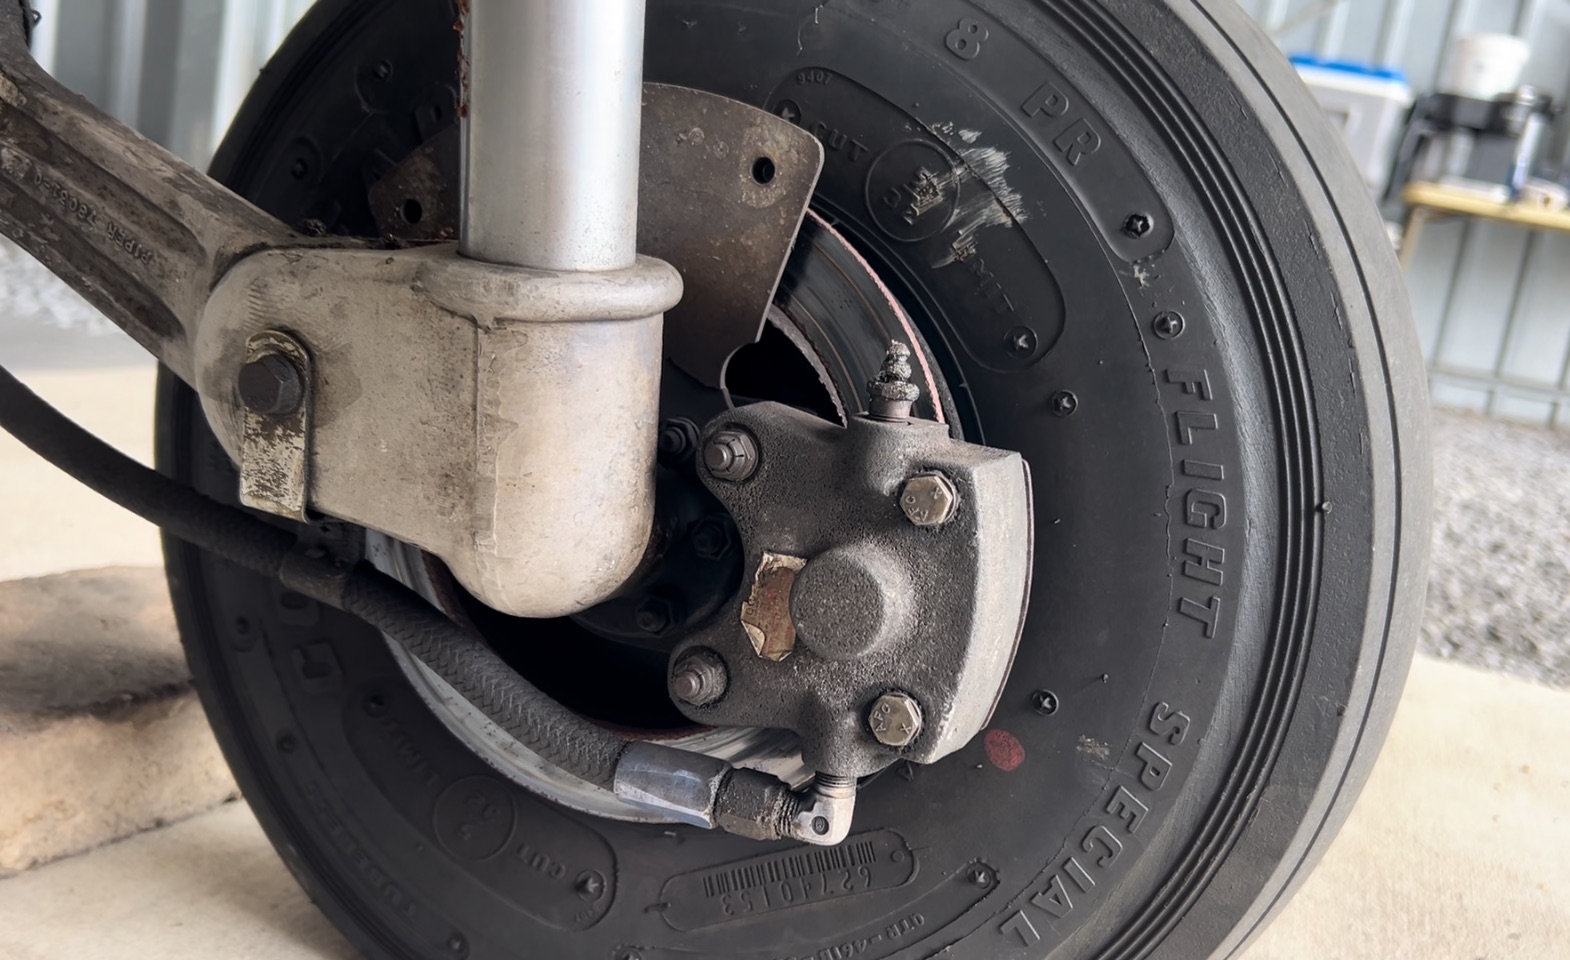
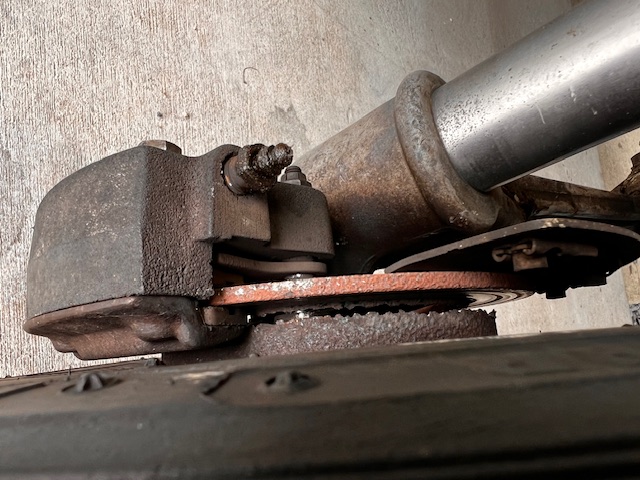
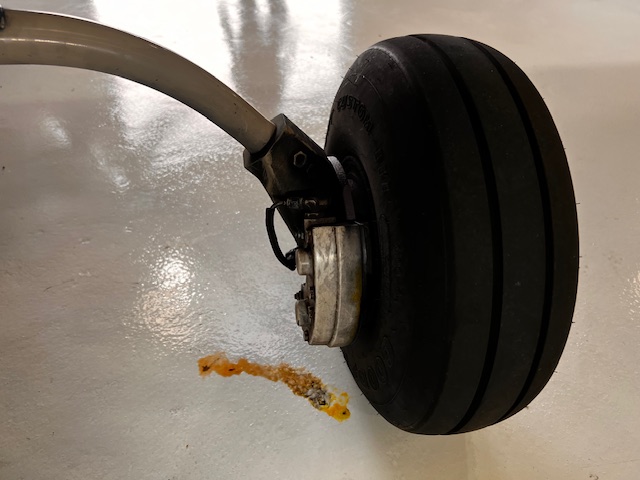
What we can’t see from this angle is the fact that the brake disc has broken in two pieces!
Check it out:
Here’s the story:
The pilot landed the Piper Cherokee, and after a successful landing, something gave way on the left brake, and it became ineffective. Now we know why.
It’s definitely time for new brake discs, and this airplane will soon get new APS164-02000 Blacksteel brake discs that are corrosion resistant.
It will also be a good time to replace the worn tire on this wheel.
After some research, I discovered a retread Goodyear Flight Special II (like the airplane currently has on it,) is about half the price of a new one, and can be purchased directly from Wilkerson Tire Company here in Virginia!
And when I called them, a real live knowledgable and helpful person answered the phone… it was truly a great customer service experience (it was Mckaellen Wilkerson, a fourth generation member of the team there.)
I love supporting quality family businesses whenever possible, and Wilkerson appears to be one such business.
Here’s a link for their website if you want to check it out:
In this podcast episode, I also shared two emails I received recently.
One was from Troy, who had some very helpful and interesting things to say about the last episode about single engine RG Cessna airplanes. Thanks Troy, for the reminder that if one of these airplanes is not high enough and the gear is retracted, it can actually lift the airplane right off the jacks… yikes!
Be sure to listen to the audio to hear the rest of his email.
The second email I mentioned was from Fabien.
He and his family moved to the US awhile back and they fly a nice V35B Bonanza. He had a question about where to get his ruddervators stripped and repainted due to some corrosion that has been developing.
If you have any excellent recommendations for V-Tail Bonanza ruddervator paint work, you can contact Fabien directly at the following email:
fabien.turpaud{at}icloud{dot}com
Along with his paint question, he also shared some really great photos and gave permission to include them here:
The filiform corrosion on the ruddervators is not critical yet, but Fabien is being proactive about making a plan to remedy the issue as soon as reasonable.
Hopefully we can find a good solution for Fabien to get his ruddervators repainted with minimal down time so he can continue the adventures with his family!
This story begins with a squawk from the owner. It went something like this:
“When I fly my airplane, on the first landing gear retraction, the gear begins to move and then the “gear pump” circuit breaker pops. After I reset the circuit breaker, the gear retracts and extends normally with no further problems the rest of the trip.”
Weird…
What could be wrong?
It was my job to figure out what was going on.
I put the airplane on jacks and selected “gear up.”
Sure enough, the gear began to move and after a short time, it stopped mid-travel and the “gear pump” circuit breaker popped.
For once, the problem happened just like the airplane owner had reported.
I checked each gear leg for any binding, and everything appeared nice and free to move.
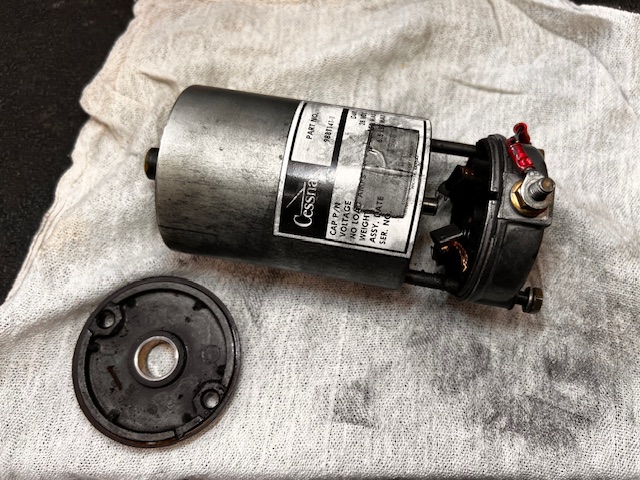
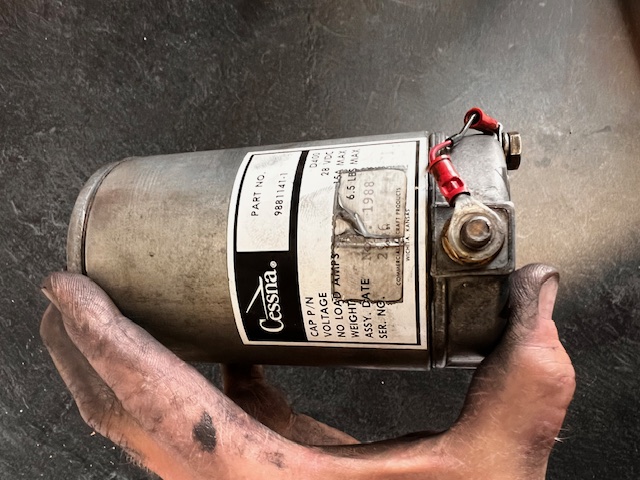
After evaluating and thinking through the situation, I decided it was a reasonable possibility there was an internal problem in the electric motor on the landing gear power pack.
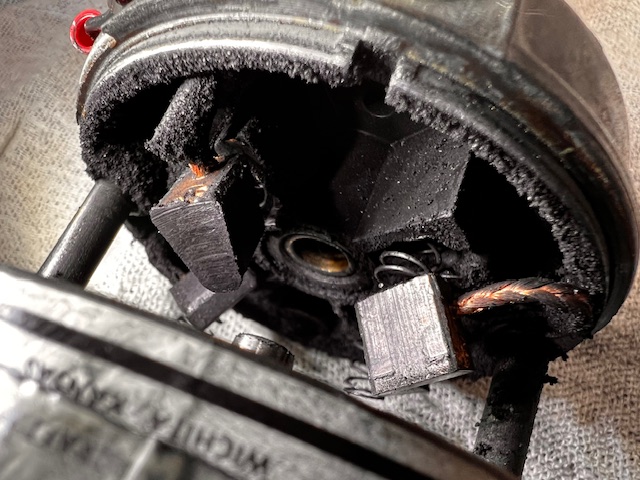
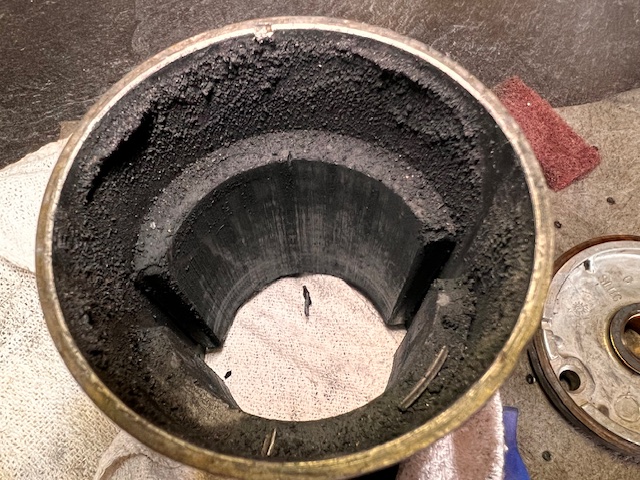
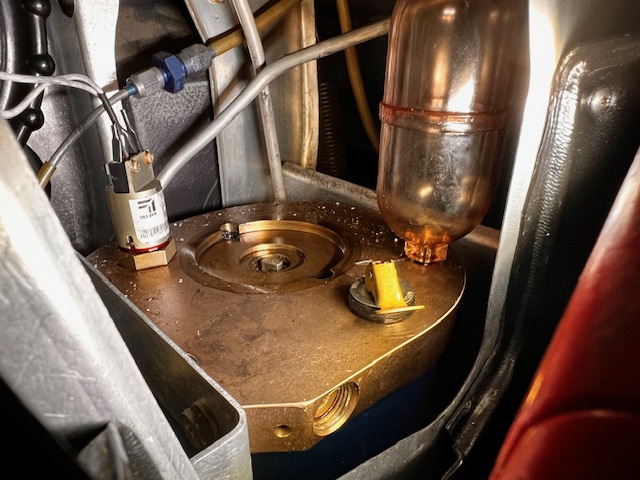
I removed the motor and quickly discovered it was full of debris. Take a look at the brush housing:
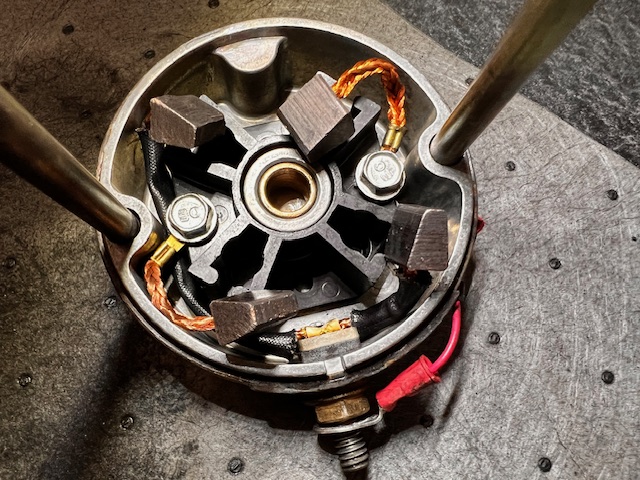
Amazingly, a can of contact cleaner and some compressed air produced a quick transformation… and the brushes actually had lots of good material remaining:
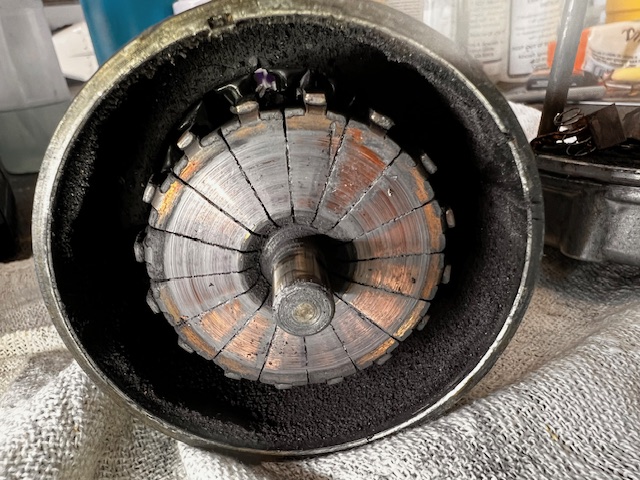
The commutator segments were in similar rough shape when I first disassembled the motor:
But some Scotch-Brite, contact cleaner, and compressed air freshened up this area as well:
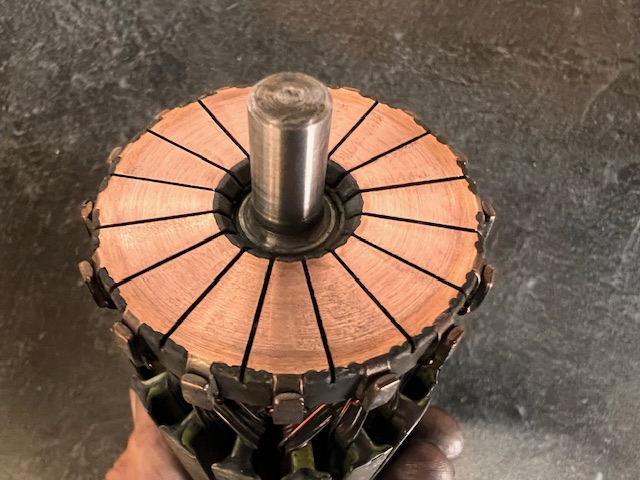
The armature housing also had a large amount of debris to be removed:
I didn’t think to take a photo after cleaning, but it turned out very nice as well.
Before disassembling the motor, I thought we might end up replacing it with an overhauled one.
But after seeing how well the motor was made, how simple it was, what good condition the brushes and other parts were in, and how easily it cleaned up, I realized it would likely be good to go for a long time, and I decided to reinstall it.
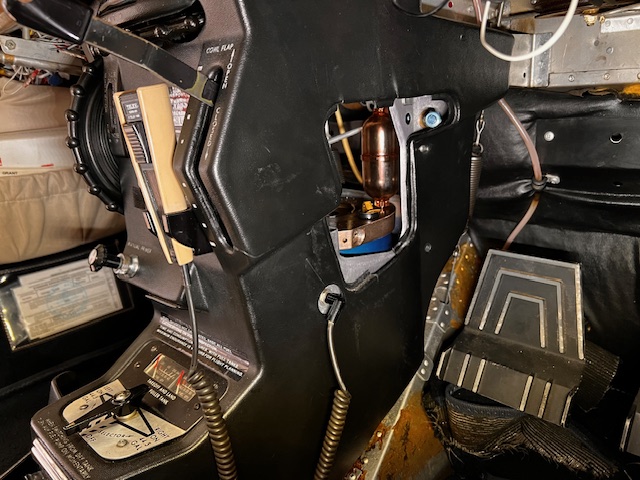
And here’s the motor after reassembly, along with one of my grubby hands 🙂
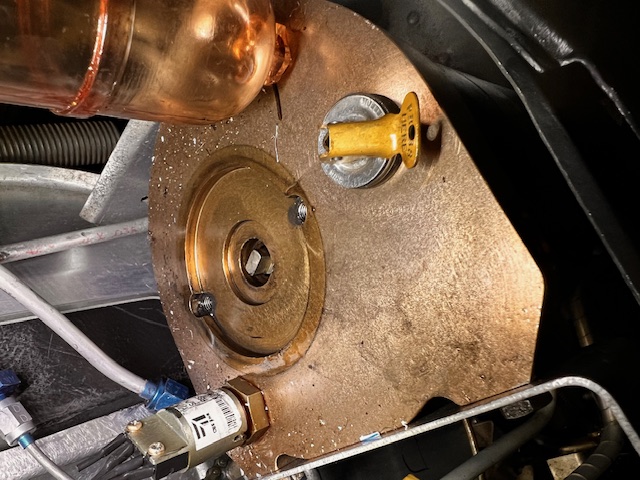
Here’s the landing gear power pack area that’s accessible near the copilot’s feet after removing the little plastic cover on the side of the console: (these photos are before I reinstalled the motor.)
Before reinstalling the motor, I put some black electrical tape around the end seams to keep the housing from coming apart (there are 2 long 1/4 inch bolts that go through the length of the motor and attach it into the drive area on the power pack.)
After everything was back together, I ran the landing gear, and it performed flawlessly!
Now, the real test will be to see what happens the next time the owner flies his airplane. Until then, I’m hopeful for a good report.
Sometimes, we do need to just replace parts on airplanes… but sometimes, we can be a real mechanic, and dig in and repair an existing component!
In this case, I’m figuring I saved this owner a chunk of change on this repair.
One final item: when the airplane was in the shop, it became really obvious the right brake caliper was leaking… check it out:
A couple new o-rings and some brake linings took care of this squawk as well.
Now it’s time to go fly!
The post, “246 – Parts Changer or Real Mechanic? Cessna-210 Landing Gear Motor Story” appeared first at AirplaneOwnerMaintenance.com
The week I’m talking about here was almost too full!
But I wouldn’t change a thing.
A real highlight was taking my Pennsylvania cousin for a short flight in a Piper Cherokee:
From Sunday to Friday, I had the following opportunities:
Flew every day except Tuesday… this was unusual!
Did an owner-assisted annual inspection on a Bonanza.
Spent an afternoon with my grandson… I love him so much!
My cousin Dan stayed overnight with us and I took him flying… Maria made us a tasty supper, and we enjoyed some great conversation with Dan. A fun side note – Dan and I were born about a week apart years ago!
… and probably more that I can’t remember right now 🙂
Also, during the Bonanza inspection with my friend Mike, we adjusted the fuel quantity circuit board adjustments a bit to make them indicate accurately when the tanks are full… the maintenance manual had excellent instructions which also agreed with the very clear information on the circuit boards themselves located just under the top center part of the instrument panel glare shield… here’s a photo:
It was an awesome week, and I recorded some thoughts about it for at least a couple reasons:
One, I hope you might find some inspiration and encouragement in it.
And two, I wanted to document the week a bit to help me remember it in the future.
So… if you’d like to hear more about the adventures of this particular week, listen to the audio for this week’s podcast.
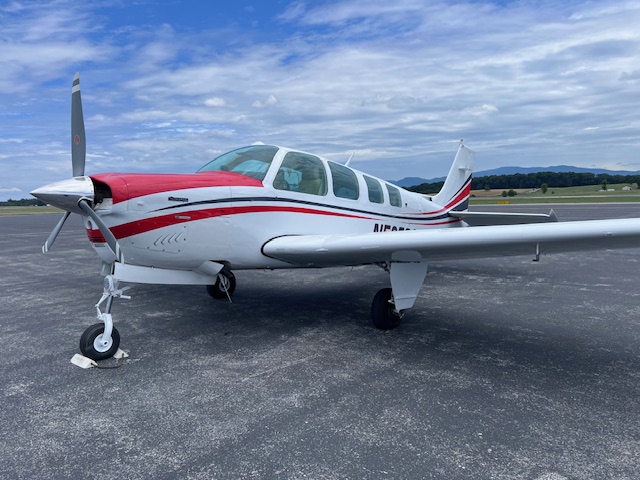
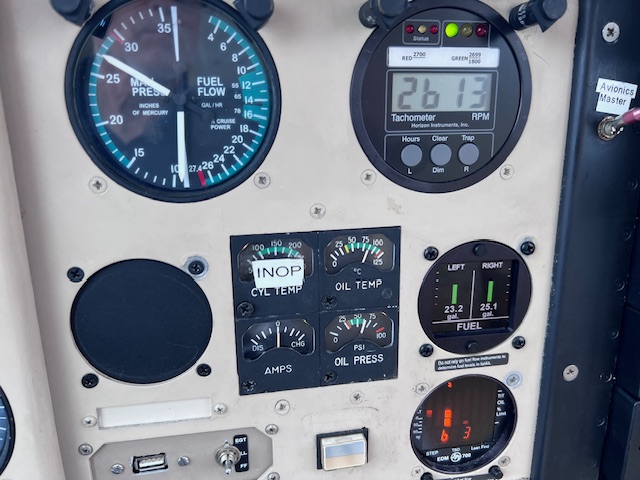
During a recent prebuy evaluation on this nice Beech A36 Bonanza, the question came up, “Does the old analog CHT gauge need to work in order for the airplane to be considered airworthy?”
(In this case, the analog CHT gauge had an INOP placard on it.)
Check it out:
The airplane has a JPI engine monitor installed (bottom right in the previous photo,) but it is not considered “primary” for CHT. And since CHT is required in the limitations section of the POH/AFM, the original analog CHT gauge must be operative.
Listen to the audio for this episode to hear the full story, including a discussion in the tech forum on the American Bonanza Society website (here’s a link to that ABS forum conversation if you’d like to read it):
Here’s the short story of how we resolved the issue on this airplane:
Removed the bayonet CHT probe for the JPI engine monitor, from cylinder #3.
Installed in its place a bayonet CHT thermistor probe in cylinder #3 and attached it to the existing wiring that was tied up on the right side of the engine.
Installed a spark plug type CHT probe for the JPI #3 CHT.
Now, everything should work, and the airplane will be officially airworthy.
If you have any thoughts you’d like to add to this topic, I’d love to hear them! Just click that tab over to the right and leave me a voice message.
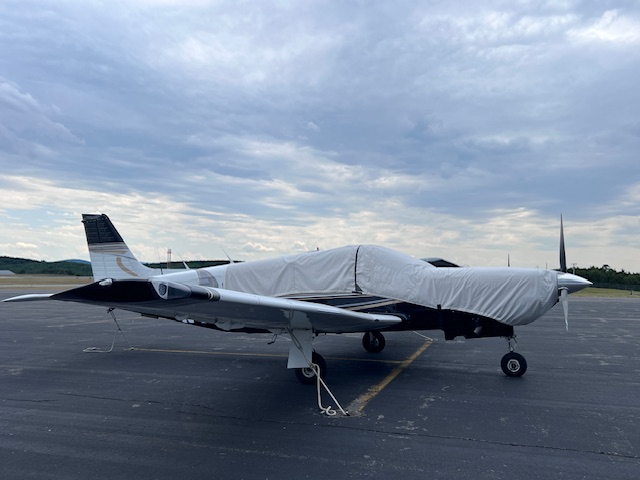
This airplane appeared on the ramp not long ago at the Shenandoah Valley Airport in Virginia.
I discovered it had taken off, and then very quickly made a 180 and returned for landing due to engine trouble.
The pilot thought he may have lost a cylinder.
His mechanic stopped by to check it out, and there was nothing blaringly wrong with the cylinder or the engine.
Finally, after meticulously checking the engine and doing a runup, he found the fuel injector for the problem cylinder was clogged (or at least partially clogged.)
We put it in the ultrasonic cleaner for just 5 minutes, blew it out, and it was perfect.
He put it back together and all was well… they flew it out of there not long after that.
This particular A&P/IA’s name is Dusty Foster, and he seemed very knowledgeable and exceptionally competent. He runs a GA maintenance shop at New River Valley Airport (KPSK) in Southwest Virginia, Foster Avaition & Mobile Maintenance.
And he also travels quite a bit for prebuy evaluations and other maintenance. Here’s his website if you’d like to check it out… he seems like an all-around great guy, family man, excellent communicator, and pilot-mechanic.
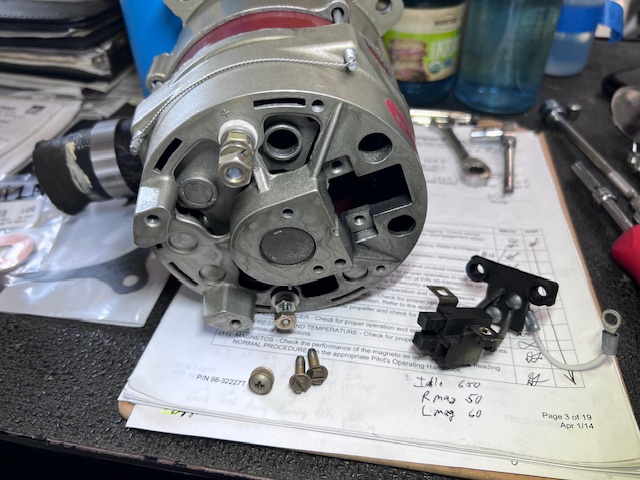
In this podcast episode, we’re talking about alternator maintenance!
Here’s the alternator I removed from a Beechcraft Bonanza to inspect the drive coupling and the brushes… note the brush assembly in the lower right side of the photo:
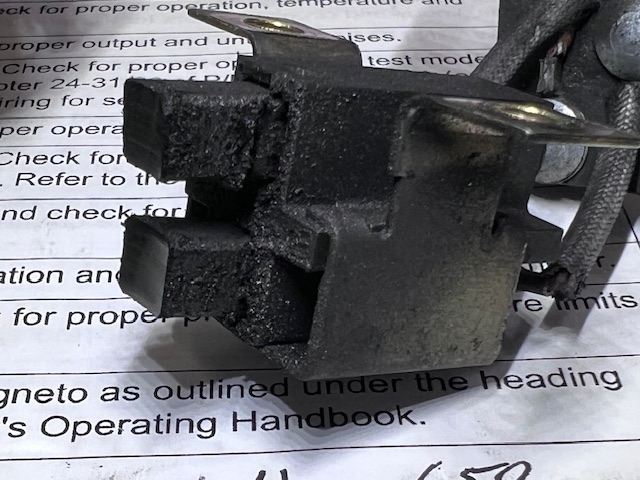
The brushes had plenty of length left, but they needed a good cleaning due to carbon dust that had collected from normal brush wear. Check it out:
After a good cleaning, the brushes looked great and were ready to reinstall.
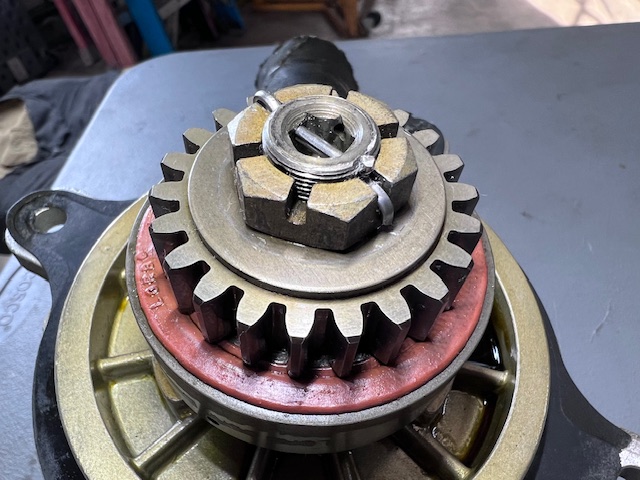
Another thing (and perhaps more important) I wanted to check on this alternator is the elastomer drive coupling:
There have been numerous cases where these drive couplings have come apart and caused serious engine damage and / or failure.
Since it had been nearly 500 hours since this alternator was removed and inspected, I wanted to verify the drive coupling’s condition.
I performed the following: (Reference Continental M-0 manual.)
Verified no slippage at 140 inch pounds.
Verified proper coupling attach nut torque.
Installed new cotter pin.
Cleaned off old gasket and installed alternator with new gasket.
If you have a belt driven alternator, it’s important to keep the belt tensioned properly and in good condition.
How about you?
Do you have a plan for proactive preventive maintenance on your airplane’s alternator?
If not, you may be interested in listening to the audio for this episode, and then make a plan that best fits your situation.
It’s certainly a good idea to check alternator brushes each 500 hours.
And for gear driven alternators, it’s probably wise to check the drive coupling at a shorter interval than that. There have been too many stories of these couplings coming loose and / or coming apart, and if we can prevent that, it’s always a good thing!
For some additional discussion on this topic, here’s some interesting info I found on the Pilots of America site:
When it’s time to overhaul your engine, who do you call? Where do you go?
Listen to this episode to hear ideas from other airplane owners who have had good experiences with various engine overhaul shops around the country.
I always love meeting podcast listeners, and I was surprised when I met Ken Blow recently at the King Air Gathering in West Virginia… a bunch of us were at the Lewisburg airport one afternoon looking at all the King Airs, and Ken mentioned he listens to the Airplane Owner Maintenance podcast. Great to meet you Ken! (Ken is the Executive Vice President of Kadex Aero Supply in Ontario, Canada.)


Recent Comments