Podcast: Play in new window | Download
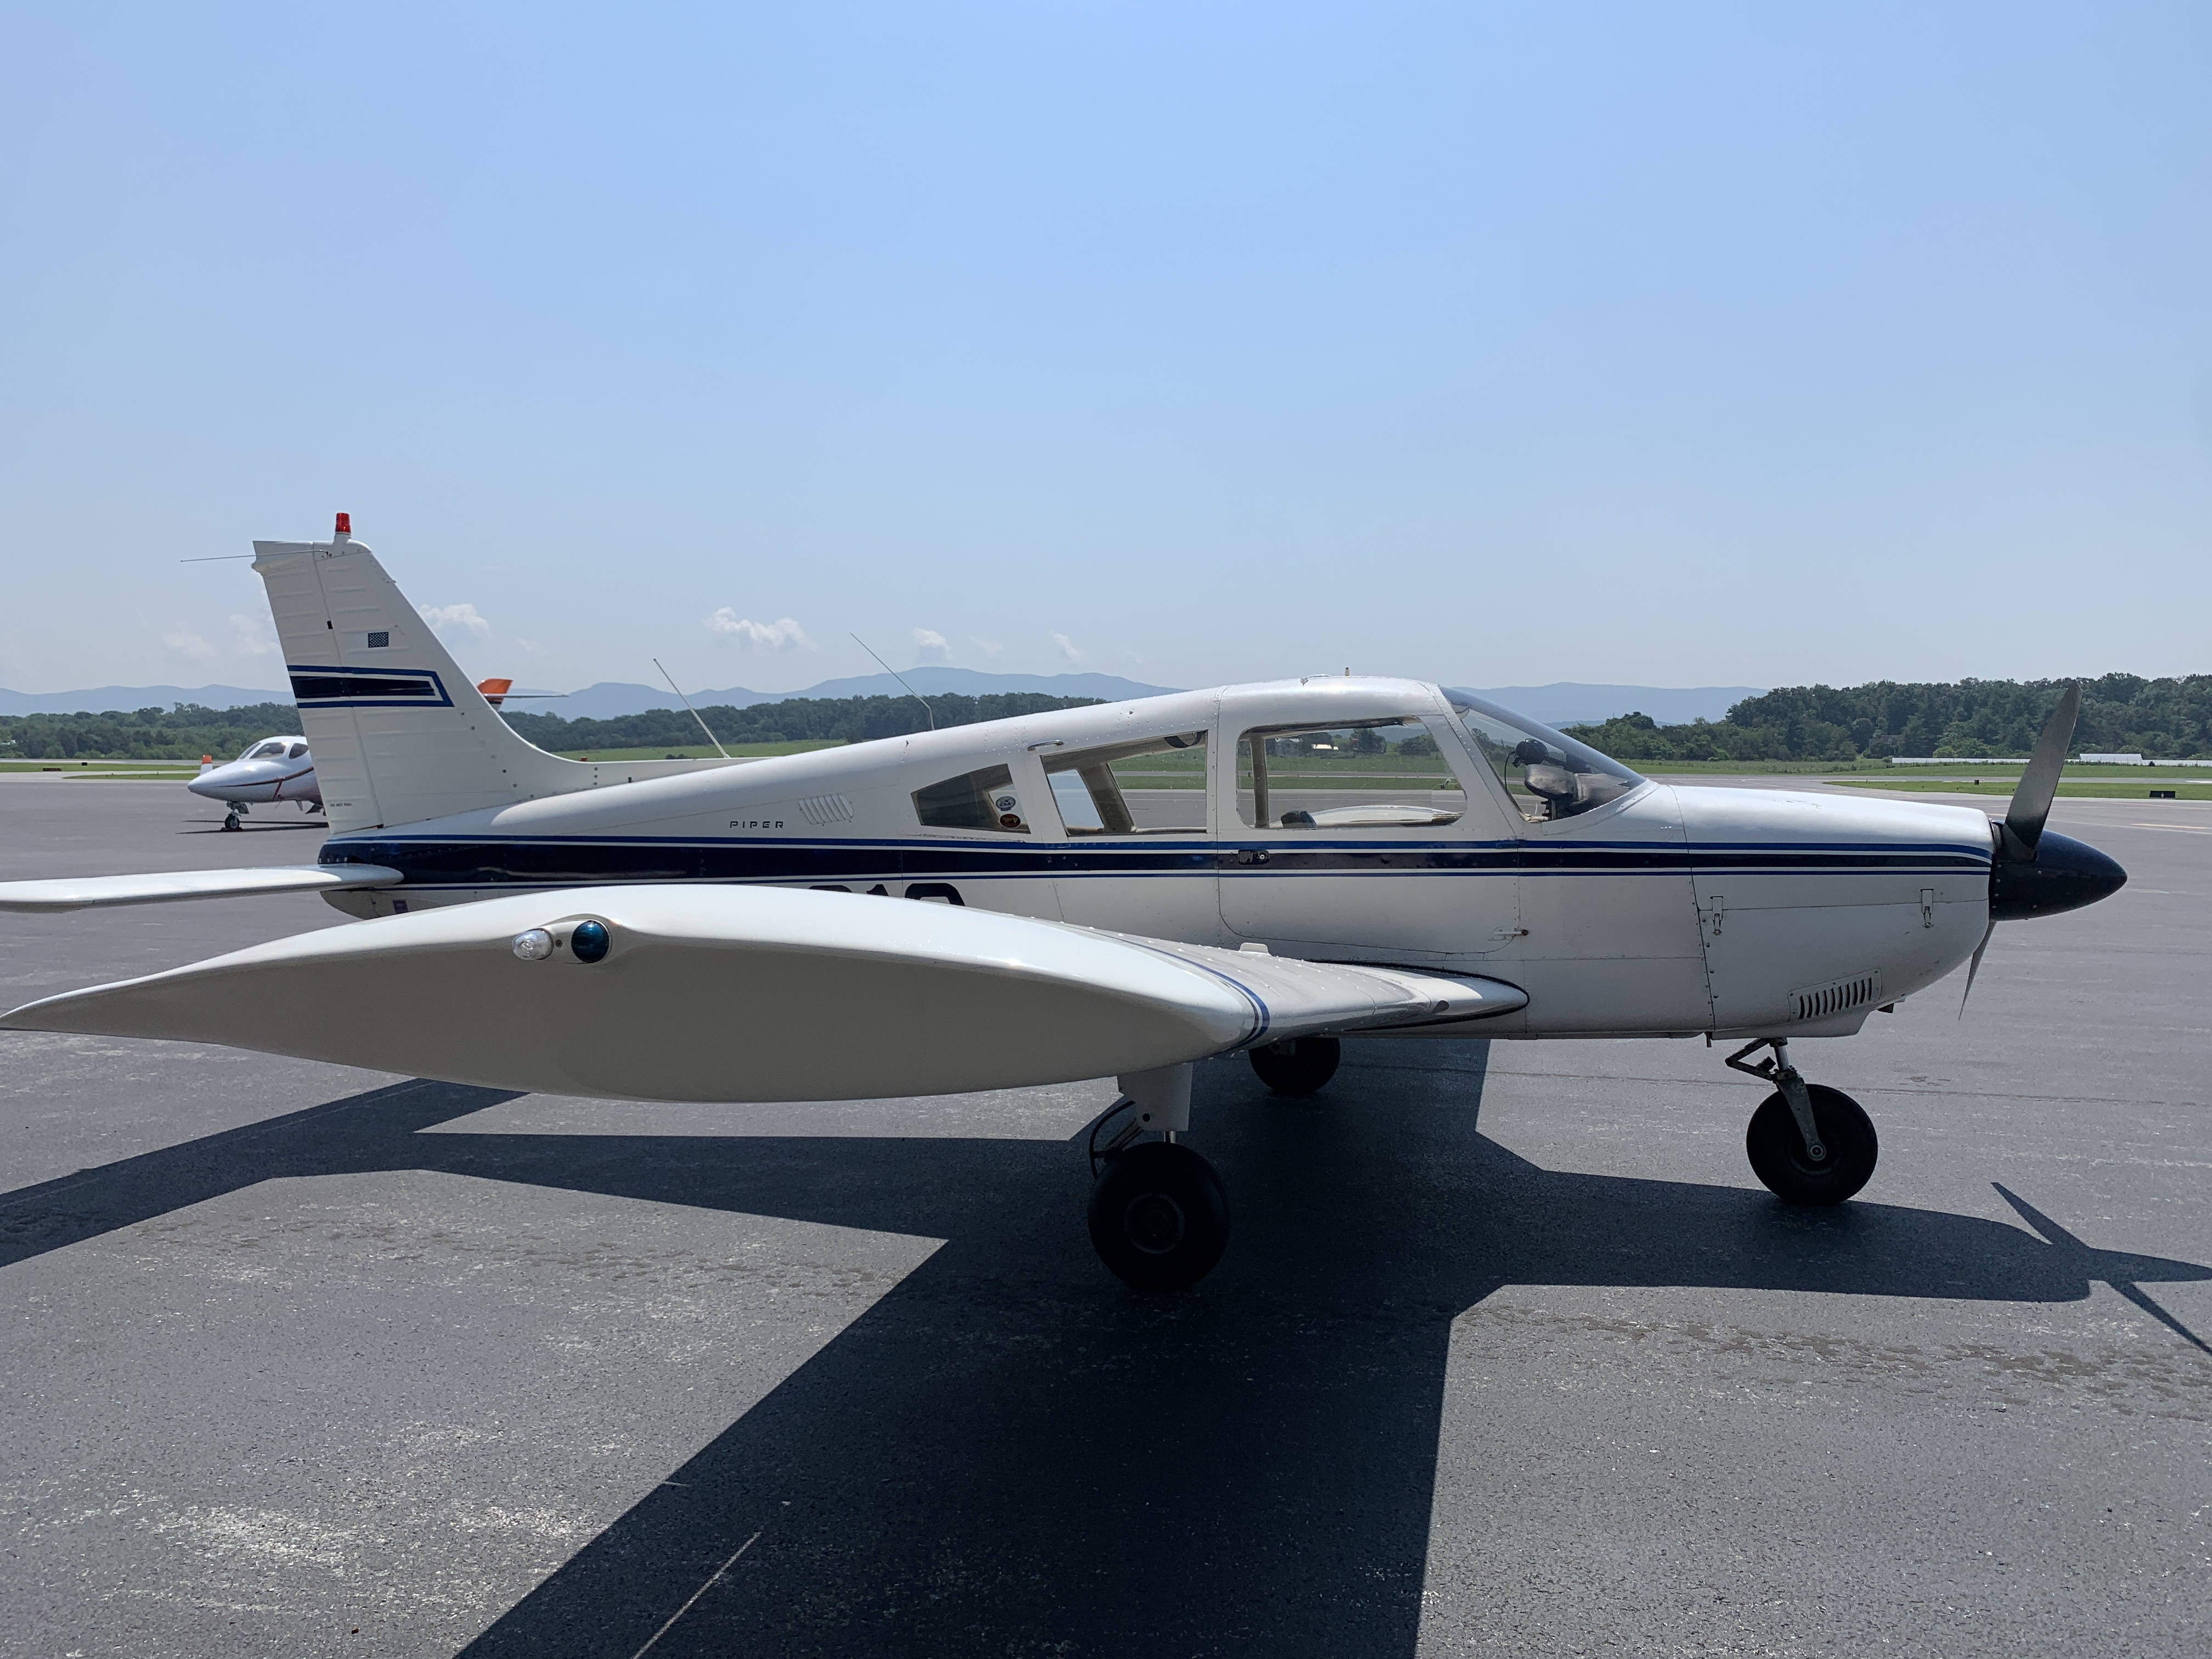
I’ve known Tom for a long time, and what a fantastic experience it was, working with him on his annual inspection!
Tom is the president of our local EAA chapter, and he’s given me numerous opportunities to speak to the group about maintenance topics. Thank you Tom, for serving our local general aviation community so well!
It had been quite a few years since I had inspected Tom’s Cherokee, and it was a great experience to work with him again in the shop at Classic Aviation, LLC. I was impressed with the way he has kept up the maintenance on his airplane, and I was also reminded once again of the value of getting a different set of eyes on an airplane from time to time.
Other inspectors notice things I don’t see, and I notice things other inspectors don’t see. It’s always been that way, and I suppose it always will be.
So this year, I was happy for the opportunity to work with Tom, and take his Piper Cherokee from really good condition, to even better condition.
Here’s a list of squawks we addressed this year, that I’m confident will put us in a situation where we just might be able to accomplish his next annual inspection in one day, when the time rolls around next year:
Squawk #1: The AD records needed updating.
I sorted through the past AD records, and put all the information into my favorite online AD platform that we use at Classic Aviation LLC, the AD Toolbox, by April and Reuben Zook. These people are awesome, and their service is the best! Check them out at AirworthinessDirectives.com They even have a free trial, and it’s totally worth checking out!
When it comes to AD research, record keeping, and compliance reports, April and Reuben are the go-to people. Why waste your time with some big corporate company, when you can get the best service available from our friends at the AD Toolbox?!

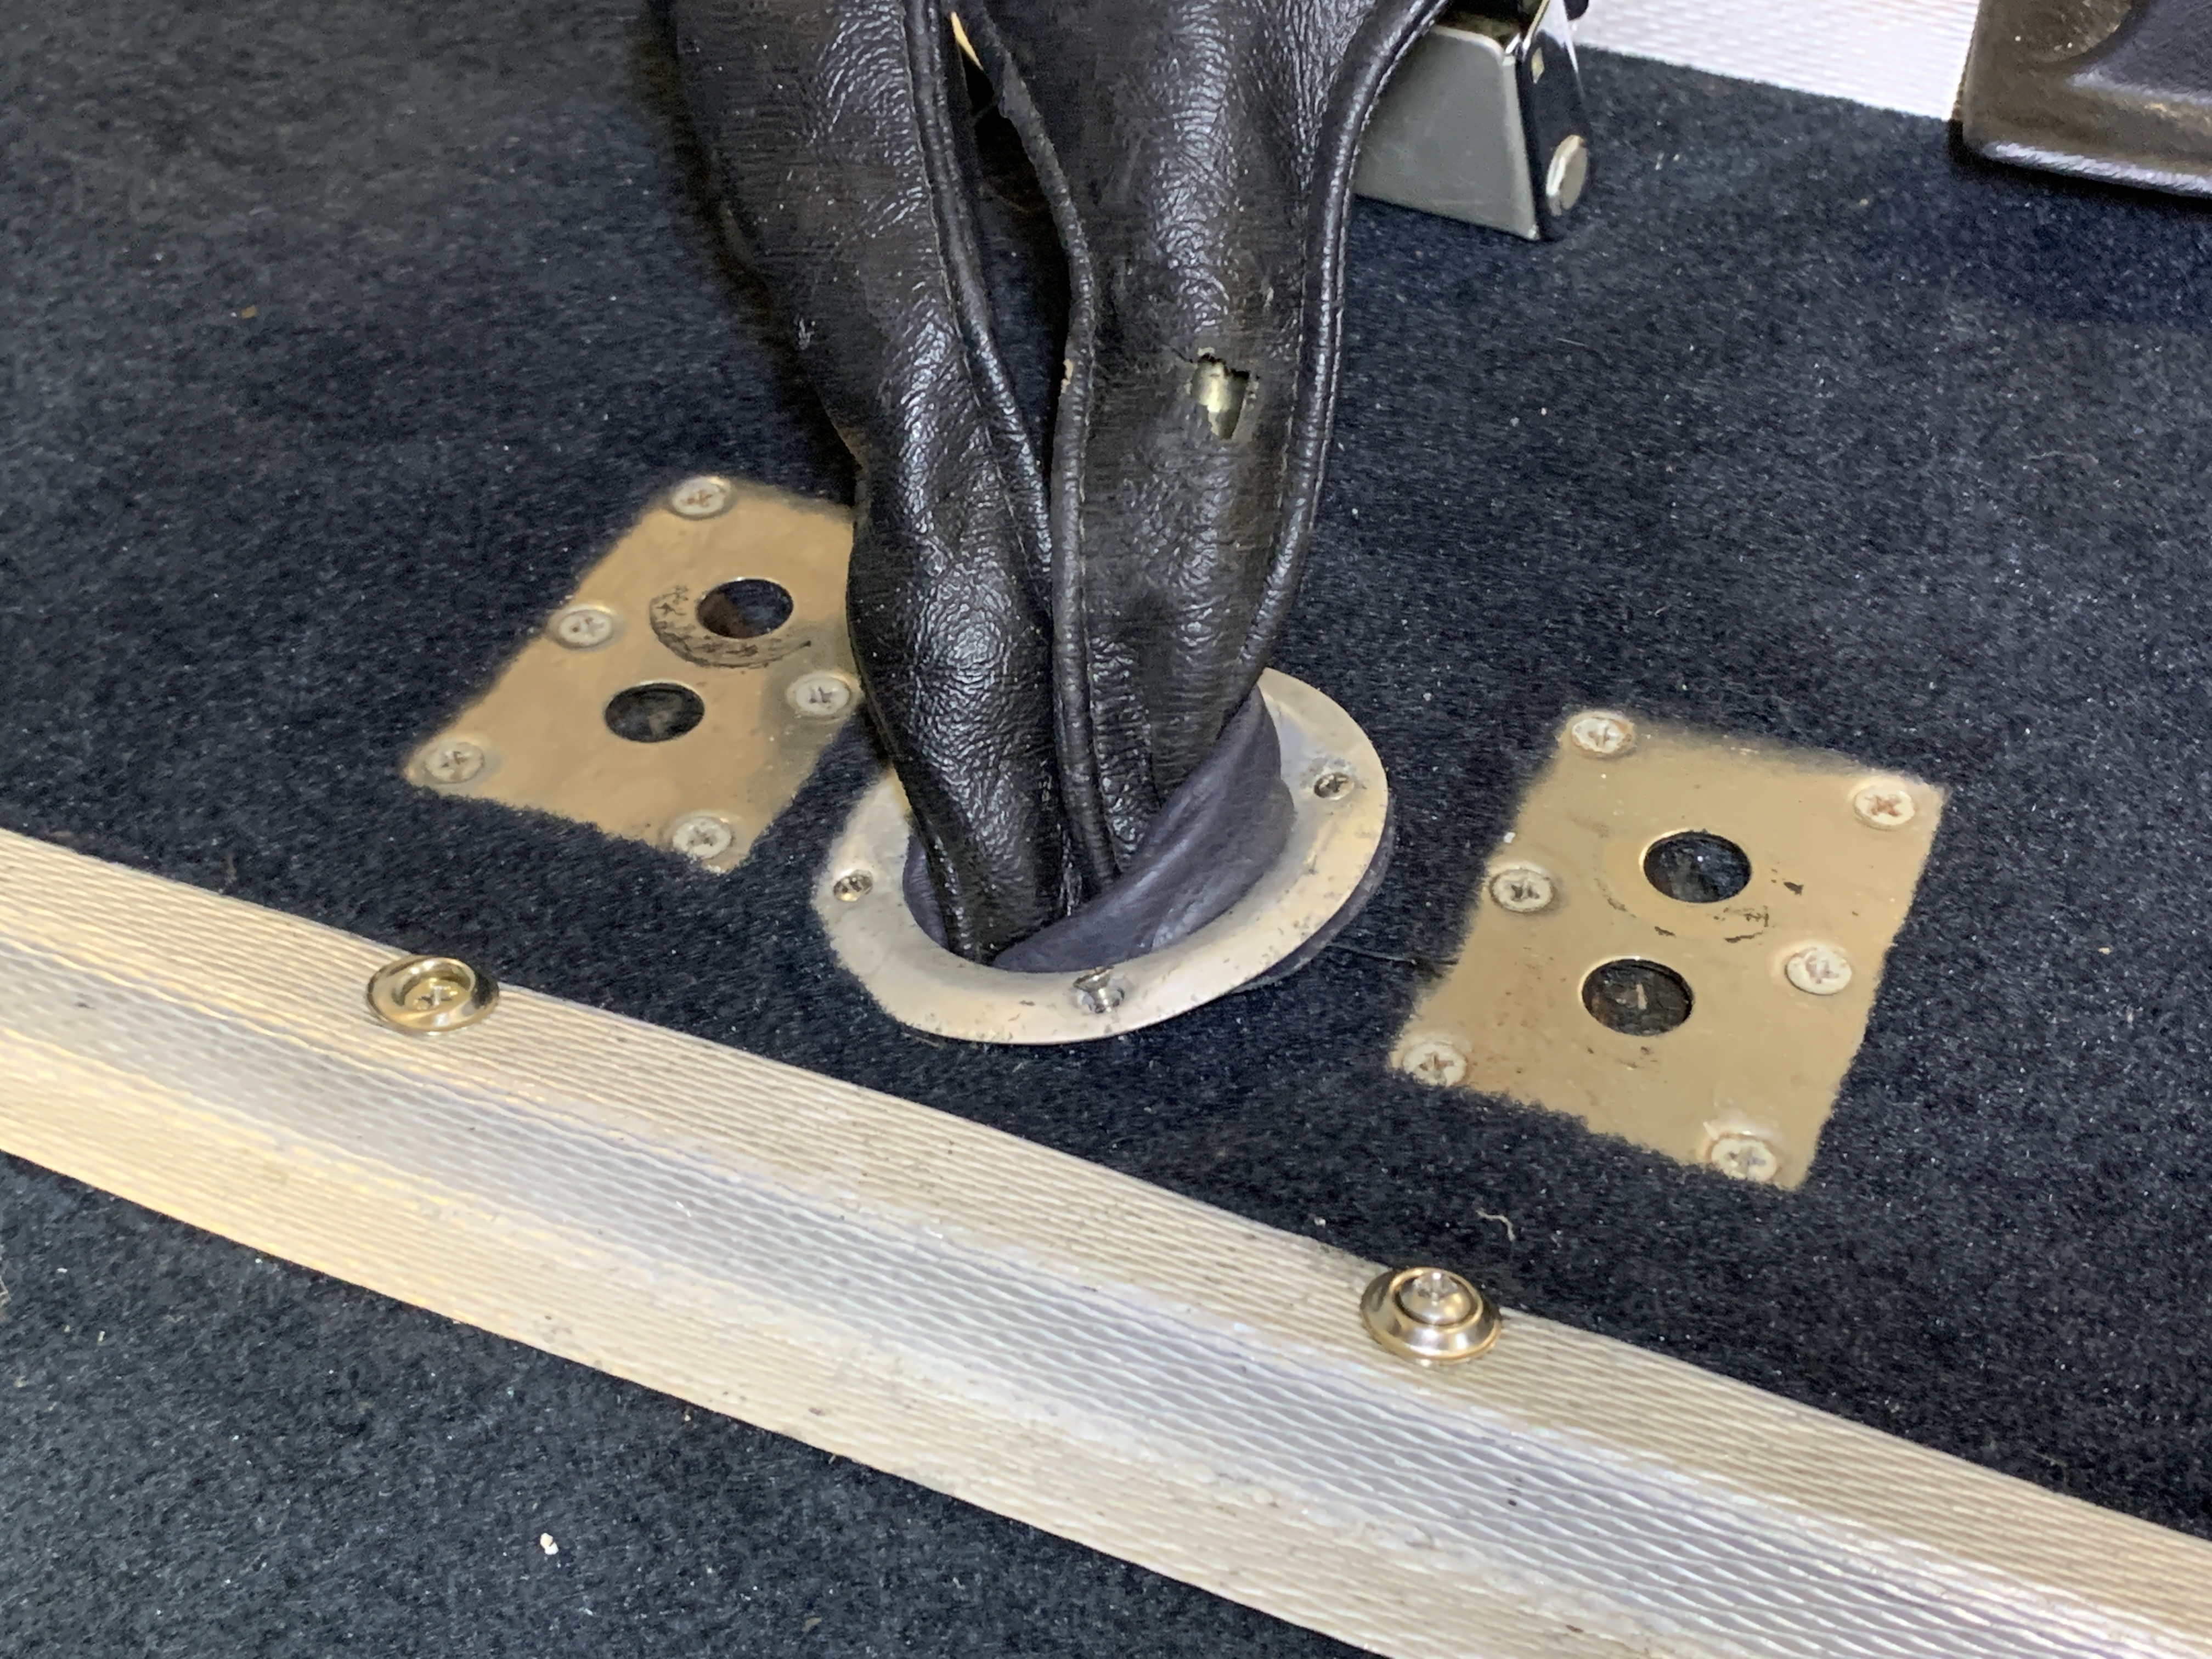
Squawk #2: AD 75-24-02.
This one was a simple matter of verifying the rear seat anchors were still holding the seats firmly in place, with the proper amount of pull tension to pull them up out of the anchor points. The plates with the round holes are where the seat anchors fit into, and must require a minimum of 15 pounds to pull them up out of the anchors.
Squawk #3: AD 76-07-12.
This one is simple, but really important. At low RPM, you momentarily turn the key to “OFF” and then put just a little pressure in the “past off” direction, to make sure the engine does not continue to run (it’s going to quit if you stay there too long,) and then turn the key back to “BOTH.” This verifies you do not have a hot mag when the ignition switch is in the “OFF” position.
Squawk #4: AD 2013-02-13.
This AD is due each 2000 hours, or 7 years, whichever comes first, and begins after an affected Piper is 15 years old. Since many of the Pipers were inspected in 2013, they are now coming due again for this inspection in 2020, 7 years later. Such was the case for Tom’s Cherokee.
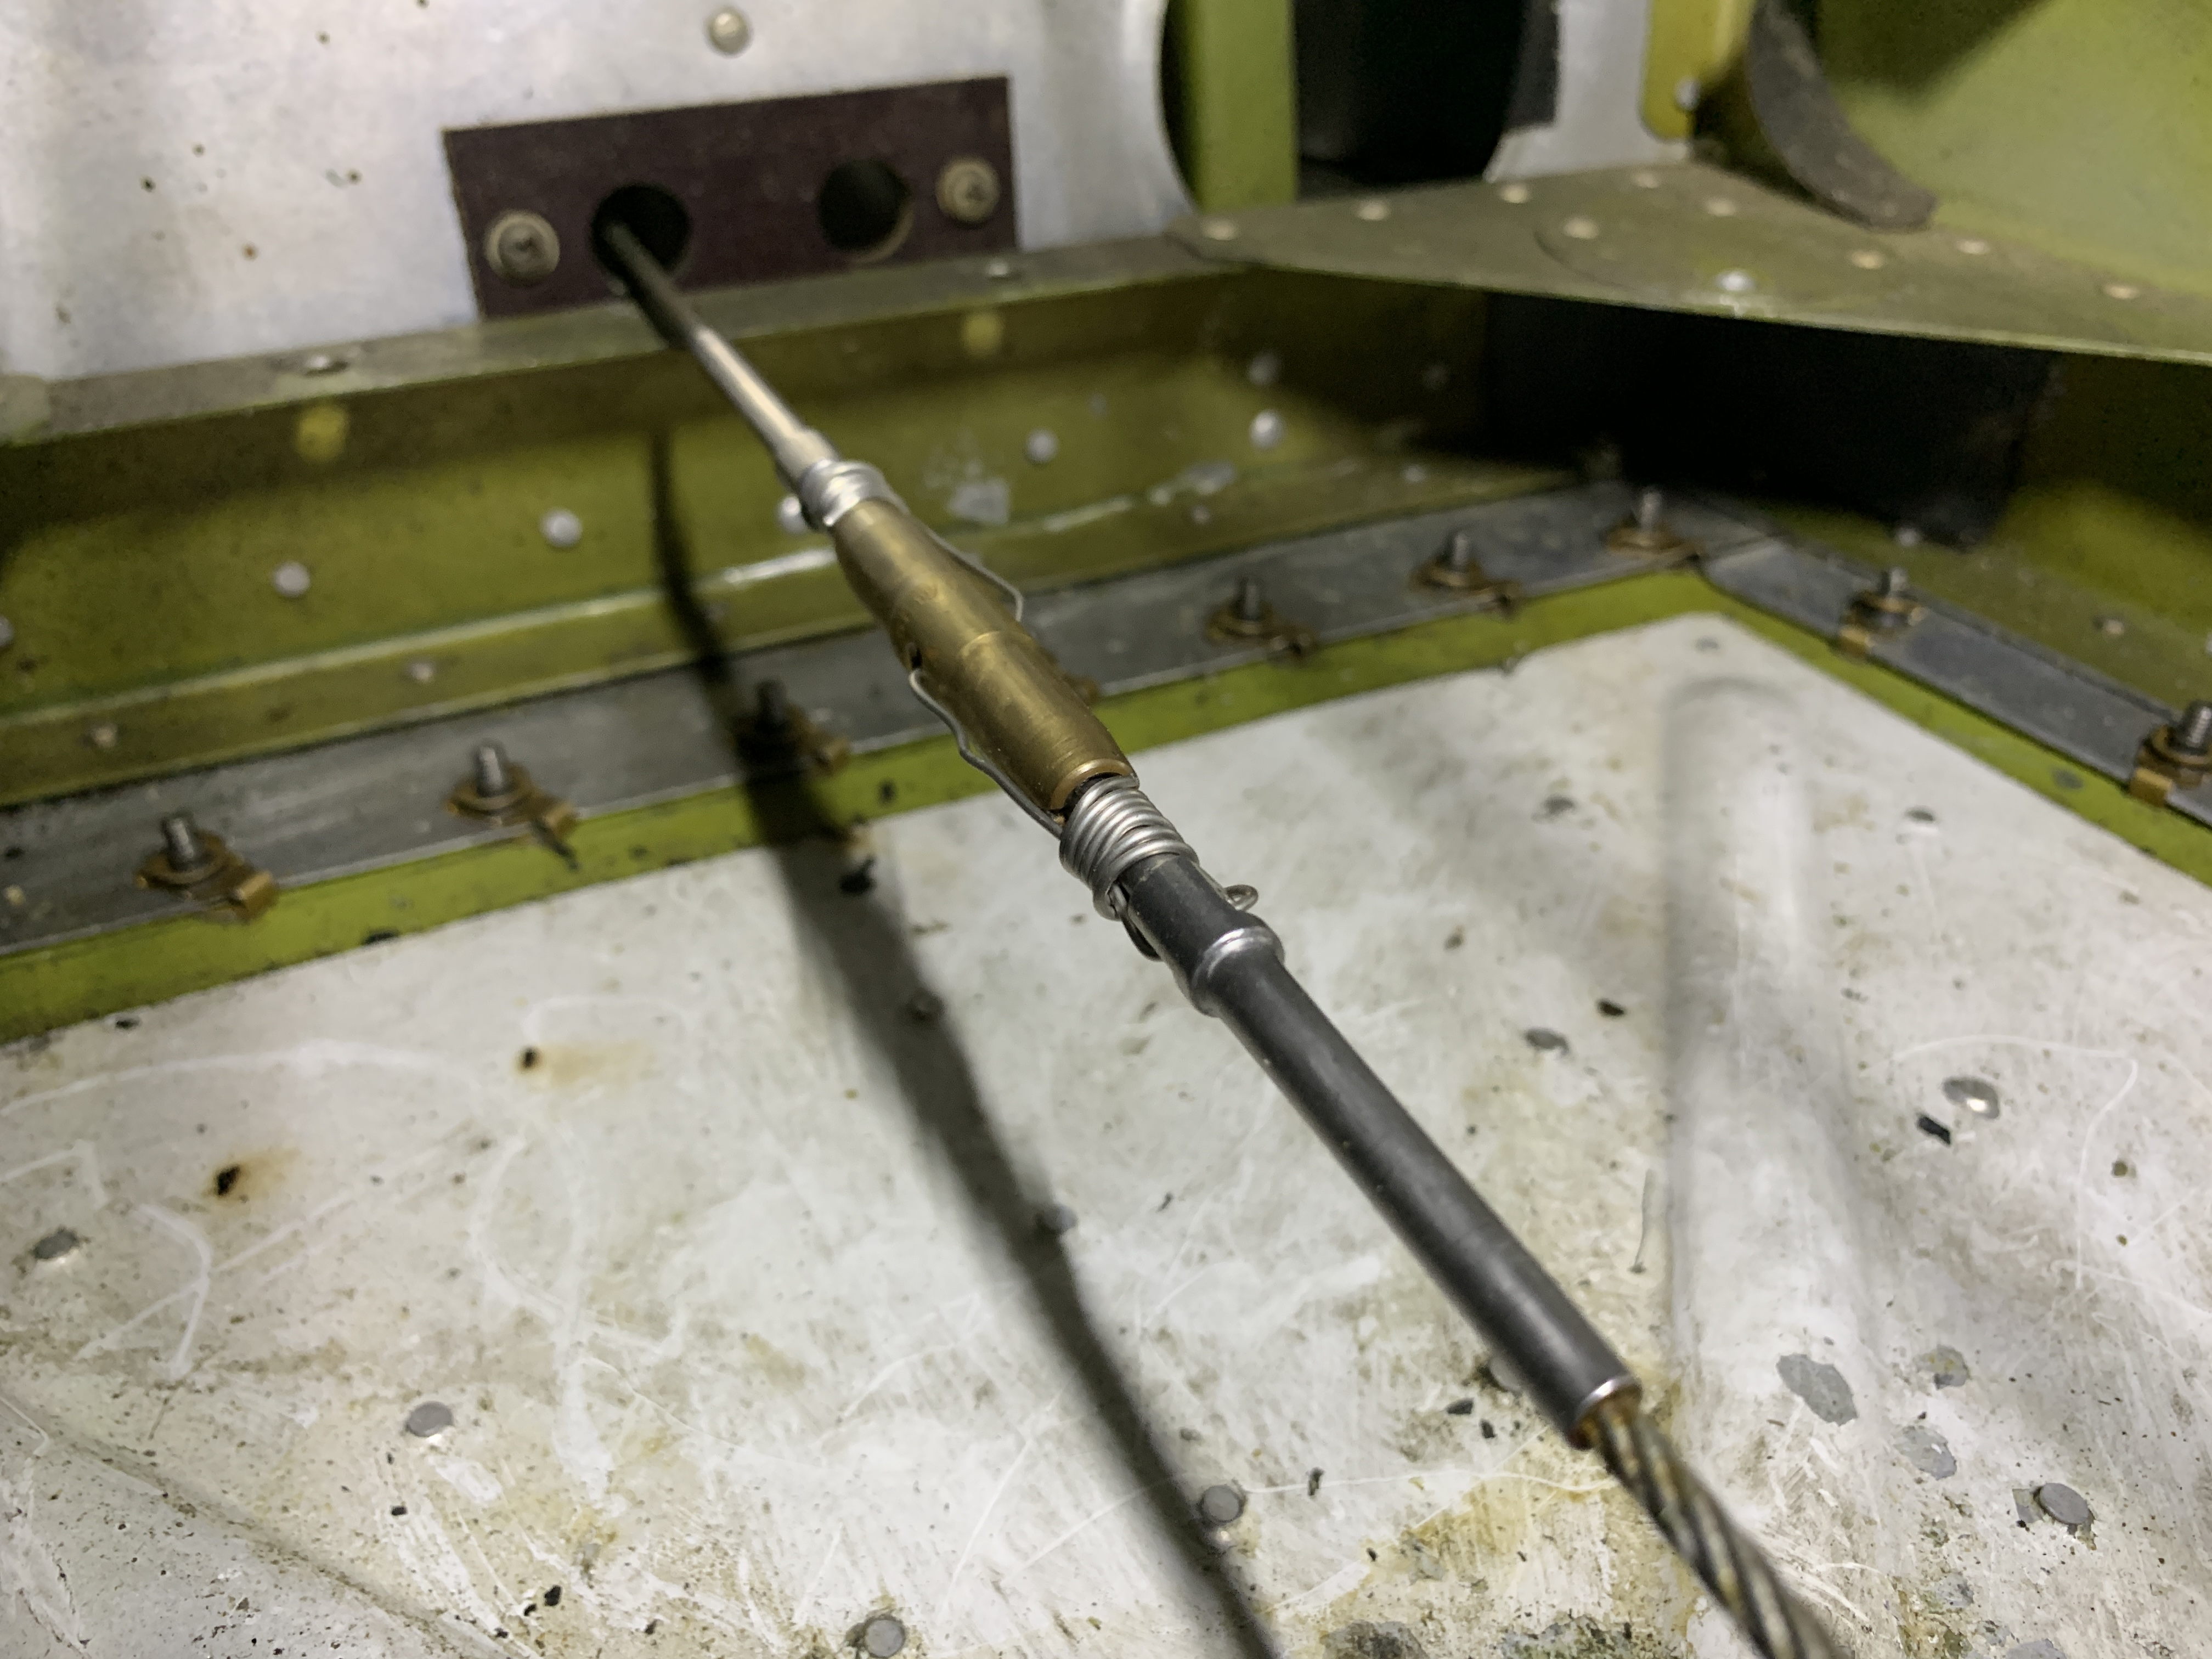
This AD requires inspection of the complete stabilator control cable system, with special emphasis on the two turnbuckles in the tail. Since the AD states the inspection is to be done “following instructions 1-10 of Piper SB 1245A,” this is a case where that service bulletin becomes mandatory, because the AD says so.
Therefore, when the service bulletin says to “Disassemble the turnbuckle bodies to facilitate a complete inspection of the turnbuckle bodies and associated cable terminals,” we have no choice but to do that. So if anyone tells you it’s not necessary to take the turnbuckles apart for this AD, they’re simply not correct.
SB 1245A also says to “Clean the turnbuckle bodies and associated cable terminals thoroughly with Methyl Ethyl Ketone (MEK) or acetone prior to inspection. The non-threaded surfaces of the turnbuckle body and cable terminals may be cleaned using Scotch-Brite™ General Purpose Green Scouring Pad 96 or 105b.”
This will give you a like-new appearance of the turnbuckle body. Check it out:
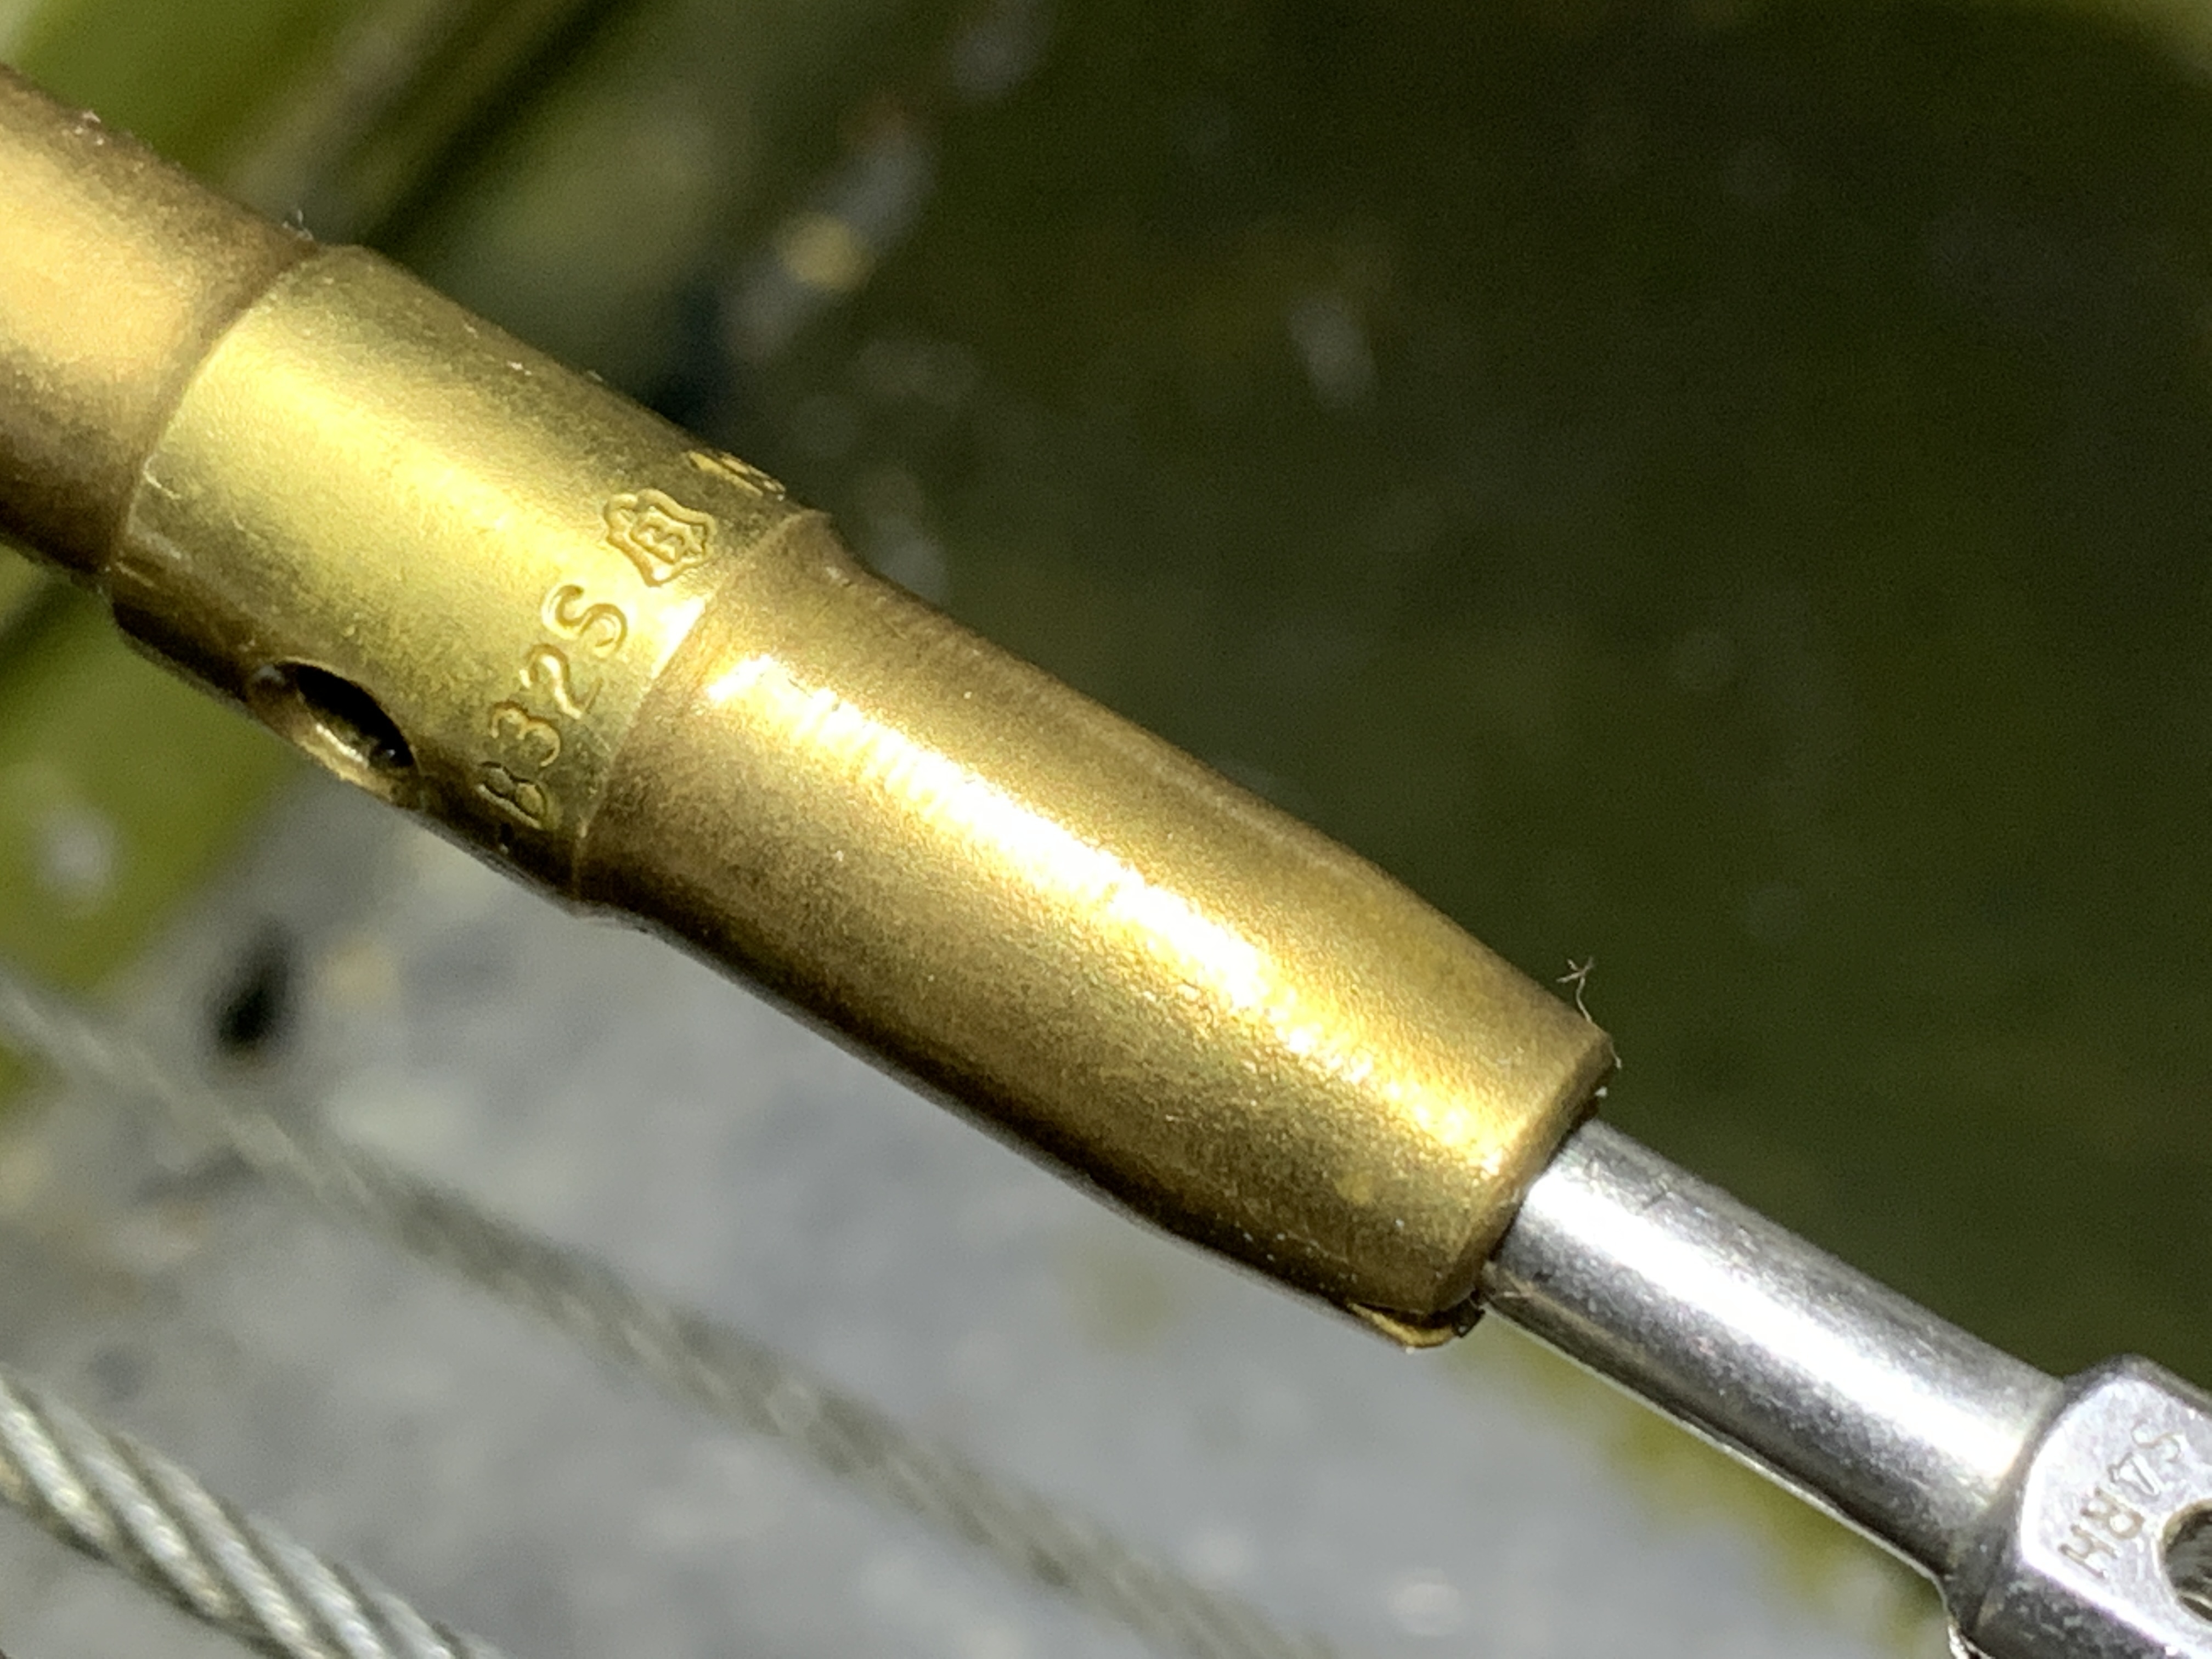
I completely disconnected the cable ends from the turnbuckle body, on both turnbuckles, and inspected them with a 10x magnifying glass, per SB 1245A. They were in excellent condition, so I reassembled them, set the tension, verified full and correct stabilator travel, and installed safety clips in the turnbuckles.
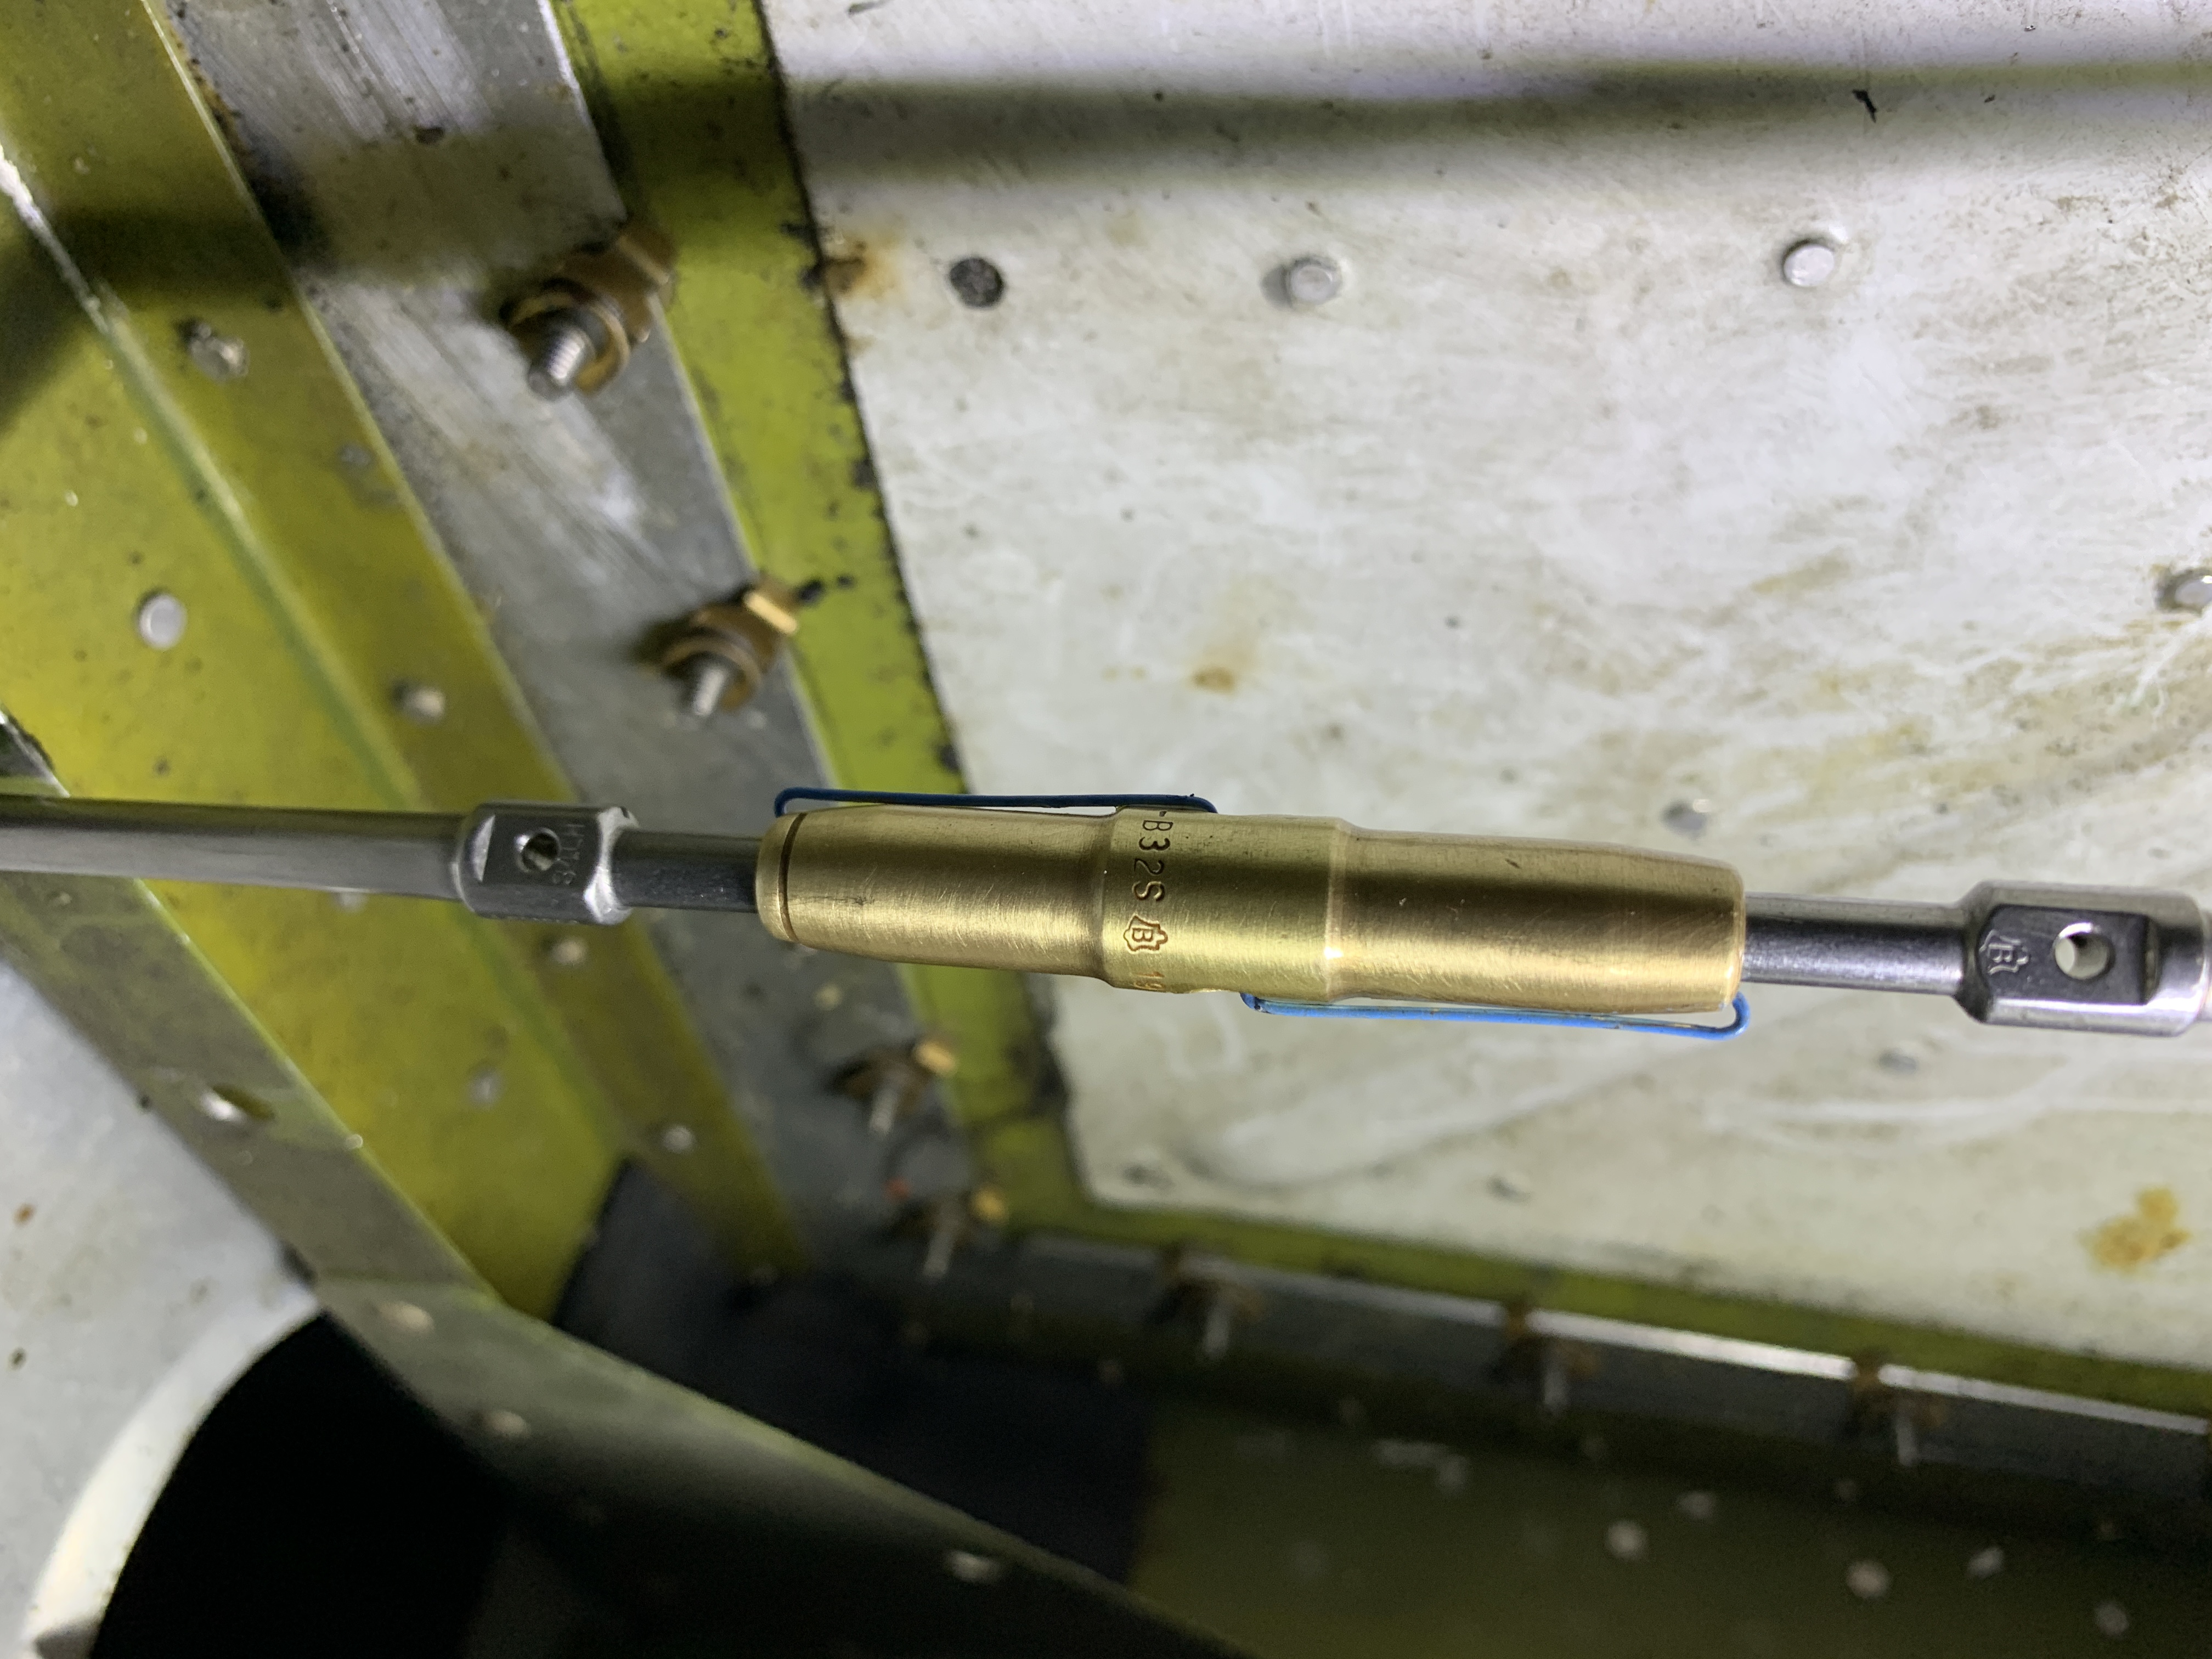
Now Tom is good to go for another 7 years, as far as this AD is concerned.
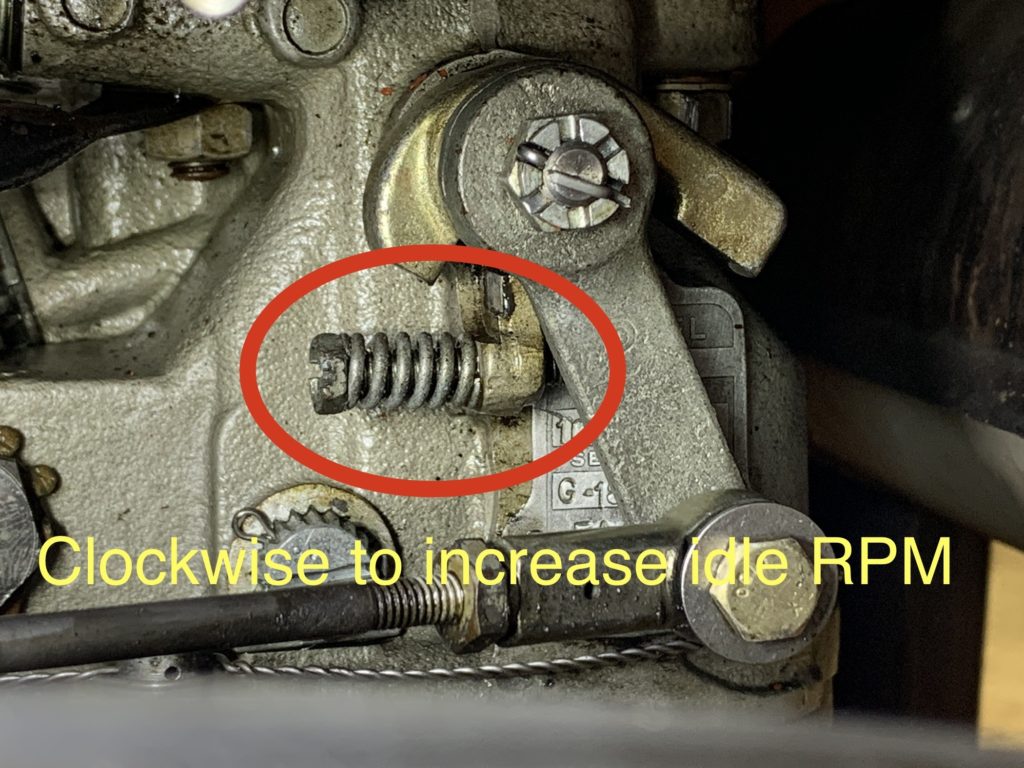
Squawk #5: Idle speed slightly low.
The fix for this was to simply turn the idle stop screw in 1/2 turn so the throttle control on the carburetor would make contact a little sooner and bring the idle RPM up just a little.
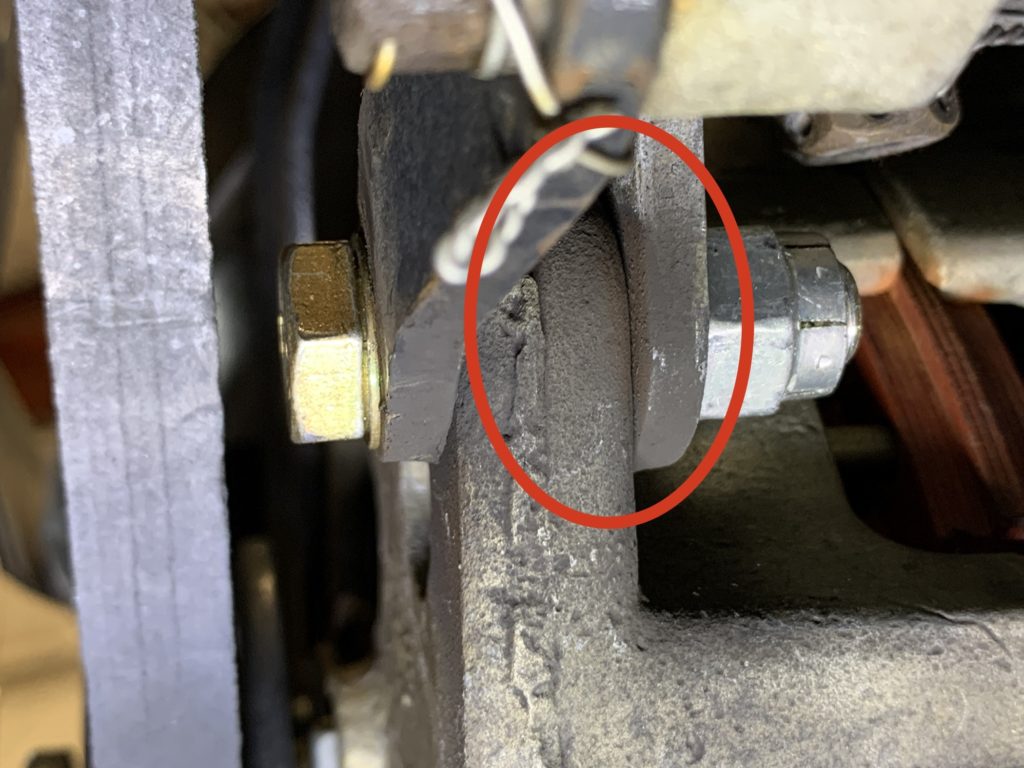
Squawk #6: Alternator forward mounting bolt slightly loose.
The first thing that got my attention on this one, was the dark brown wear dust that appears when a steel bolt is chafing. The following picture was taken after I installed a new bolt and locknut, but you can still see some of the brown dust.
Squawk #7: Cockpit door stop does not hold the door open.
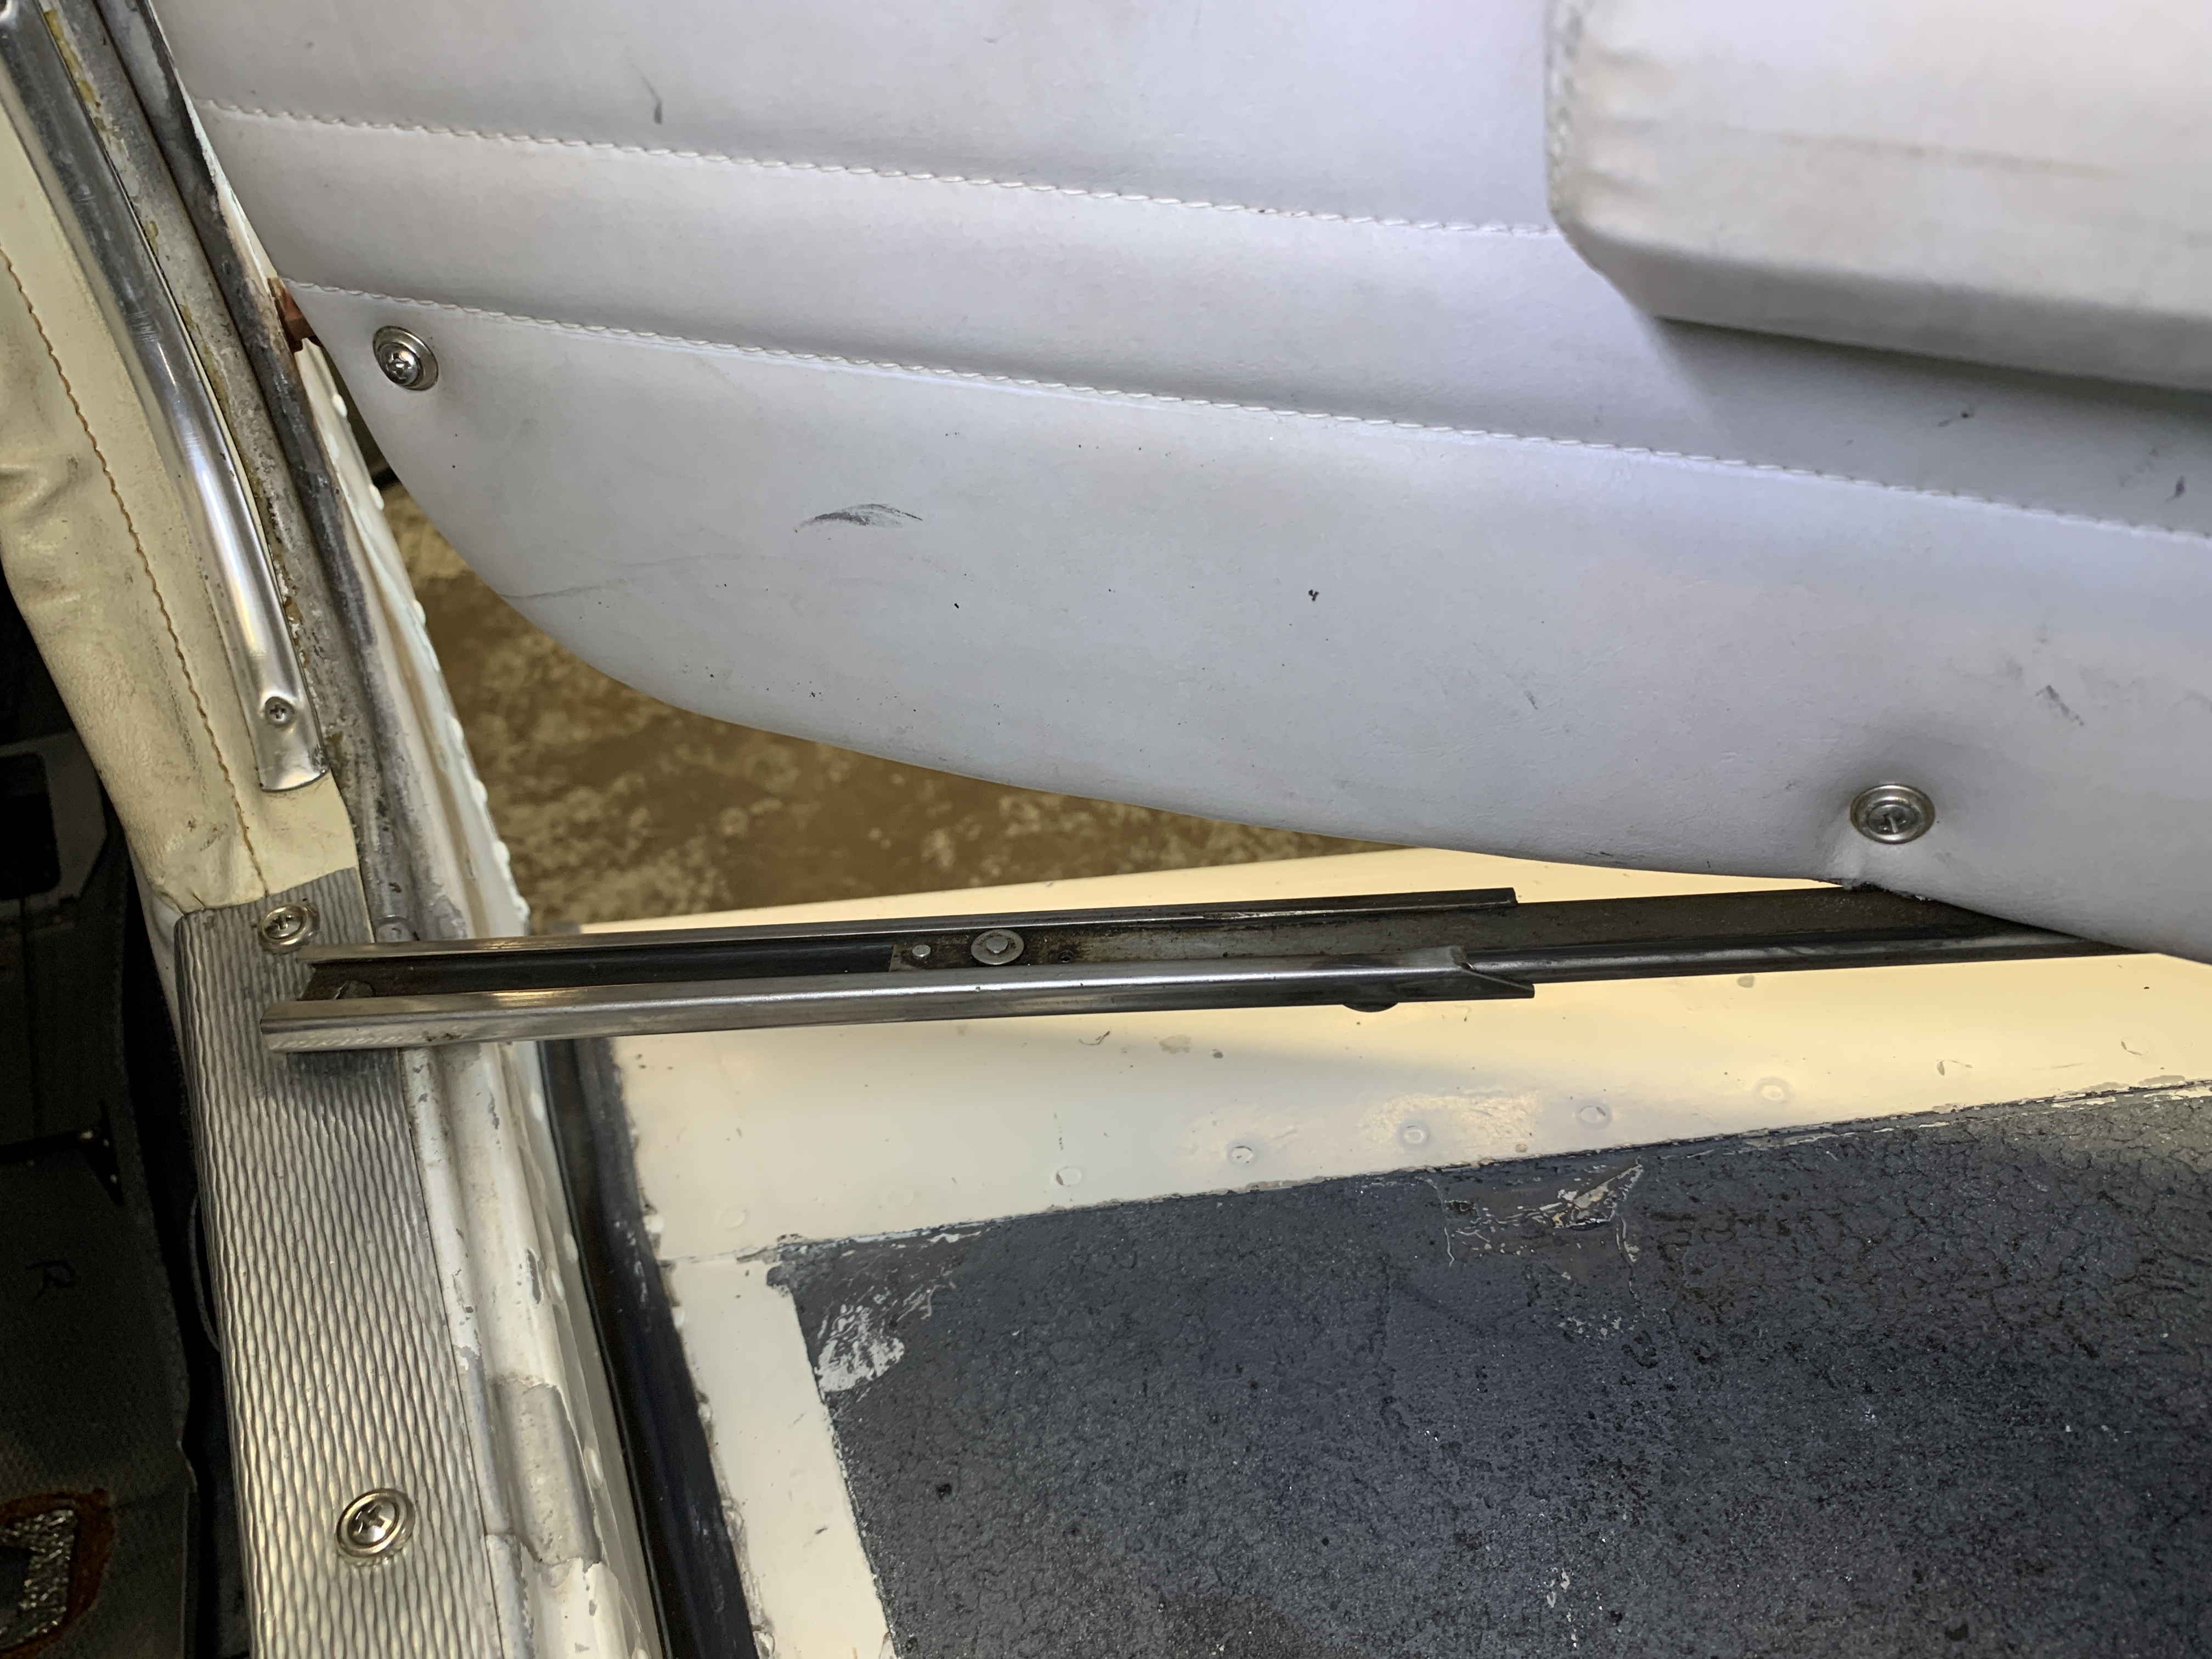
Since this was not an airworthiness issue, we did not do anything with this one, but I did find some very interesting information. If you own a Piper, you’ll like this one!
I researched and found a new door stop / slide assembly is about $700… yikes!
But wait… Airward.com has a “Door slide repair kit” for $95!
And wait… Airward.com also has a “Door slide spring” (with the appropriate stainless rivet included,) for a mere $15! In Tom’s case, I think this is all he needs, since the other parts appeared to be in good condition. If you also need the attaching clevis bolts and spacers, you might want to order the $95 kit.
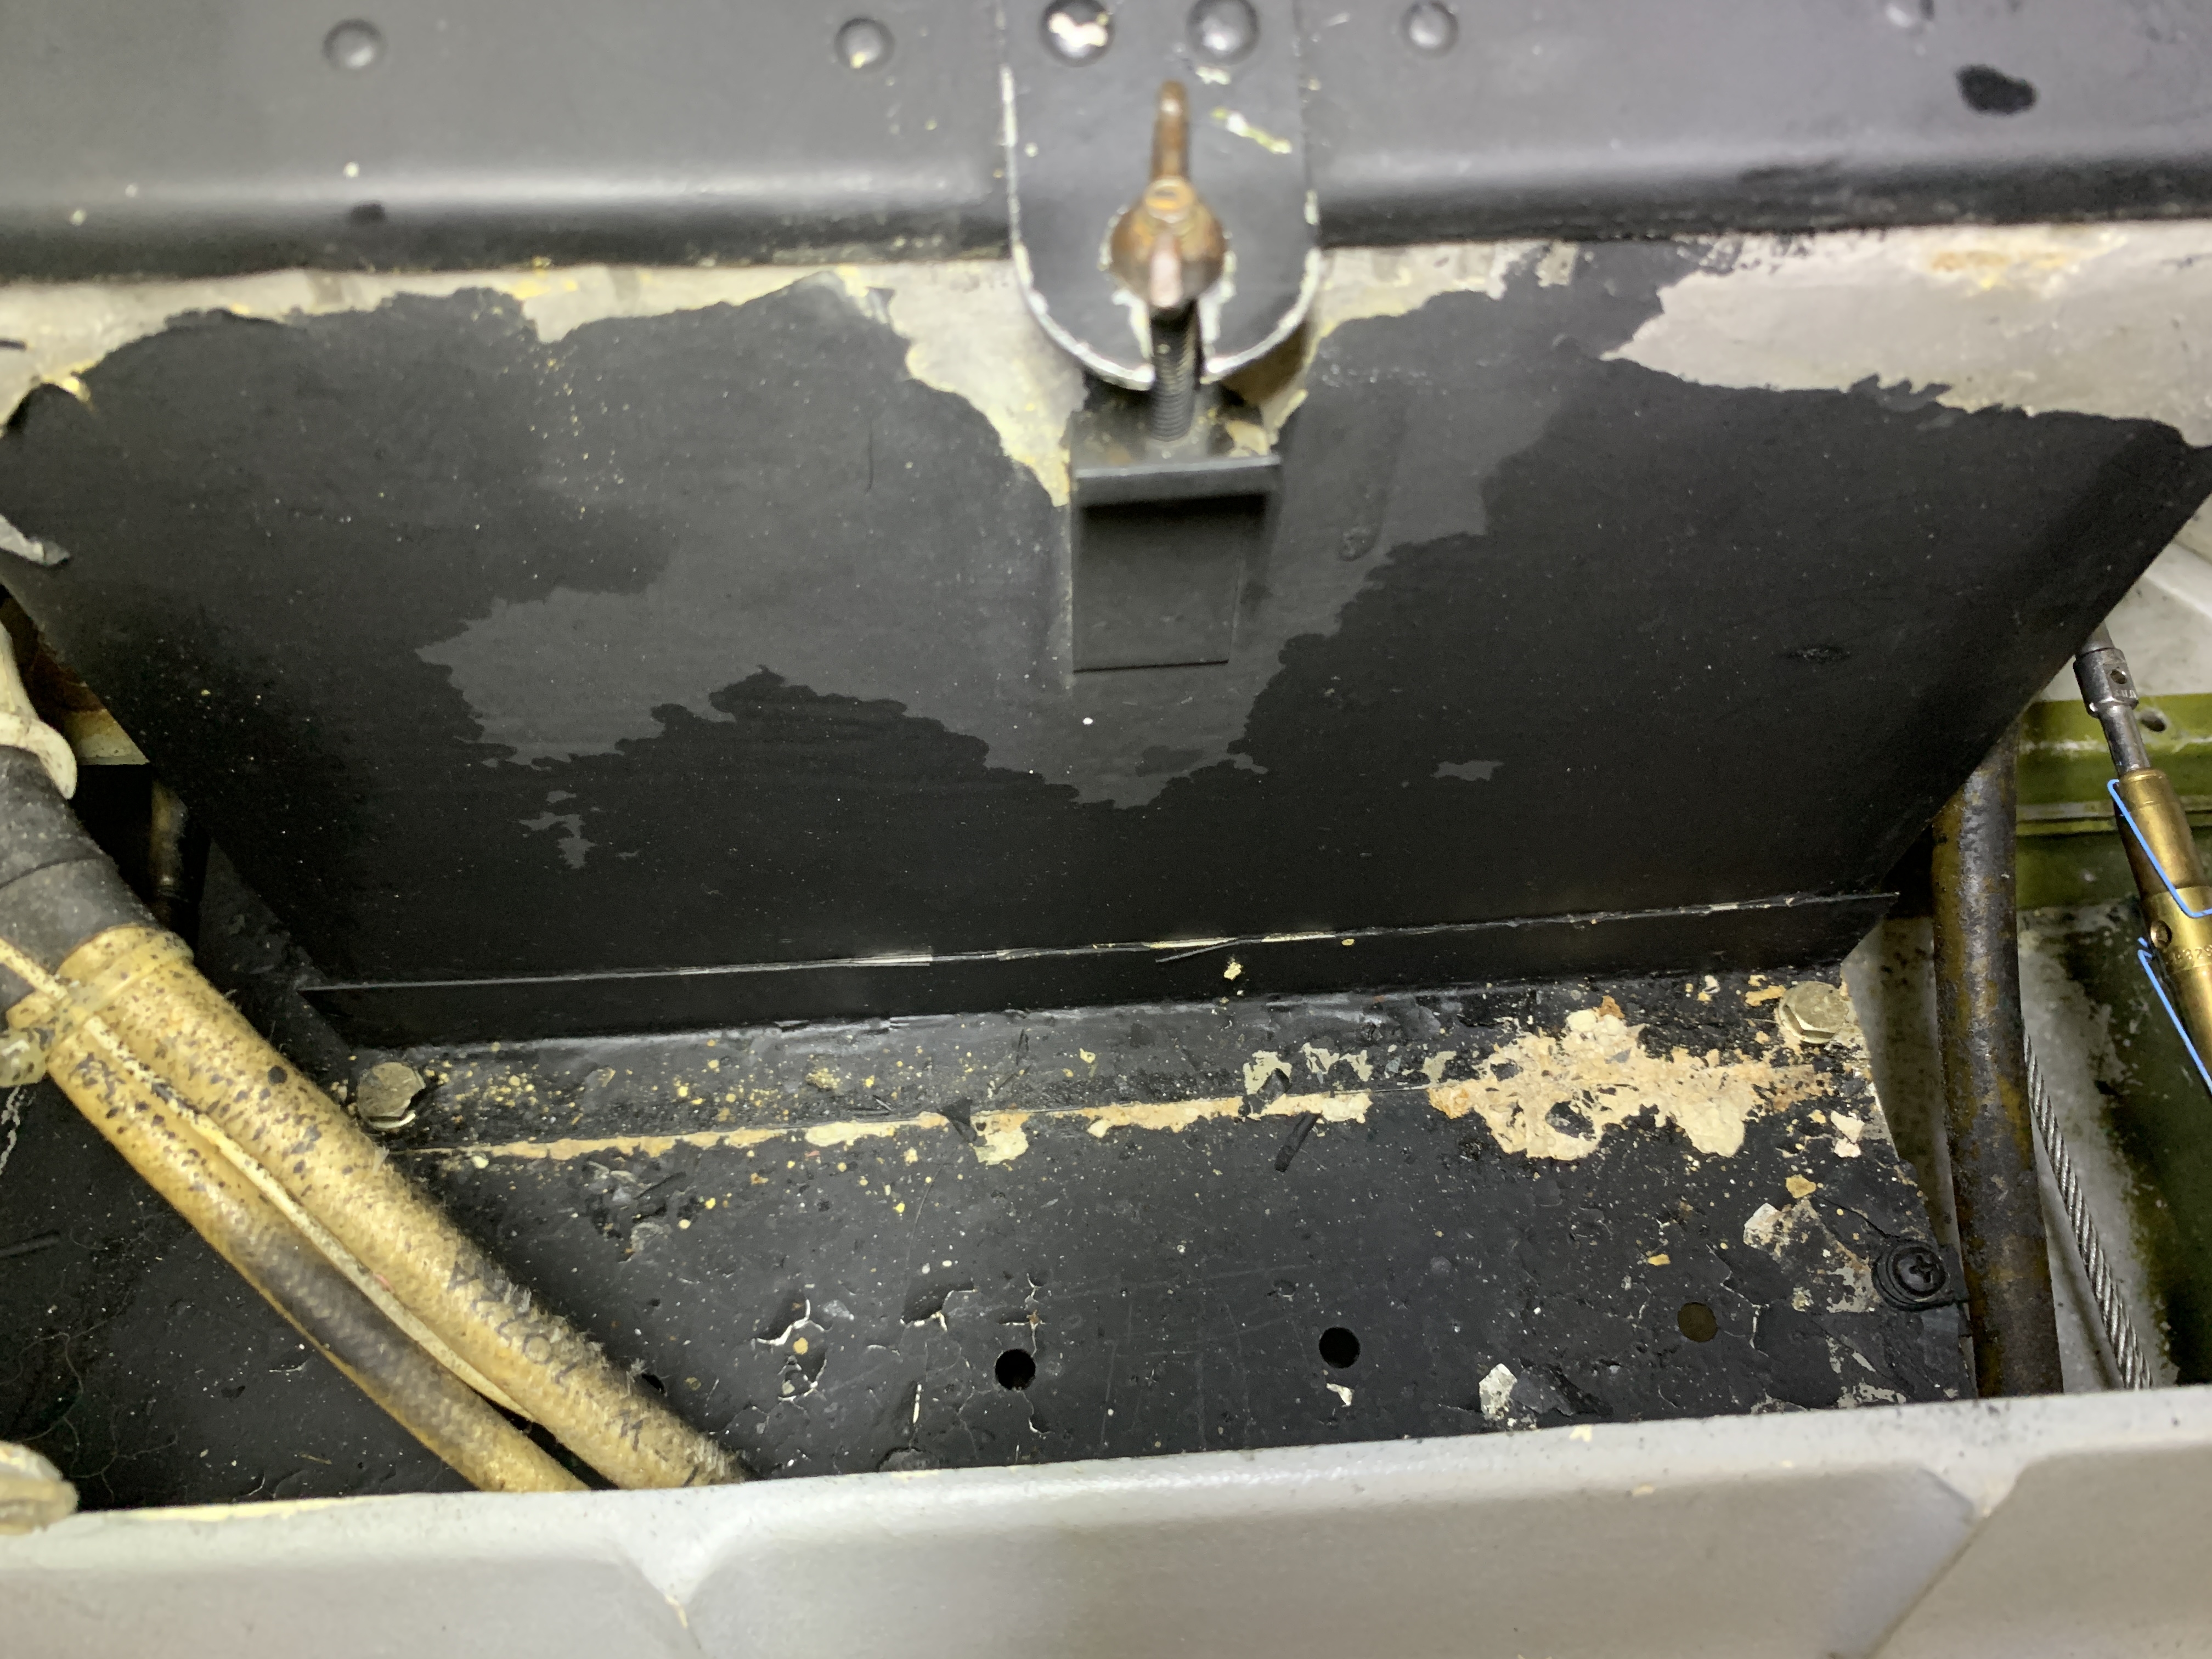
Squawk #8: White powdery growth under battery box.
At first glance, the problem appeared fairly small, with a little evidence of corrosion at the base of the battery box:
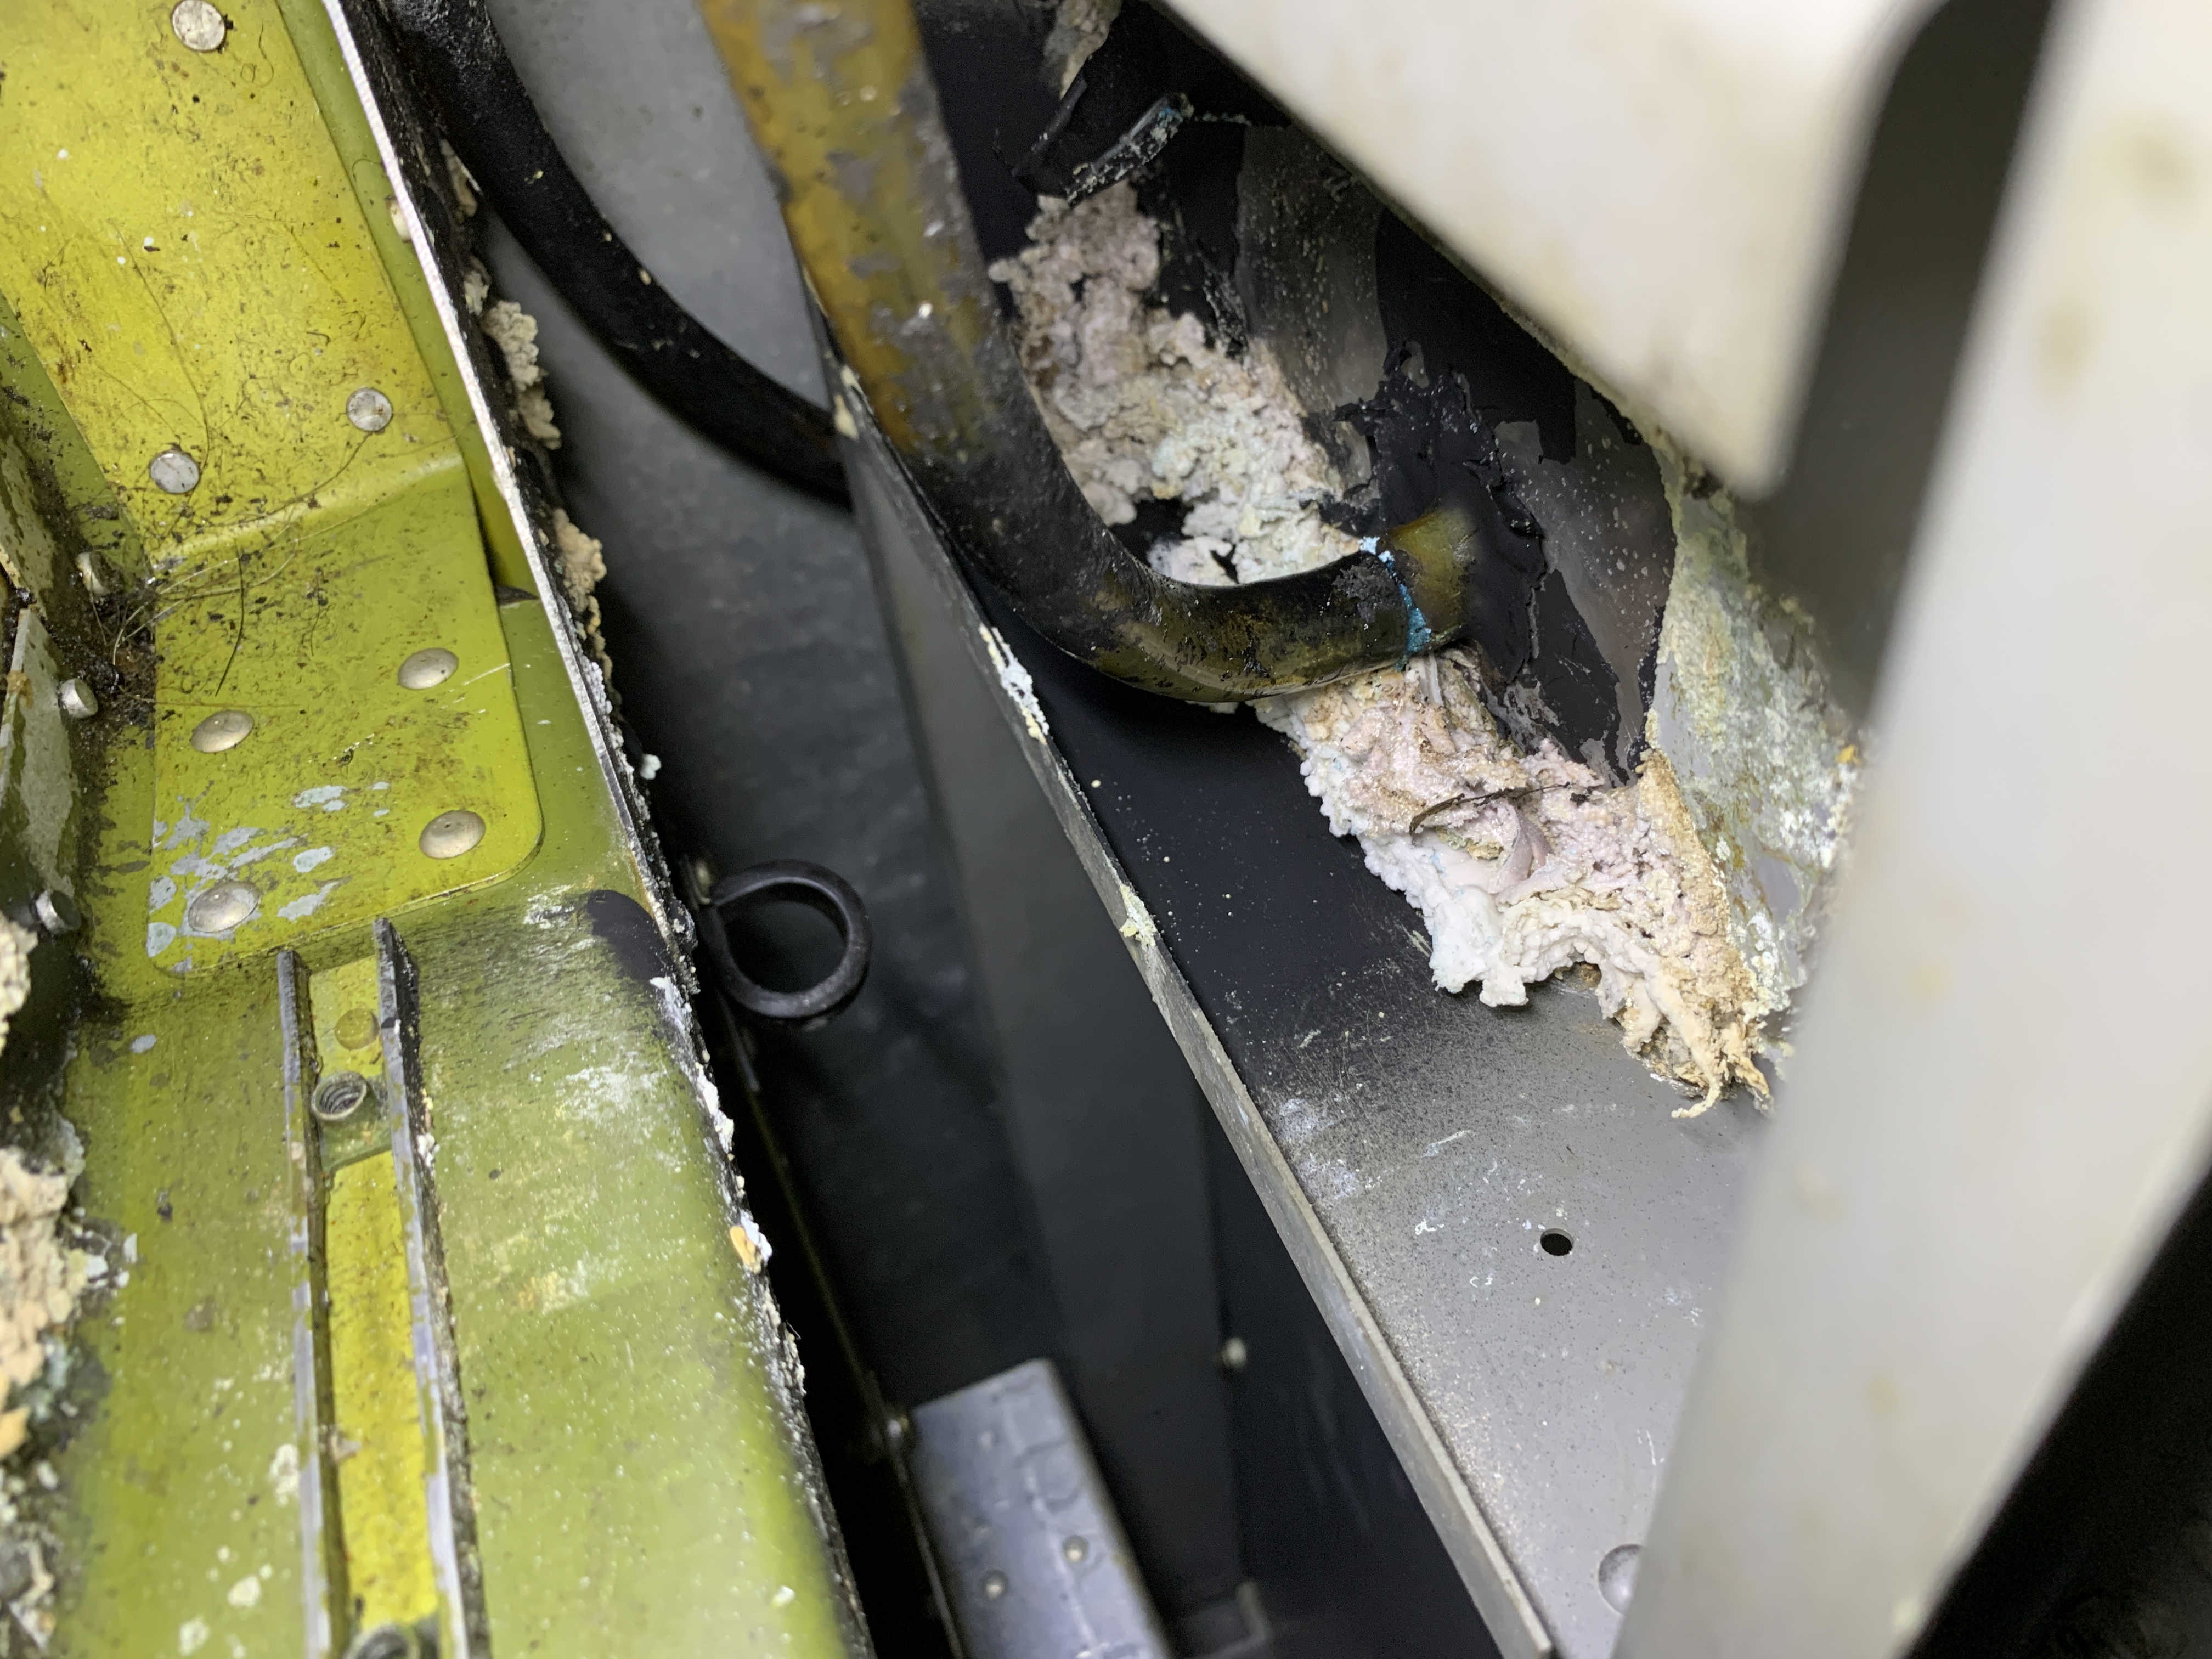
But after further investigation, it was obvious, the problem was much bigger UNDER the battery box:
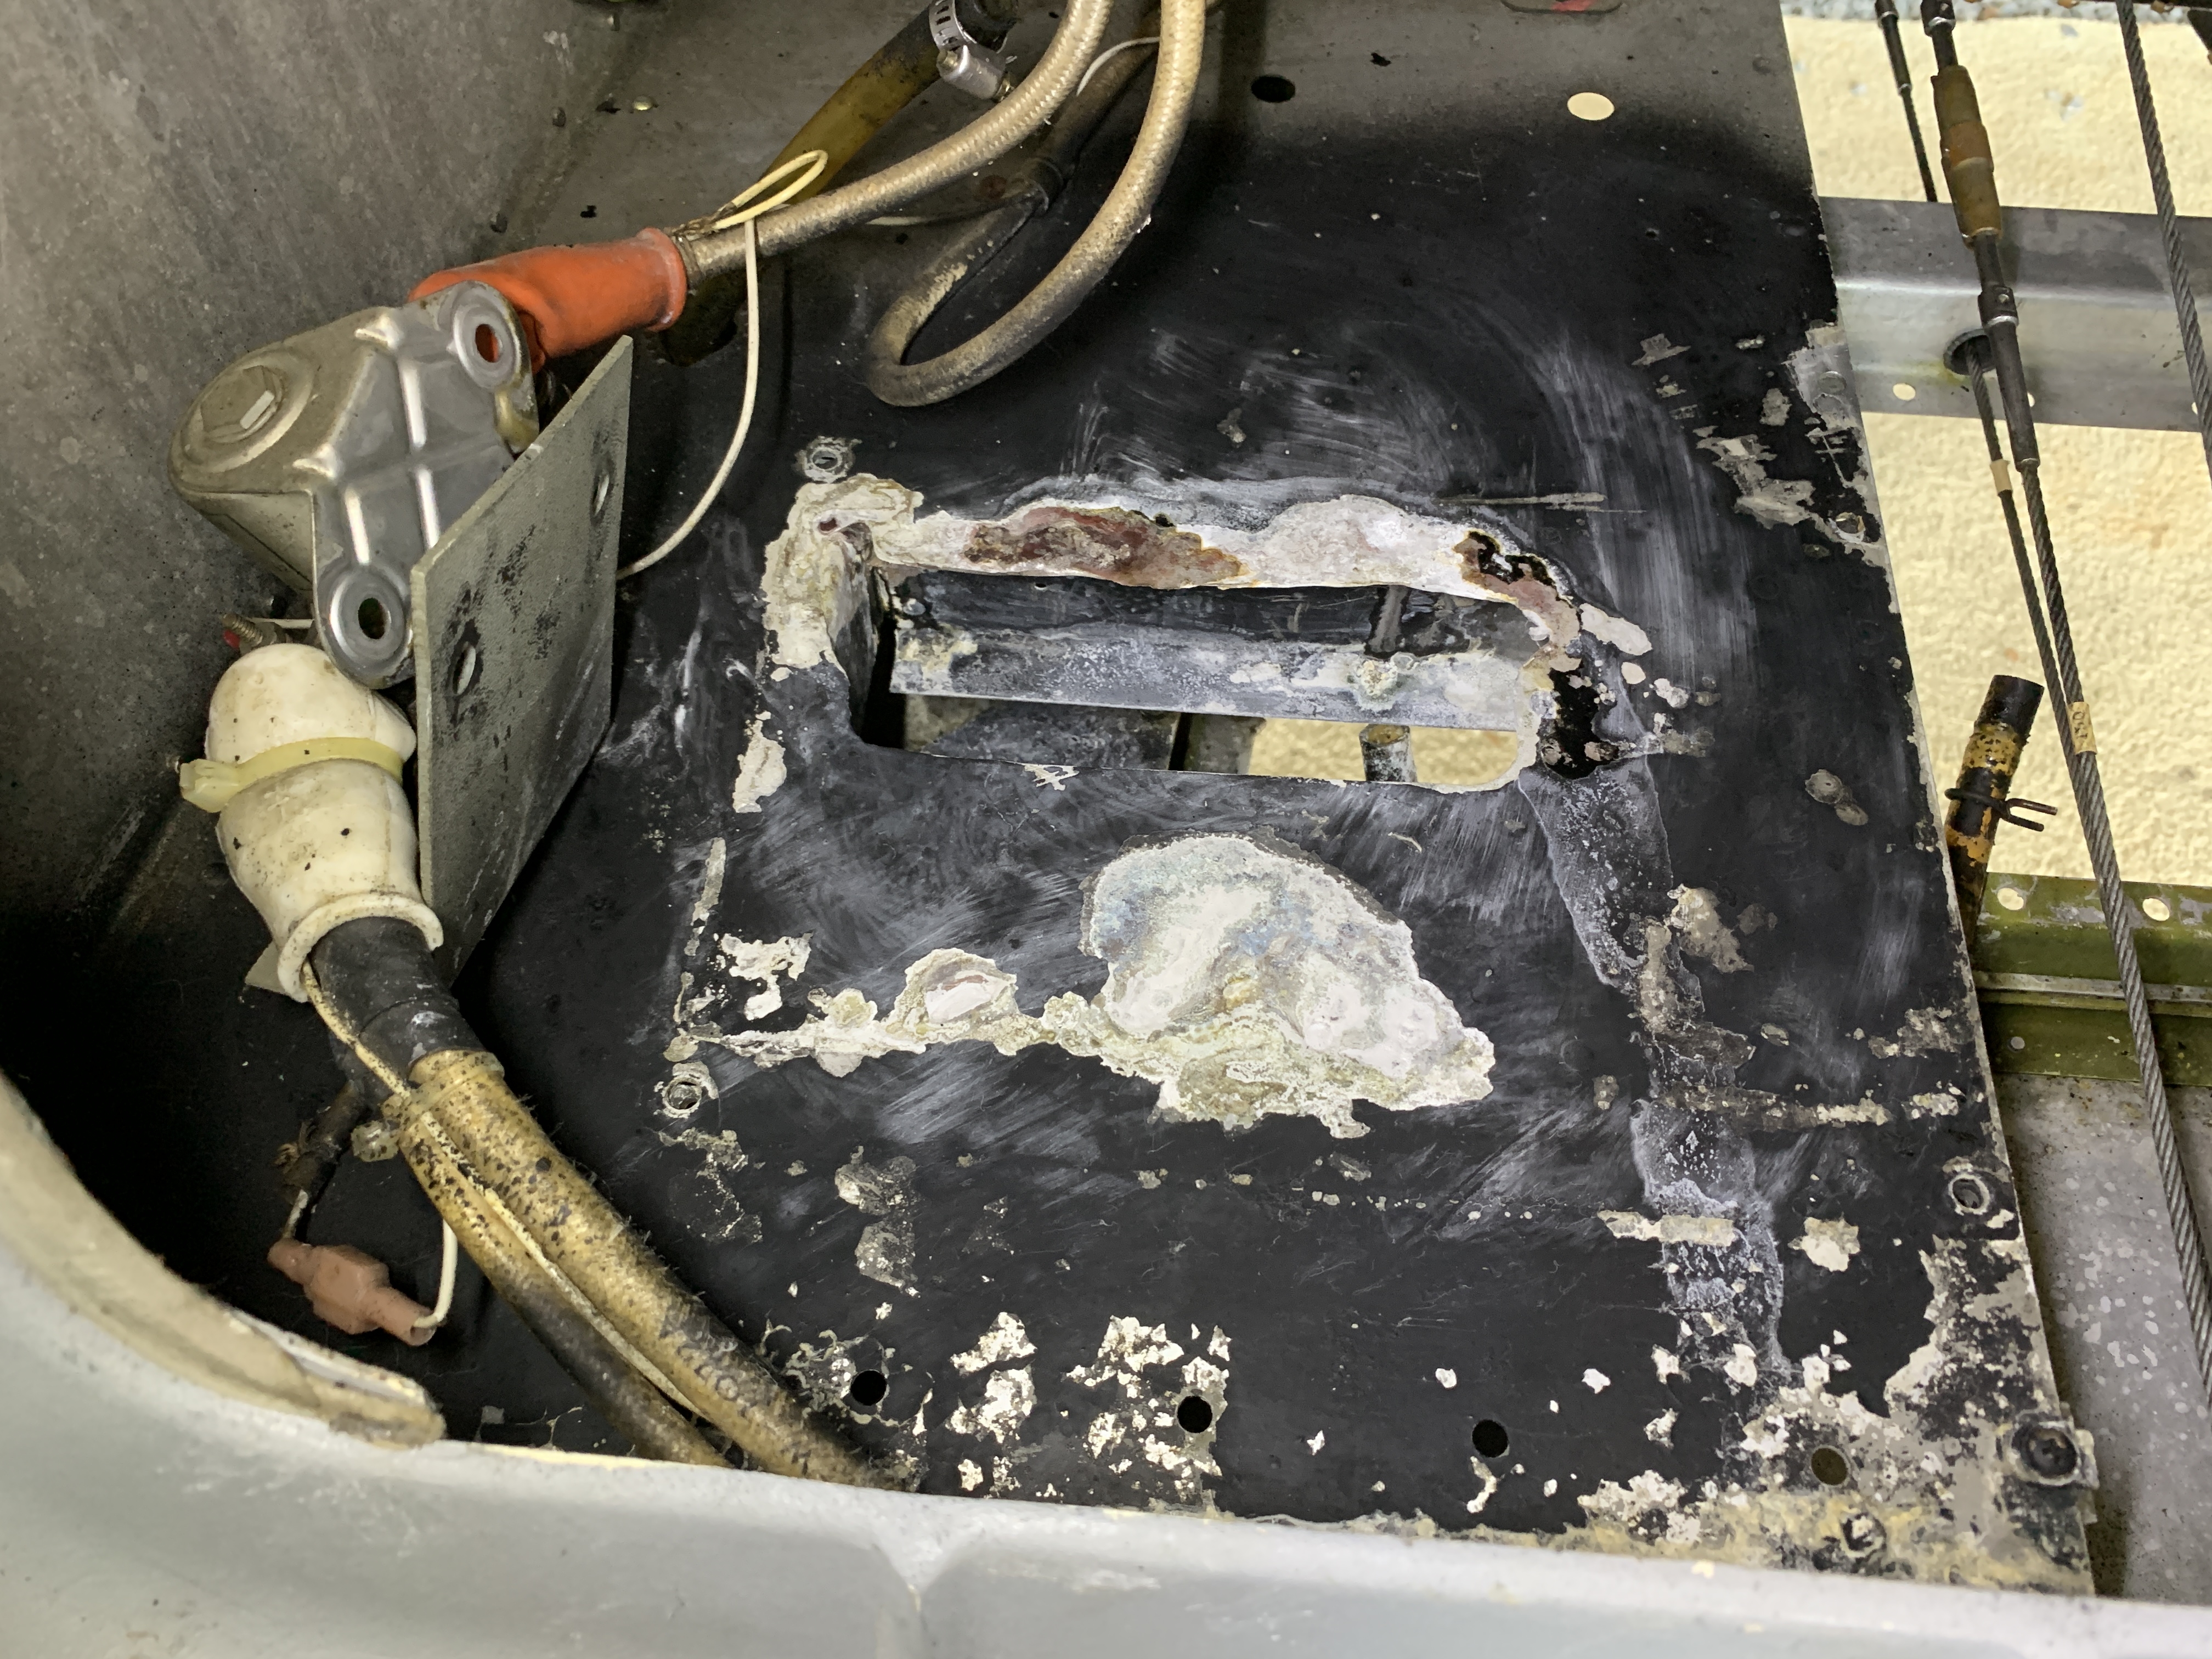
Tom chose to clean and treat this area himself… smart decision in my opinion, and a win-win! I didn’t have to worry about it, and he didn’t have to pay $85 per hour to have it done.
Tom ended up removing the battery box to clean the area.
Squawk #9: Debris inside right spar area in fuselage.
This one showed evidence of a mouse nest, and a prime example of why annual inspections are important. This issue was found after removing the center floor board and inspecting inside the main wing spar carry through area.
Tom chose to clean this up as well… he cleaned the area and treated it with Corrosion-X. It was a fairly simple, but very important part of the annual.
Squawk #10: One loose seat back stop bolt on pilot seat.
This one was simple… I tightened the stop bolt.
Squawk #11: Right aileron chafing on nutplate in forward center console.
This one was a bit challenging to figure out. There was a clicking noise when I pulled the control yoke all the way back and rotated it. Finally, I discovered one of the aileron control cable ends was catching on a nutplate that had moved out of position.
I repositioned the nutplate, and the noise was gone, along with the chafing. It reminded me again, of the importance of tenaciously discovering the source of any out-of-the-ordinary noises.
Squawk #12: One clip nut broken for center floor board attachment.
We ordered a new clip nut for this one.
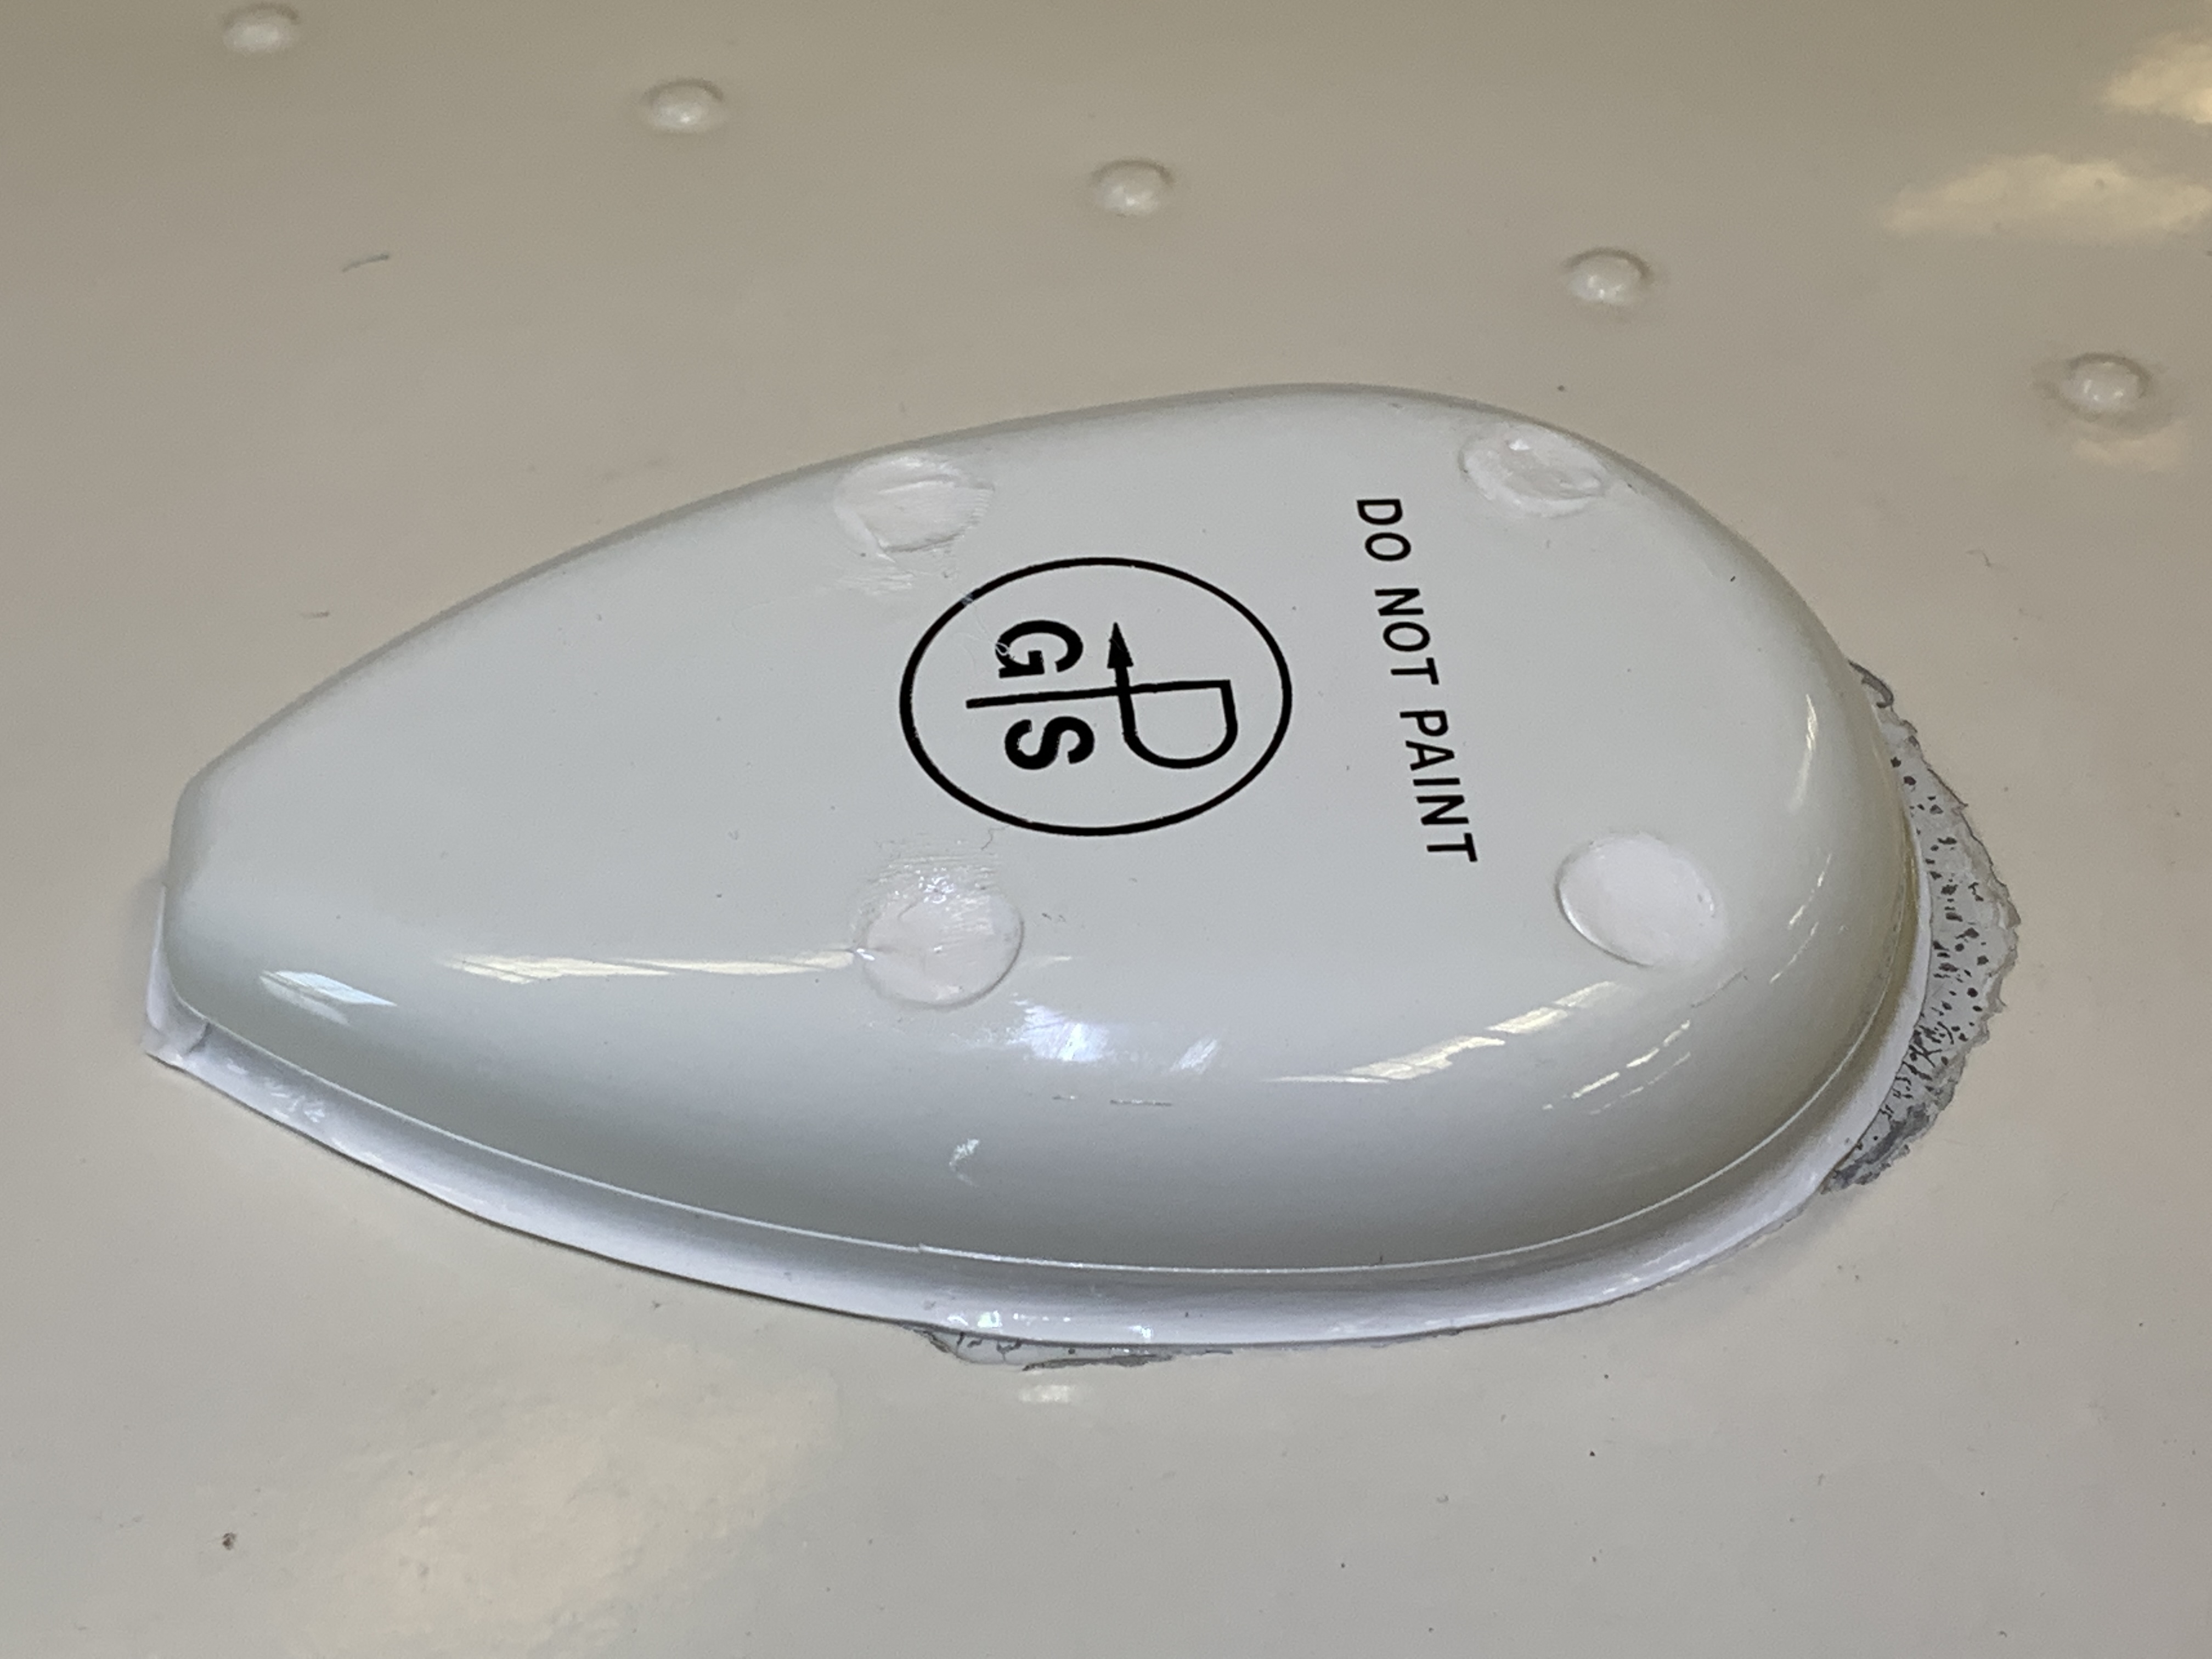
Squawk #13: GPS antenna not sealed at edge, and at screws.
I’ve seen many airplane antennas that are sealed, and many that are not. Is it absolutely necessary? Some may say not. I prefer to have them sealed around the edge, even though there is typically a gasket, just to safeguard any moisture from getting inside. And in Tom’s case, he had very recently had an avionics upgrade, with a new GPS antenna installed. One of the avionics guys came over to our shop and did a fantastic job of sealing the antenna:
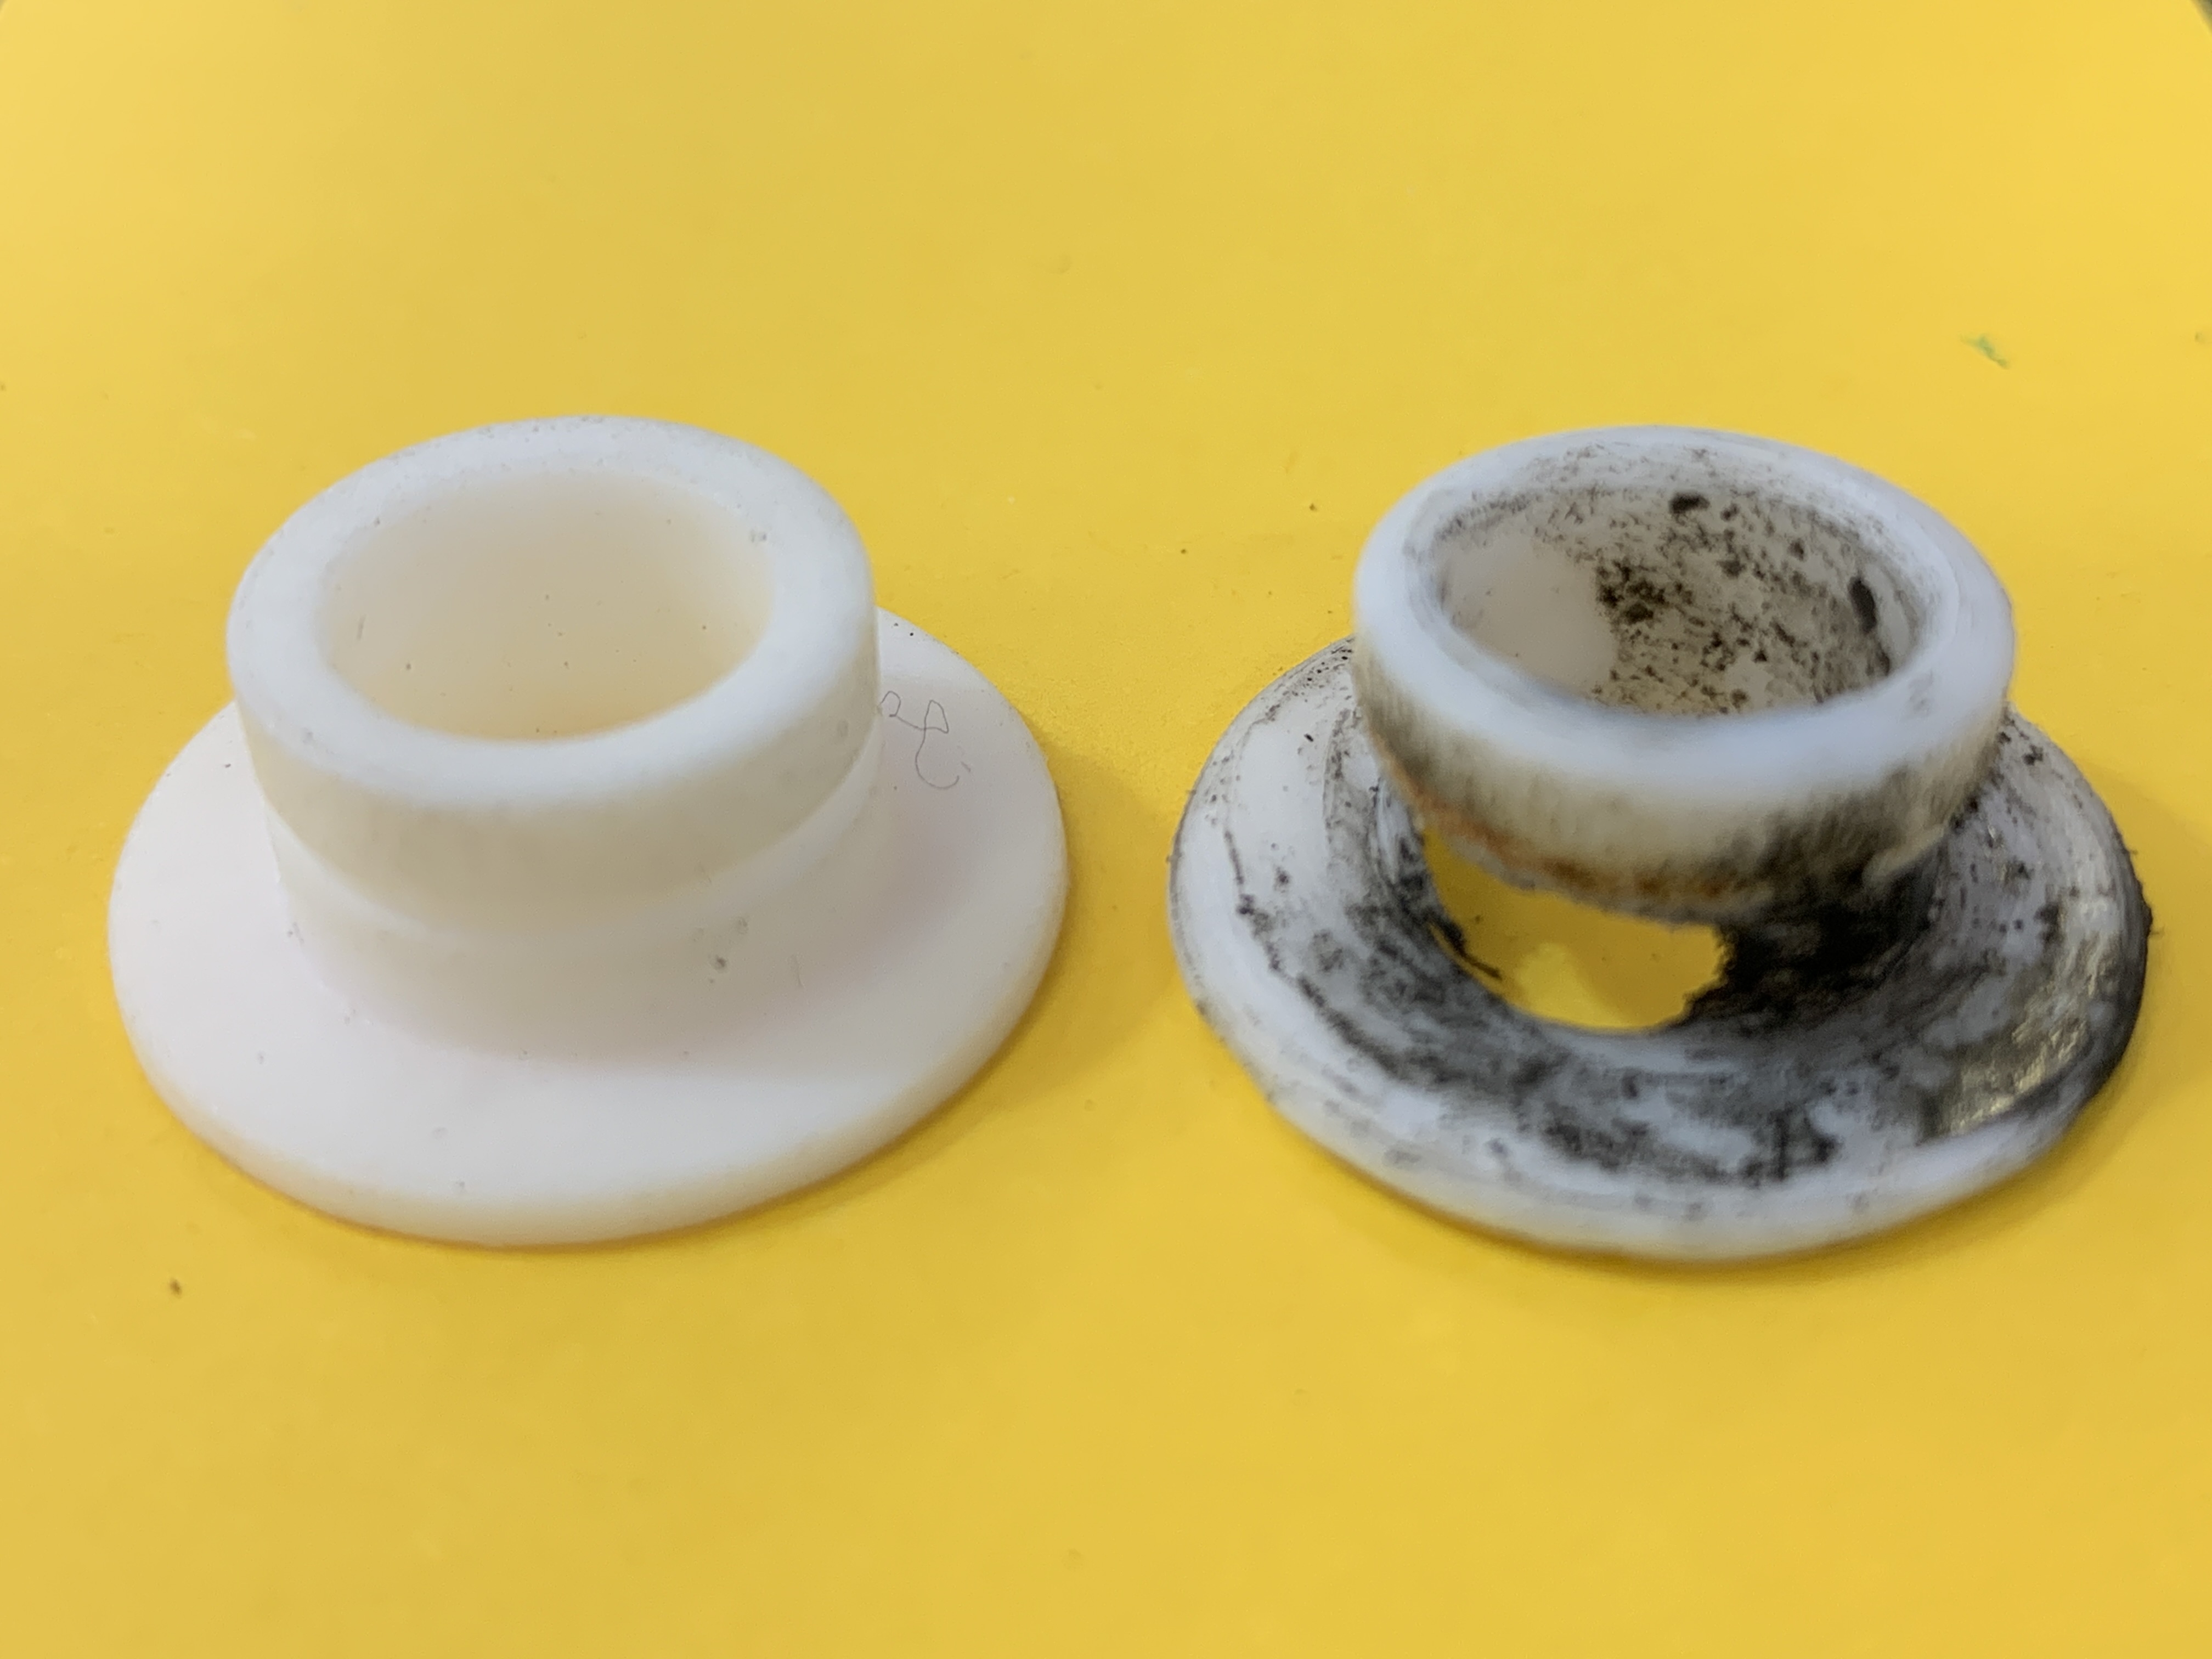
Squawk #14: One cowling pin bushing worn.
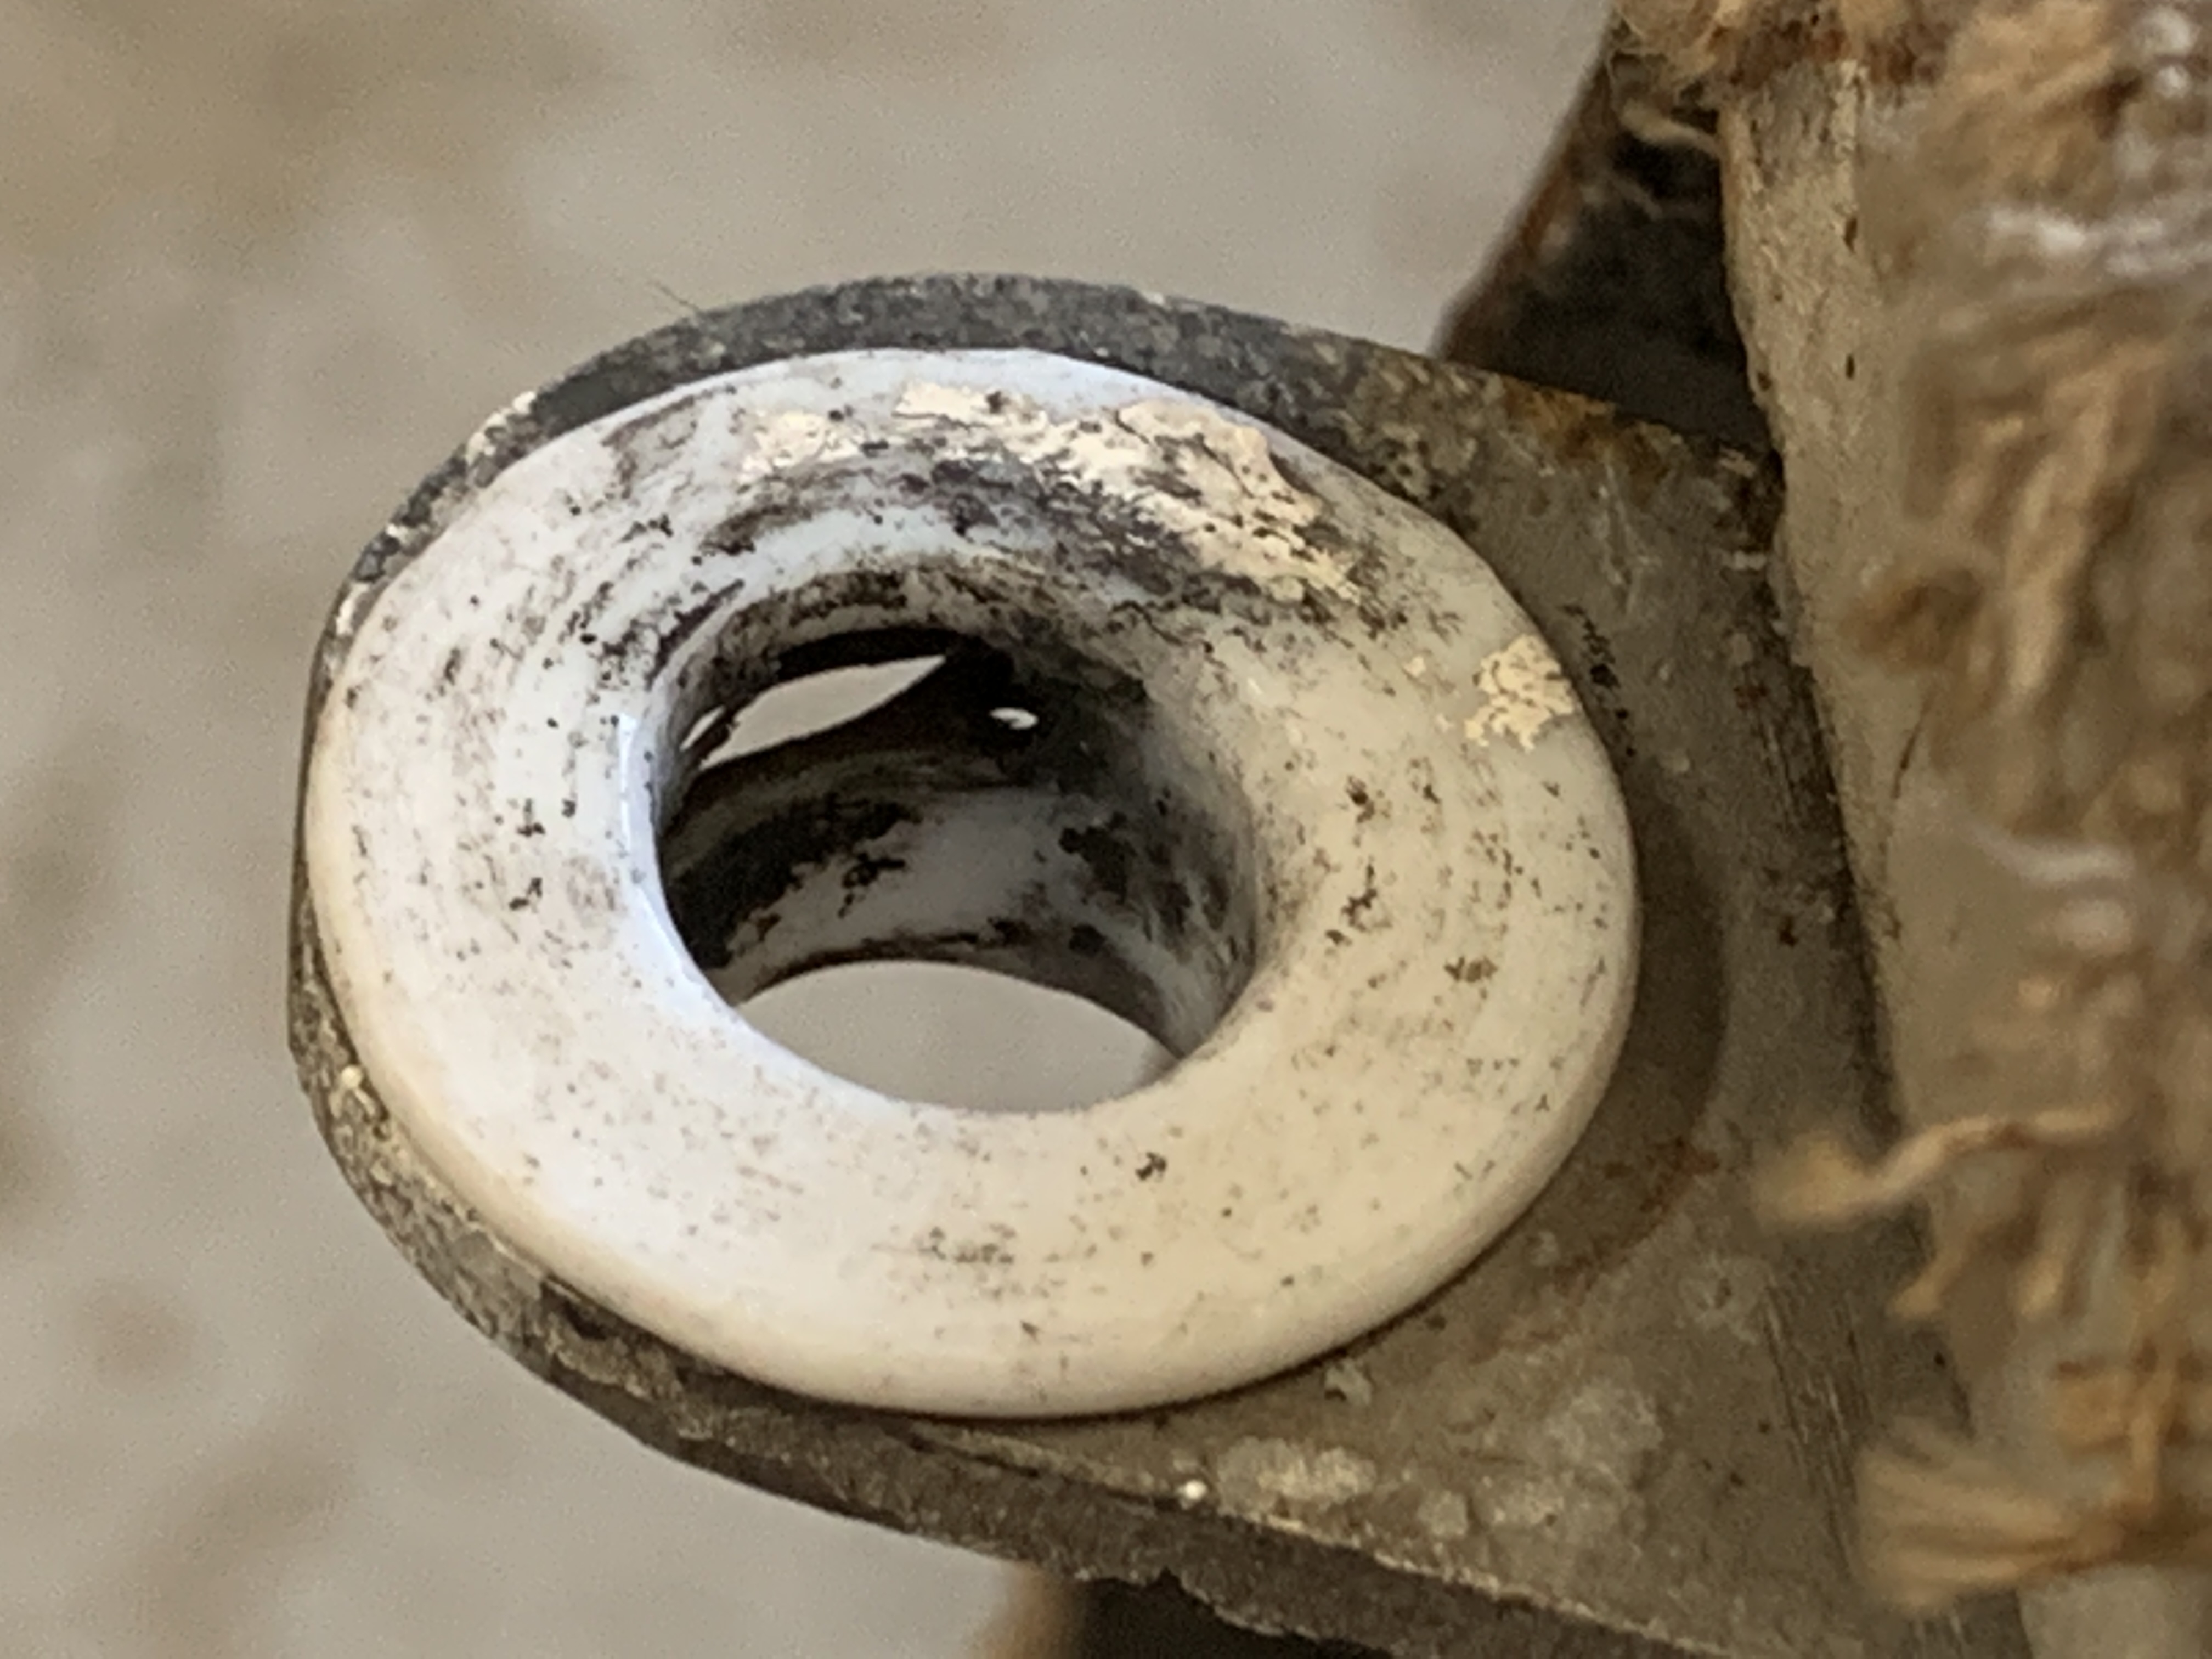
There are two of these bushings, one at each forward side of the bottom cowling. The steel pins in the top cowling fit into these bushings, and it’s important to keep them in good condition to prevent metal-on-metal wear between the pin in the top cowling, and the bushing receptacle in the bottom cowling.
In this case, it was time for “out with the old, and in with the new!” The new bushing P/N 69790-000 by PMA Products, is available at Aircraft Spruce for $9.85. McFarlane also has one, which may be better quality… theirs is P/N MC69790-000 and is sold WITH a new snap ring for $25.50.
Squawk #16: Left wing, aft attach bolt slightly loose.
This the the most important one!
This is common on Piper aircraft, and needs to be checked closely!
And, it seems to happen more on the left wing than on the right. I think it might have something to do with the direction of torsional movement that happens during takeoff, landing, and flight, between the wing and the fuselage attachment.
And sometimes it makes a difference if the airplane is on jacks or not, for being able to detect the problem of looseness.
If you can put a wrench on the bolt head on the aft side of the rear spar attachment, and turn it easily, it’s a sure sign it’s too loose.
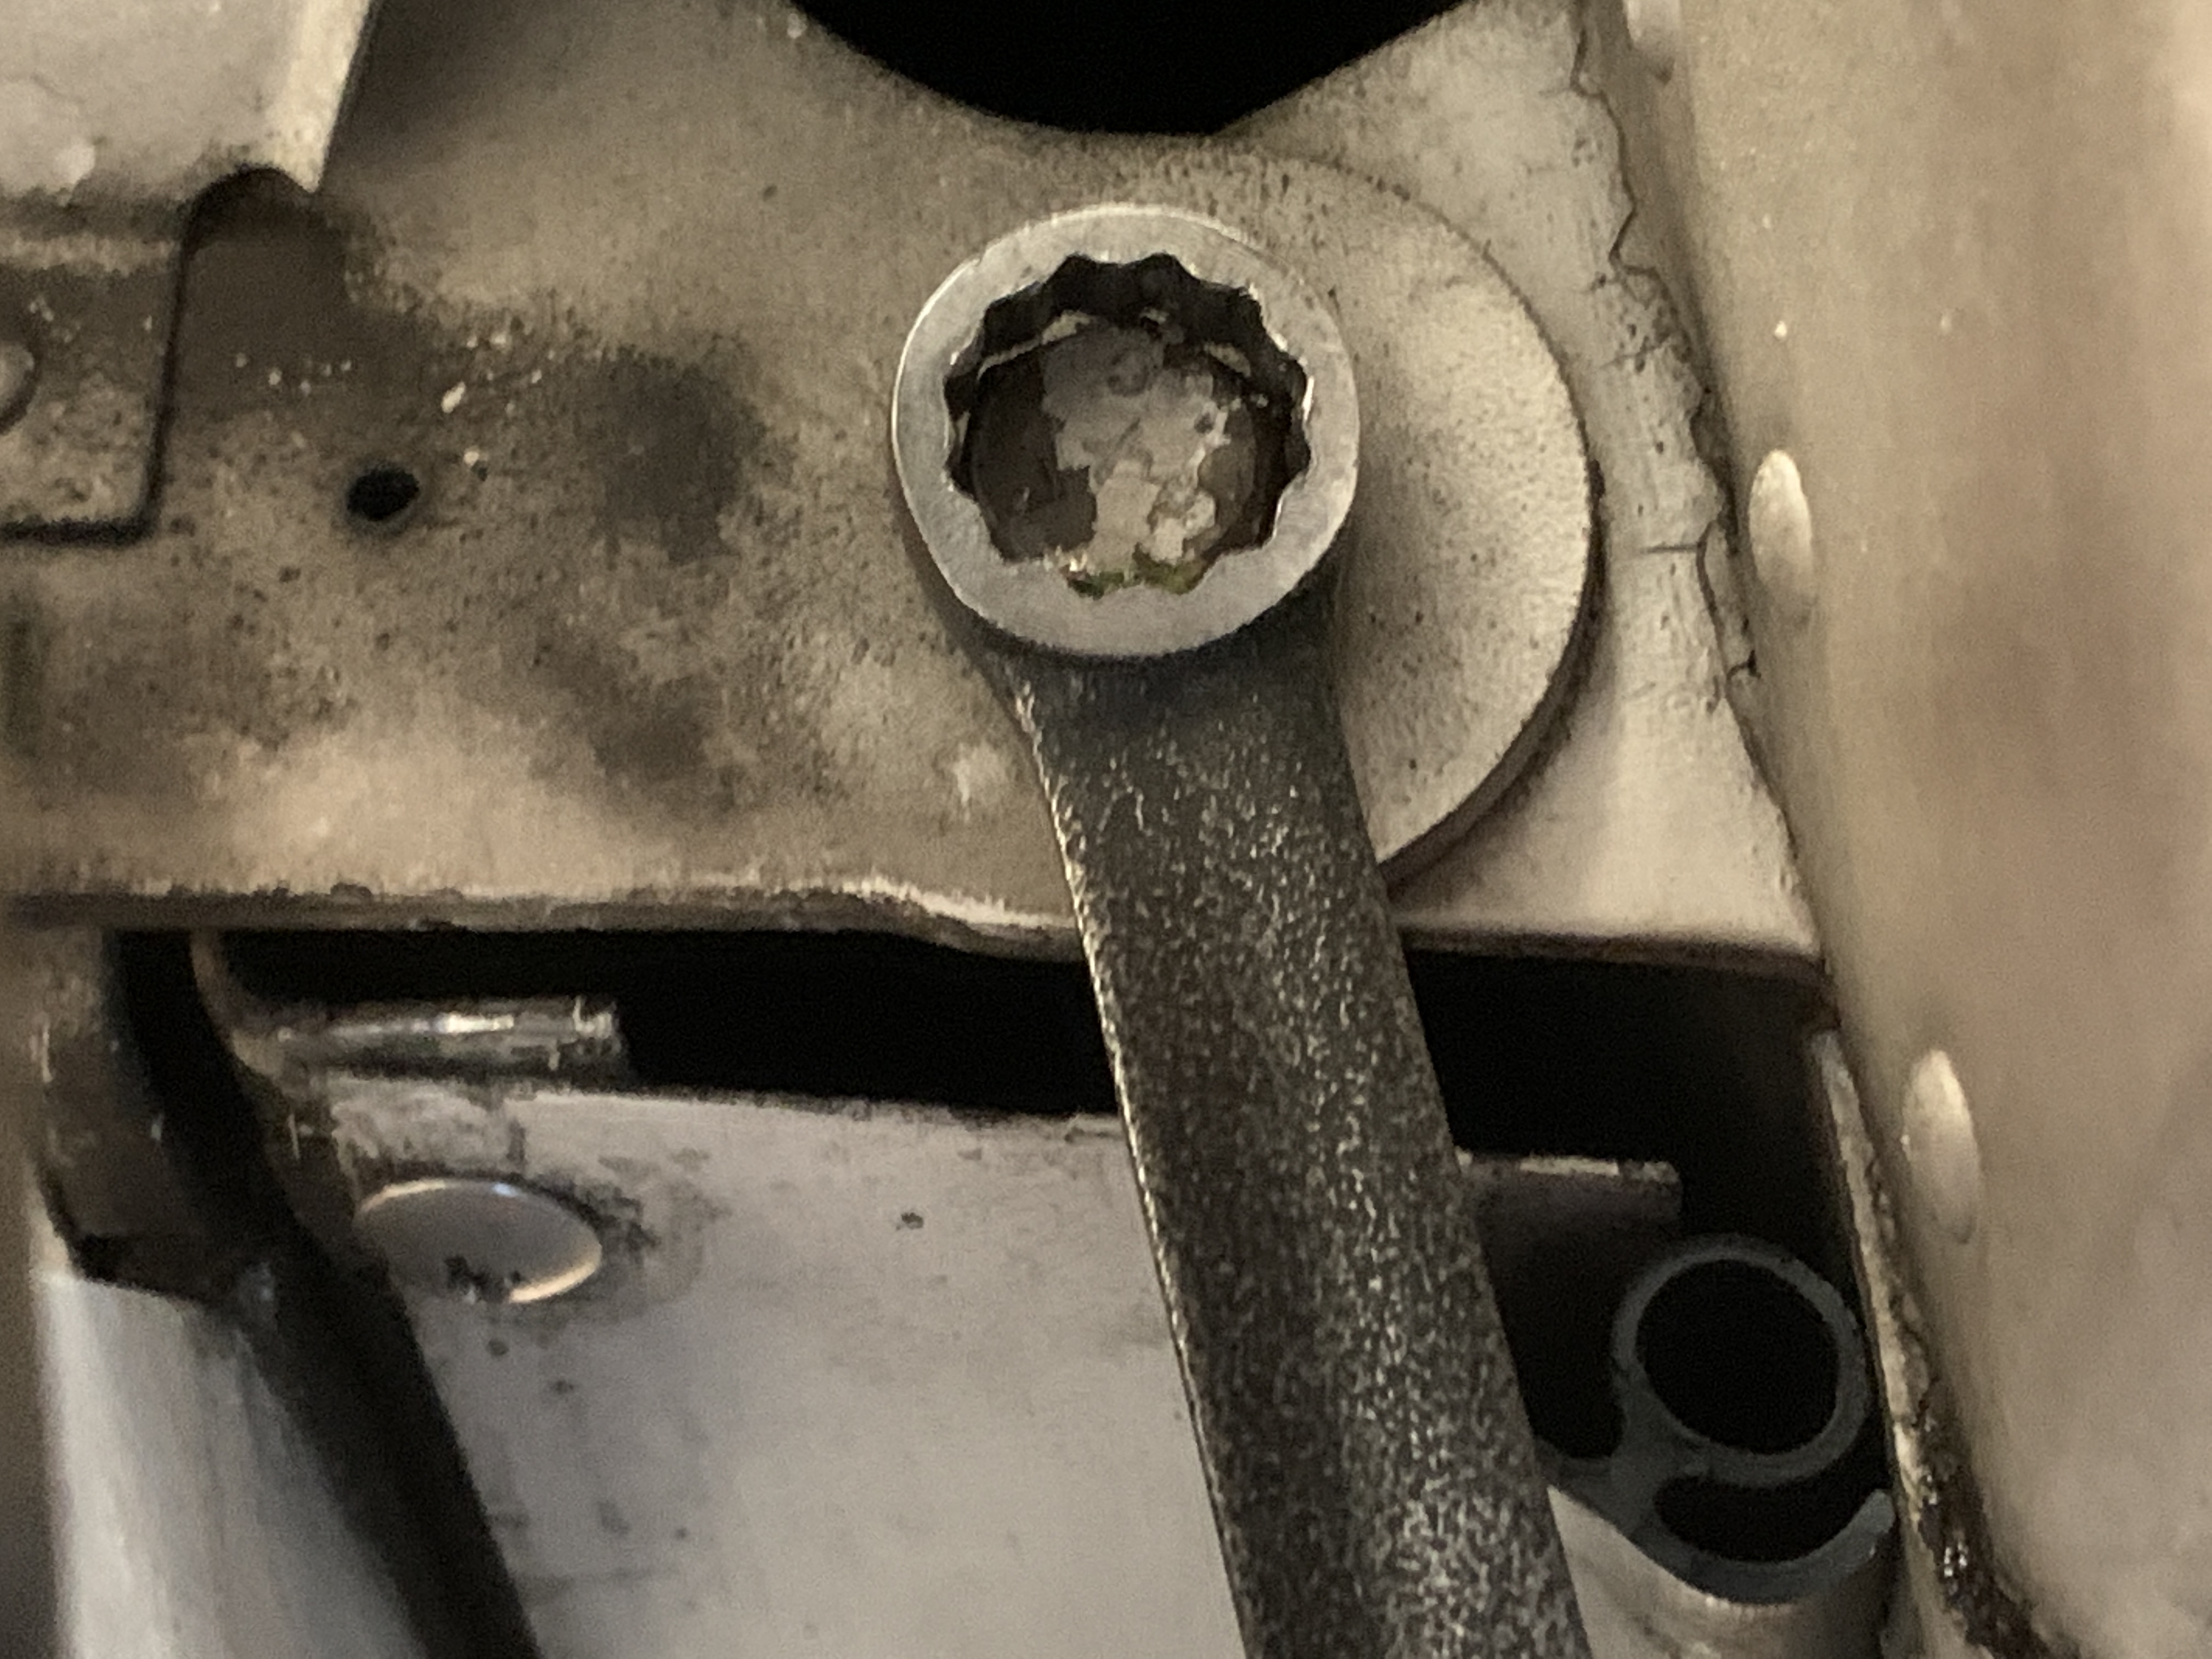
After verifying the correct torque on this bolt, it’s a good idea to put a stripe of torque putty on both the bolt head, and the locknut on the forward side, so you can tell in the future if it has moved, or not.
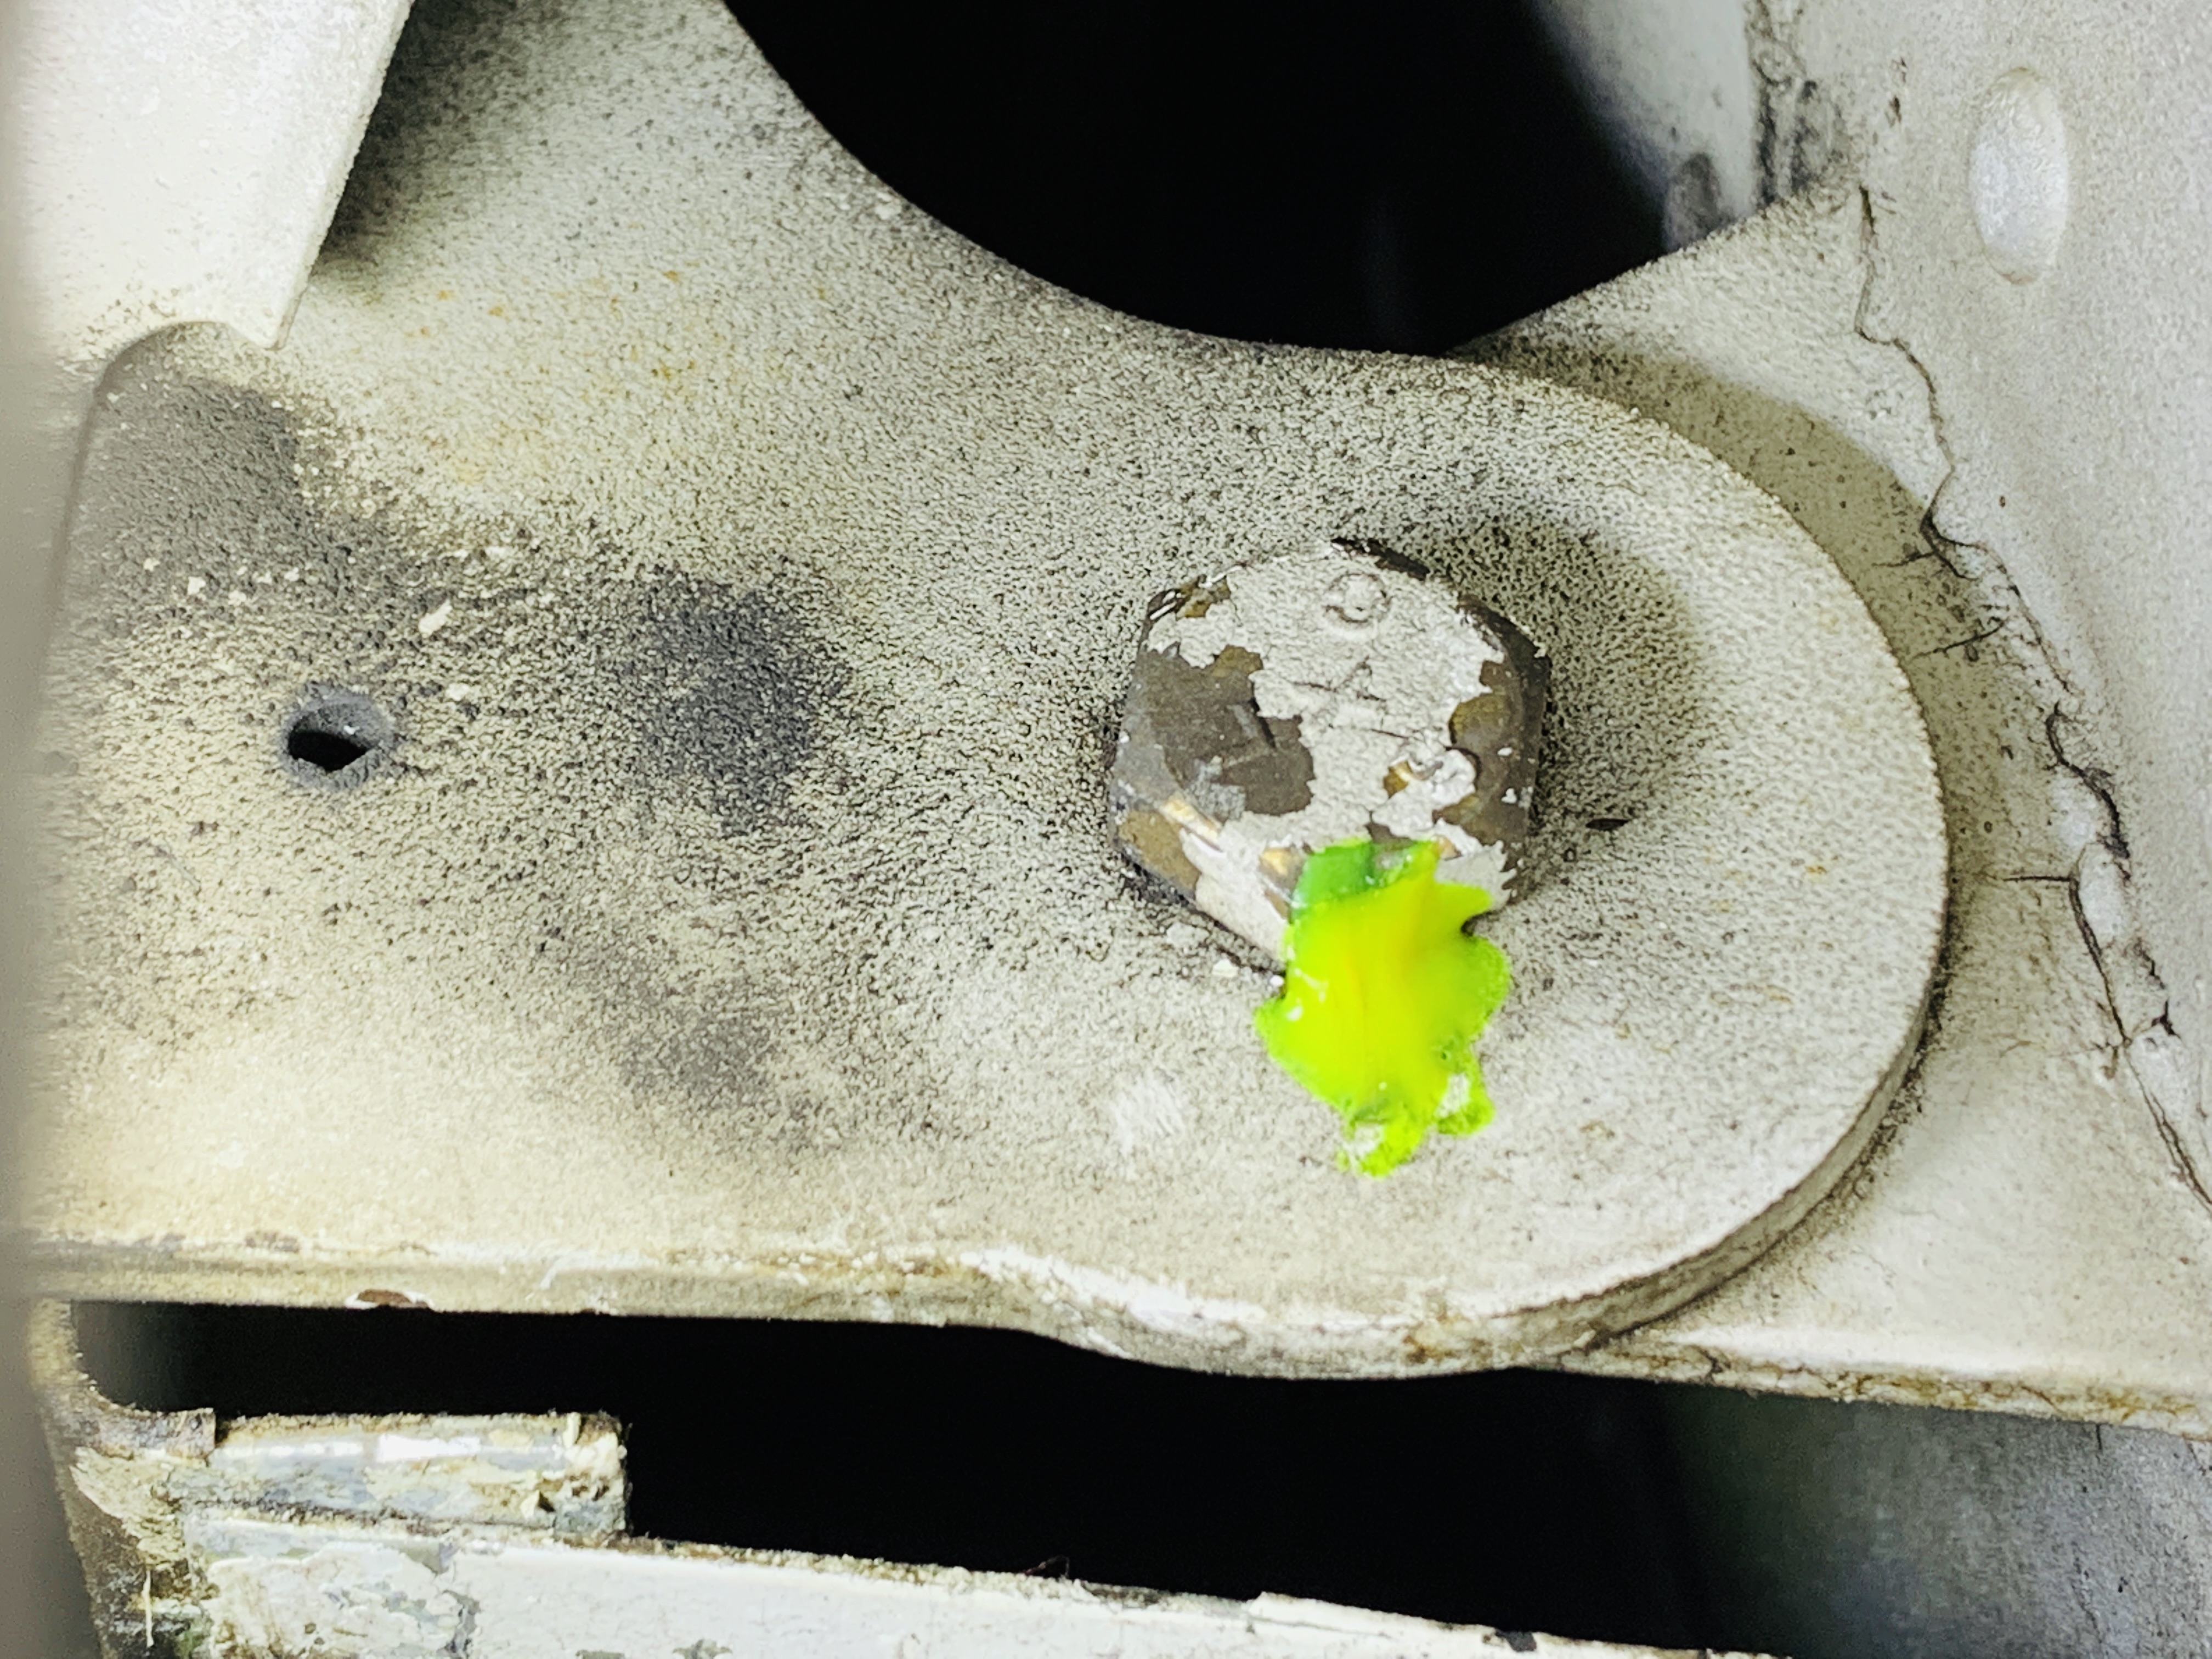
Also keep in mind the maintenance manual has specific instructions about torquing these bolts, along with replacing hardware and even installing a repair kit in some cases. Check your maintenance manual for specific instructions, as this is an absolutely critical area.
Another related issue with this aft spar area is the potential for corrosion between the aluminum aft spar of the wing, and the steel plate attached to it, where the bolt attachment is located.
Here’s a great video by Airframe Components showing this critical area and inspection per Piper SB 1244B:
Thank you Tom, for the privilege of working with you on your airplane!
After all the previous work Tom has done to keep his airplane in good condition, and after the work we did this year on the annual, I’m very hopeful we’ll be able to complete his annual next year, in one day! We’ll see how it goes.
Other resources from Dean Showalter:
Video training course: Safety Wire Like A Pro! (Learn to perform safety wiring that keeps everything tight, and makes it look like it was done by an experienced A&P! Don’t settle for mediocre… develop the skill to do your safety wiring well! Click here to check it out. And remember, there’s a money back guarantee… if you’re not satisfied, I wouldn’t want to even keep your money. Try it out for 30 days, and if you’re not satisfied, I’ll gladly give you a full refund… no questions asked.
Need help evaluating exhaust valve pictures? Grab a copy of my Exhaust Valve Borescoping Guide! It will help you understand what to look for when borescoping your exhaust valves… it’s just the resource I wish I had when I was getting started with borescoping. Click here to check it out.
Cessna 172 Common Parts List: Do you need a quick, convenient place to check common part numbers for your Cessna 172? Click here to get a copy of this simple resource you will love!
The post “151 – Things I Found On Tom’s Piper Cherokee” appeared first on AirplaneOwnerMaintenance.com

Leave a Reply
You must be logged in to post a comment.