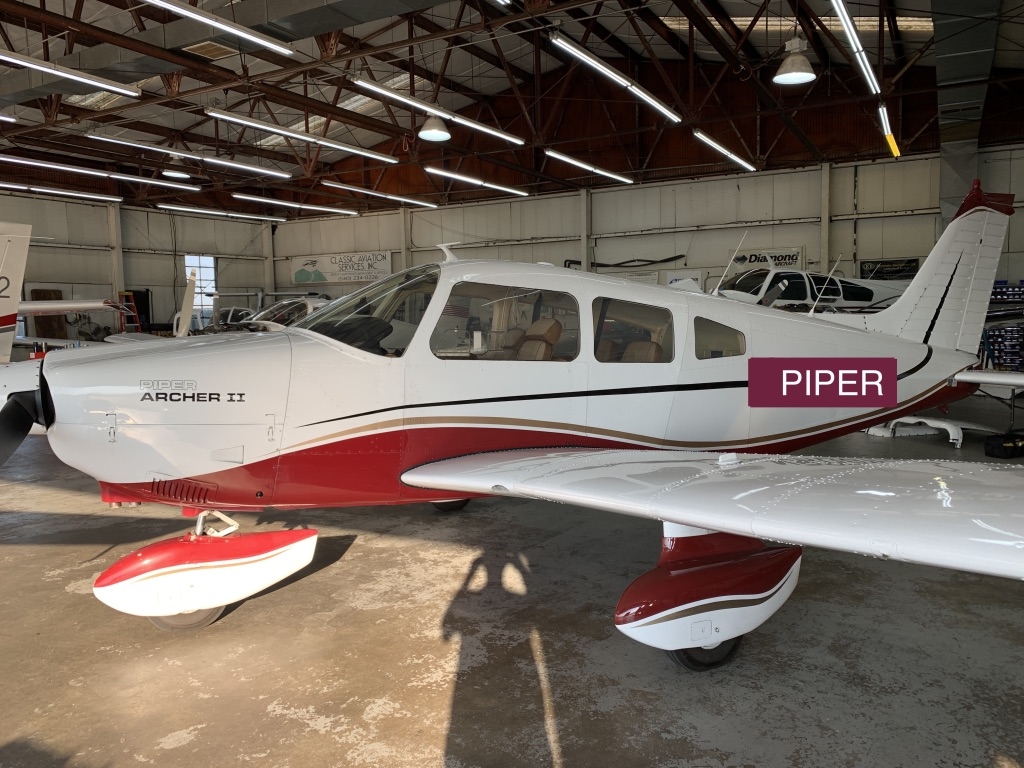
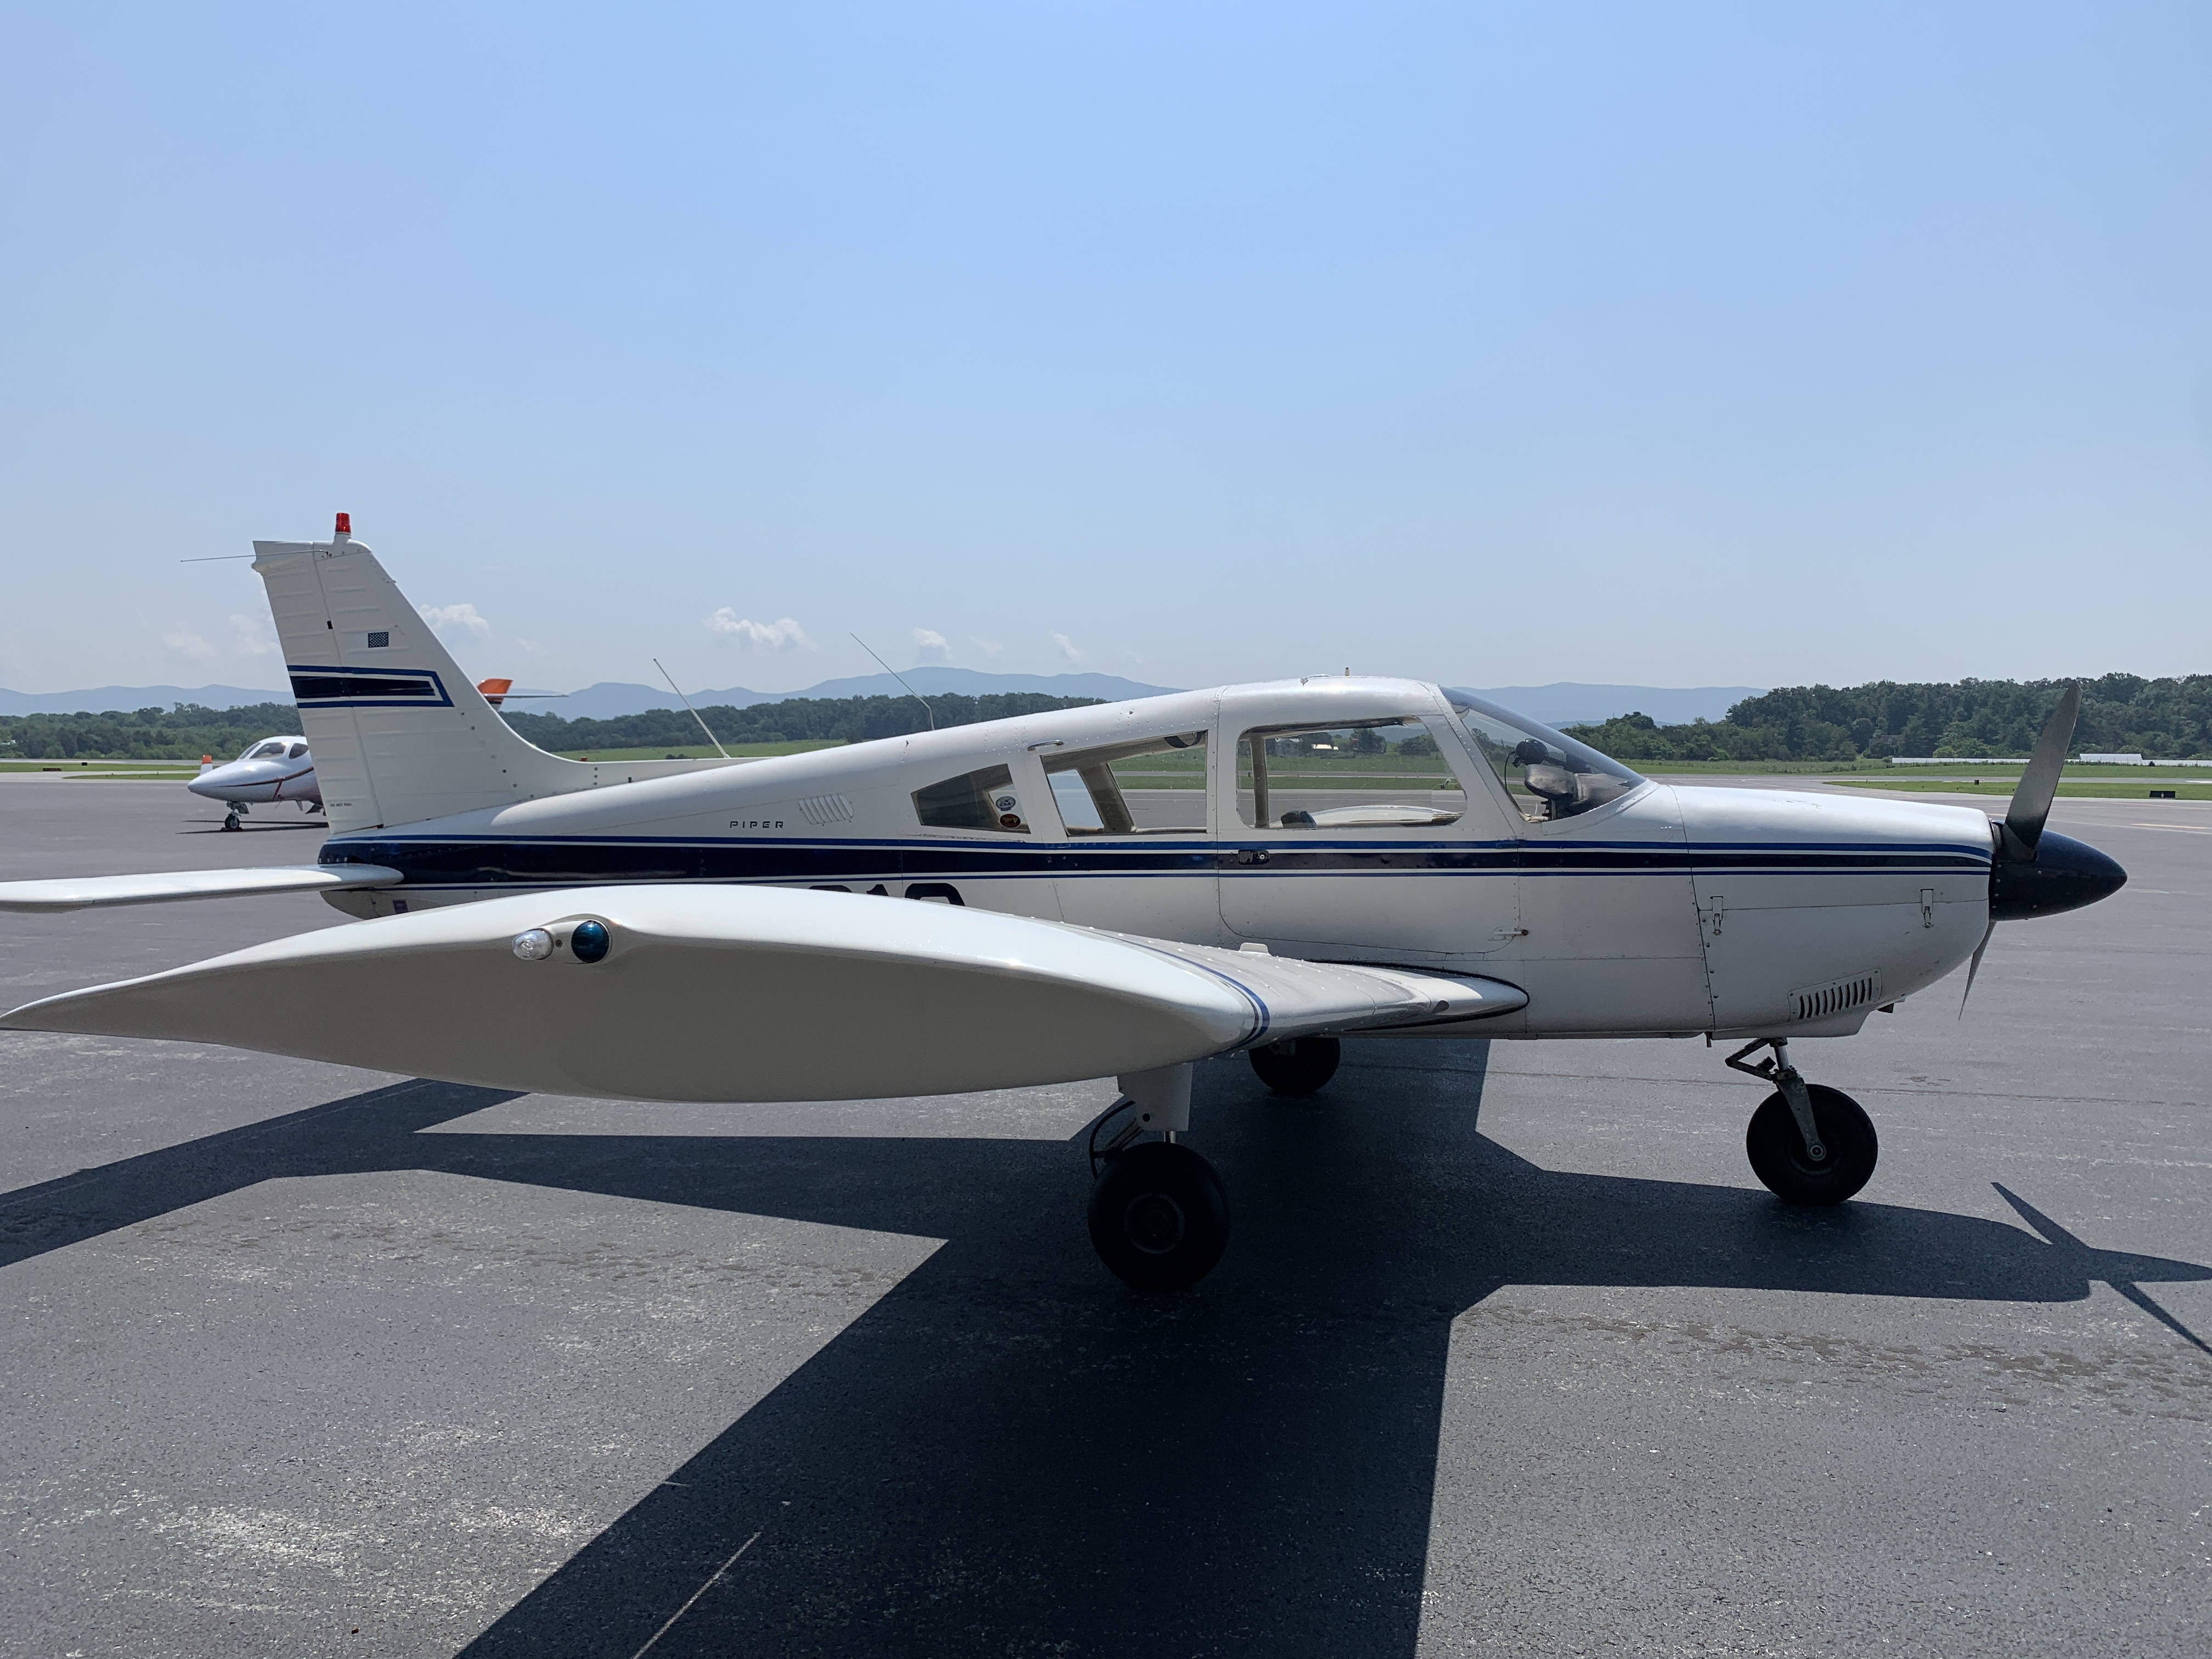
A good friend from another airport recently bought this Piper Archer, and I’ve had the opportunity to do a little maintenance on it and take a look around.
This is one of three airplanes I’ve had an opportunity to look at recently… all three were in annual inspection, but I noticed a few things that could use some attention. We’ll save the Archer for last.
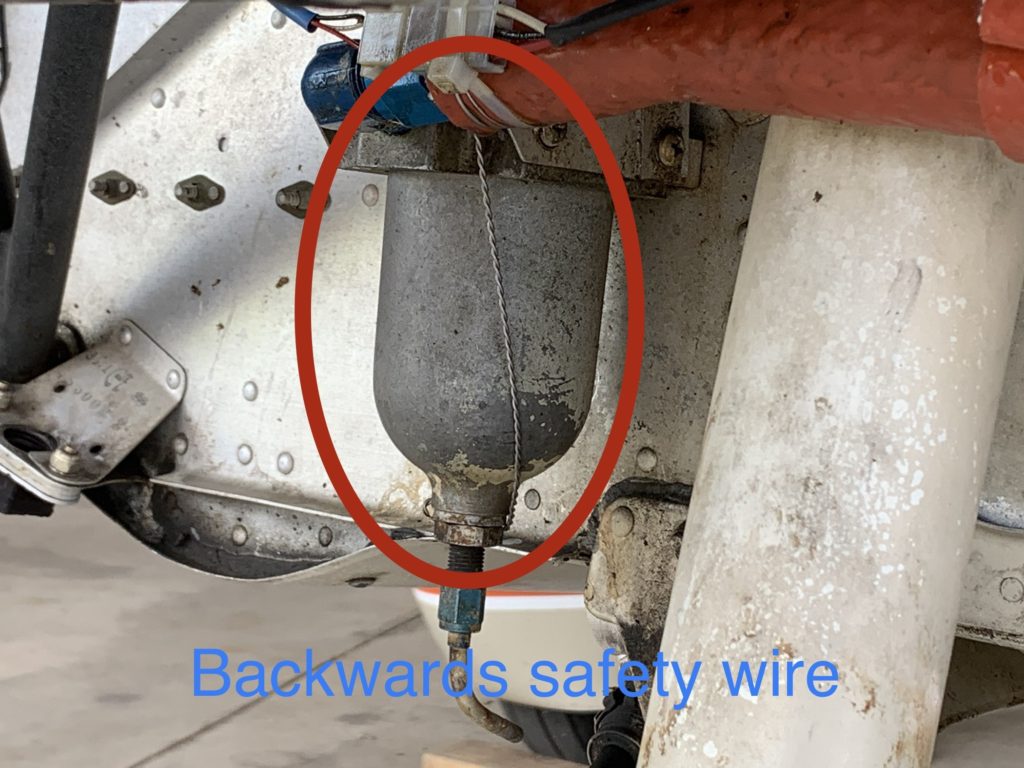
First, a Cessna 172:
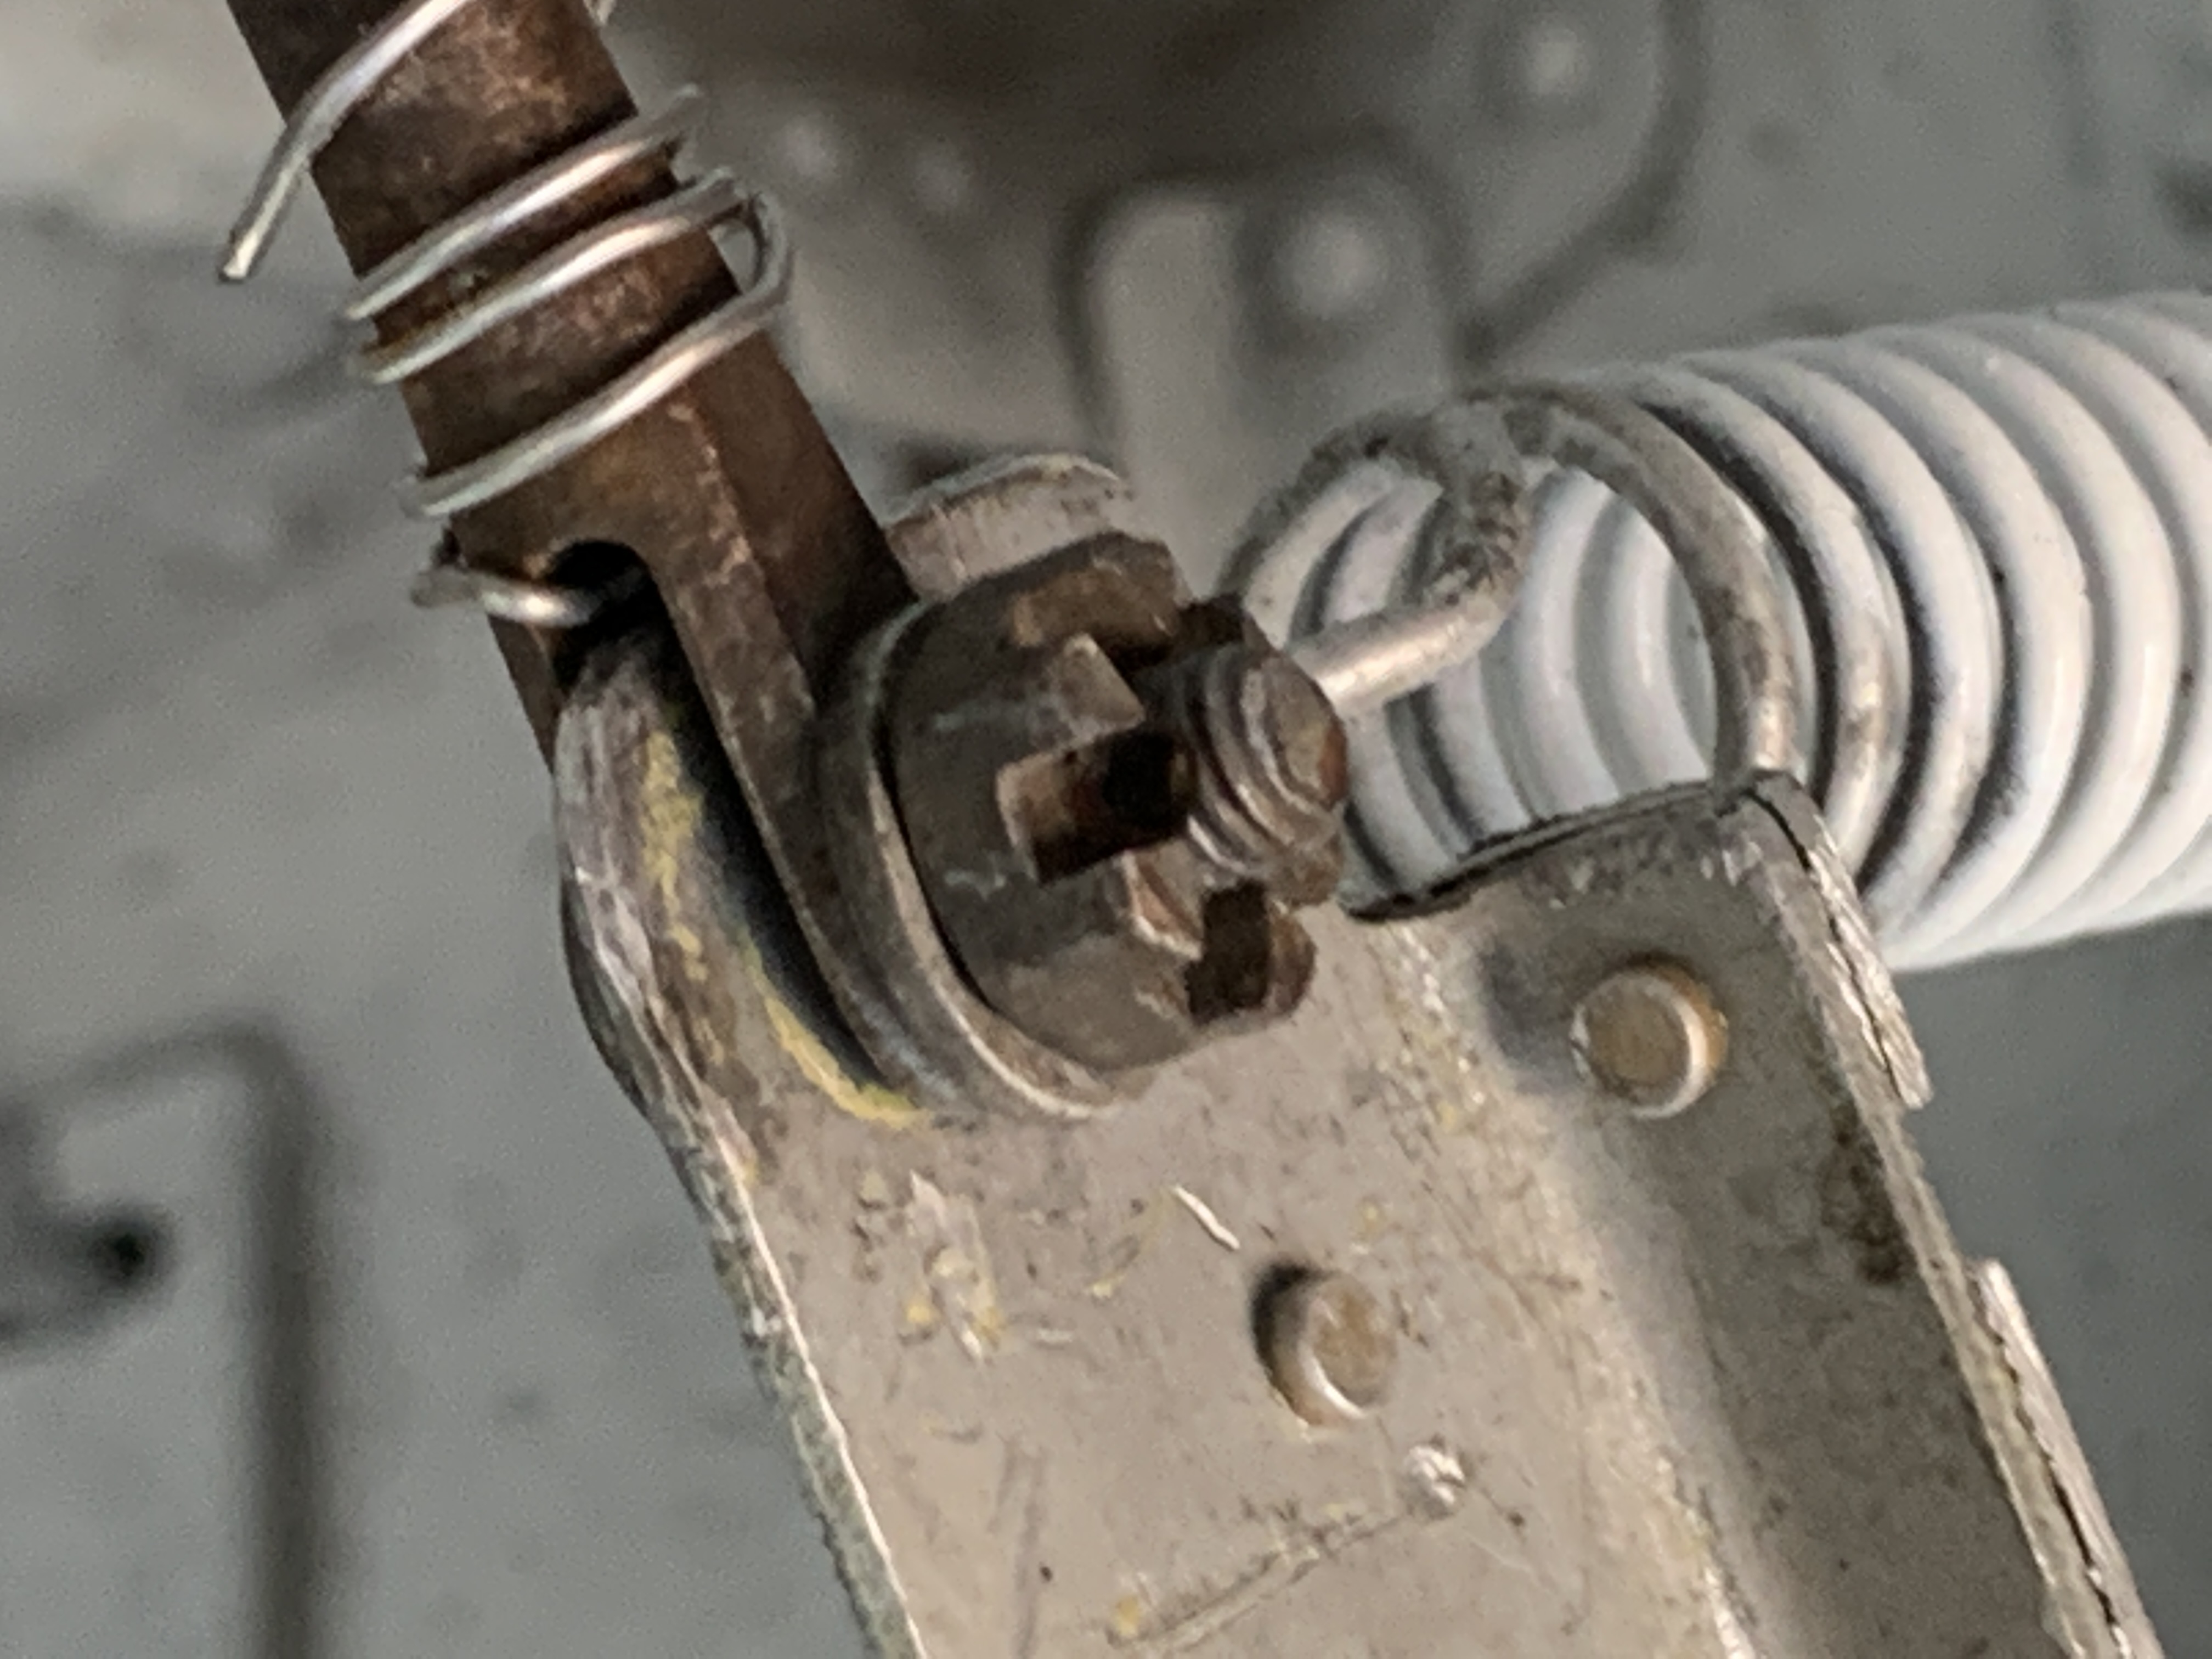
I noticed the fuel strainer (gascolator) was safety wired backwards!
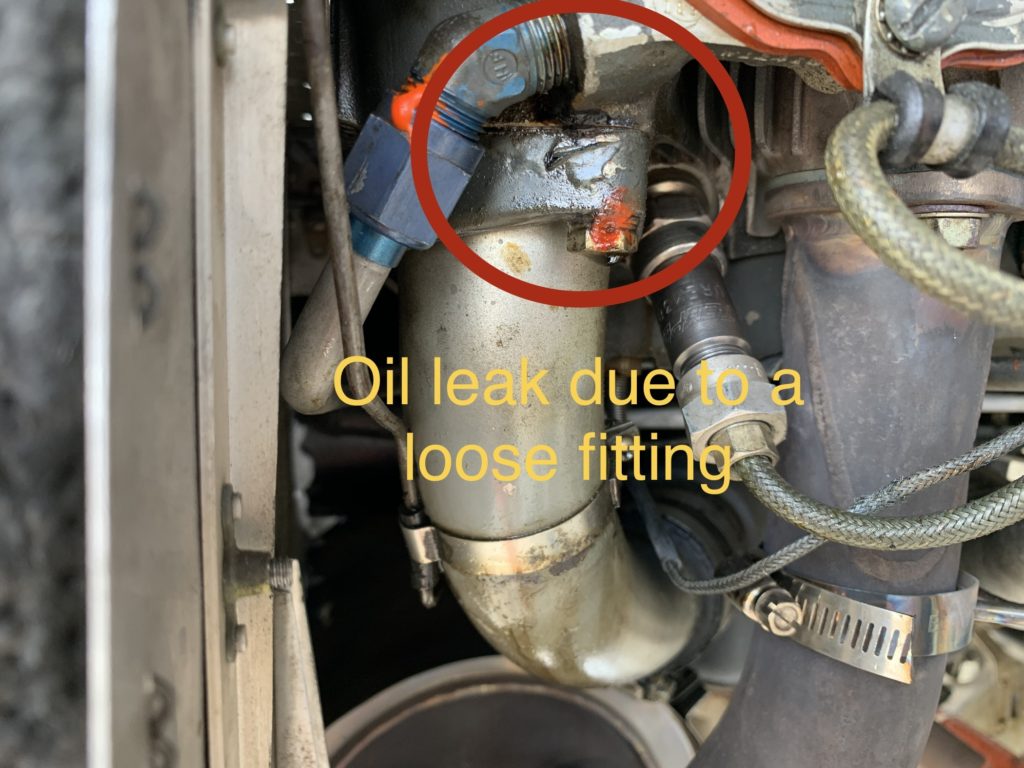
The same Cessna 172 also had a small oil leak… I later discovered the rocker box oil return fitting was loose and needed to be resealed:
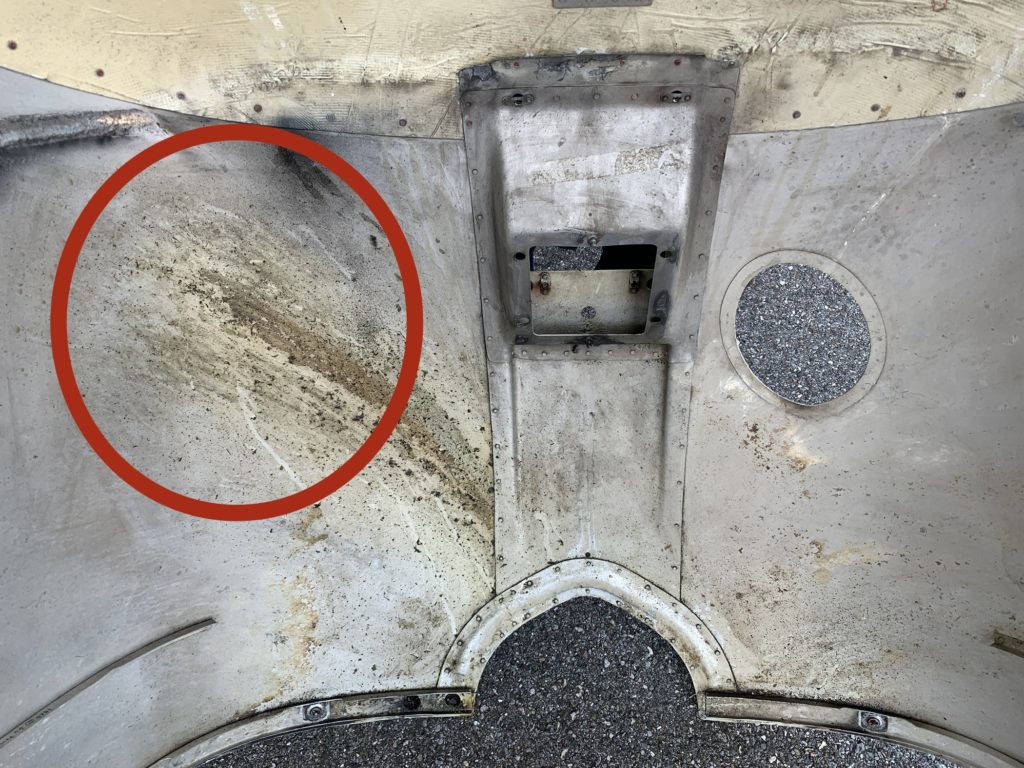
The bottom cowling was telling a story about that oil leak… it’s always a good idea to look for oil in the bottom cowling and then try to determine where it’s coming from:
Second, a Beech Bonanza:
No pictures for this one, but here are a few things I found on this one:
No copper safety wire on the emergency exit window pins.
No safety wire on the fillister head screws in one of the ruddervator hinge brackets.
One loose ruddervator hinge bolt.
One worn ruddervator thrust bearing.
Listen to the audio for more details on this one.
And third, a Piper Archer:
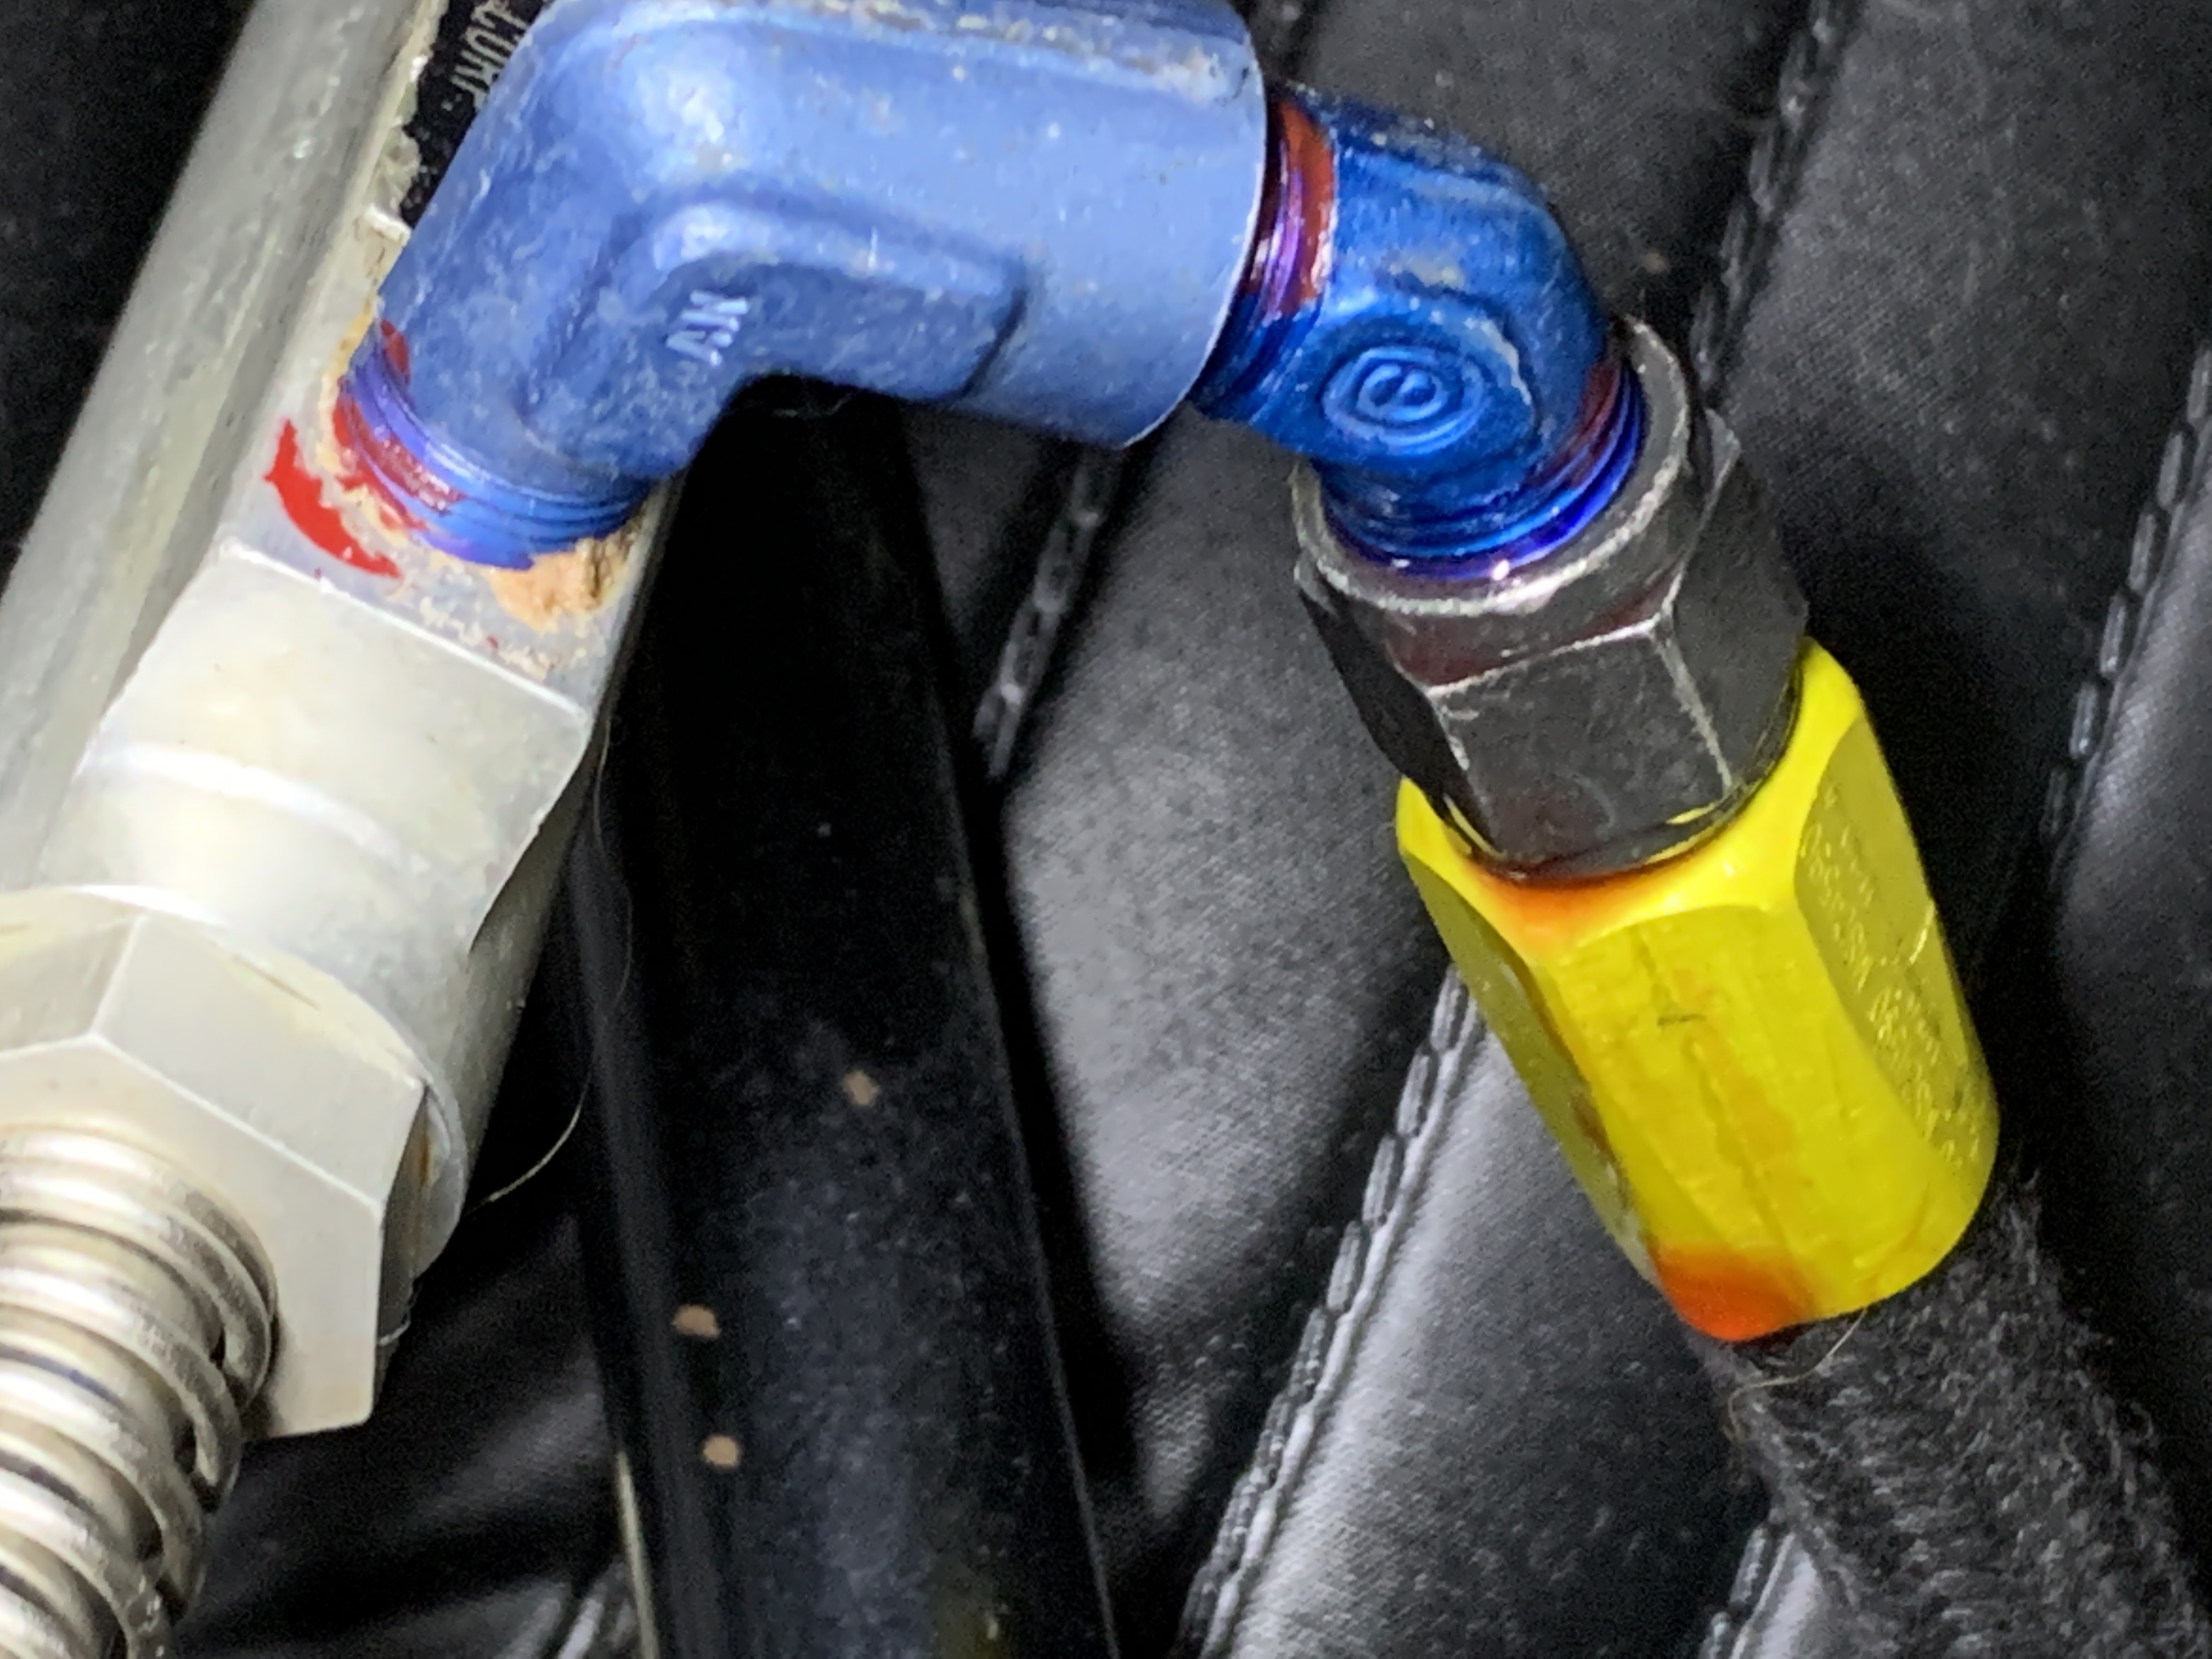
One of the brake hoses was leaking – the nut was only finger tight!
The cabin door hinge pins were worn and the door was hitting the frame when closing. New pins and some shim washers fixed the problem.
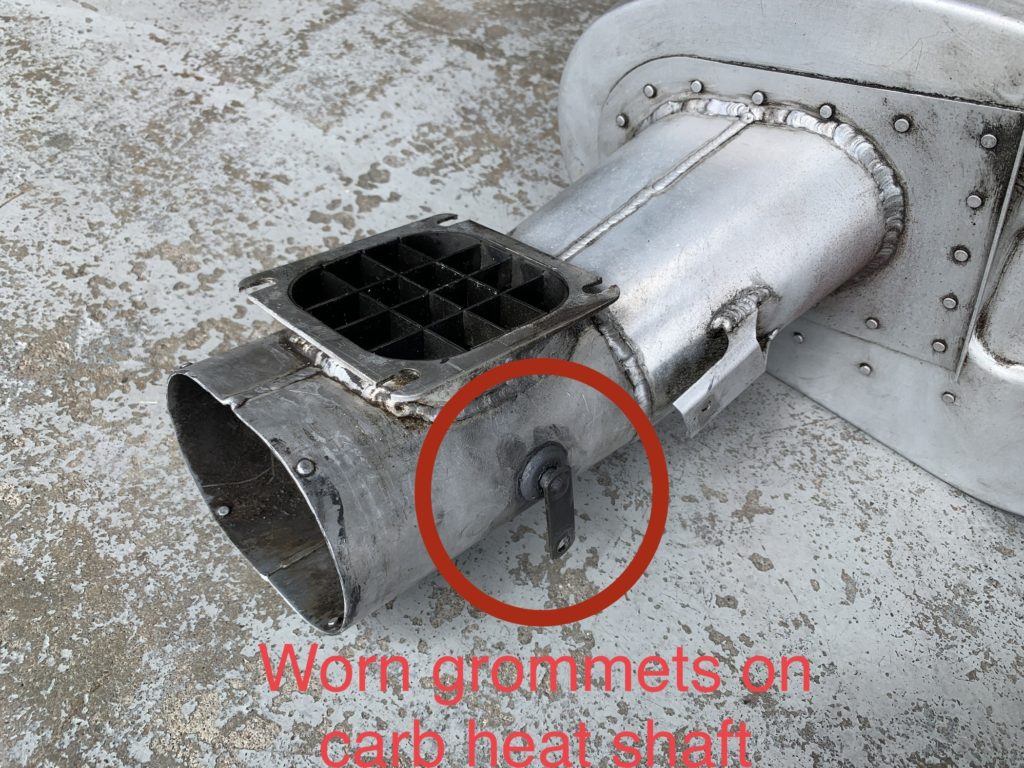
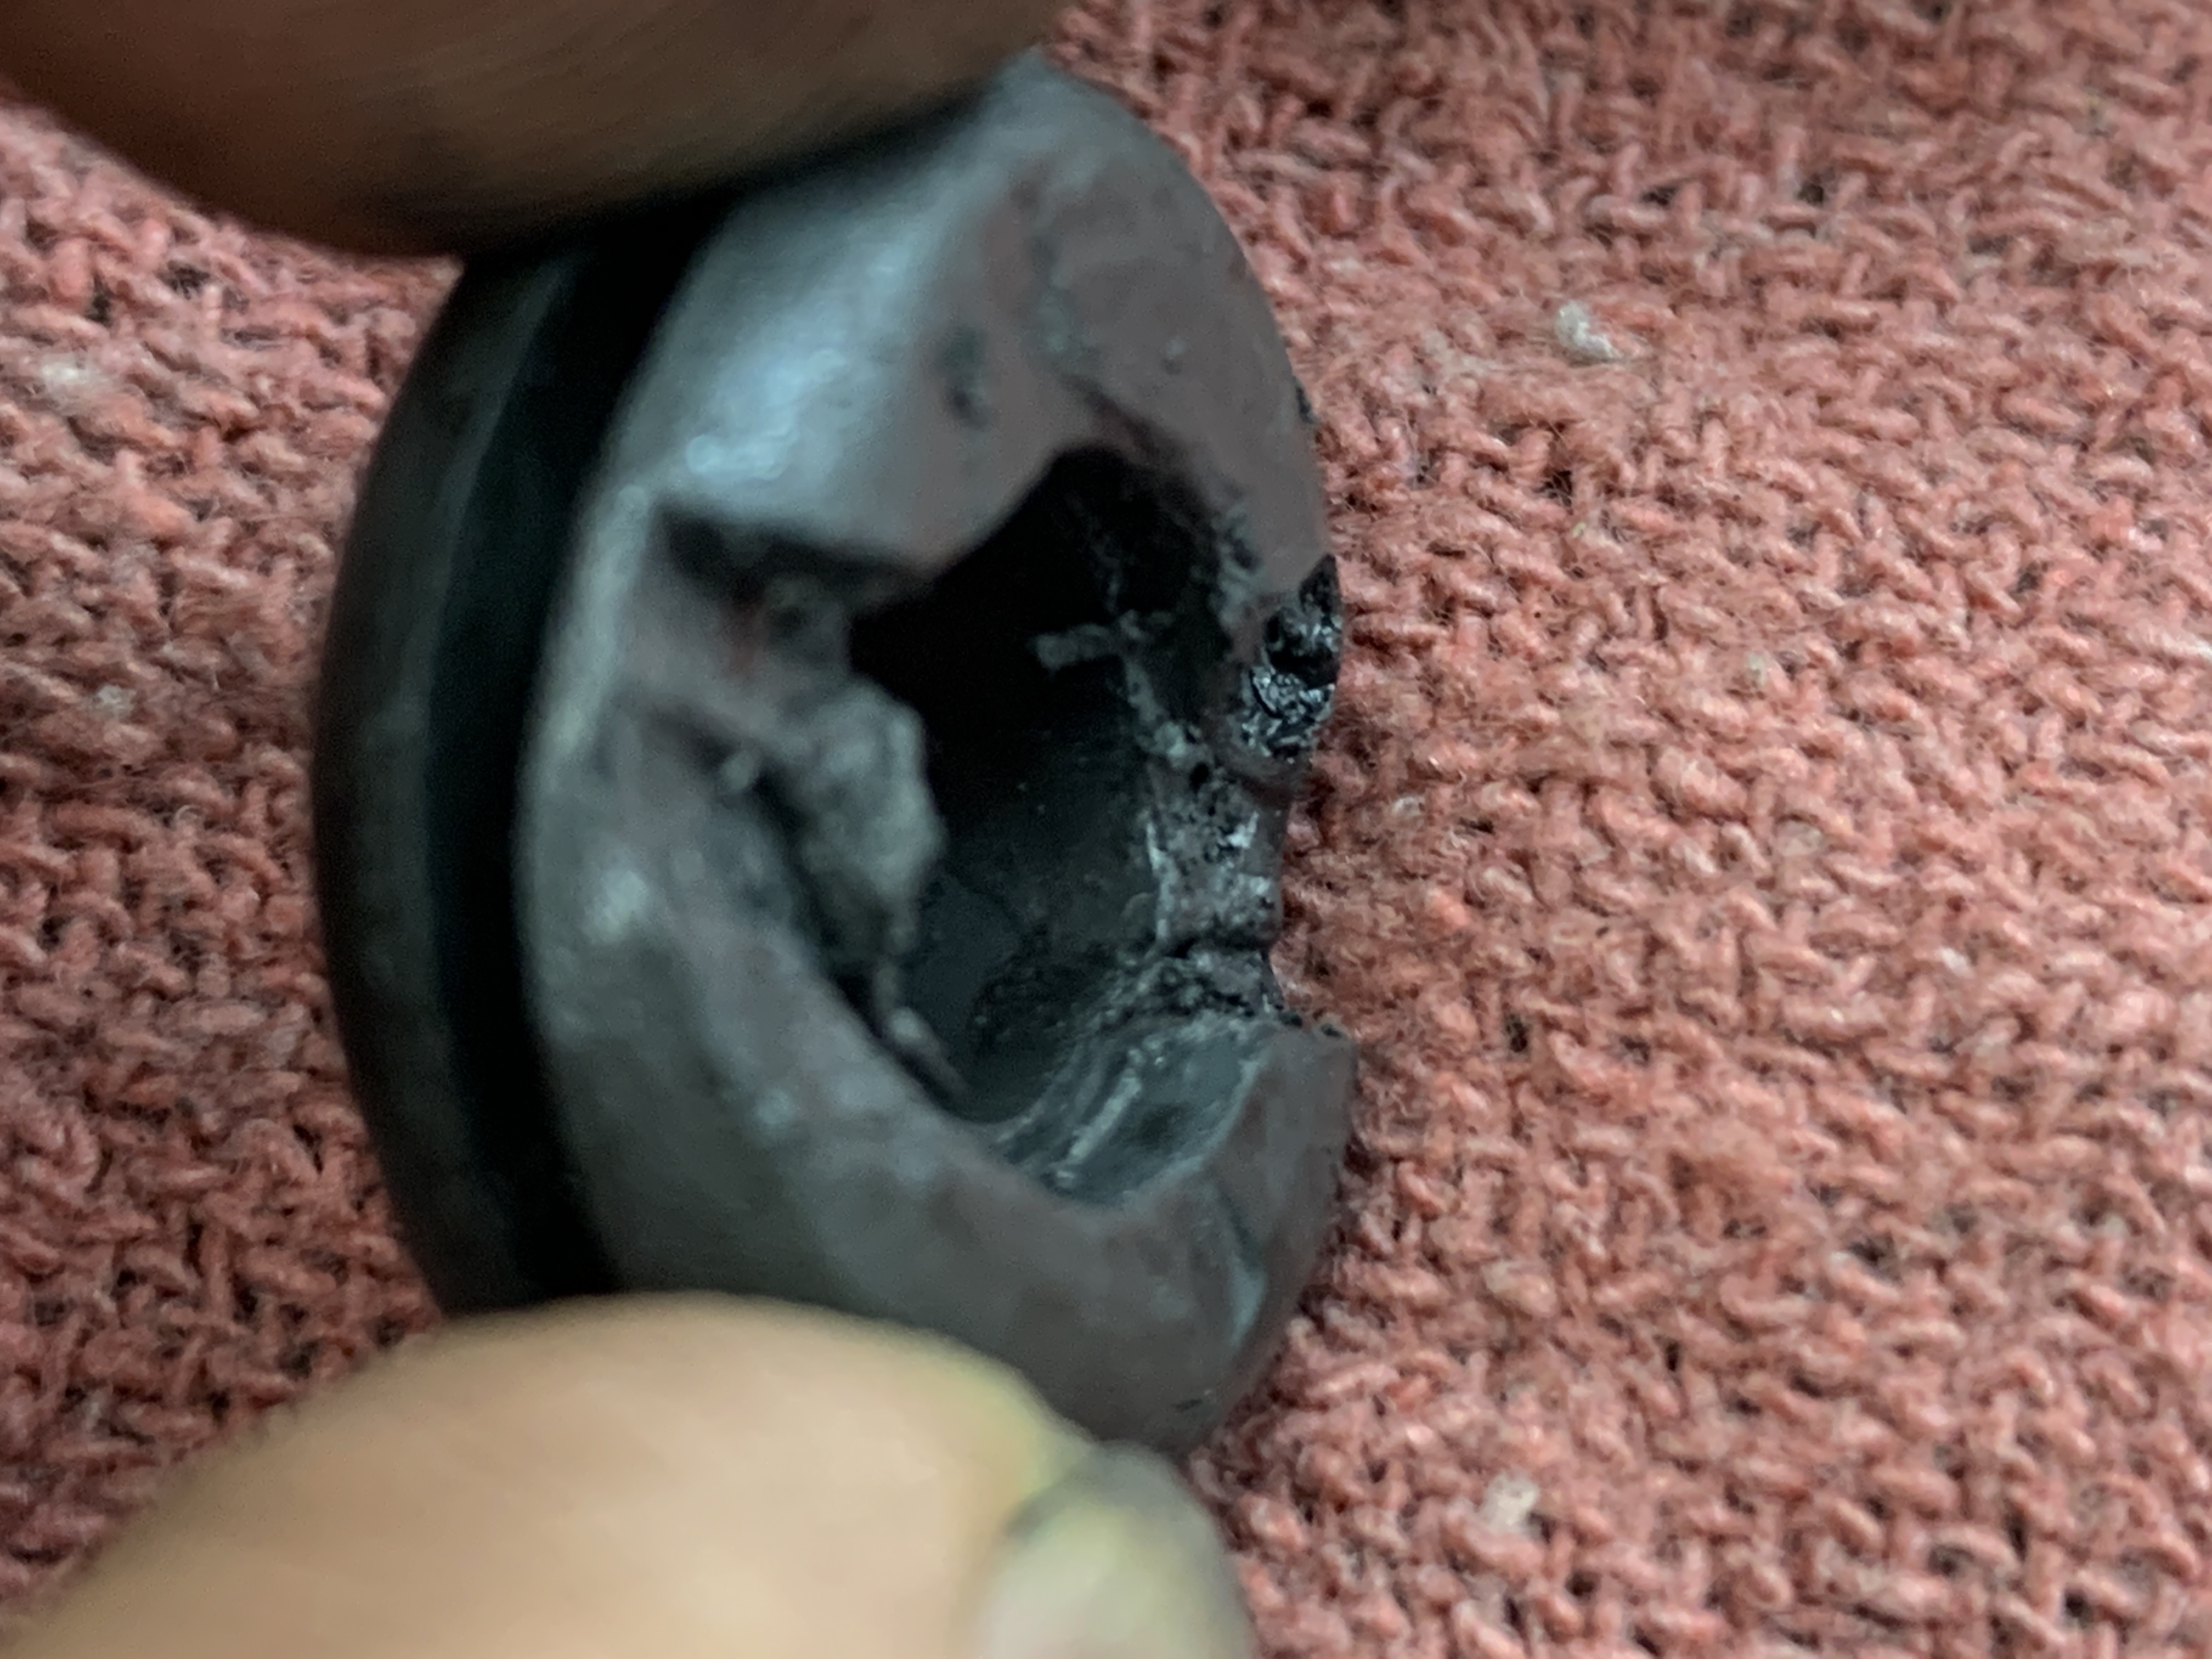
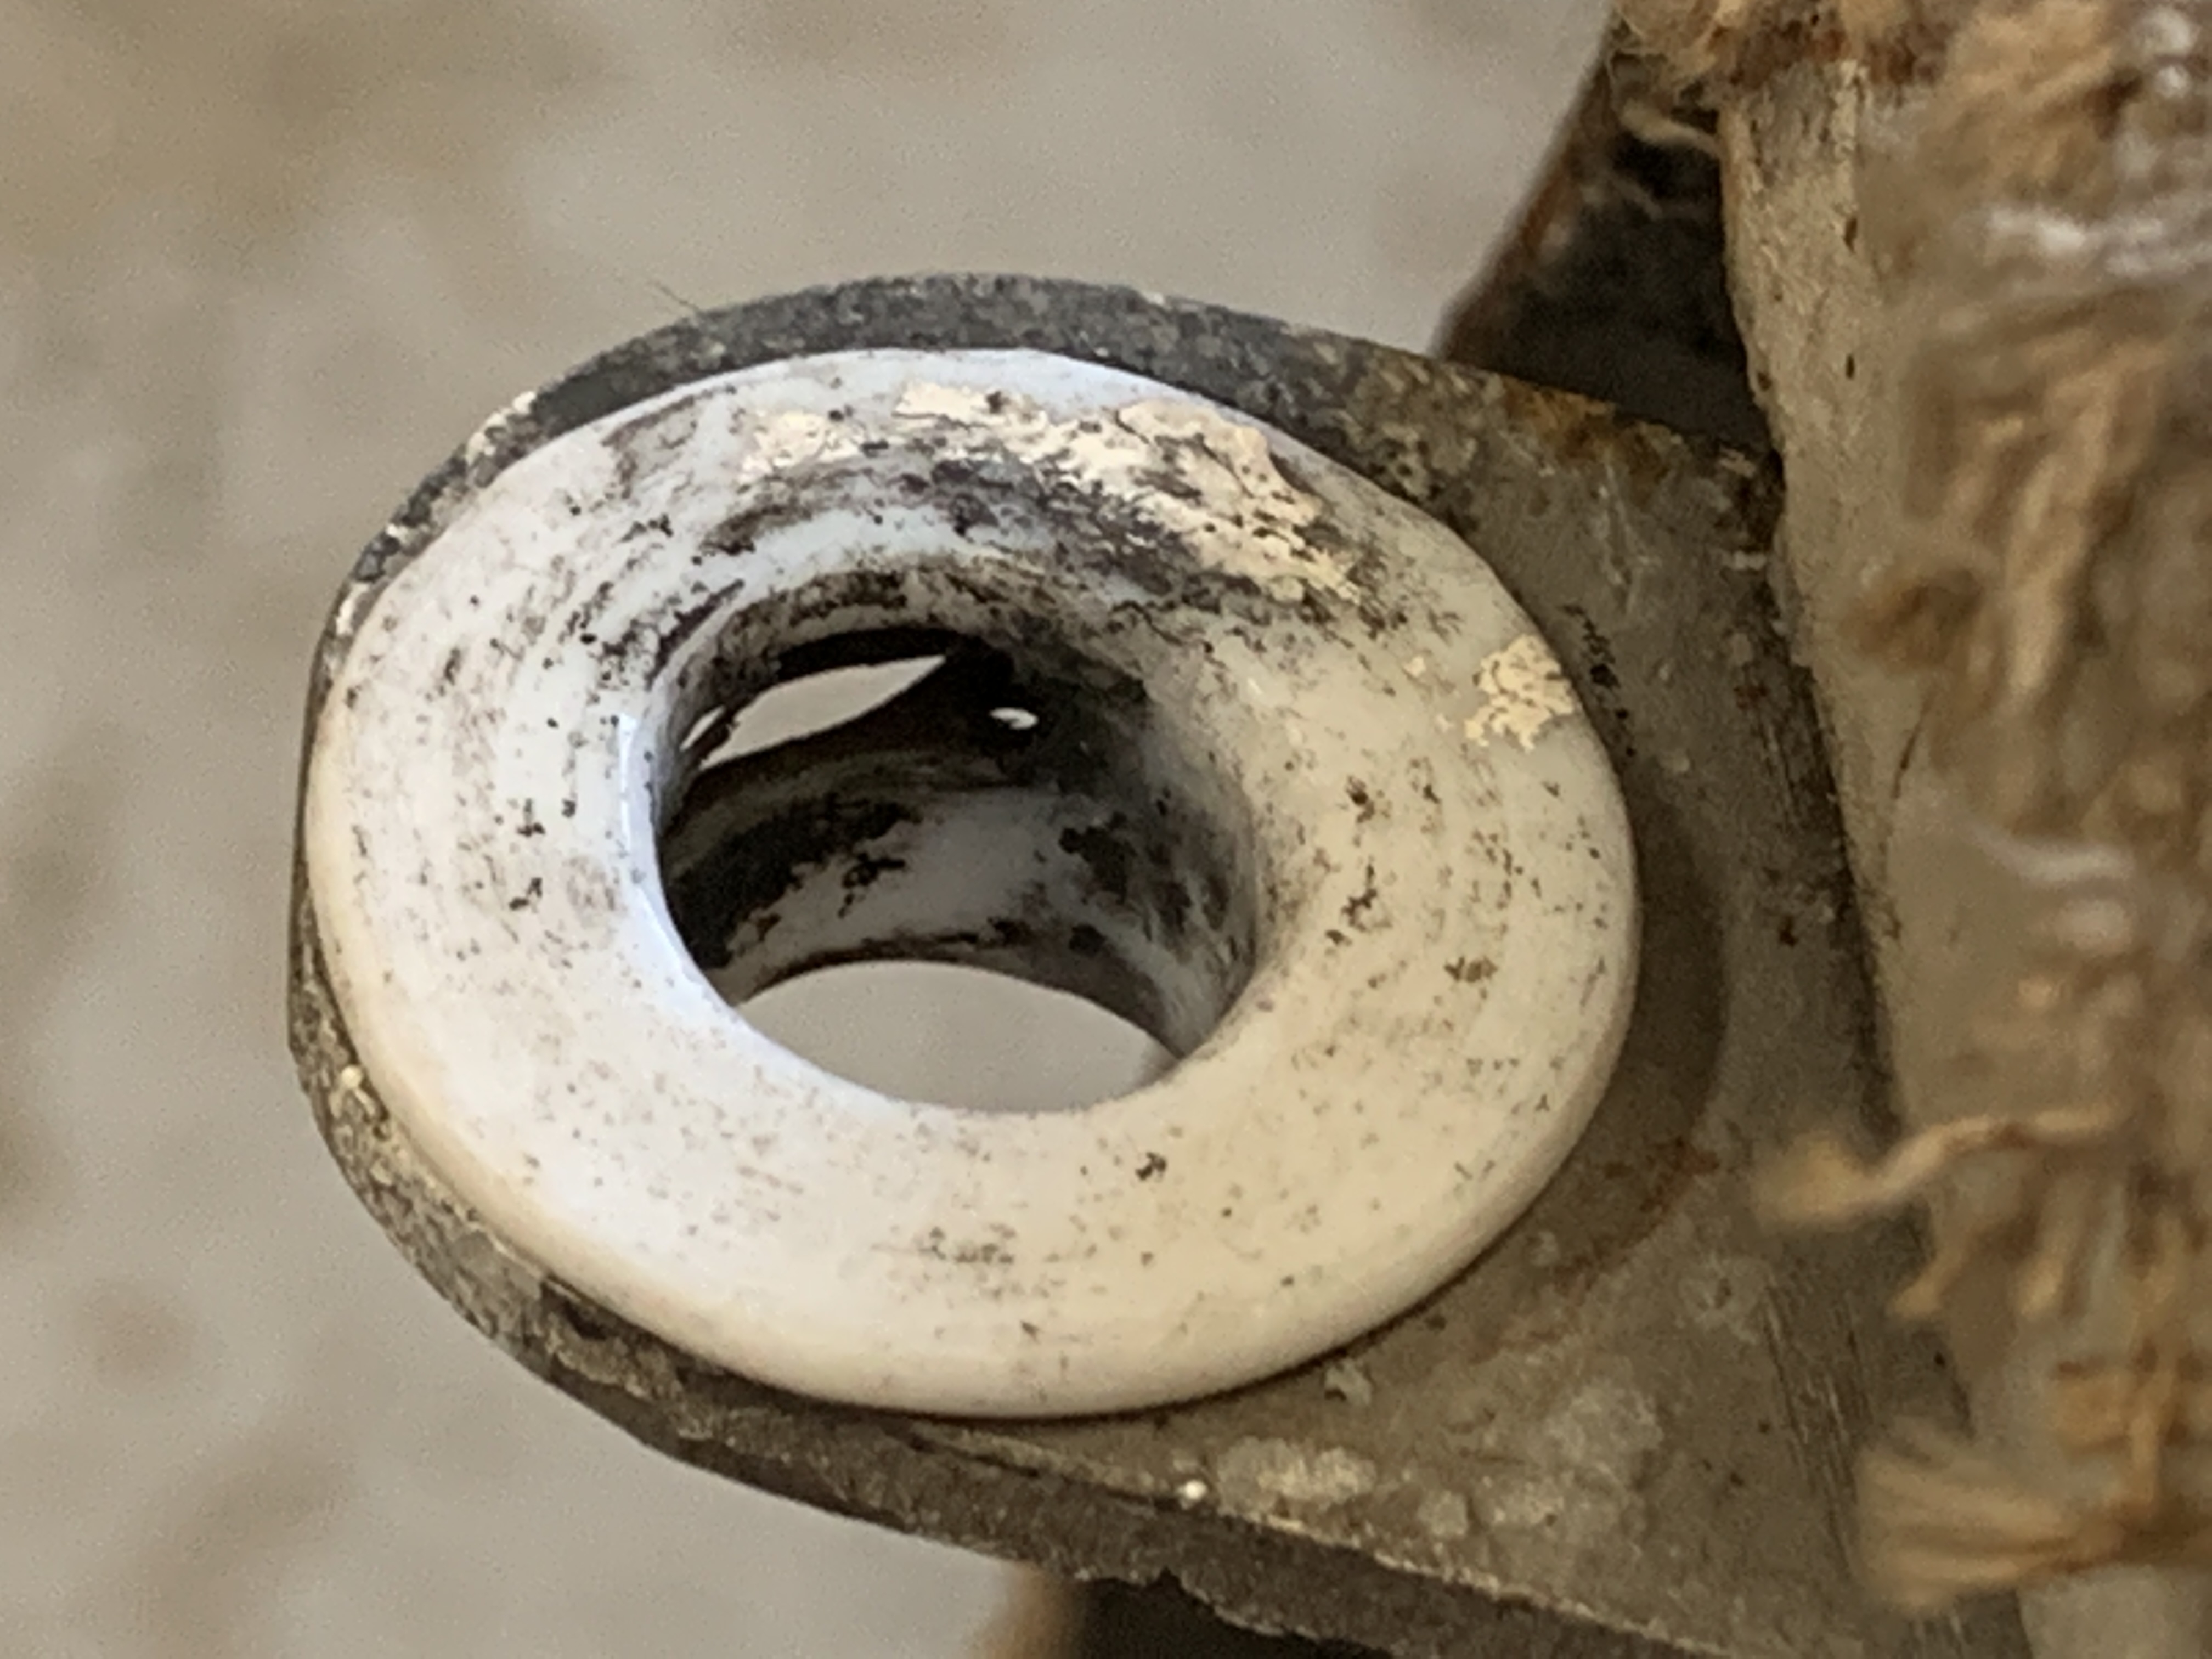
The carb heat door shaft grommets were worn:
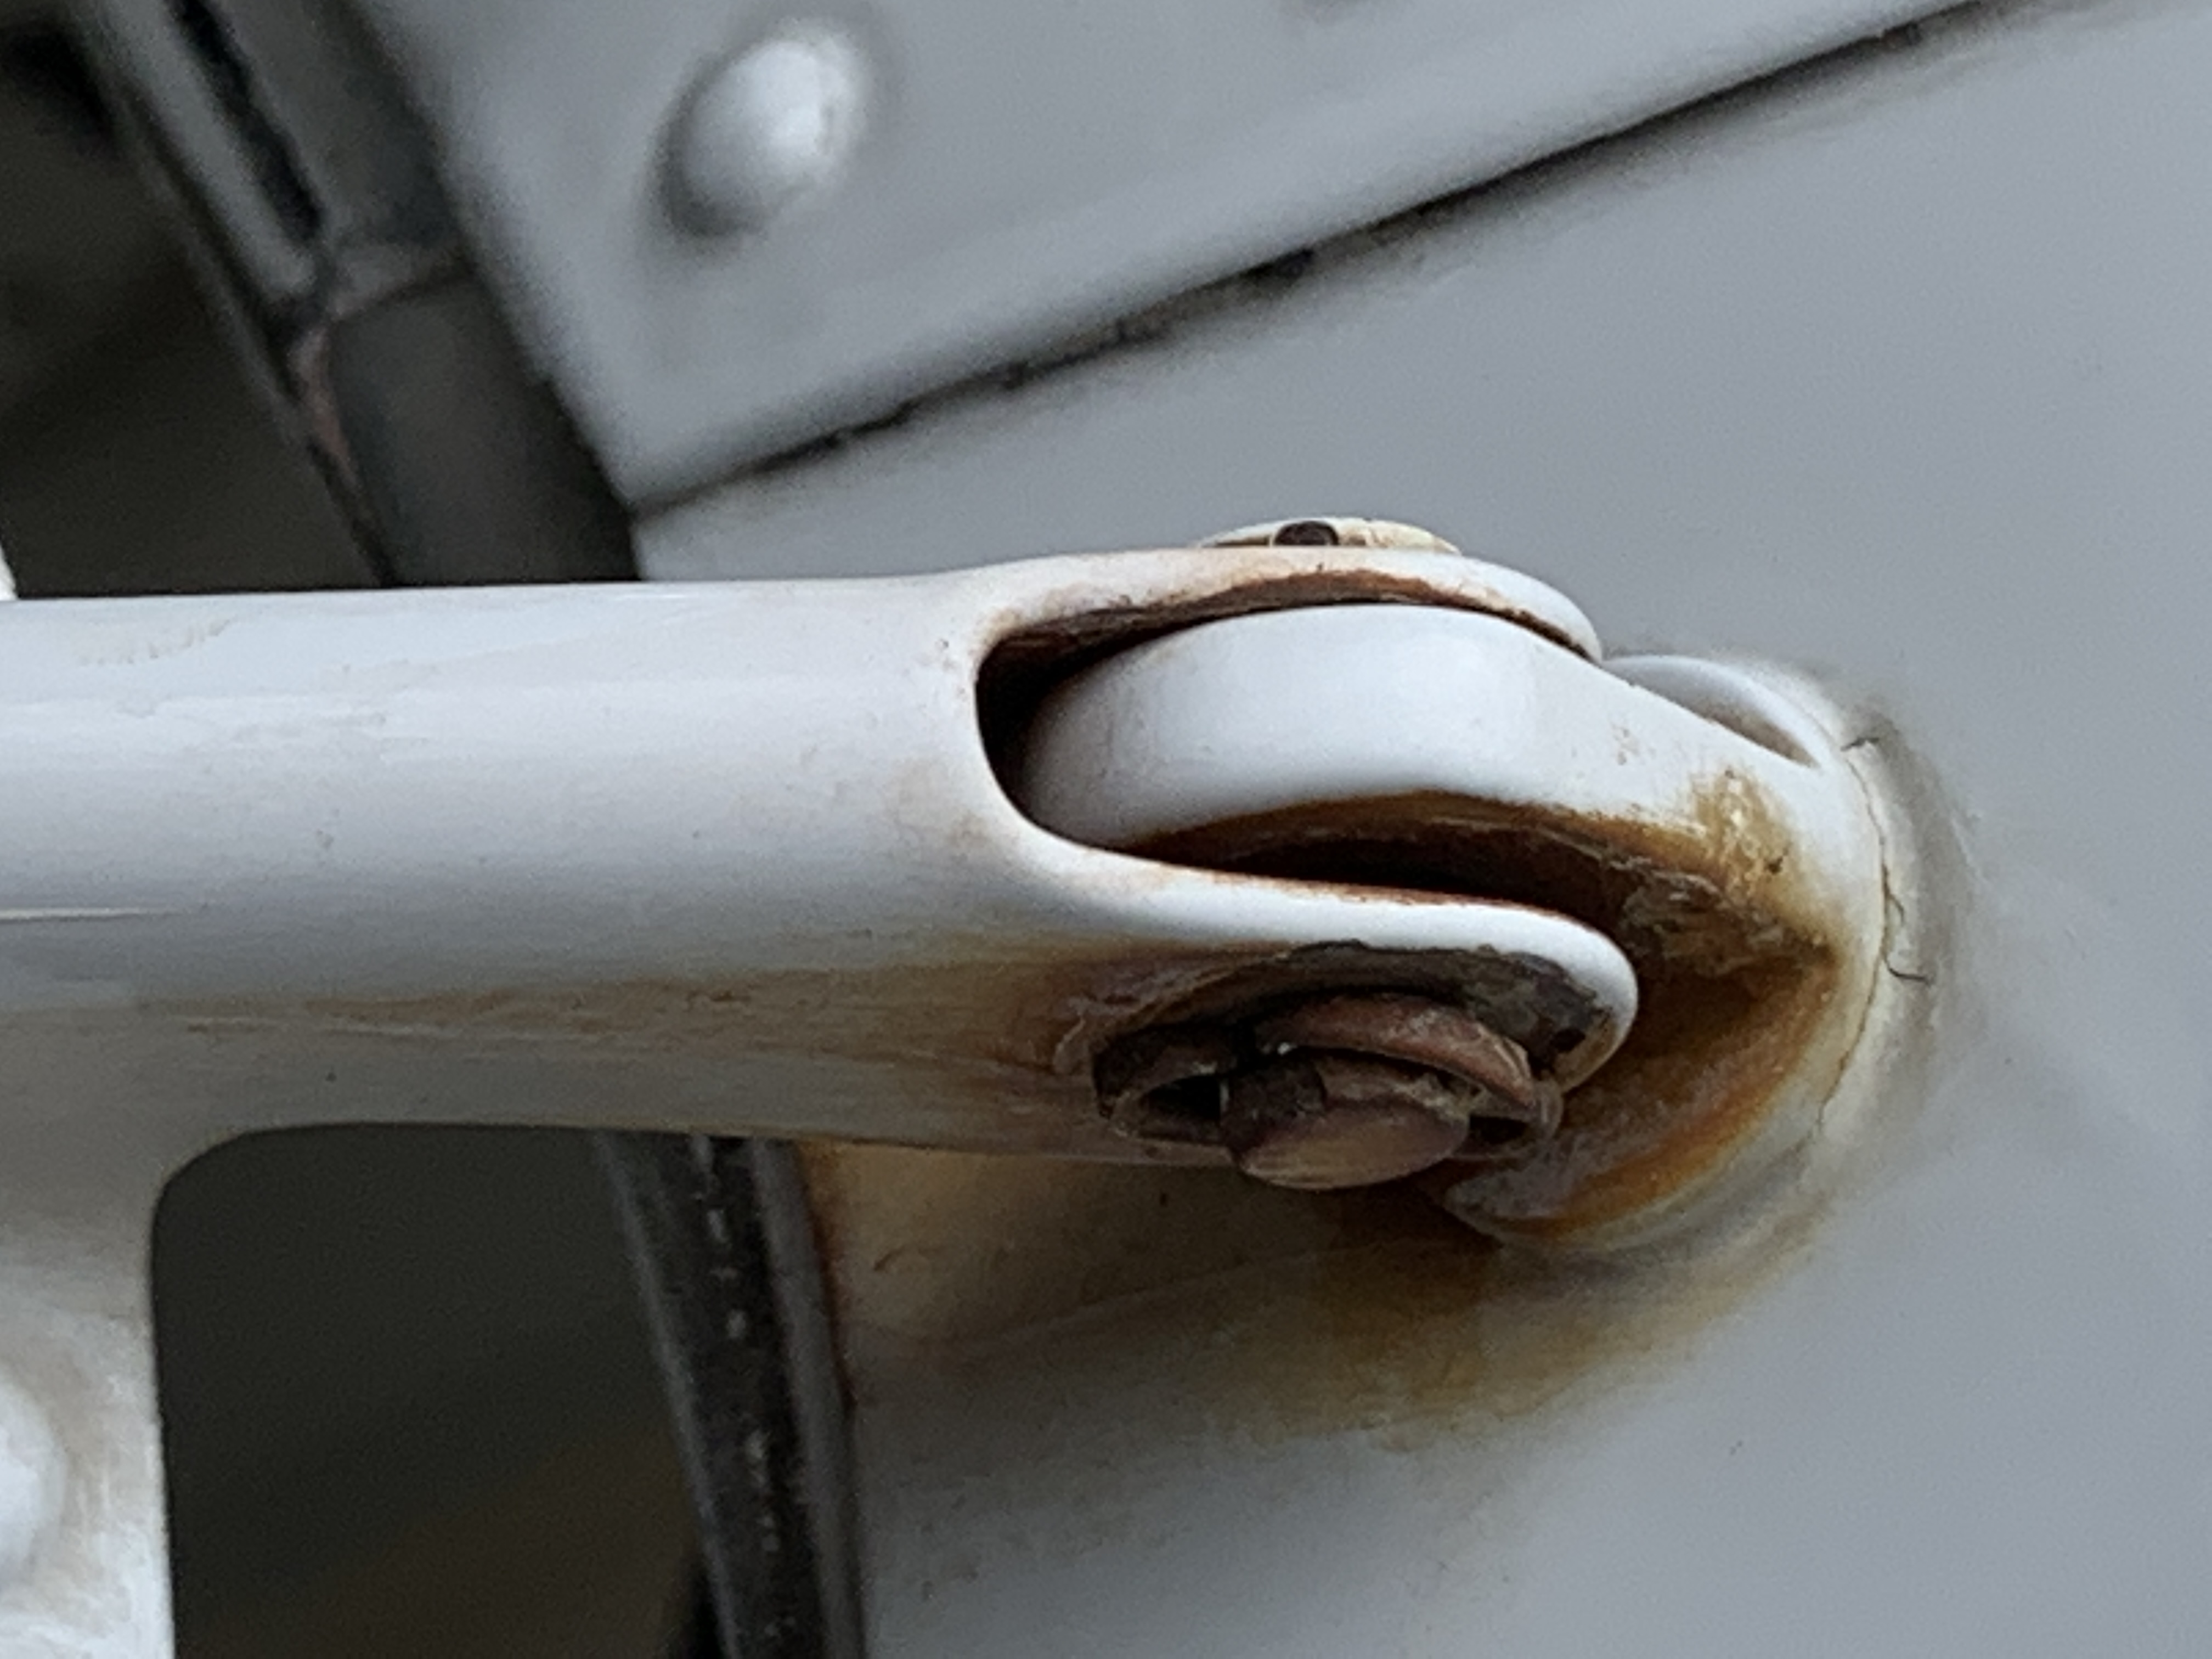
The left cowling pin bushing bracket was loose:
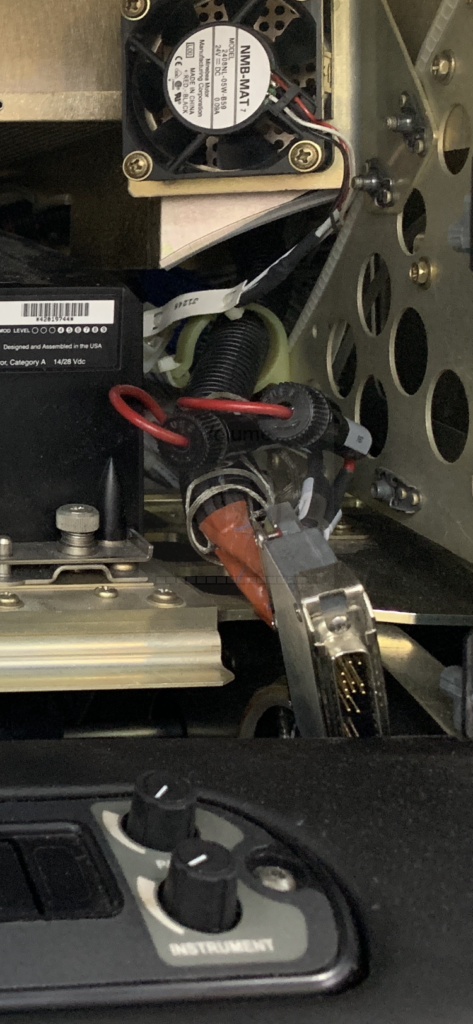
And finally, the fuel primer nozzle was really dry and stiff:
I always love to discover things on airplanes that need attention.
What about you? Could you benefit from having me look at your airplane? Send me an email to explore the options. dean{at}airplaneownermaintenance{dot}com
Or, go ahead and set up a Facetime consulting call and we can look at your airplane together and discuss any issues you might have:
Schedule a FaceTime call with me in 2 simple steps
Go to my calendar and pick a time spot that’s good for you.
On the scheduled day, I’ll call you and we can discuss and examine your airplane concerns. (Many prefer FaceTime for this.)
Other resources mentioned in this episode:
PilotWorkshop.com – This is a great place to help you stay sharp as a pilot… be sure to sign up to receive the “Tip of the week,” a short, 2 minute or less, valuable tip to make you a better pilot… and it’s free!
The post “154 – If I Looked at YOUR Airplane, What Would I Discover?” appeared first at AirplaneOwnerMaintenance.com
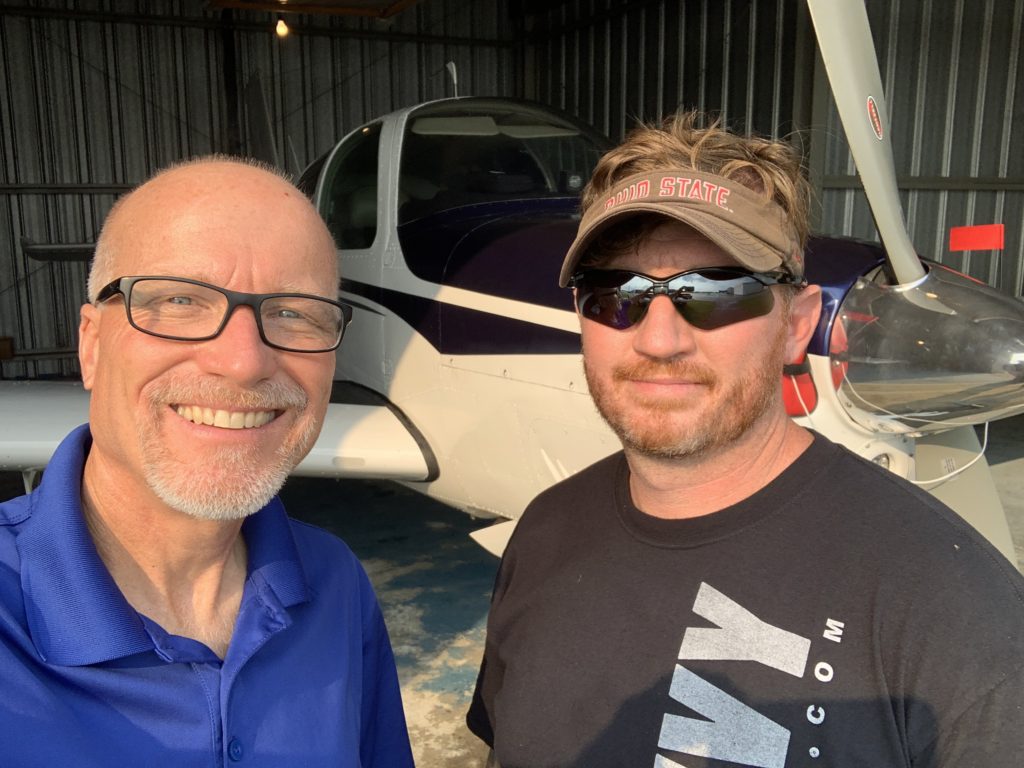
Josh recently purchased his 1963 Beechcraft Debonair and needed some help, so I flew to his airport and spent the good part of a day with him. We replaced a broken exhaust support angle on the right exhaust tailpipe, and then we took a good look around the airplane.
It surprised me when we discovered missing cotter pins in the left and right main landing gear uplock cable clevis bolts.
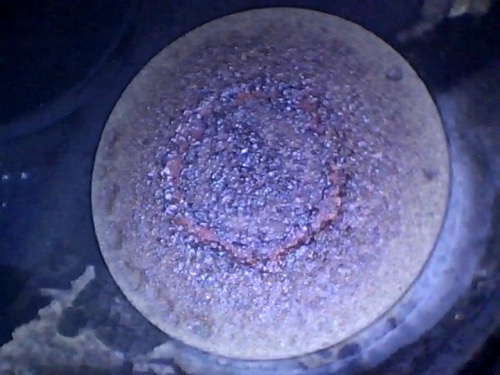
Toward the end of our time that day, we borescoped the exhaust valves, and they were all in very good condition. Here’s the exhaust valve in cylinder #1:
This is the appearance of a very healthy exhaust valve.
I flew the little Cessna 150 home and got it tied down before dark… what an adventure!
If you’d like to talk about the possibility of having me come to YOUR AIRPORT for some consulting and training on your airplane, send me an email, and we can set up a time to talk. Even if it’s across the country, I can hop on the airlines if necessary. Don’t hesitate to contact me, and we can make a plan.
Contact me at dean{at}airplaneownermaintenance{dot}com.
Final tip for today: Check your ignition switch and make sure you cannot remove the key unless it’s in the “OFF” position… watch for the condition in the following video, which is VERY DANGEROUS if the key is removed with one or both mags on, and the prop is rotated!
The post “153 – A Flying and Maintenance Adventure at Ravenswood WV” appeared first on AirplaneOwnerMaintenance.com
This was Jim’s story when he brought his airplane in for the annual inspection.
Listen to today’s episode to find out what we did with Jim’s door latching system… he did most of the work on that issue, and I think his wife will fly with him now!
Other items of interest in this episode:
Kat’s story about the time her student overprimed the engine and it caught on fire.
Comments and questions from Alan Christy.
Voice message and a question from Dan Douillard.Here’s the Aviation Consumer article about vacuum pumps I referenced in the podcast episode:
On the scheduled day, I’ll call you and we can discuss and examine your airplane concerns. (Many prefer FaceTime for this.)
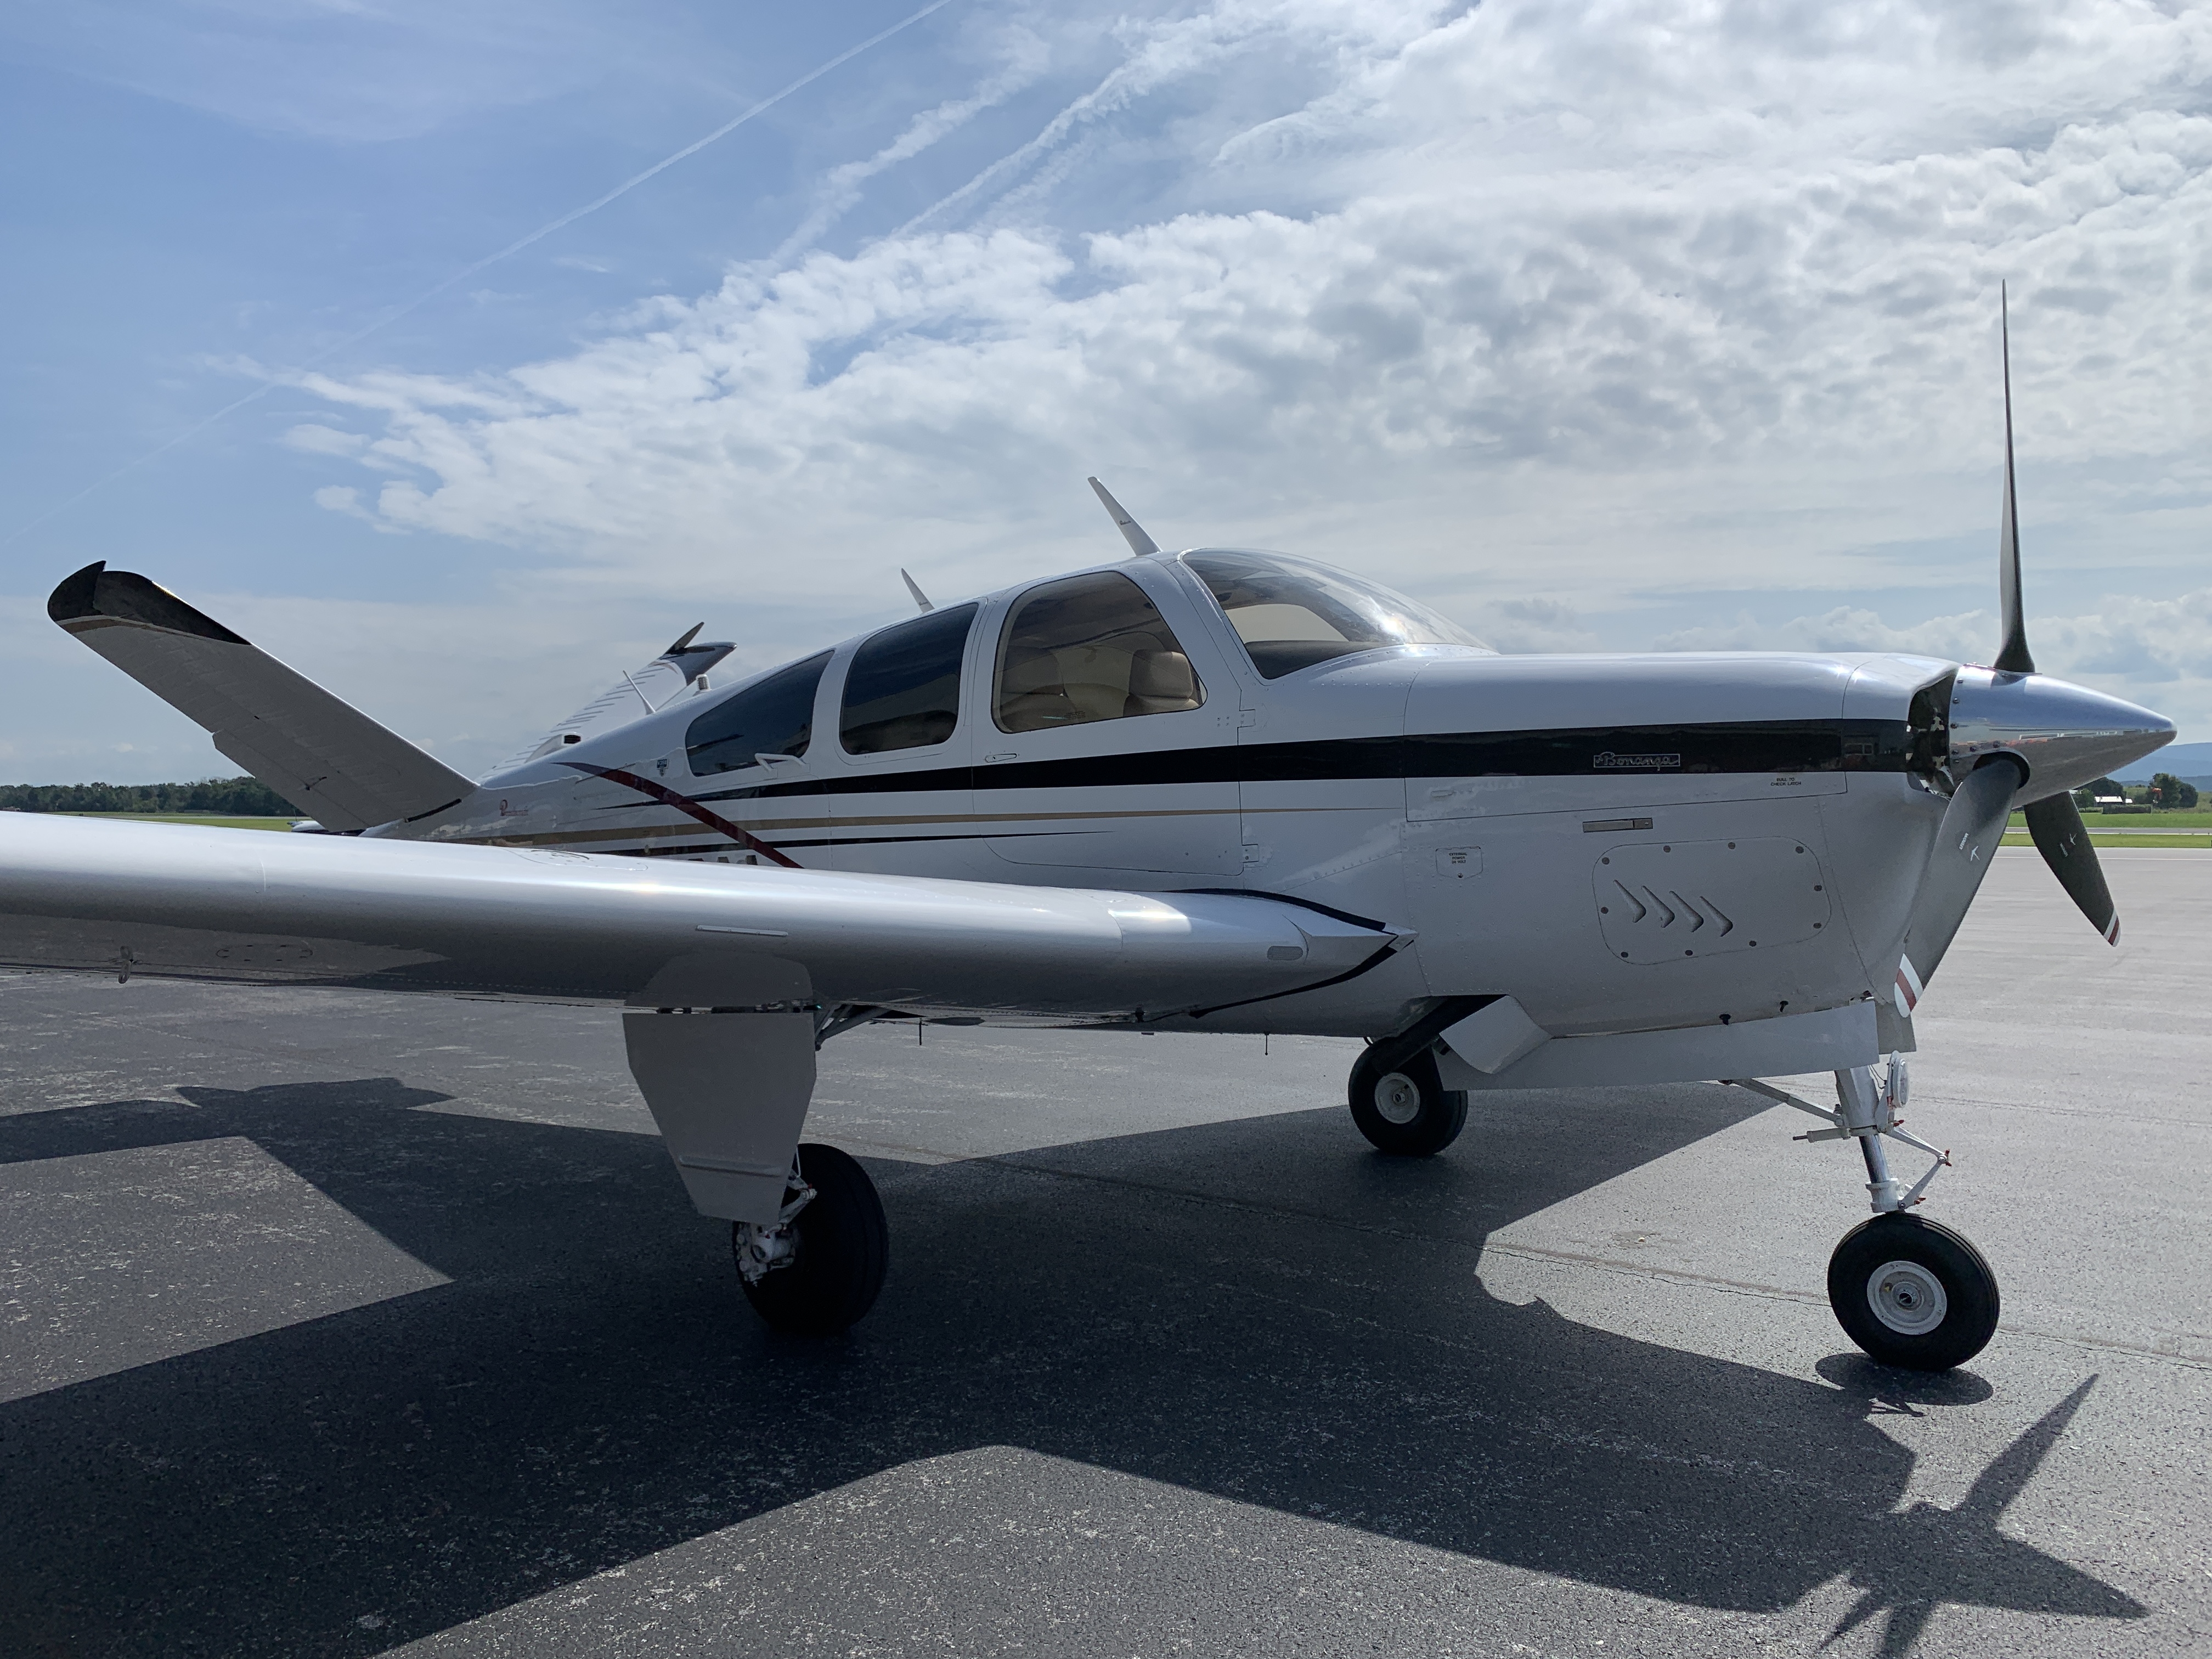
Now back to Jim’s V-tail Bonanza:
We fixed quite a few squawks on the airplane, and here are a few I mentioned in this episode:
The electric fuel boost pump was leaking at the case drain tube.
The D’Shannon engine baffle scoop for extra cooling on the cooling fins of cylinder #6, was installed upside down, and pointed at the exhaust riser.
The throttle microswitch for the magic hand landing gear safety system, was worn and one terminal was very loose.
The left aileron inboard hinge was improperly installed, with the bottom 2 screws not even in the holes of the hinge!
The main landing gear uplock springs were worn and rusty.
The shimmy dampener needed resealing and servicing.
And of course, as the titleindicates, we fixed Jim’s door latch (Jim did most of the work.)
Here are the corresponding repairs for each of those squawks:
We sent the boost pump to Aeromotors LLC in Browntown, WI for overhaul. Their price was HUNDREDS of dollars cheaper than anywhere else I could find!
We installed the engine baffle air scoop correctly so that it now points at the cylinder fins for proper cooling.
We installed a new microswitch with a new switch actuator, and researched the wiring diagram and attached the switch wires in the correct location. The “magic hand” landing gear safety system checked good, both on the ground and in flight.
We removed the left aileron, replaced some rivets, reinstalled the aileron correctly with new screws, and adjusted the aileron rigging.
We installed a new set of main landing gear uplock springs, P/N 059, from Performance Aero. (It’s always nice to know the uplock won’t punch a hole in the top of the wing due to failure of the uplock spring!)
We completely disassembled, cleaned, resealed, installed a new pin in the center piston, serviced, and reinstalled the shimmy dampener. It should last a long time now!
And Jim’s door… we installed a serviceable latch assy. in the top of the door, adjusted the bottom pin turnbuckle and resafetied, lubed, and checked… it works great now! Jim’s all set to take his wife flying!
So there you go… another annual inspection completed. We took care of many more squawks as well, but those are some of the highlights.
Jim, it was a pleasure working with you sir! I look forward to the next time!
I’ve known Tom for a long time, and what a fantastic experience it was, working with him on his annual inspection!
Tom is the president of our local EAA chapter, and he’s given me numerous opportunities to speak to the group about maintenance topics. Thank you Tom, for serving our local general aviation community so well!
It had been quite a few years since I had inspected Tom’s Cherokee, and it was a great experience to work with him again in the shop at Classic Aviation, LLC. I was impressed with the way he has kept up the maintenance on his airplane, and I was also reminded once again of the value of getting a different set of eyes on an airplane from time to time.
Other inspectors notice things I don’t see, and I notice things other inspectors don’t see. It’s always been that way, and I suppose it always will be.
So this year, I was happy for the opportunity to work with Tom, and take his Piper Cherokee from really good condition, to even better condition.
Here’s a list of squawks we addressed this year, that I’m confident will put us in a situation where we just might be able to accomplish his next annual inspection in one day, when the time rolls around next year:
Squawk #1: The AD records needed updating.
I sorted through the past AD records, and put all the information into my favorite online AD platform that we use at Classic Aviation LLC, the AD Toolbox, by April and Reuben Zook. These people are awesome, and their service is the best! Check them out at AirworthinessDirectives.com They even have a free trial, and it’s totally worth checking out!
When it comes to AD research, record keeping, and compliance reports, April and Reuben are the go-to people. Why waste your time with some big corporate company, when you can get the best service available from our friends at the AD Toolbox?!
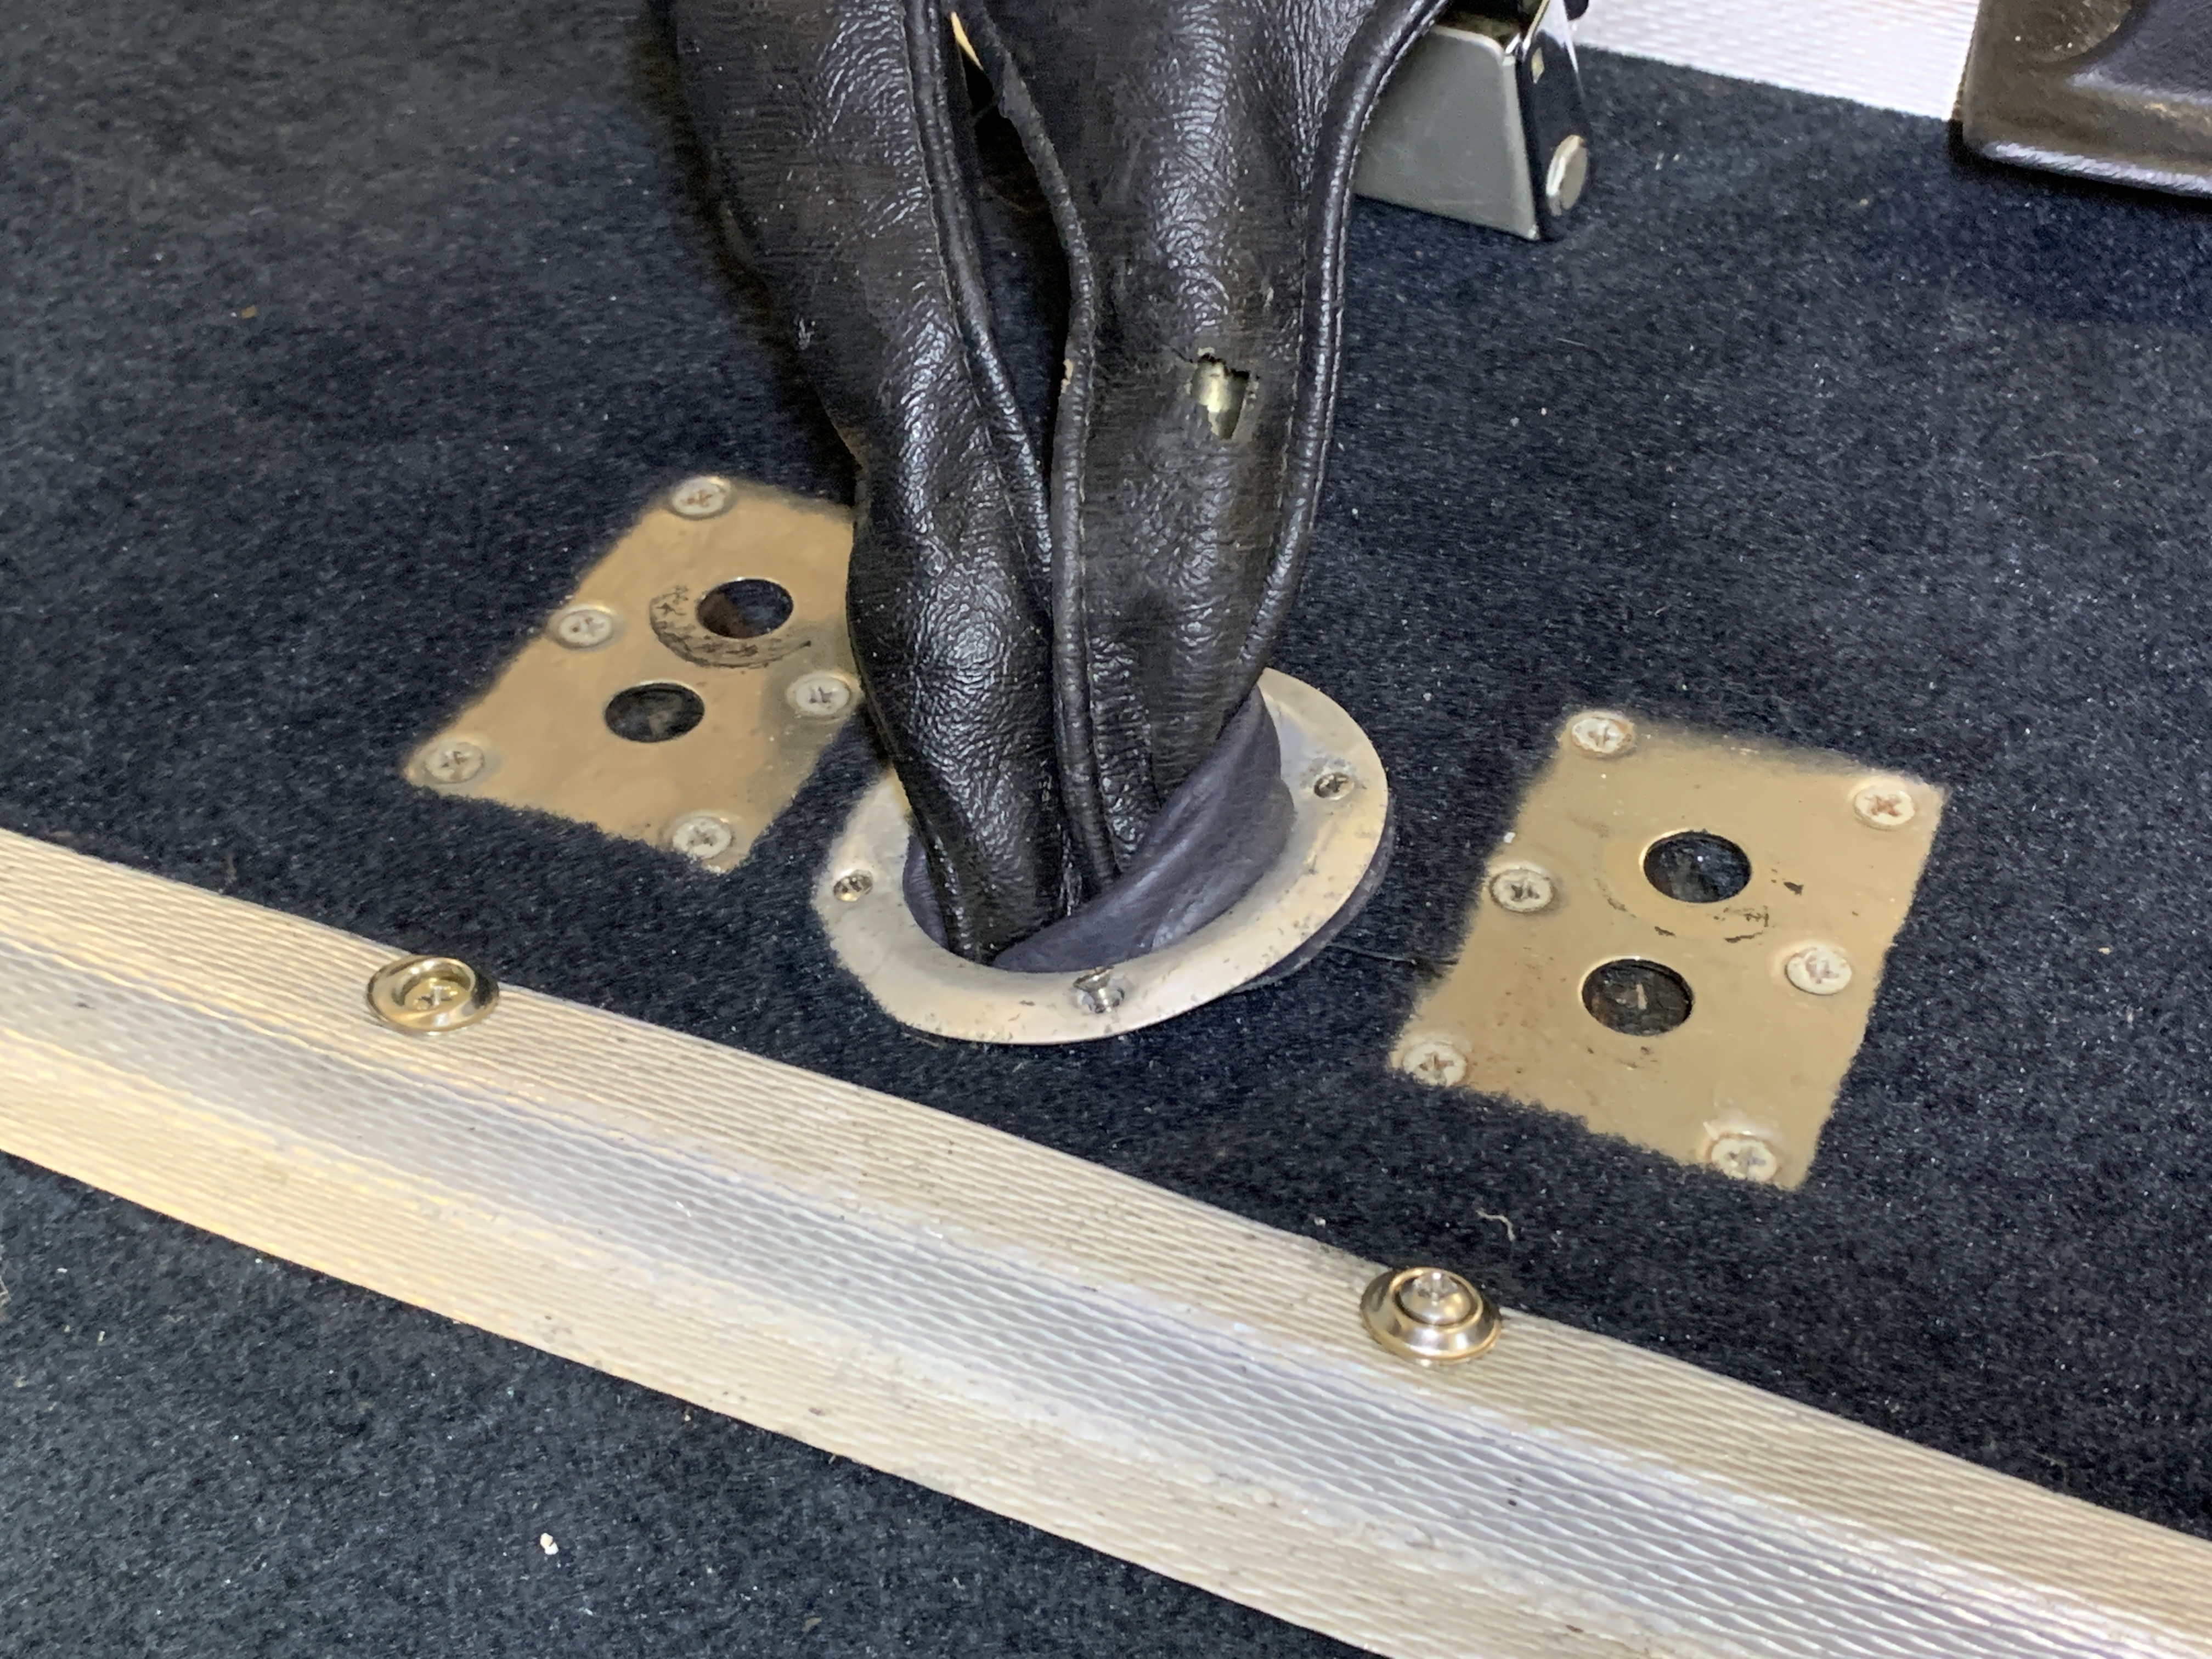
Squawk #2: AD 75-24-02.
This one was a simple matter of verifying the rear seat anchors were still holding the seats firmly in place, with the proper amount of pull tension to pull them up out of the anchor points. The plates with the round holes are where the seat anchors fit into, and must require a minimum of 15 pounds to pull them up out of the anchors.
Squawk #3: AD 76-07-12.
This one is simple, but really important. At low RPM, you momentarily turn the key to “OFF” and then put just a little pressure in the “past off” direction, to make sure the engine does not continue to run (it’s going to quit if you stay there too long,) and then turn the key back to “BOTH.” This verifies you do not have a hot mag when the ignition switch is in the “OFF” position.
Squawk #4: AD 2013-02-13.
This AD is due each 2000 hours, or 7 years, whichever comes first, and begins after an affected Piper is 15 years old. Since many of the Pipers were inspected in 2013, they are now coming due again for this inspection in 2020, 7 years later. Such was the case for Tom’s Cherokee.
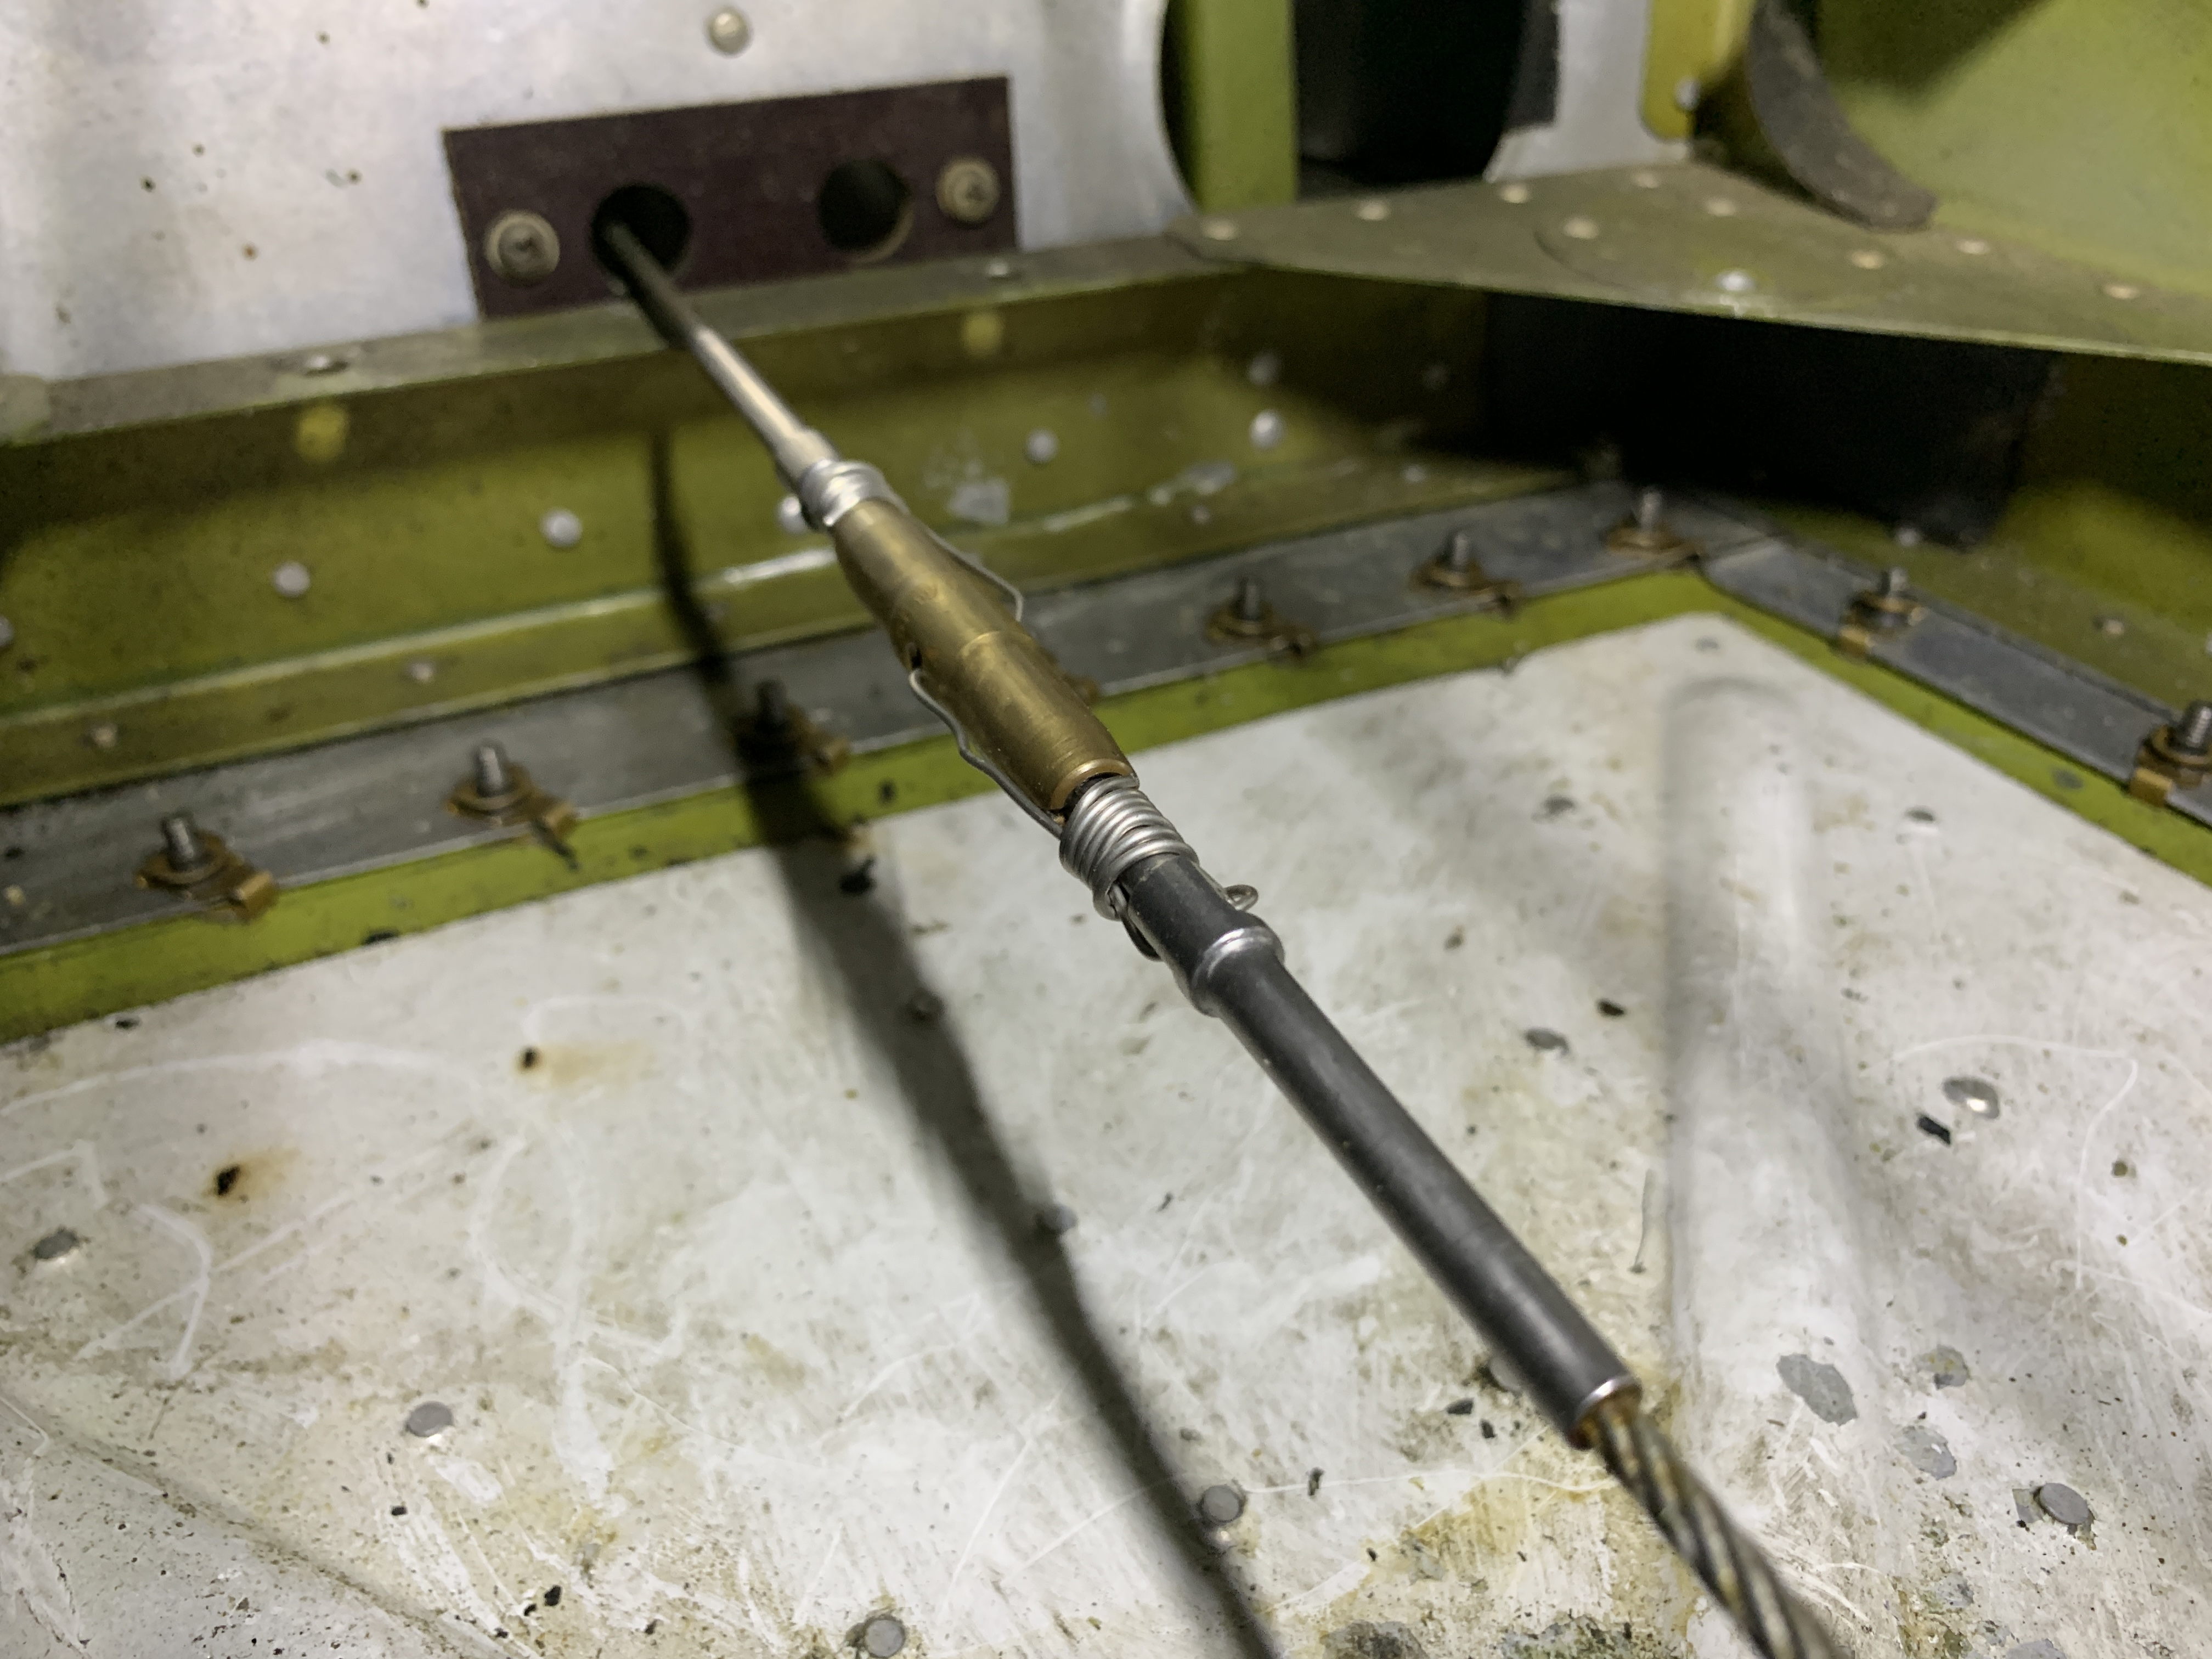
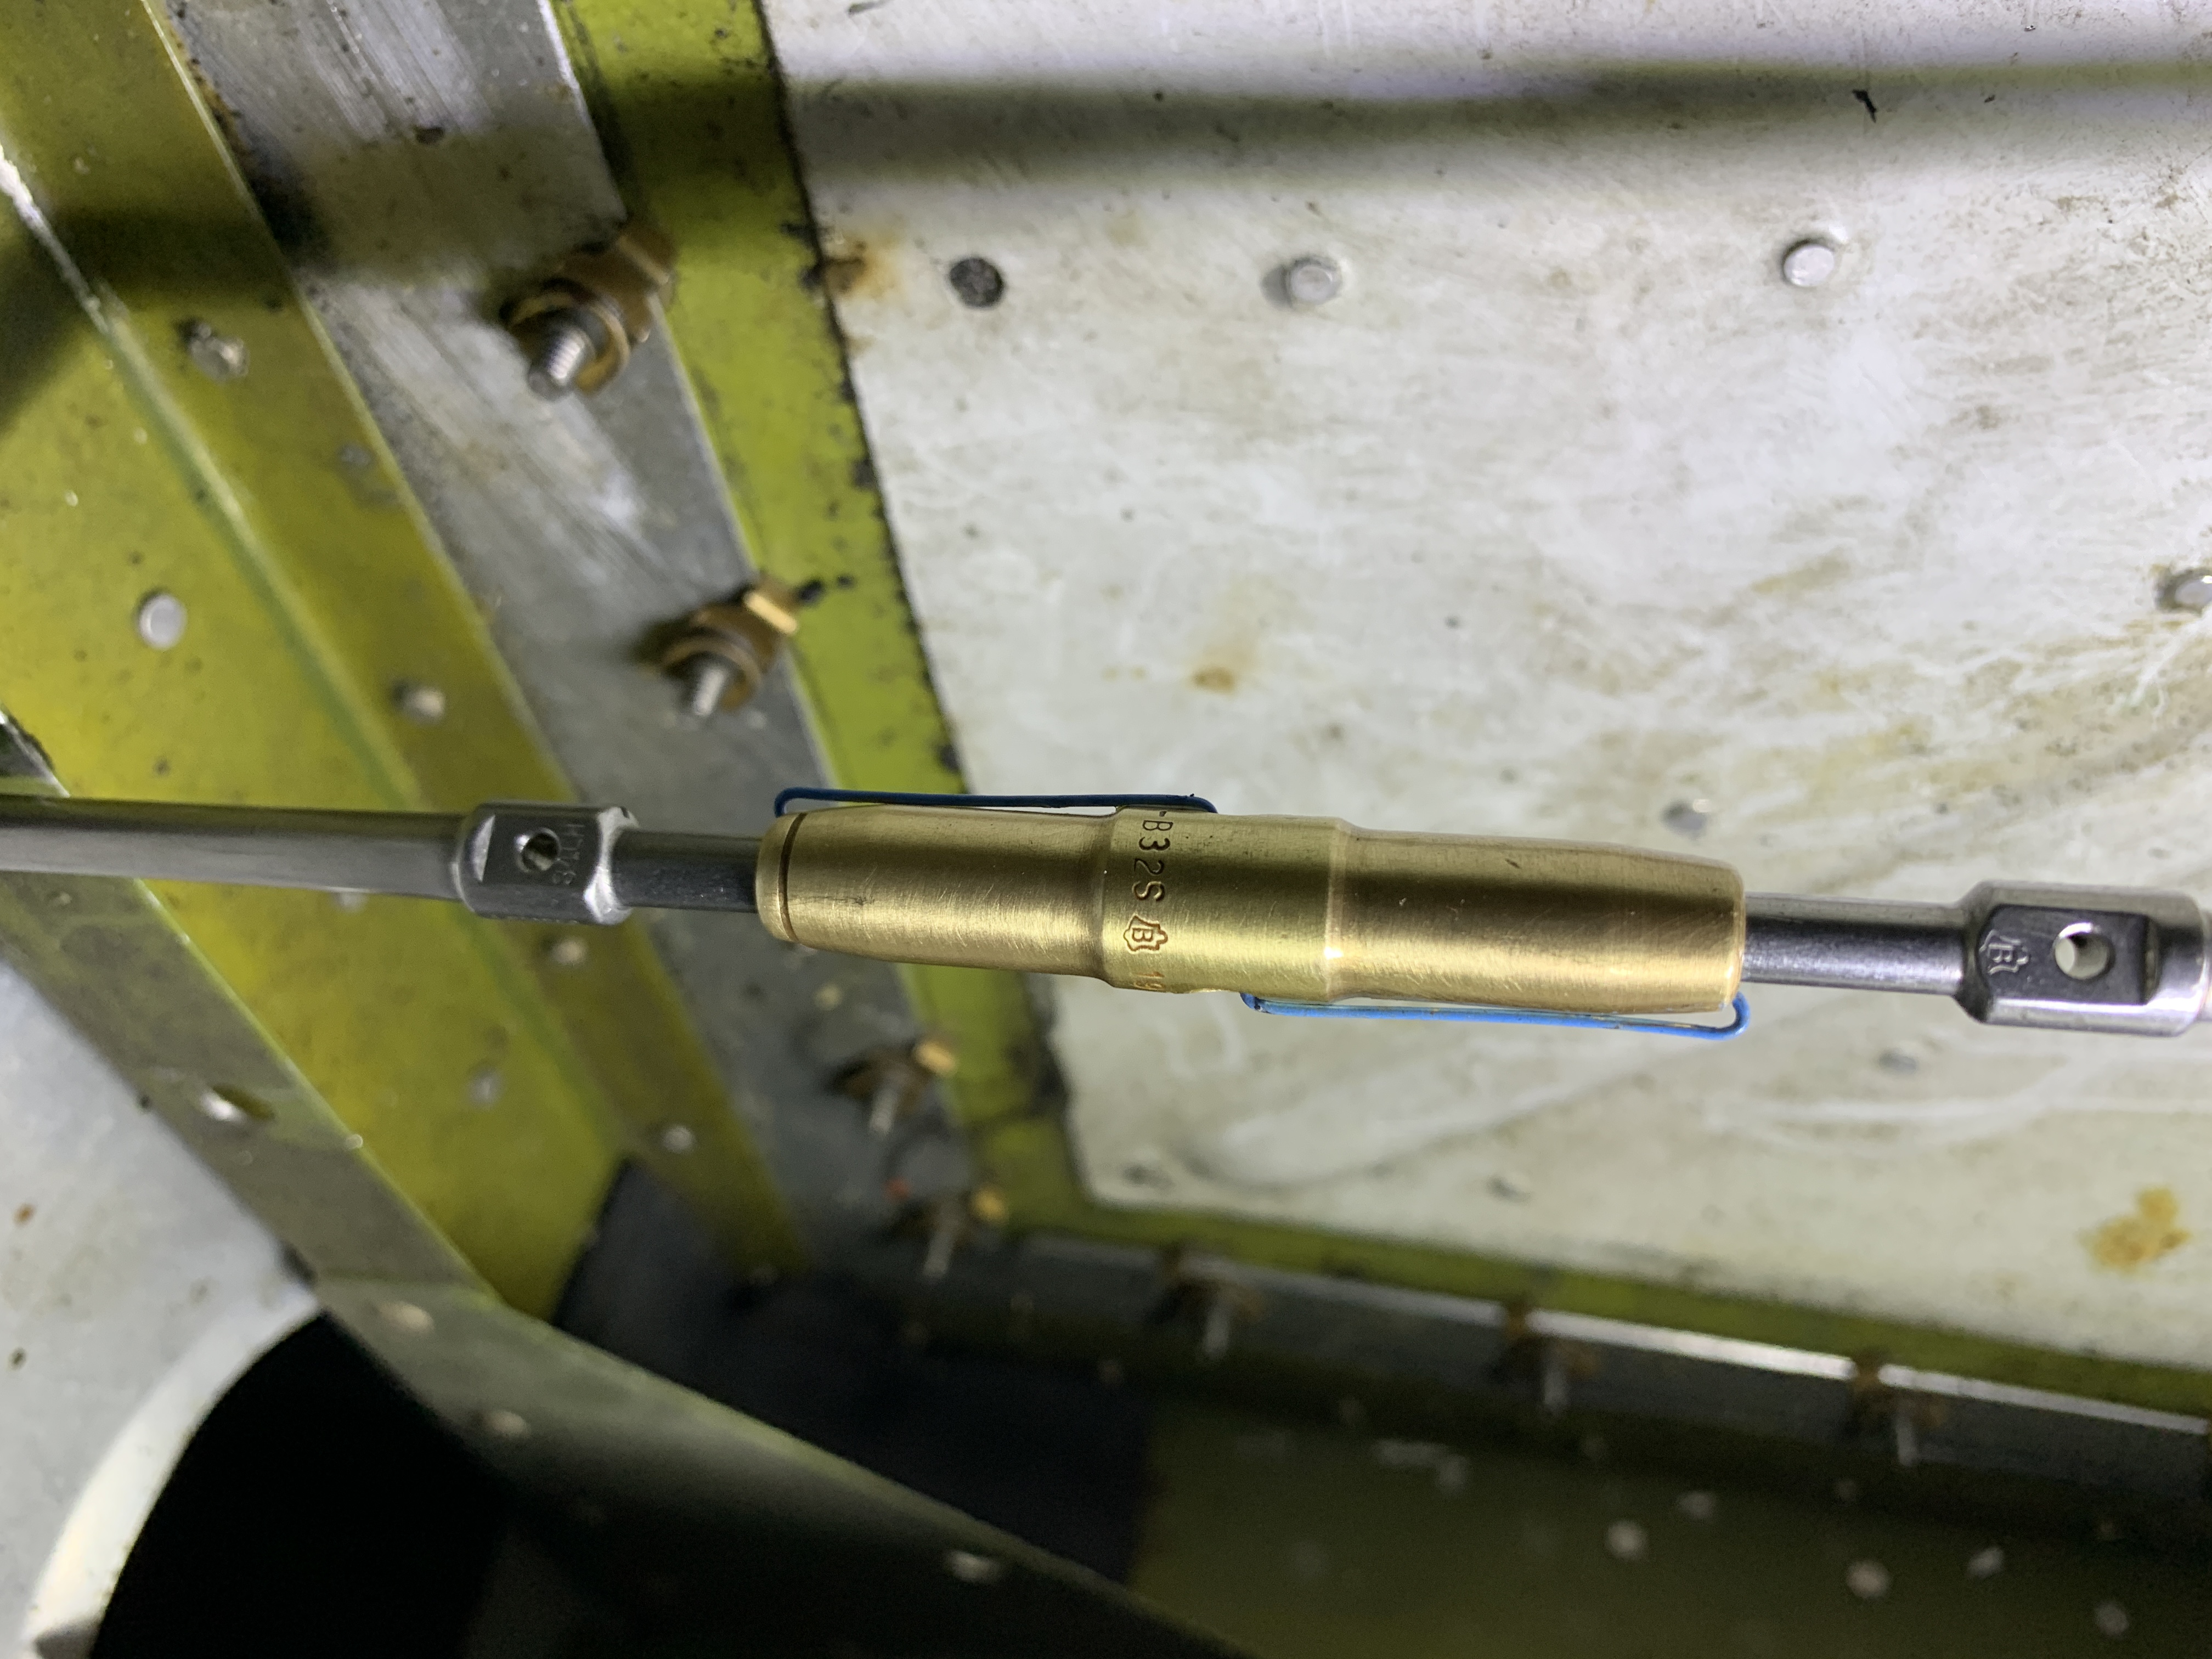
This AD requires inspection of the complete stabilator control cable system, with special emphasis on the two turnbuckles in the tail. Since the AD states the inspection is to be done “following instructions 1-10 of Piper SB 1245A,” this is a case where that service bulletin becomes mandatory, because the AD says so.
Therefore, when the service bulletin says to “Disassemble the turnbuckle bodies to facilitate a complete inspection of the turnbuckle bodies and associated cable terminals,” we have no choice but to do that. So if anyone tells you it’s not necessary to take the turnbuckles apart for this AD, they’re simply not correct.
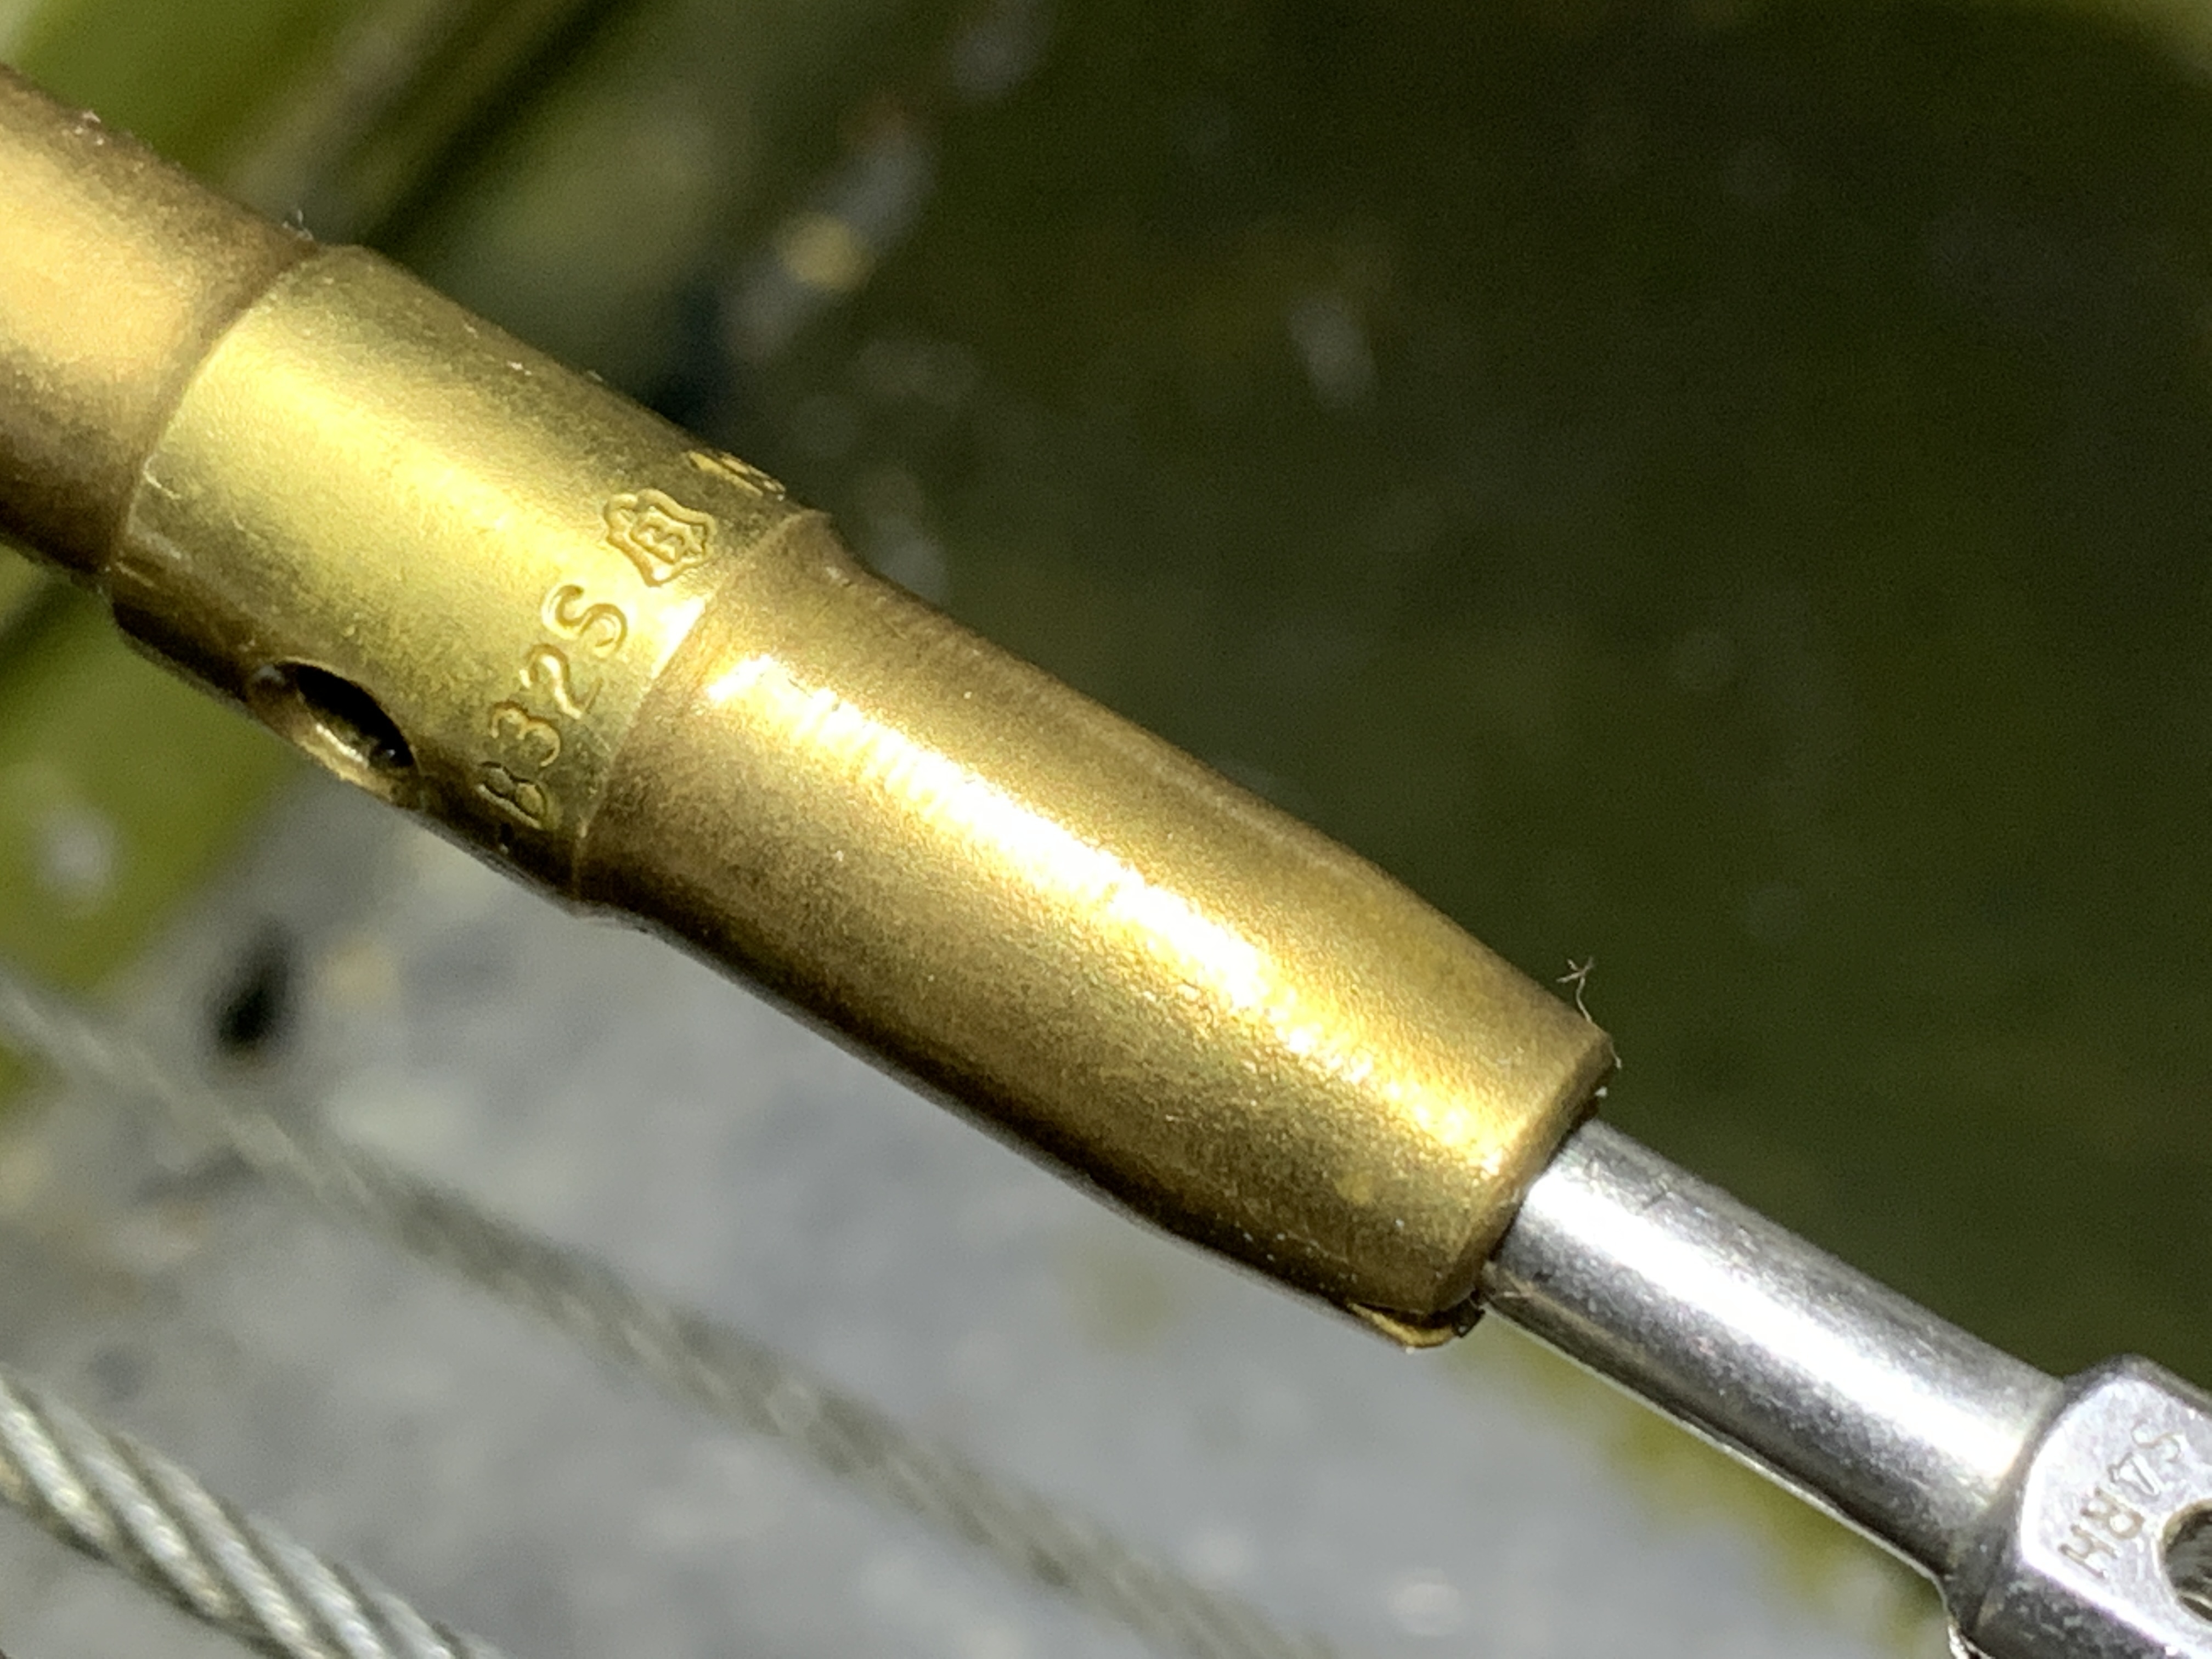
SB 1245A also says to “Clean the turnbuckle bodies and associated cable terminals thoroughly with Methyl Ethyl Ketone (MEK) or acetone prior to inspection. The non-threaded surfaces of the turnbuckle body and cable terminals may be cleaned using Scotch-Brite™ General Purpose Green Scouring Pad 96 or 105b.”
This will give you a like-new appearance of the turnbuckle body. Check it out:
I completely disconnected the cable ends from the turnbuckle body, on both turnbuckles, and inspected them with a 10x magnifying glass, per SB 1245A. They were in excellent condition, so I reassembled them, set the tension, verified full and correct stabilator travel, and installed safety clips in the turnbuckles.
Now Tom is good to go for another 7 years, as far as this AD is concerned.
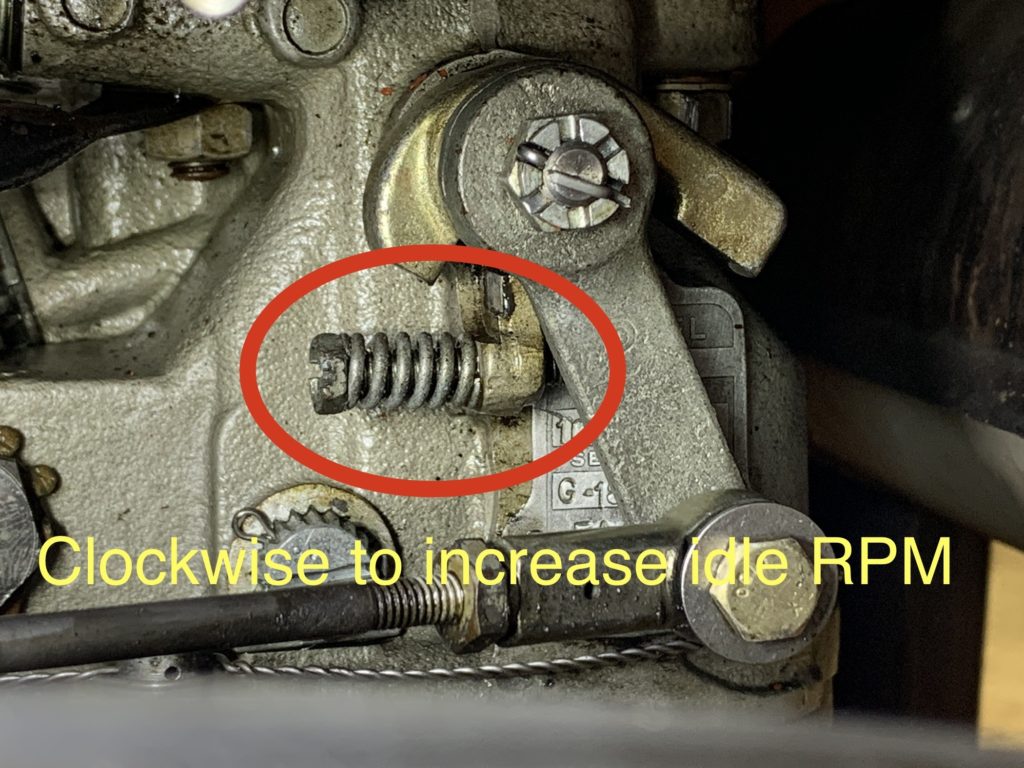
Squawk #5: Idle speed slightly low.
The fix for this was to simply turn the idle stop screw in 1/2 turn so the throttle control on the carburetor would make contact a little sooner and bring the idle RPM up just a little.
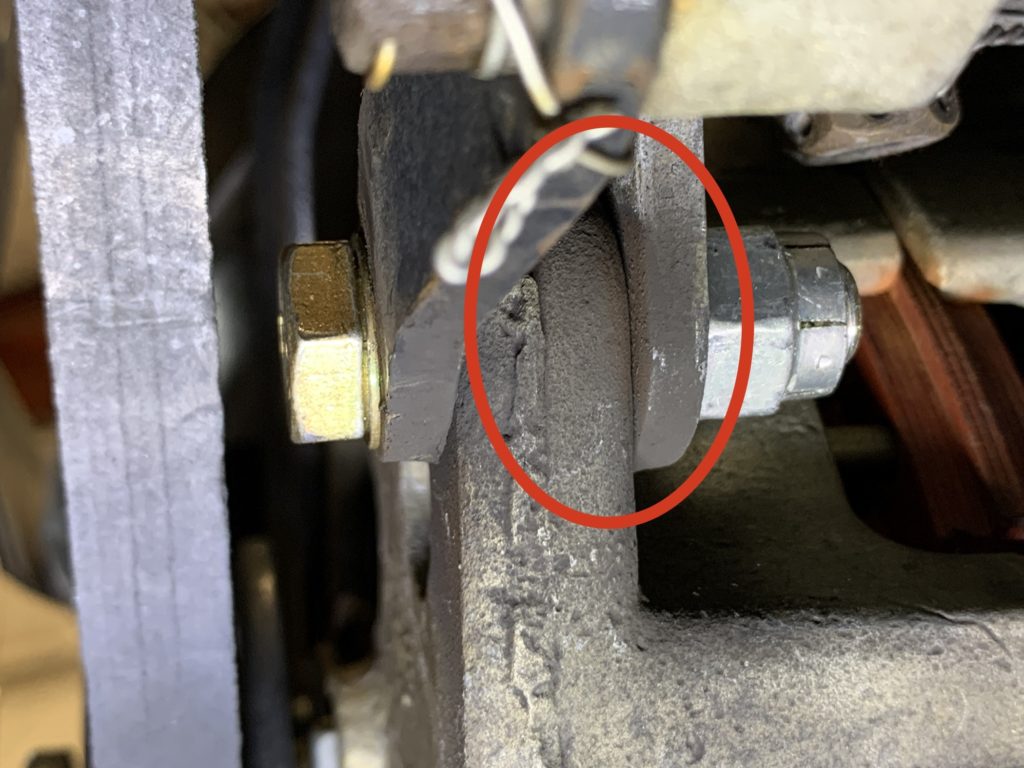
The first thing that got my attention on this one, was the dark brown wear dust that appears when a steel bolt is chafing. The following picture was taken after I installed a new bolt and locknut, but you can still see some of the brown dust.
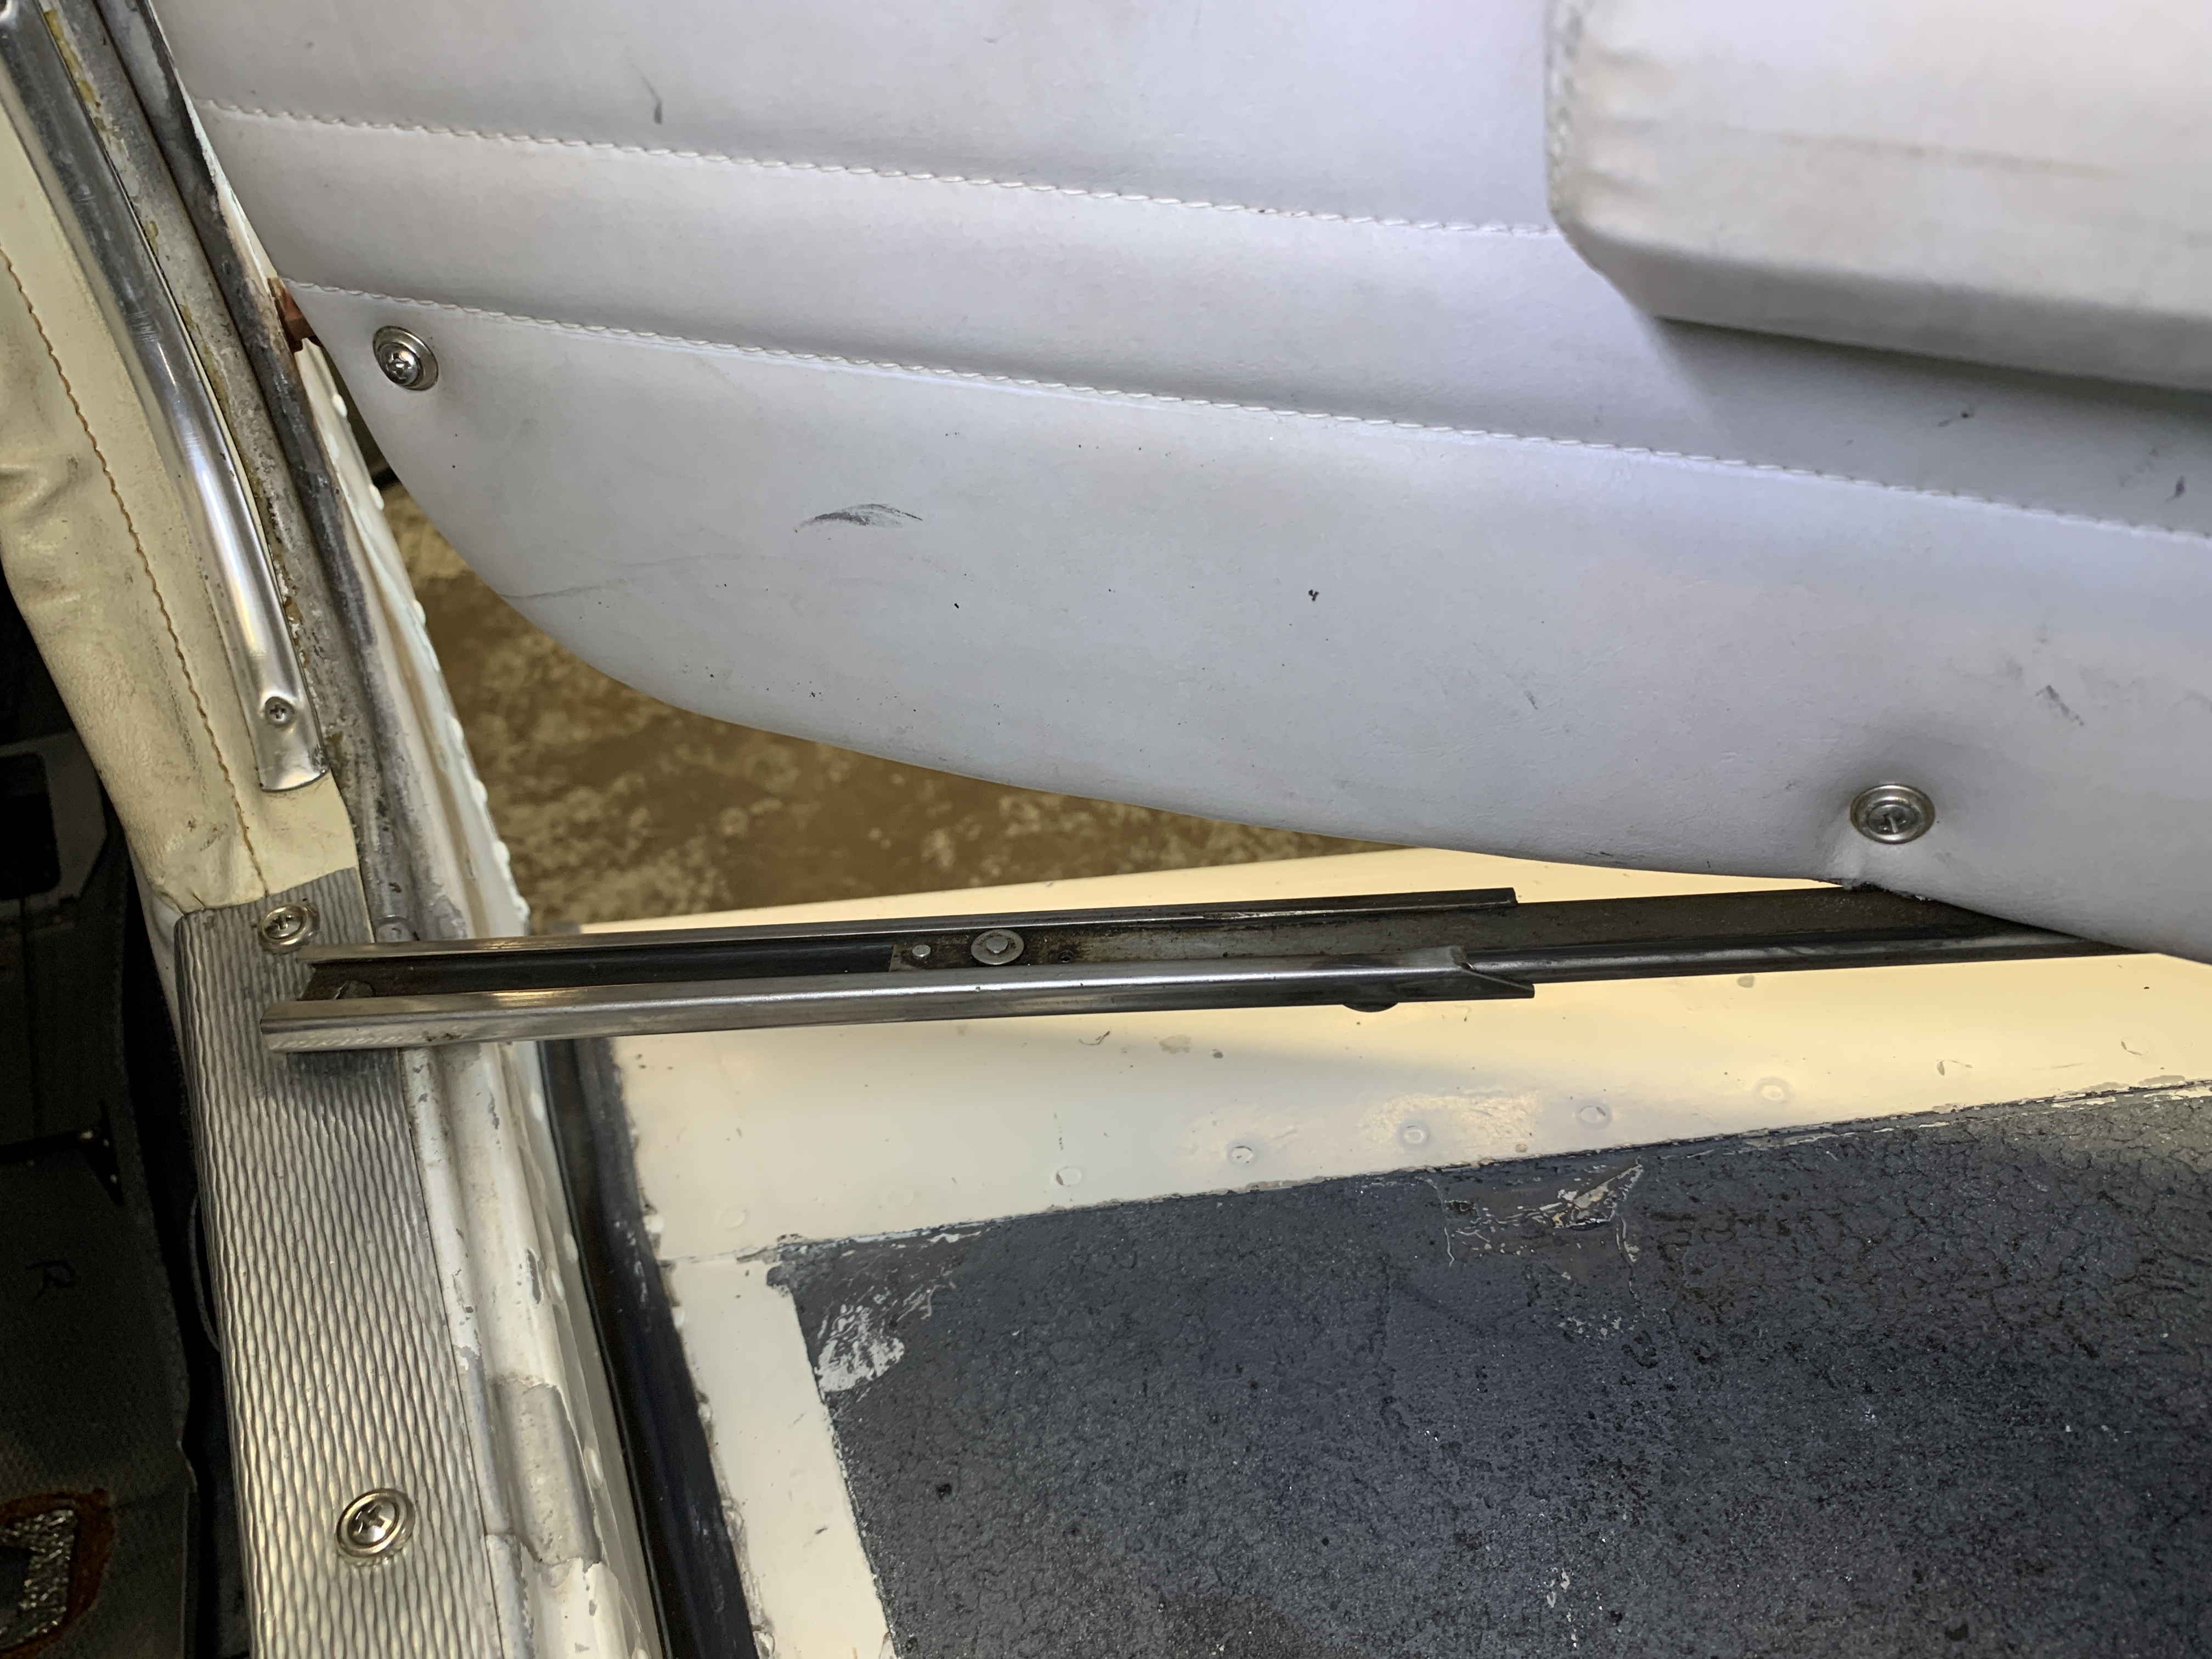
Squawk #7: Cockpit door stop does not hold the door open.
Since this was not an airworthiness issue, we did not do anything with this one, but I did find some very interesting information. If you own a Piper, you’ll like this one!
I researched and found a new door stop / slide assembly is about $700… yikes!
And wait… Airward.com also has a “Door slide spring” (with the appropriate stainless rivet included,) for a mere $15! In Tom’s case, I think this is all he needs, since the other parts appeared to be in good condition. If you also need the attaching clevis bolts and spacers, you might want to order the $95 kit.
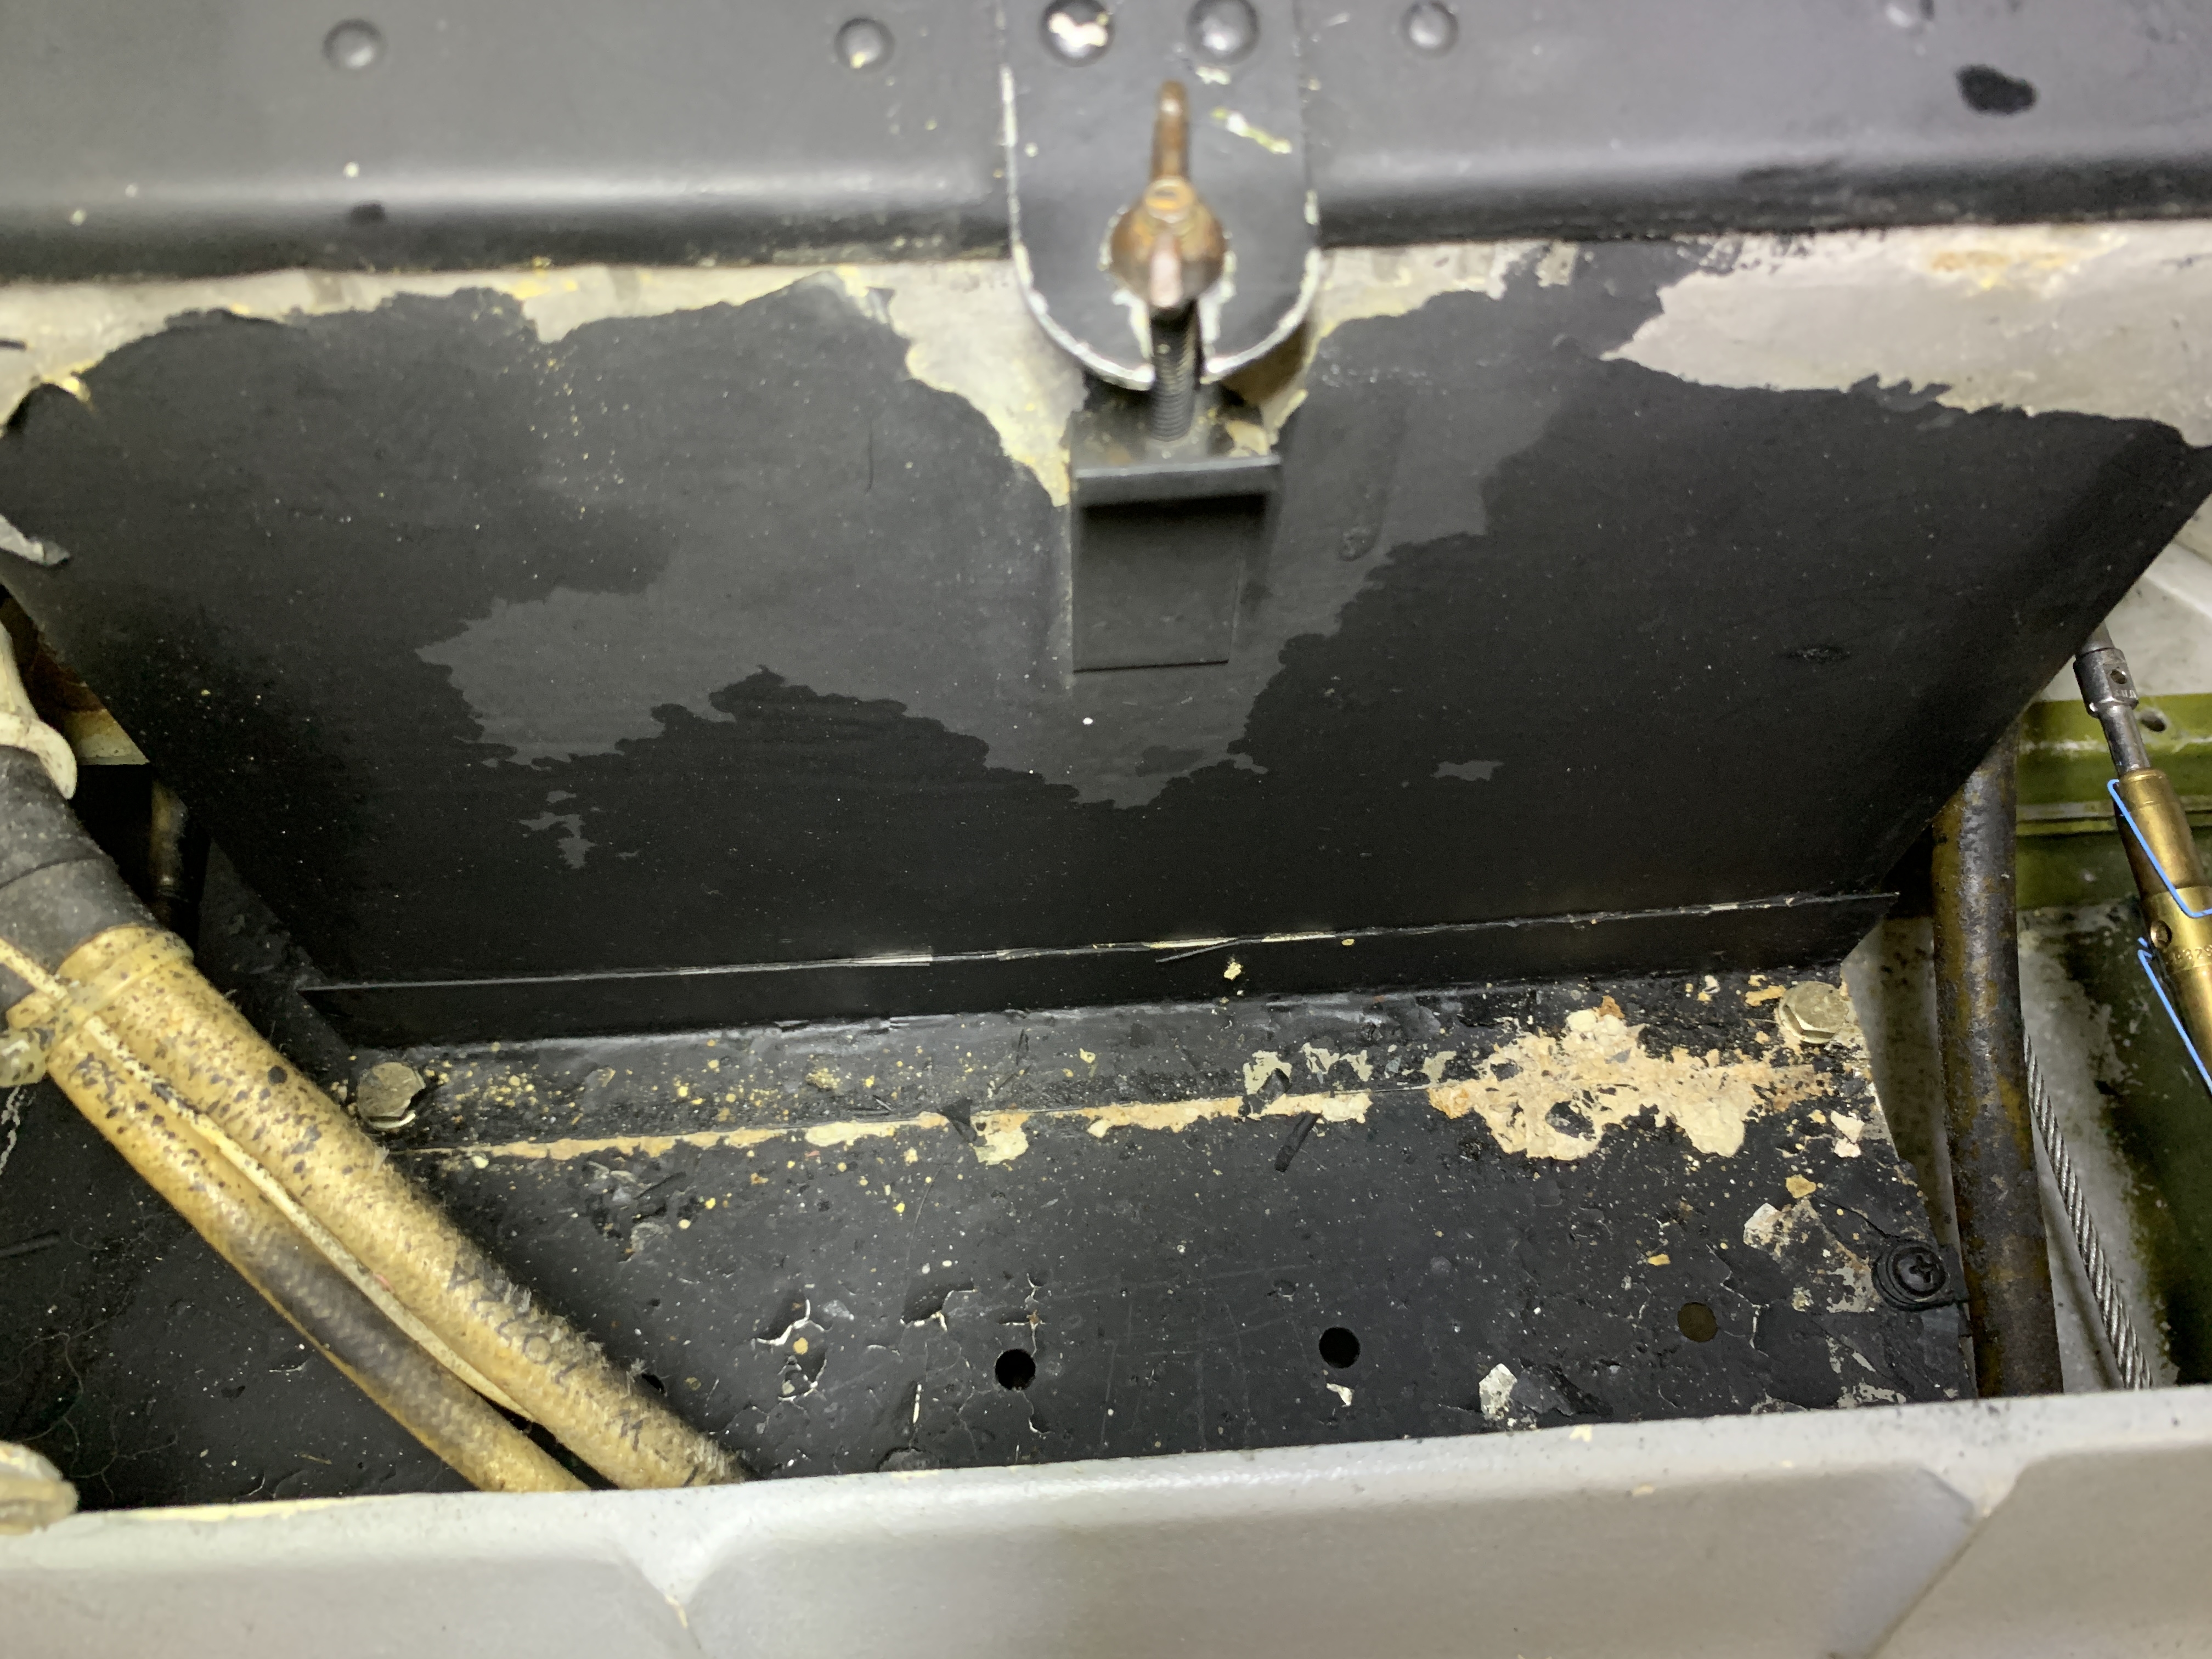
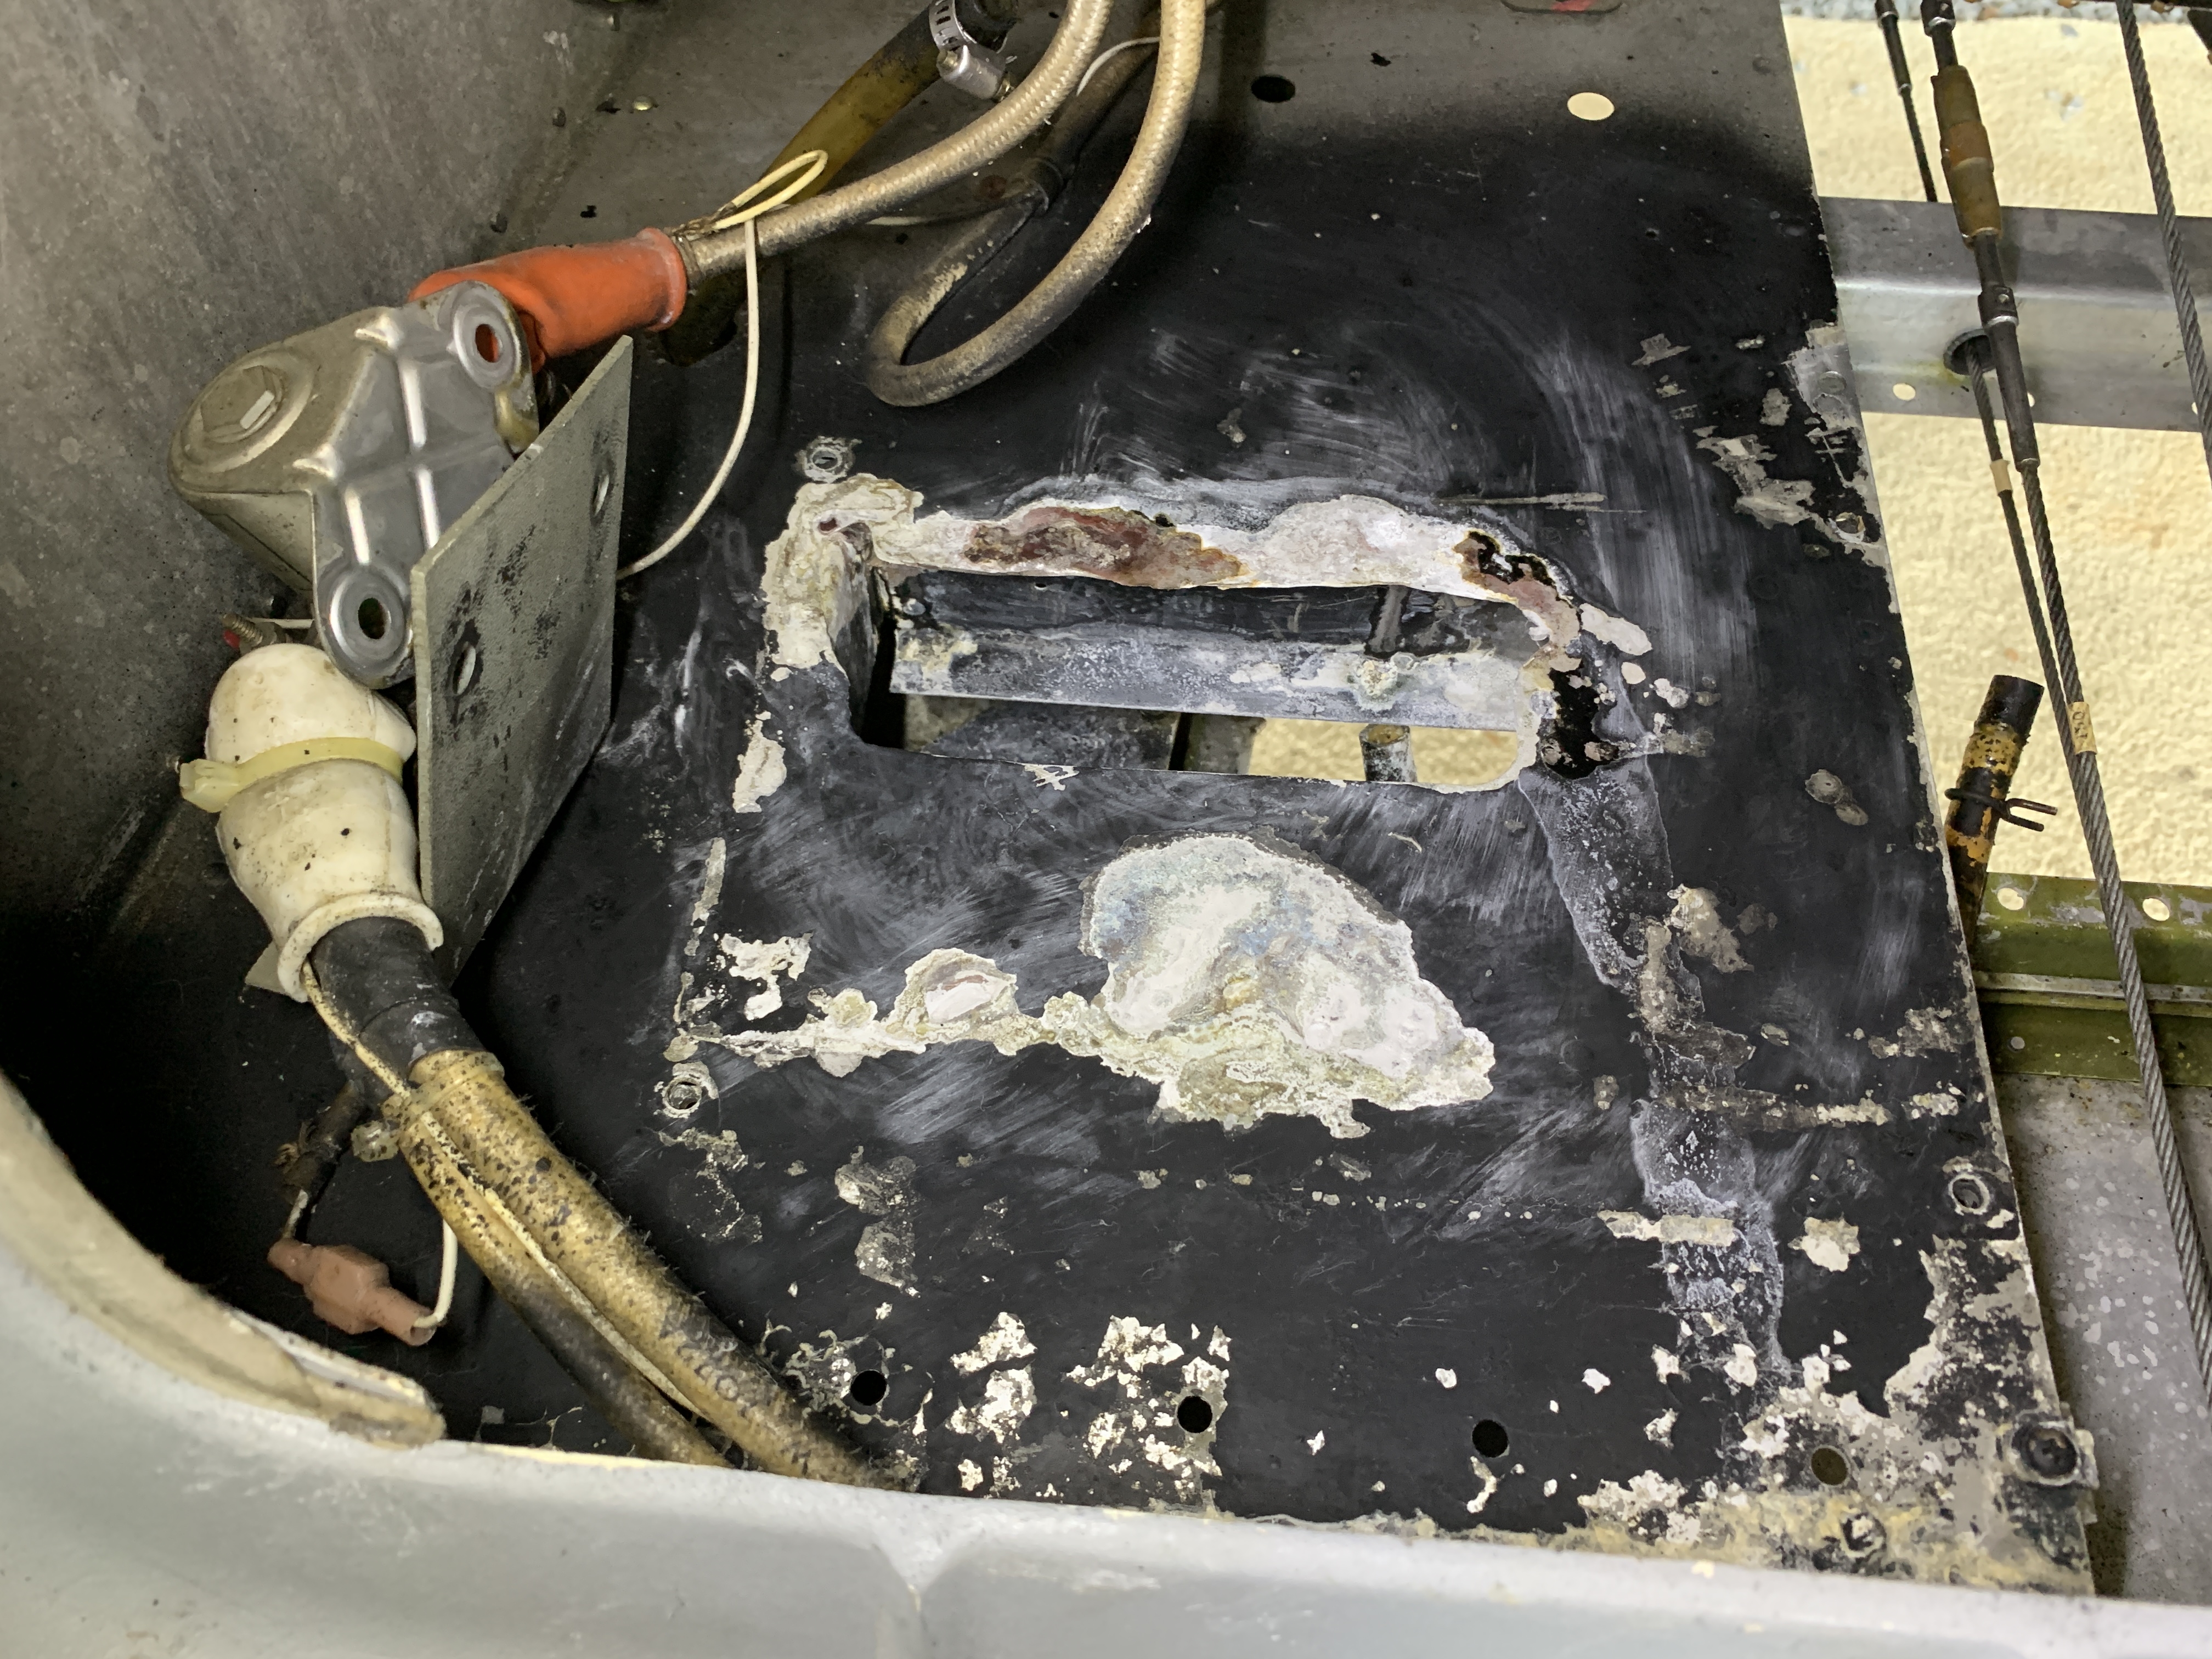
Squawk #8: White powdery growth under battery box.
At first glance, the problem appeared fairly small, with a little evidence of corrosion at the base of the battery box:
But after further investigation, it was obvious, the problem was much bigger UNDER the battery box:
Tom chose to clean and treat this area himself… smart decision in my opinion, and a win-win! I didn’t have to worry about it, and he didn’t have to pay $85 per hour to have it done.
Tom ended up removing the battery box to clean the area.
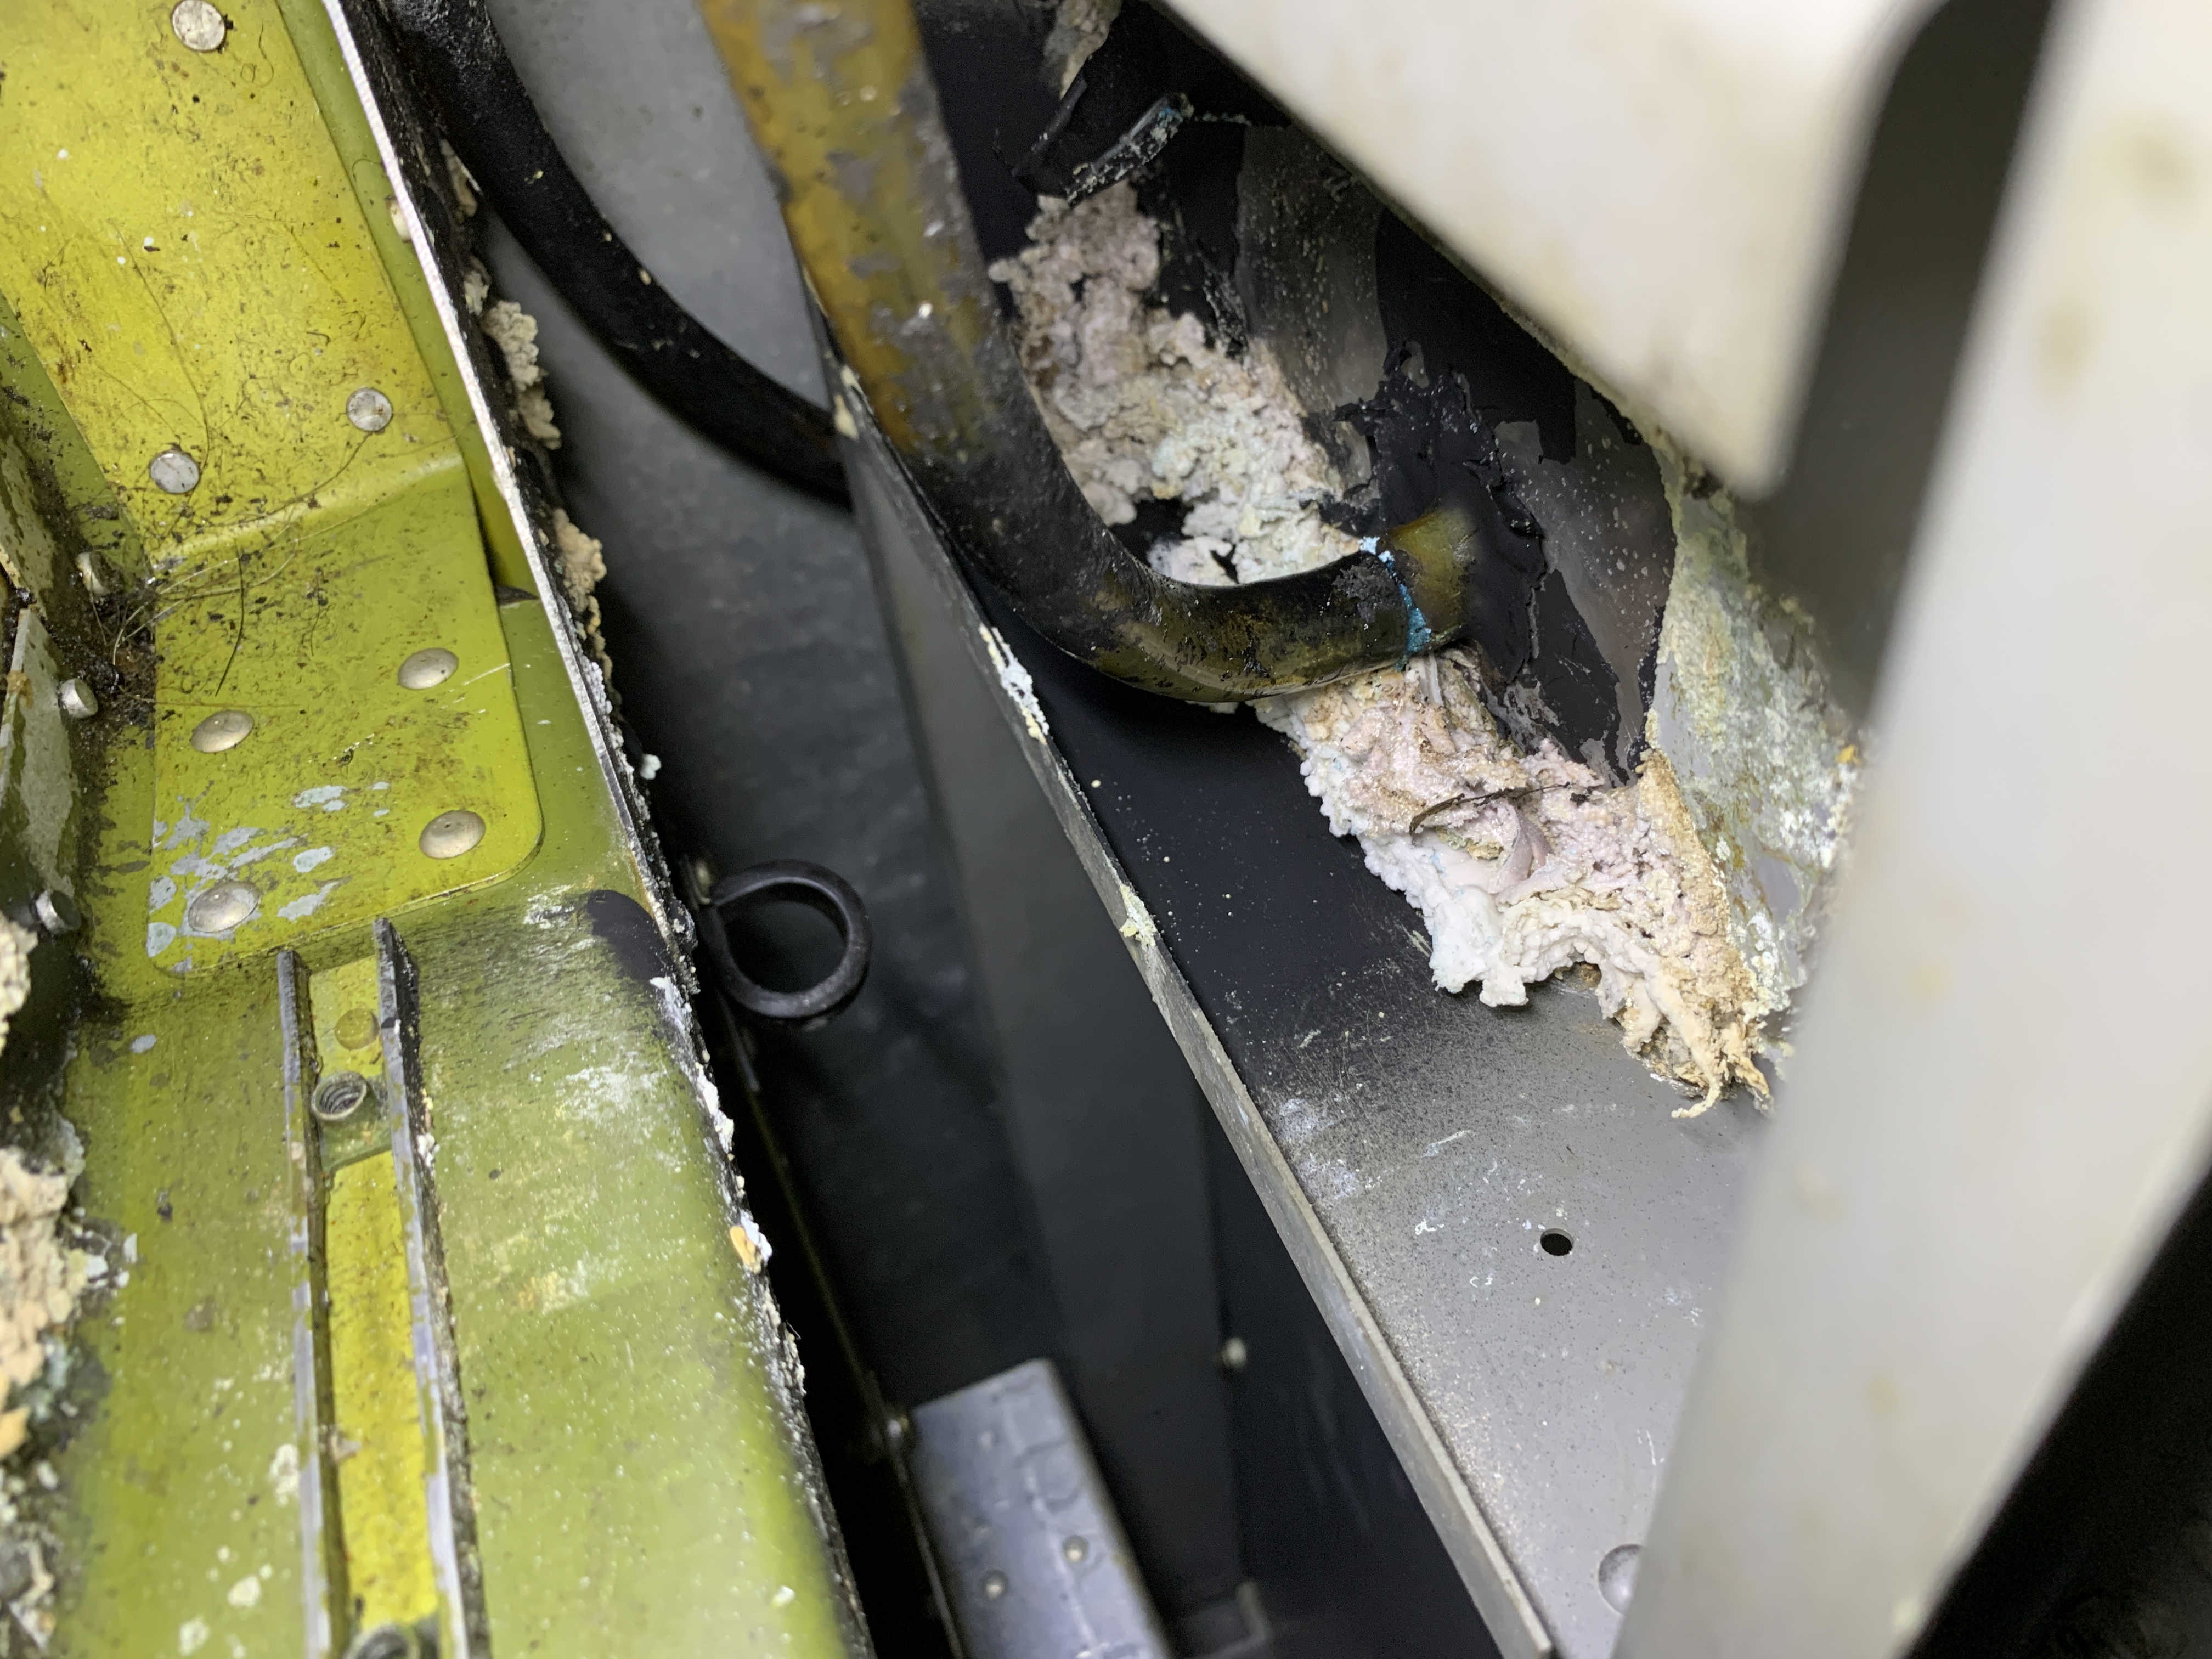
Squawk #9: Debris inside right spar area in fuselage.
This one showed evidence of a mouse nest, and a prime example of why annual inspections are important. This issue was found after removing the center floor board and inspecting inside the main wing spar carry through area.
Tom chose to clean this up as well… he cleaned the area and treated it with Corrosion-X. It was a fairly simple, but very important part of the annual.
Squawk #10: One loose seat back stop bolt on pilot seat.
This one was simple… I tightened the stop bolt.
Squawk #11: Right aileron chafing on nutplate in forward center console.
This one was a bit challenging to figure out. There was a clicking noise when I pulled the control yoke all the way back and rotated it. Finally, I discovered one of the aileron control cable ends was catching on a nutplate that had moved out of position.
I repositioned the nutplate, and the noise was gone, along with the chafing. It reminded me again, of the importance of tenaciously discovering the source of any out-of-the-ordinary noises.
Squawk #12: One clip nut broken for center floor board attachment.
We ordered a new clip nut for this one.
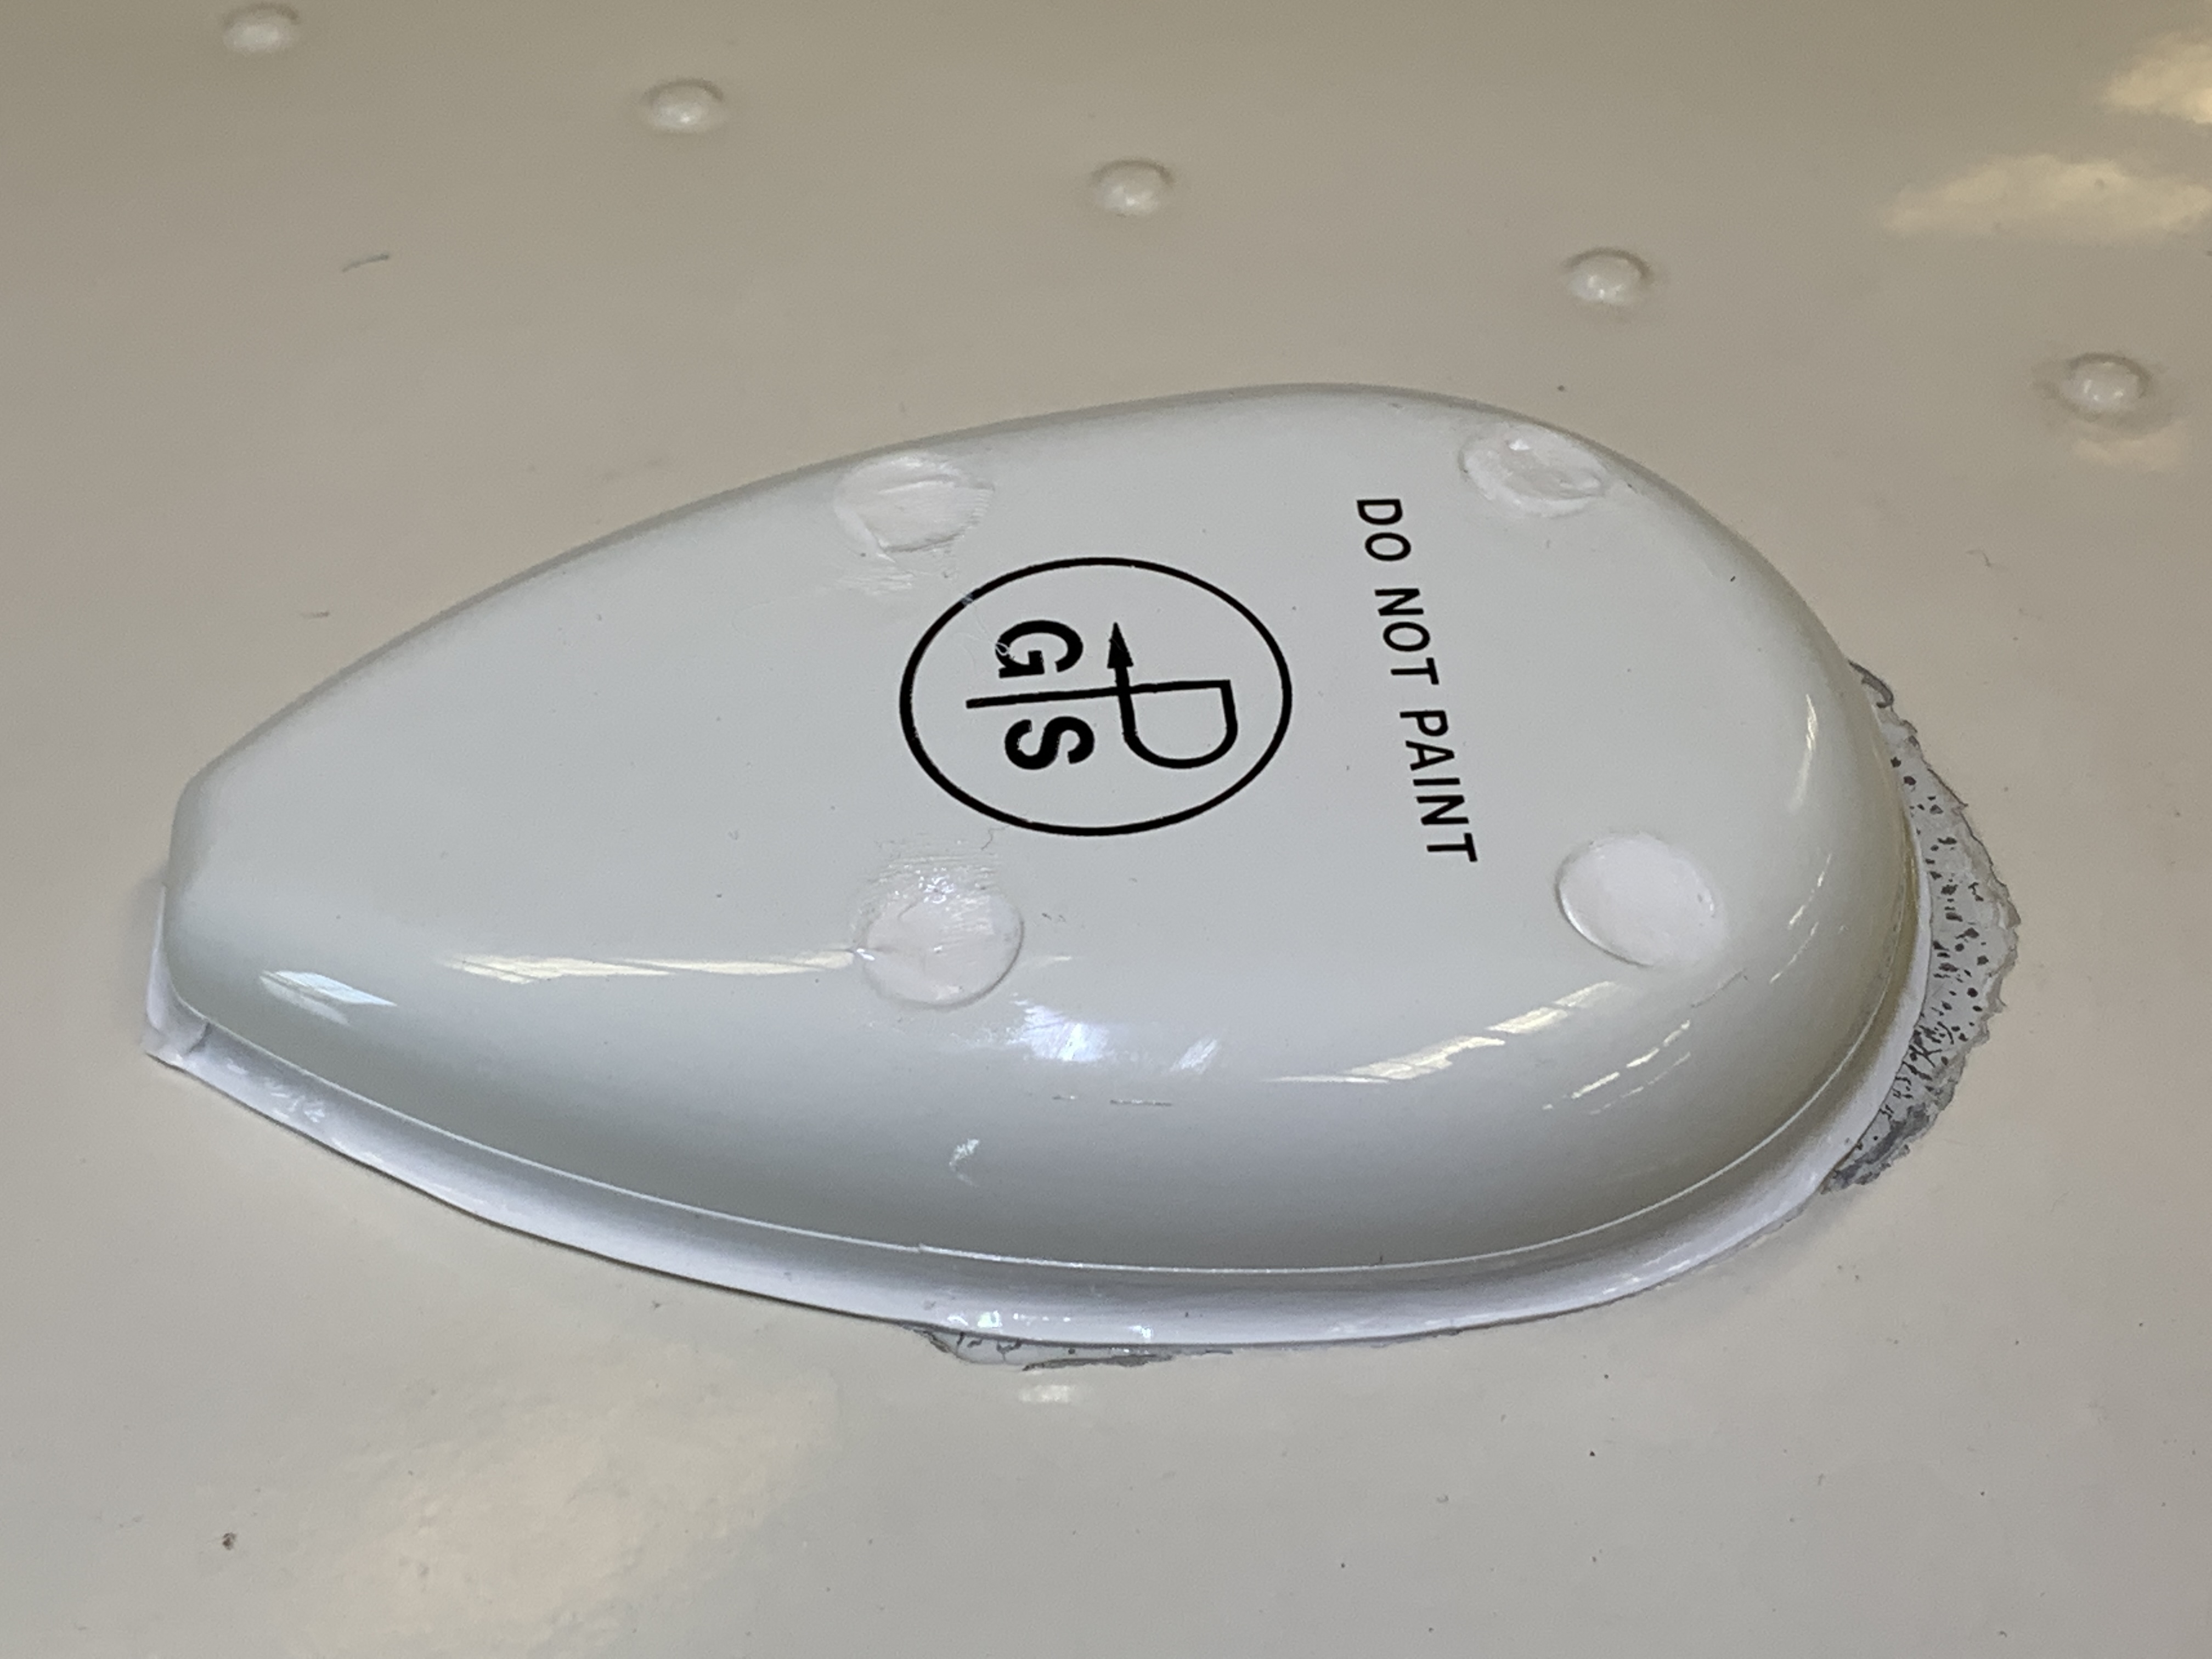
Squawk #13: GPS antenna not sealed at edge, and at screws.
I’ve seen many airplane antennas that are sealed, and many that are not. Is it absolutely necessary? Some may say not. I prefer to have them sealed around the edge, even though there is typically a gasket, just to safeguard any moisture from getting inside. And in Tom’s case, he had very recently had an avionics upgrade, with a new GPS antenna installed. One of the avionics guys came over to our shop and did a fantastic job of sealing the antenna:
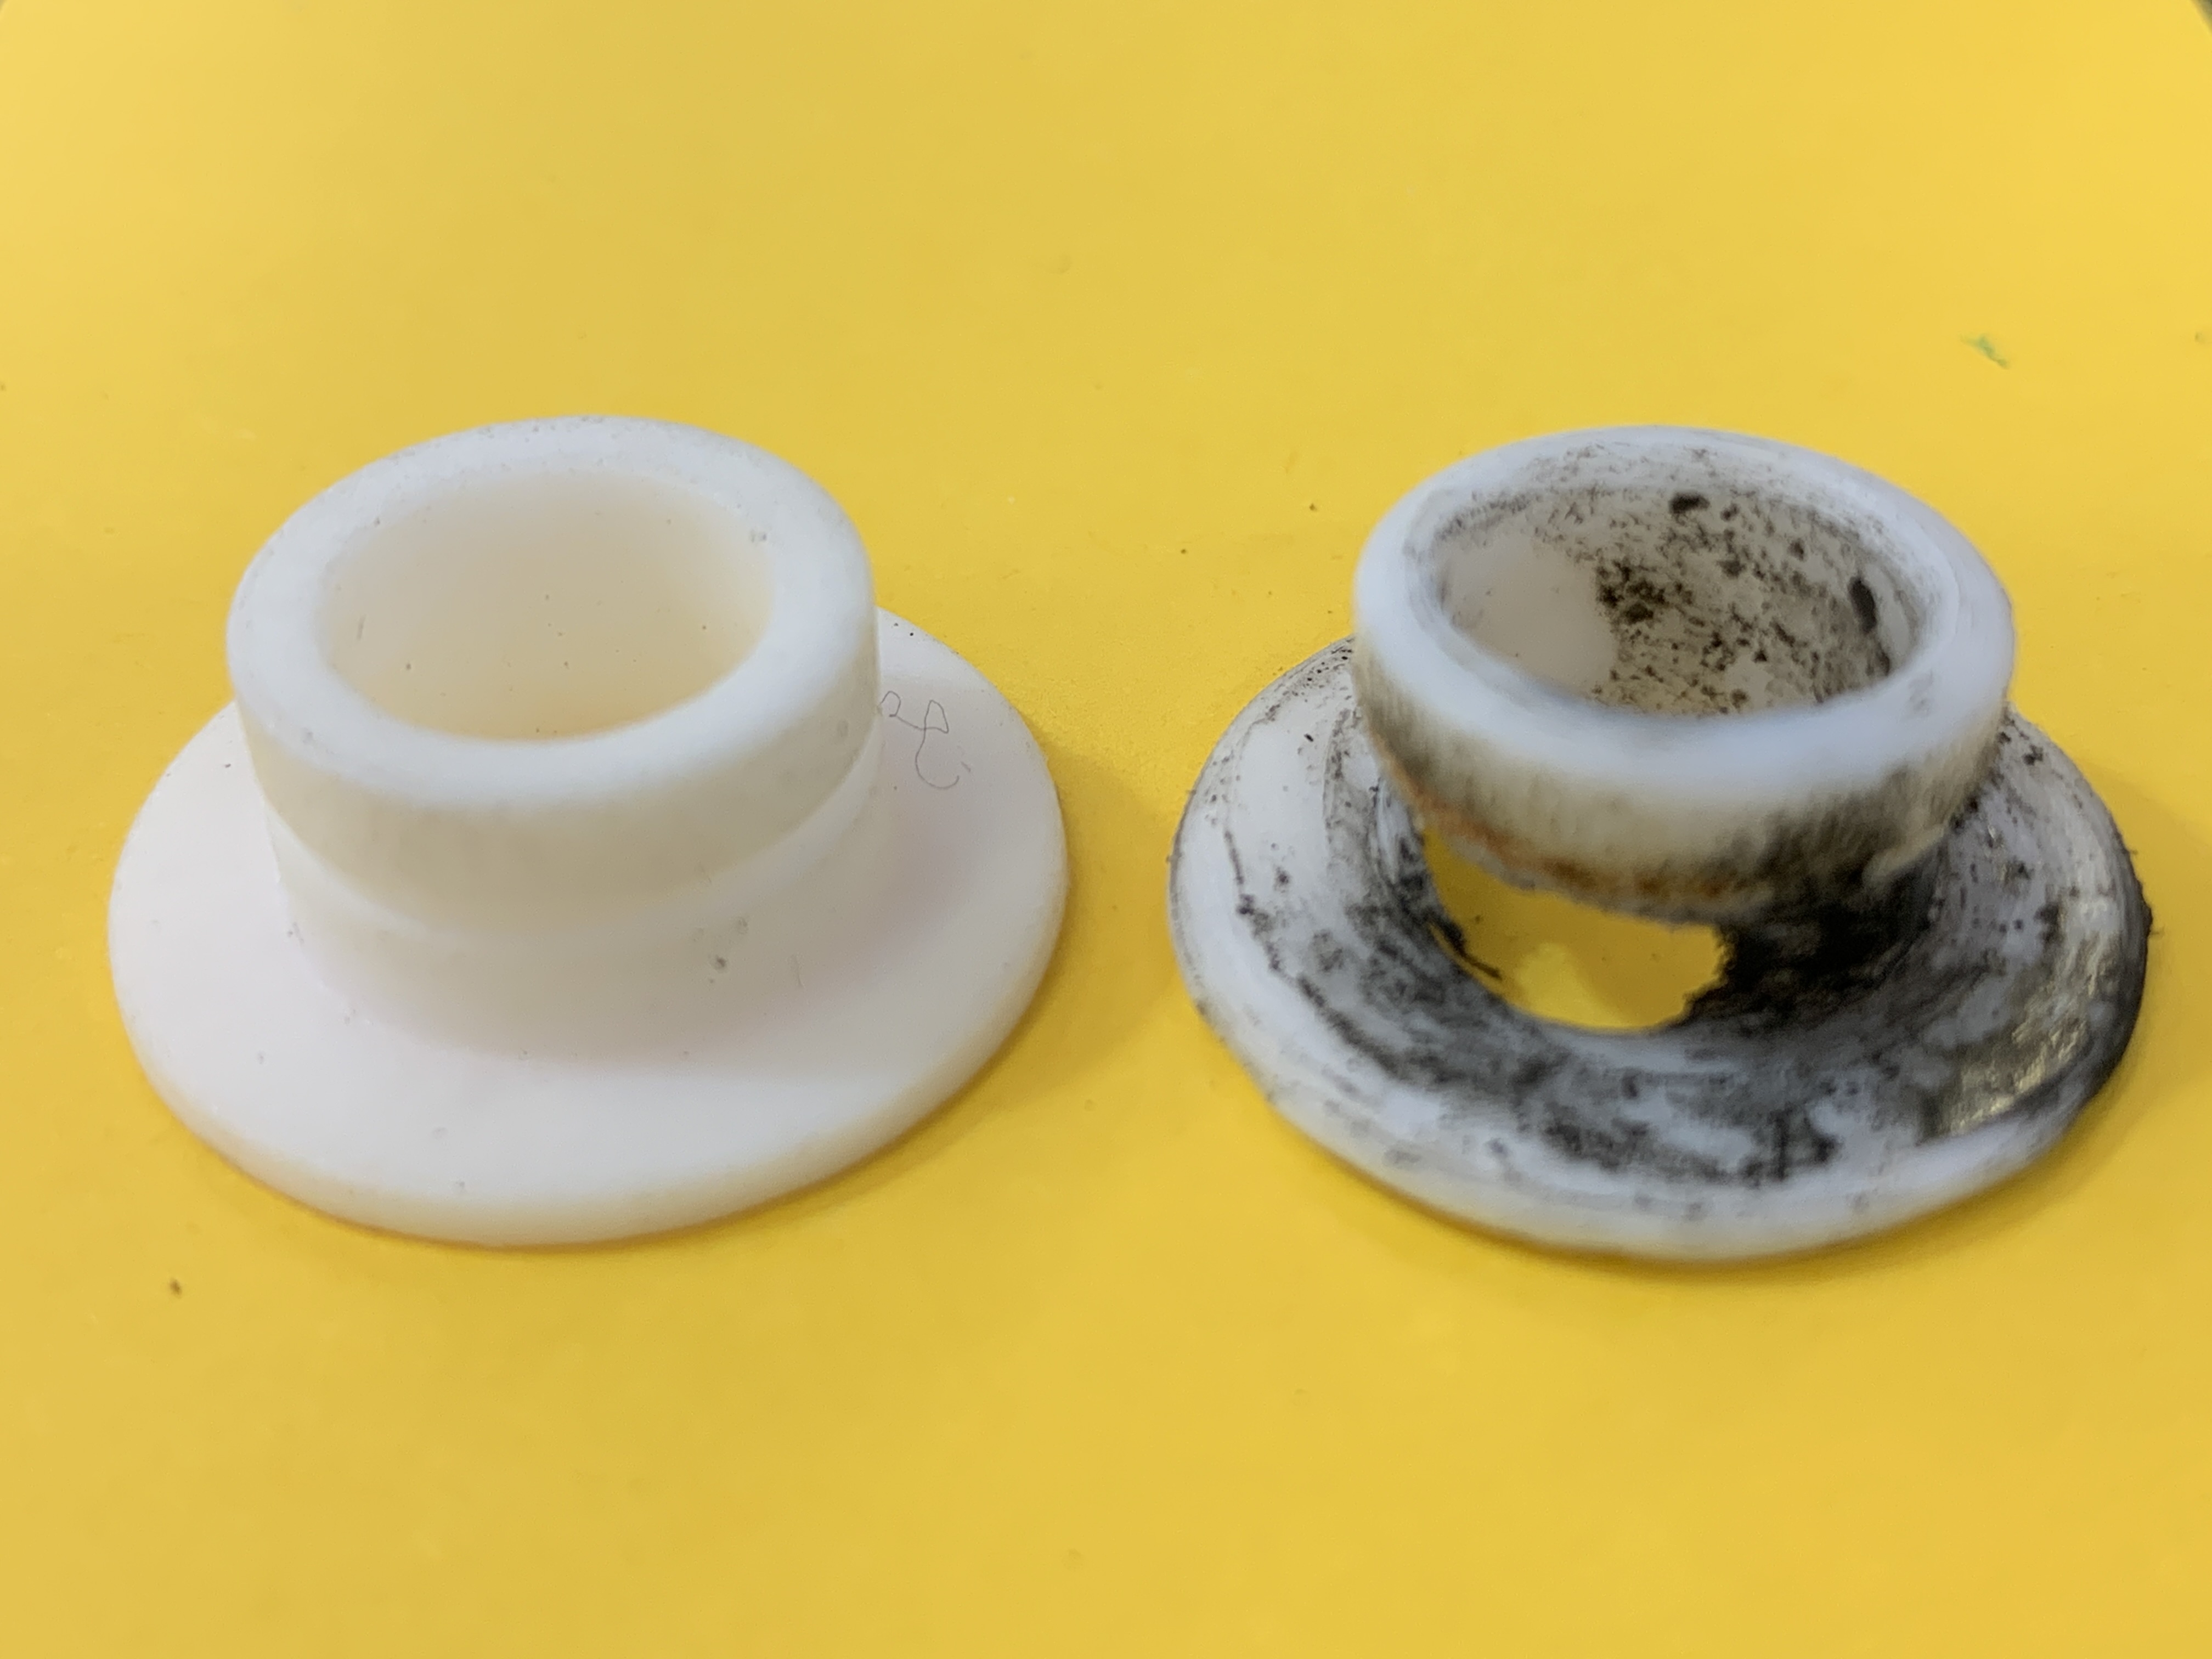
Squawk #14: One cowling pin bushing worn.
There are two of these bushings, one at each forward side of the bottom cowling. The steel pins in the top cowling fit into these bushings, and it’s important to keep them in good condition to prevent metal-on-metal wear between the pin in the top cowling, and the bushing receptacle in the bottom cowling.
In this case, it was time for “out with the old, and in with the new!” The new bushing P/N 69790-000 by PMA Products, is available at Aircraft Spruce for $9.85. McFarlane also has one, which may be better quality… theirs is P/N MC69790-000 and is sold WITH a new snap ring for $25.50.
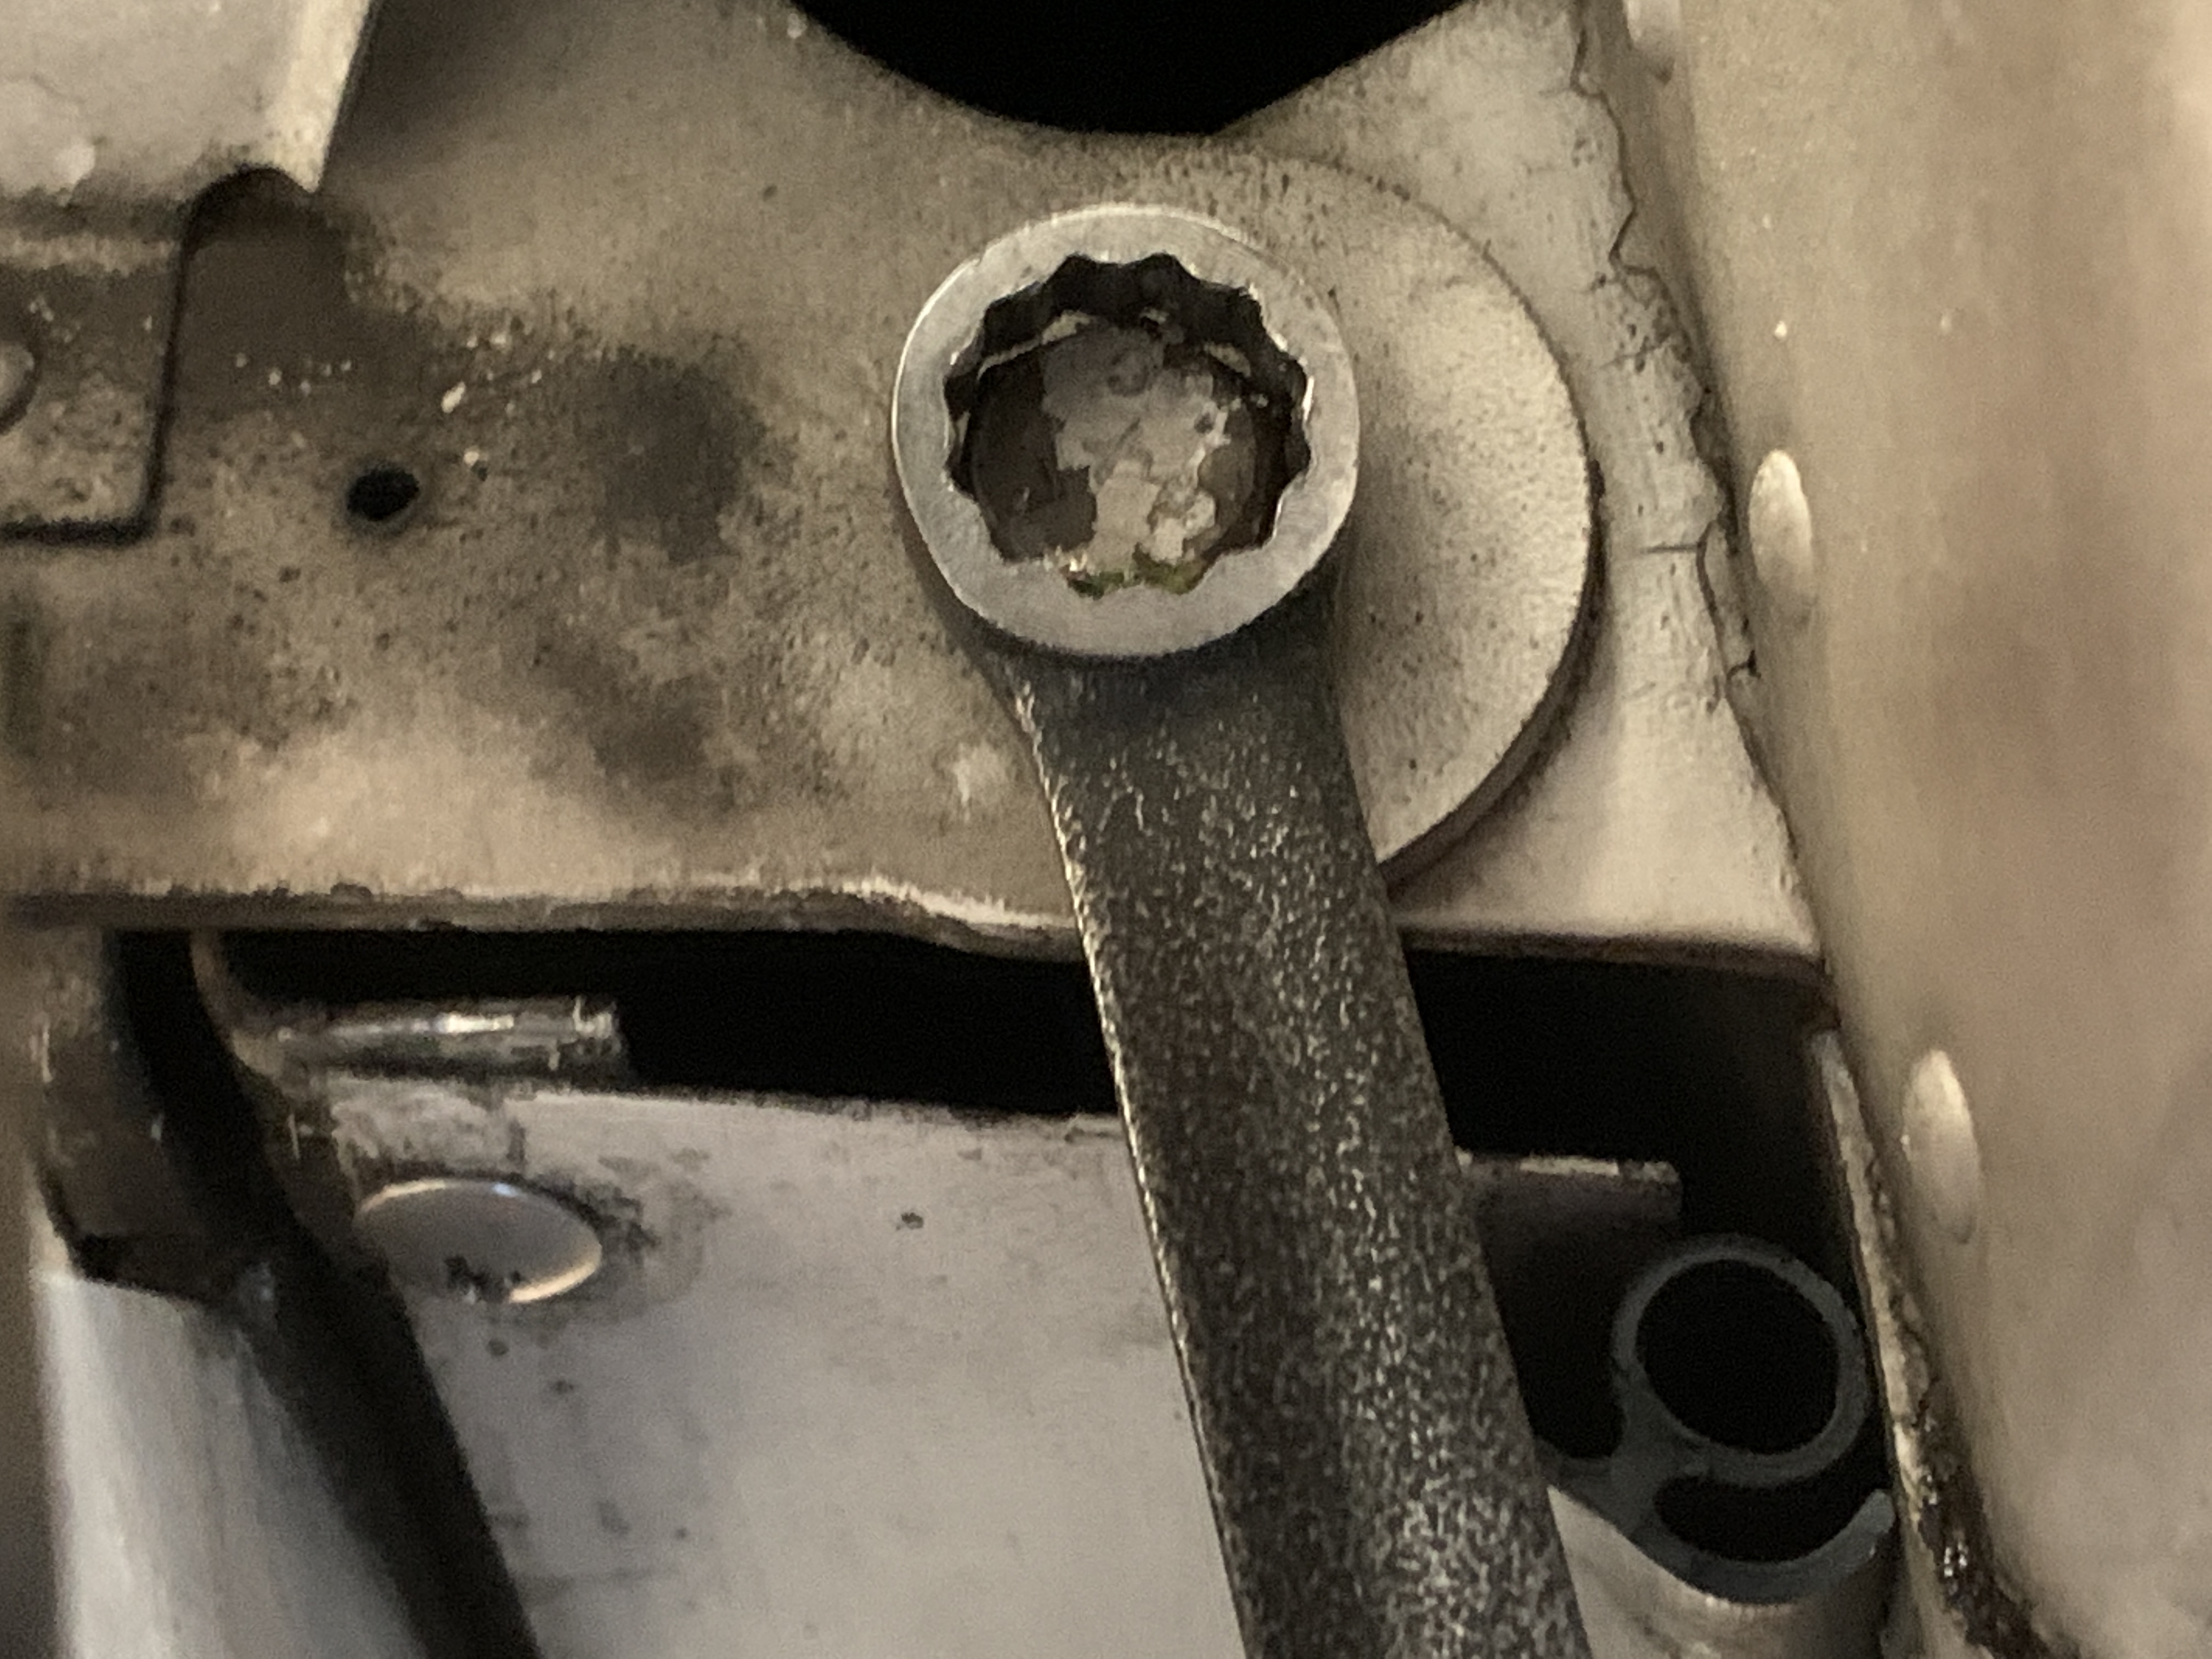
Squawk #16: Left wing, aft attach bolt slightly loose.
This the the most important one!
This is common on Piper aircraft, and needs to be checked closely!
And, it seems to happen more on the left wing than on the right. I think it might have something to do with the direction of torsional movement that happens during takeoff, landing, and flight, between the wing and the fuselage attachment.
And sometimes it makes a difference if the airplane is on jacks or not, for being able to detect the problem of looseness.
If you can put a wrench on the bolt head on the aft side of the rear spar attachment, and turn it easily, it’s a sure sign it’s too loose.
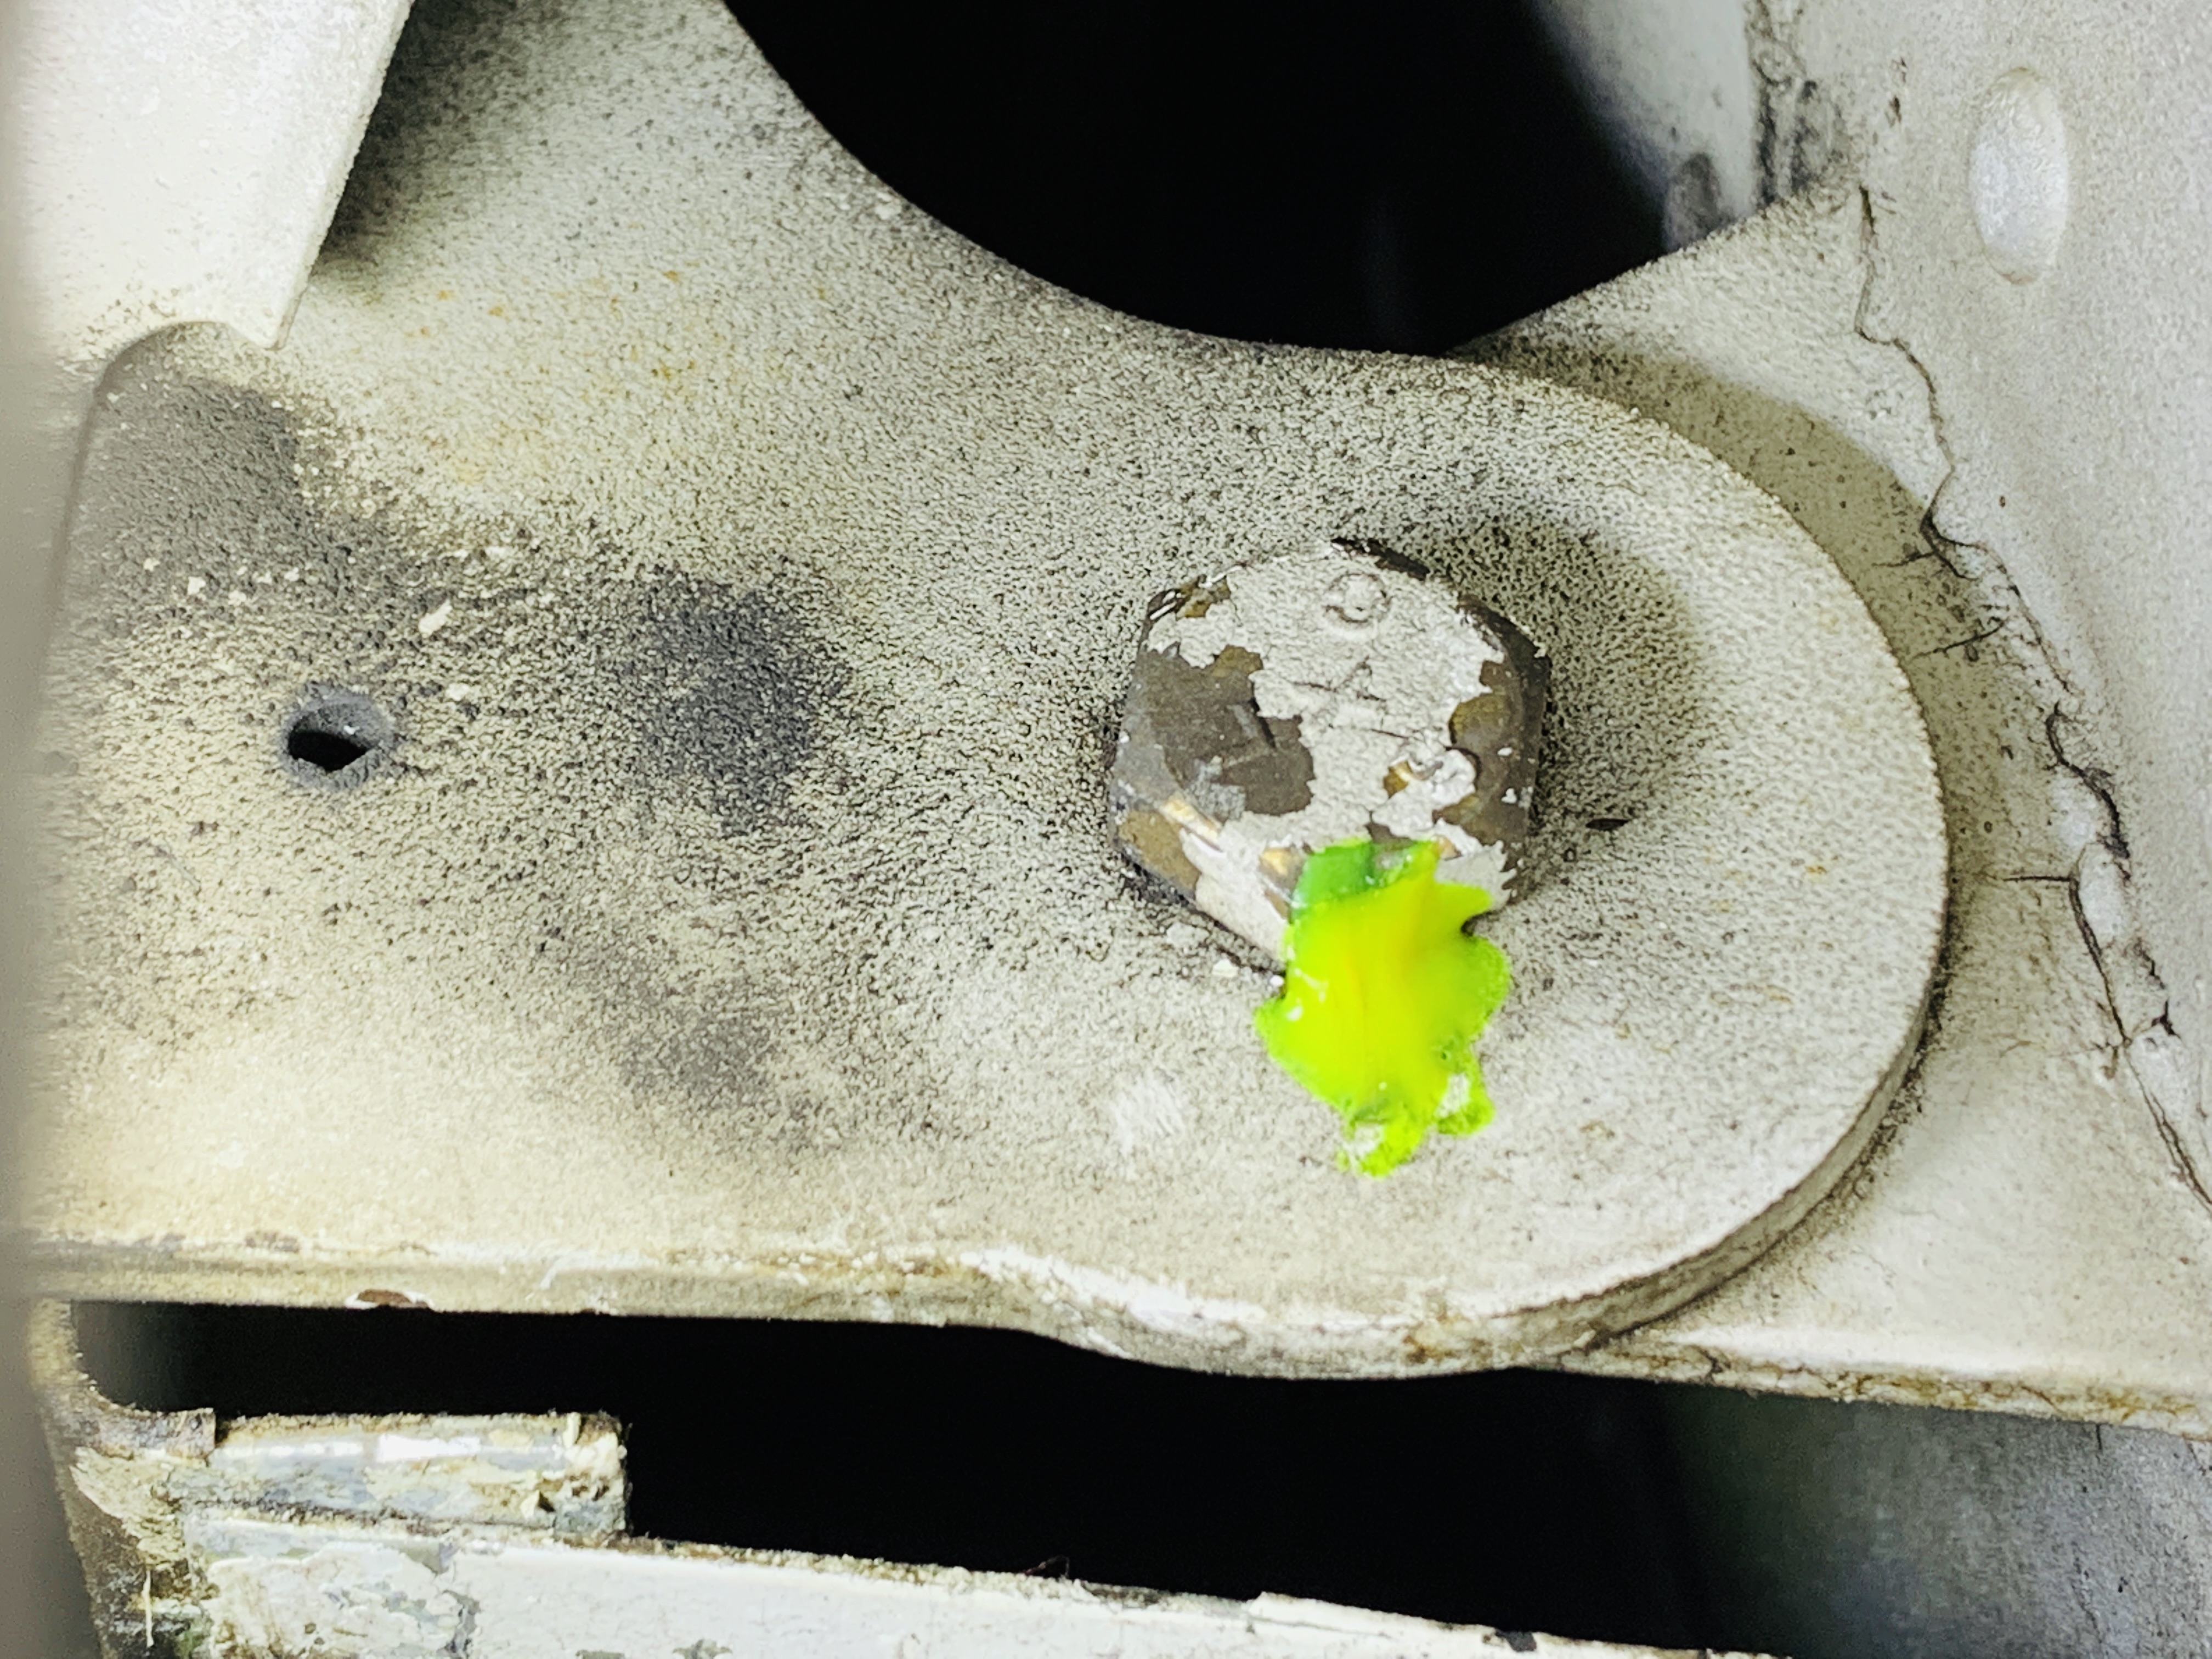
After verifying the correct torque on this bolt, it’s a good idea to put a stripe of torque putty on both the bolt head, and the locknut on the forward side, so you can tell in the future if it has moved, or not.
Also keep in mind the maintenance manual has specific instructions about torquing these bolts, along with replacing hardware and even installing a repair kit in some cases. Check your maintenance manual for specific instructions, as this is an absolutely critical area.
Another related issue with this aft spar area is the potential for corrosion between the aluminum aft spar of the wing, and the steel plate attached to it, where the bolt attachment is located.
Here’s a great video by Airframe Components showing this critical area and inspection per Piper SB 1244B:
Thank you Tom, for the privilege of working with you on your airplane!
After all the previous work Tom has done to keep his airplane in good condition, and after the work we did this year on the annual, I’m very hopeful we’ll be able to complete his annual next year, in one day! We’ll see how it goes.
Other resources from Dean Showalter:
Video training course: Safety Wire Like A Pro! (Learn to perform safety wiring that keeps everything tight, and makes it look like it was done by an experienced A&P! Don’t settle for mediocre… develop the skill to do your safety wiring well! Click here to check it out. And remember, there’s a money back guarantee… if you’re not satisfied, I wouldn’t want to even keep your money. Try it out for 30 days, and if you’re not satisfied, I’ll gladly give you a full refund… no questions asked.
Need help evaluating exhaust valve pictures? Grab a copy of my Exhaust Valve Borescoping Guide! It will help you understand what to look for when borescoping your exhaust valves… it’s just the resource I wish I had when I was getting started with borescoping. Click here to check it out.
Cessna 172 Common Parts List: Do you need a quick, convenient place to check common part numbers for your Cessna 172? Click here to get a copy of this simple resource you will love!
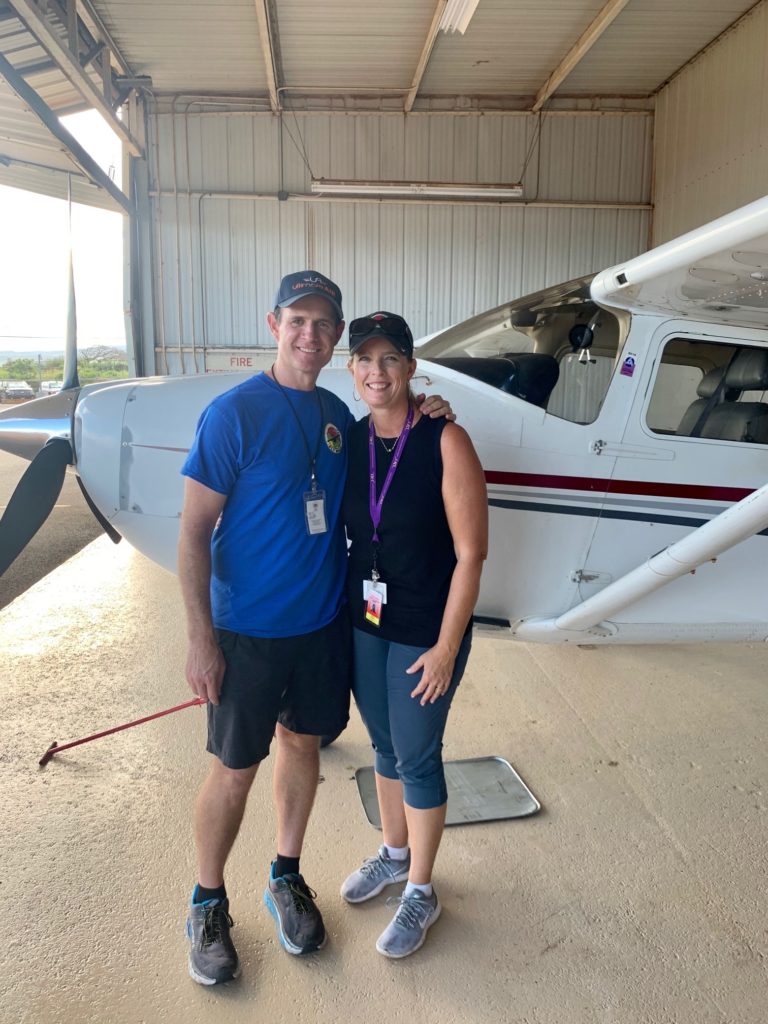
In today’s episode, we get to hear how John and Leslie got into aviation, and their move from Arkansas to Maui. It’s a real adventure, and I’m sure you’ll be inspired listening to their story!
Be sure to also listen to their latest episode of the Fly Maui Podcast, “Don’t Let Setbacks Define You.” What a timely message for all of us! Listen on your favorite app, or click here for the Fly Maui HI website.
To learn more about John and Leslie and what they’re doing, check out the following links:
You can also find flymauihi and thealoha360 on Instagram.
New resource for Cessna 172’s: I’ve put together an easy-to-use list of common Cessna 172 parts, with part numbers. I’d love to send you a copy, and you can find it here:
Even if you don’t have a 172, take a look at it, and let me know what you think… I might consider making a similar resource for some other types of airplanes as well.
In today’s episode, I’m super excited to introduce John and Leslie Caubble to you!
They’ve become good friends of mine in the last couple years, and they have a really inspiring aviation journey.
We put together some Cessna 172 maintenance related questions, and I thought it would be a lot more fun to have them join me for this episode, rather than me talking about these questions by myself.
In a future episode, we’ll have them back again to talk about their personal aviation journey.
Thanks, John and Leslie, for being a part of this episode!
To learn more about John and Leslie and what they’re doing, check out the following links:
You can also find flymauihi and thealoha360 on Instagram.
I thought this might also be a good time to provide a free resource for owners and operators of Cessna 172’s… it’s a list of commonly needed parts, along with part numbers.
It’s completely free, and I’m confident can save you some significant time and frustration… grab a copy at the following link:
You might be wondering, “How is that possible,” or “What kind of shady operation is that?!” Same here. When I first heard about the $200 annual inspection, I was skeptical… until I actually researched what Jim does and how he does it. That prompted me to call him, and he was gracious enough to take some time to talk with me for the podcast. Thanks Jim!
In talking with Jim, I discovered he does a very thorough, AND very efficient annual inspection with the carefully selected owners he works with. He does this by maximizing the involvement of the airplane owner, and by requiring a very specific process of preparation before he even puts his eyes on the airplane.
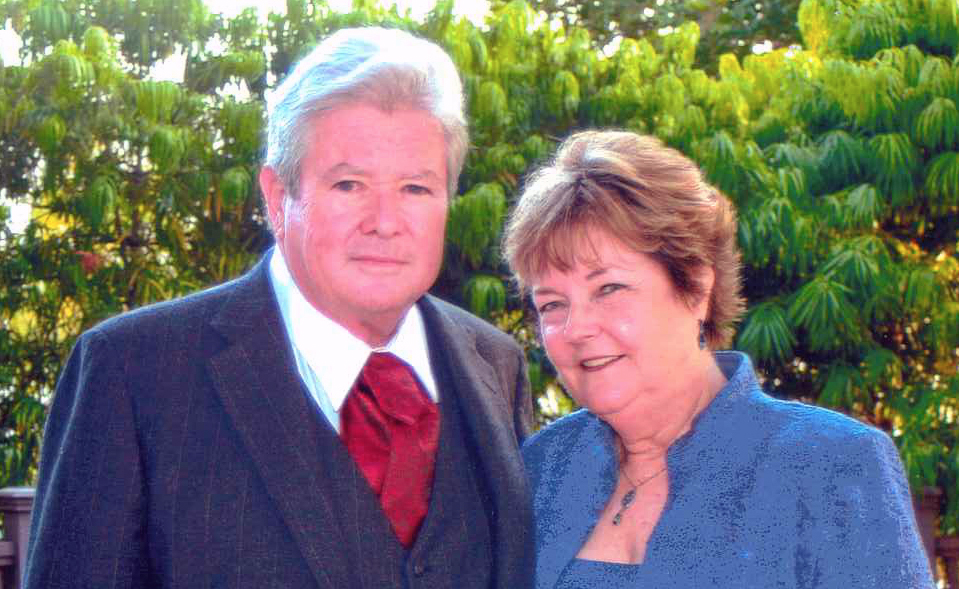
Jim Weir has been involved with aviation for many years, and has a wealth of wisdom and experience to share with us.
Although the following picture may have been a few years ago, Jim is still very much full of life and energy… I discovered that the day I spoke with him!
And somehow, I’m guessing Cindi has been a very significant part of Jim’s success in aviation and in life 🙂
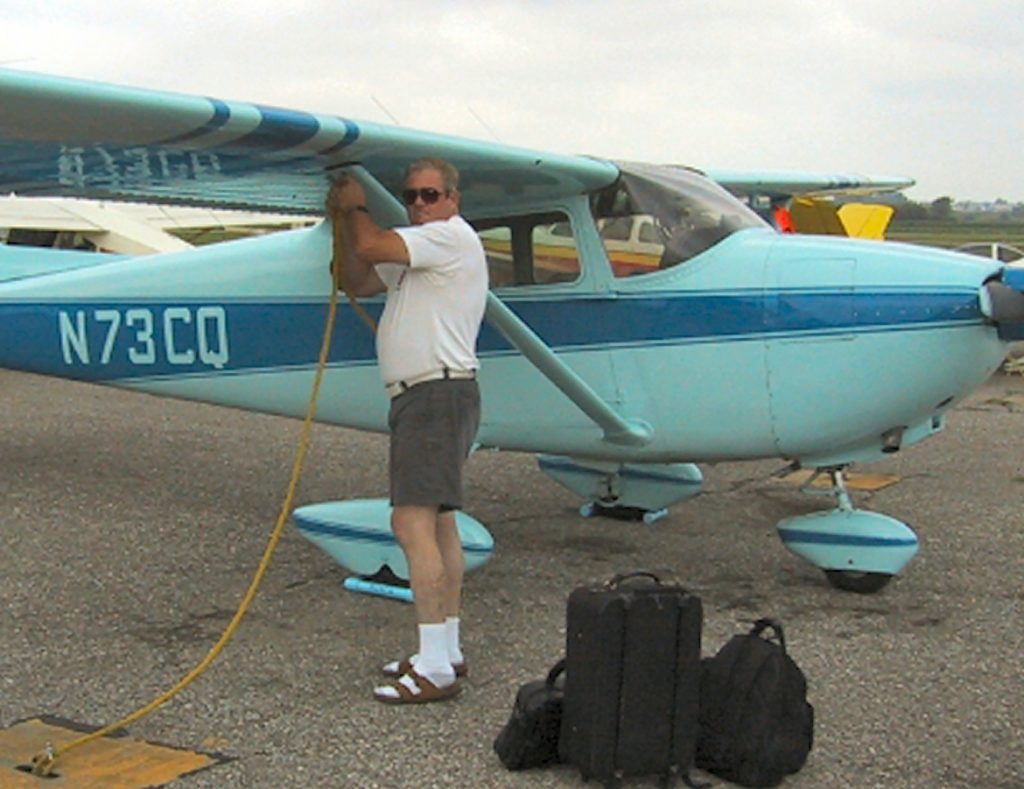
In the following picture, Jim ties down his Cessna 182 in advance of a thunderstorm on the way to Oshkosh (Iowa City) in 2002.
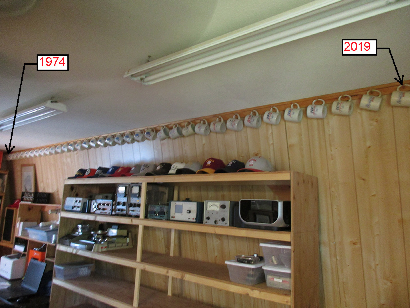
And here’s a fun picture: Jim has collected a coffe cup from Oshkosh, every year from 1974 to 2019!
I have to admit, Jim’s approach to annual inspections is not for everyone, but for the owners of small planes who want to be deeply involved in the process, it’s certainly a fascinating option to consider, especially if you’re anywhere near the Sierra Nevada foothills.
Maybe one day I’ll be able to travel clear across the country to visit Jim in person and see his operation… I would LOVE that, for sure!
Thank you Jim, for talking with us in this episode! Keep up the good work!
In today’s episode, I’m happy to introduce my good friend, Aram Basmadjian! Aram has a very interesting aviation journey, and it was fun talking with him for this episode.
Aram flew for Skywest Airlines for about 8 years, which was a great foundation for the flying he does today.
Aram enjoys going places with his wife and daughter in his 1962 P35 Bonanza.
He’s also the chief flight instructor at a local college, which allows him to use his skill and passion for teaching pilots effective procedures for instrument flying.
And one of these days, I’m hoping to make a trip to Pennsylvania to have Aram work me over in the flight simulator!
Aram is also a phenomenal organist, and is Vice President of Sales at Allen Organ Company in Macungie, Pennsylvania. According to the website, “Aram Basmadjian is one of the most accomplished organ virtuosos in America.” Wow, well done Aram!
I heard years ago that musicians many times make really good pilots, and I think that’s certainly true in Aram’s case.
So back to the Bonanza, Aram shared some really great tips and thoughts in this episode, and here are a few highlights:
Be involved in the maintenance of your airplane!
Plane Logix is one good solution for digitizing your maintenance records.
When digitizing your maintenance records, transcribe them yourself because you will learn so much valuable information.
Good quality maintenance is expensive… be prepared for it.
And finally, Aram shared something really interesting about his specific airplane… for the first 200 hours or so of his airplane’s life, Larry Ball’s name is in the records because he flew the airplane. Larry is well known for his time as the “Bonanza Program Manager,” and for his books, “Those Incomparable Bonanzas,” and “They Call Me Mr. Bonanza.”
Very interesting indeed. Everywhere Aram goes, he seems to attract a lot of interest in his Bonanza. It is indeed a great airplane.
Here are some links where you can learn more about Aram along with his Bonanza and his aviation adventures:
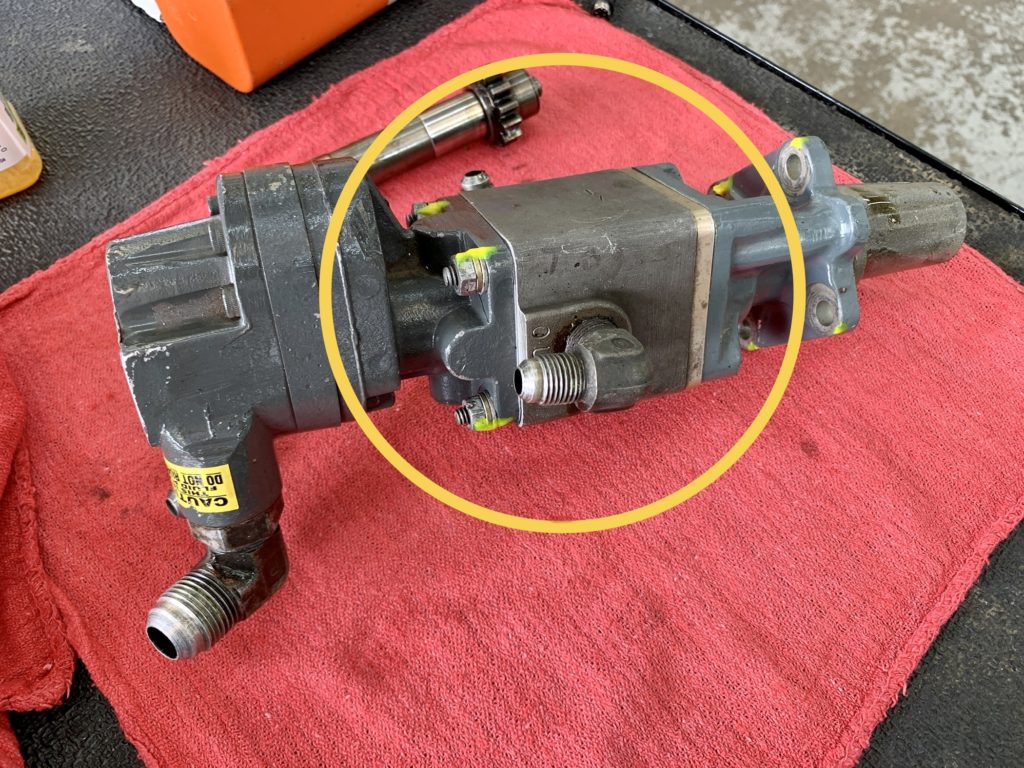
The part in the yellow circle is an oil scavenge pump that returns oil back to the engine oil sump after it lubricates the turbocharger center bearings. The right side of the assembly is the adapter that fits into the engine accessory case. The left side of the assembly is the hydraulic pump that is used for the landing gear system, the flap system, and the nosegear steering system in this Aerostar 601.
Inside the oil scavenge pump, there are two oil seals, (sometimes called garlock seals,) and two o-rings.
In today’s episode, we discuss this type of pump that reminded me of A&P school from years ago… it’s called a “gerotor pump.” It has a gear within a gear.
Listen to the audio for the details on fixing this oil leak.
We also talk about a Mooney M20K engine in this episode… we lapped the exhaust valve in cylinder #5. We might end up checking the exhaust valve in cylinder #2 as well to make sure it’s not sticking, after the owner had some classic “morning sickness” symptoms as described in Mike Busch’s recent article about sticking exhaust valves. The article is well worth reading.
And while we’re on the subject of exhaust valves, I wanted to remind everyone this resource is available for free… for now. If you want to learn about what to look for when you’re borescoping exhaust valves, this is a great resource. I’m considering moving the guide into the paid section of resources, so grab a copy while you can.
Click here and sign up with your email, and you’ll receive a free copy of the guide, for at least another two weeks.
Post it on Facebook or Instagram, or wherever you like, so people can take advantage of it while it’s free.
Also in this episode:
A big “thank you” to Jeff Claridge who contacted me and did a conference call with me to demonstrate the smoke tester he has to detect leaks in engines. He suggested this would be a great tool for checking exhaust and intake systems for leaks on airplane engines… after seeing it in action, I totally agree! Thanks Jeff!
The tester Jeff has is an Autool SDT202. (If you make a purchase with the following link, I’ll get a small percentage… thanks so much!)
I recorded a conversation yesterday with my friend, Aram Basmadjian, that will appear in a future episode. Be looking for that one. Aram owns and flies a V-tail Bonanza.
I also recorded a second conversation yesterday with Jim Weir, a gentleman I only recently became aware of. He has a very unique and strategic way of doing “owner assisted” annual inspecions. That one will also be in a future episode.
And… it’s risk-free. Within 24 hours after the call, if you are not completely satisfied with the results, I’ll gladly refund 100% of your money… and we’ll still be friends 🙂 Your complete satisfaction is a top priority for me.
So schedule a one-hour call with me, Dean Showalter, today.
Listen to the episode to hear about a couple challenging issues on a Cirrus SR22 aircraft.
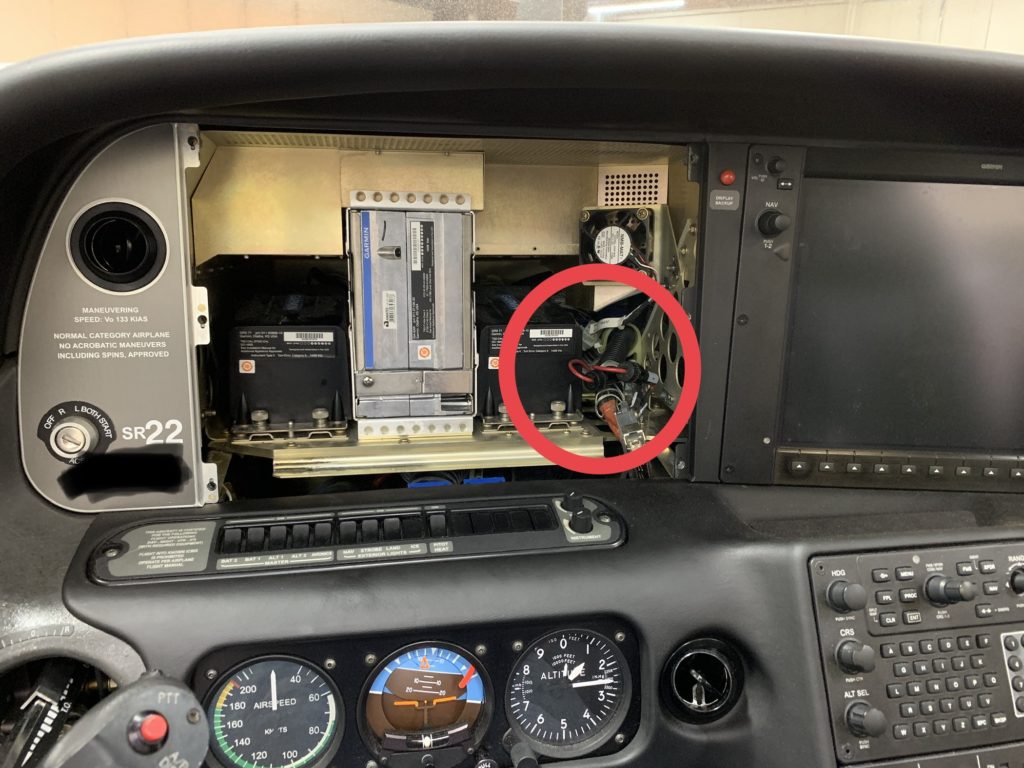
First, the TVS’s, or “Transient Voltage Suppressors.”
There are two different types of these TVS’s. One type is installed in the wiring bundle and is hard to see because it’s mostly covered with heat shrink. The other type is a device about 2 1/2 inches square and about 1/2 inch or so thick. The inline type, along with the corresponding fuses, is pictured in the red circle.
These are used to help guard against lightening strike damage. In this particular airplane, the manual indicates there are 10 TVS’s. Each one has its own fuse, and is to be visually checked at the annual inspection.
Here’s a closer view of a couple of the fuses for this system.
The various TVS’s are located in different areas, including some in the center console area, accessible by removing the panel near the copilot’s left leg.
That’s one topic we discuss in this episode (Transient Voltage Suppressors.)
The second topic is seatbelt airbags.
The AmSafe system includes an EMA (electronic module assembly,) one inflator for the pilot seat and one inflator for the copilot seat, inflatable airbags incorporated into the seatbelts, and the wiring to connect all these components, including a test plug.
The test plug is used at the annual inspection. A test box is connected to the test plug, and the tester gives a pass/fail indication of the various parts of the system.
We talk about this system in today’s episode as well.


Recent Comments