Podcast: Play in new window | Download
I received an email recently from Spence, the owner of an S35 Bonanza with a Turbo-Normalized IO-520 engine. He included a picture of his #2 cylinder exhaust valve. Here’s what it looked like:
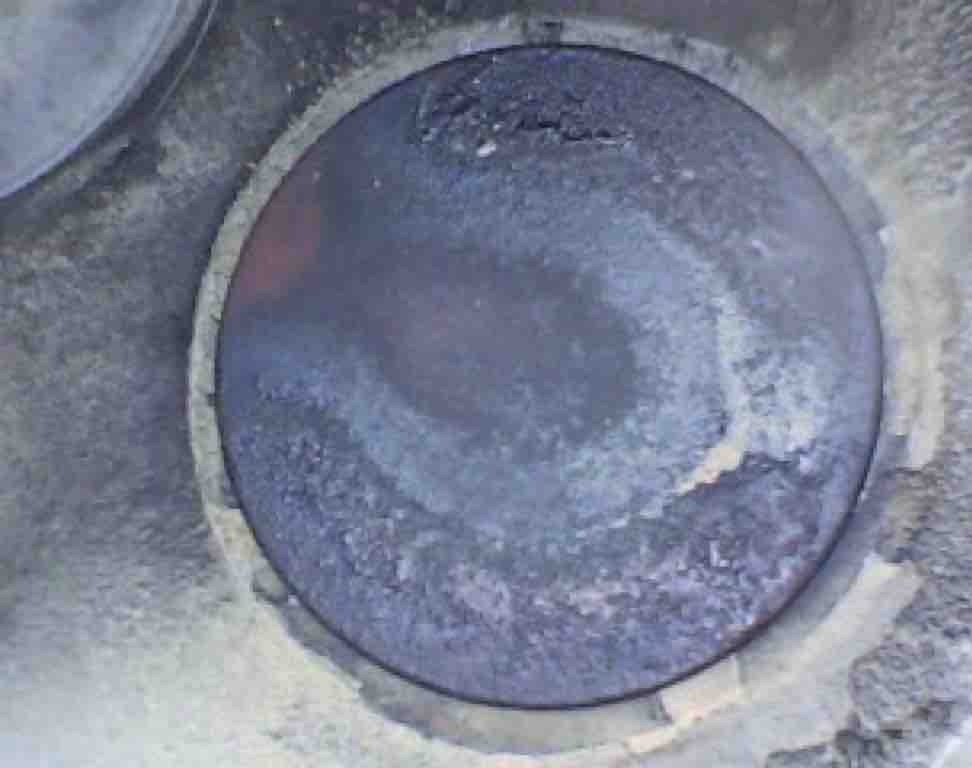
At first glance, my reaction was something like, “Oooh, that’s ugly!”
The most concerning area is the spot at the 10 o’clock position. There’s also a little concerning area at the 2:30 position as well, but not as much as the 10 o’clock position. The normal deposits seen on the top and bottom edges of the valve have been burned away over at the 10 o’clock position. The small red spot is concerning, but not as concerning as if it was green. As it says in the excellent exhaust valve poster “Anatomy of a Valve Failure,” produced by AOPA, “Green means stop!” This is because the color green has been seen on valve edges that are imminently in danger of a piece breaking off.
For sure, Spence’s borescope photo is a classic visual presentation of a burning exhaust valve. Perhaps you’re wondering, “What does “burning” mean?” And that’s a great question. It means there’s an area that is not sealing well between the edge of the valve and the valve seat when the valve is closed. This condition allows very hot exhaust gases to rush through a small gap between the valve and seat at just the wrong time when those gases are the hottest, and over time if left uncorrected, the edge of the valve can suffer extreme heat damage and finally be in danger of a piece of the valve breaking off.
Not something you want to risk while you’re flying along in your Turbo-Normalized Bonanza! (Or any airplane for that matter.) But an airplane with a turbocharger is especially vulnerable because even a small piece of an exhaust valve would be enough to completely trash the turbocharger.
The next question might be, “How would you know if an exhaust valve was burning?” This is also a great question. You might see a drop in compression, but the best way by far to find a burning exhaust valve is with a borescope. With some training in what to look for, a burning exhaust valve is very noticeable, as in the photo above.
Spence did a great thing when he found this burning valve. Finding it was one thing, but deciding what to do about it was the next big question. In his email, Spence asked, “Do you believe this is a candidate for lapping in place and is it something you would be able to do for me?”
Spence was very interested in a less-invasive way to remedy his burning exhaust valve, especially since he has had other cylinders fail this way over the years, and this particular cylinder had only 368 hours on it (he actually paid a reputable engine shop to take the new Superior cylinder, check the exhaust valve tolerances, and perform a 3-angle cut before installing the cylinder.) He was understandably weary of changing cylinders.
I agreed to give the lapping procedure a try, with a couple conditions. One, we would not want the exhaust valve guide to be significantly worn. And two, the edge of the valve and valve seat must be in reasonably good condition.
On the agreed upon morning, Spence showed up at Classic Aviation at KSHD, and we got to work. We got things opened up and before removing the valve springs, we did a cold compression check and could not get more than 30/80 psi, with significant leakage past the exhaust valve. A healthy cylinder should be a lot more than 30/80, even with a cold compression check.
We got some borescope photos of the valve edge and seat, and aside from the normal spotty appearance, things looked quite good.
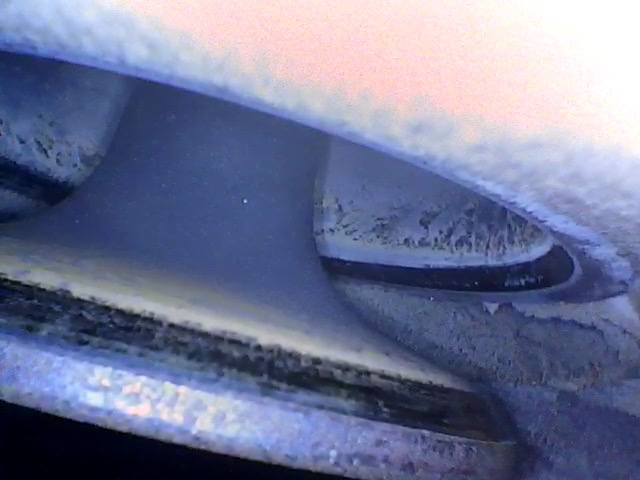
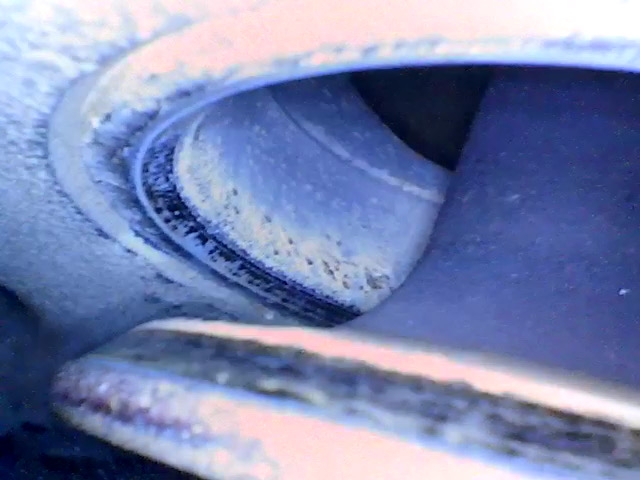
After removing the valve springs, our second condition was also met, in that the valve guide did not have a substantial amount of wear. I checked this by wiggling the valve stem up and down and side to side, in various positions.
Now it was time to perform the lapping procedure. “Lapping an exhaust valve” involves removing the rocker cover, exhaust rocker arm, and valve springs. This allows you to carefully push the valve into the cylinder far enough to see the edge down through the top spark plug hole. In this position, you can carefully apply valve grinding compound on the seating area of the valve, rotating the valve as needed to lightly coat the full 360 degrees of seating area. At this point, pull the valve back against the seat and rotate it back and forth using whatever method you decide, in order to restore a good smooth seal between the valve and the seat. I use a wood dowel rod chucked in a cordless drill, with a piece of thick vinyl tubing clamped between the dowel rod and the valve stem, which acts as a shock absorber and works very well. It may take several rounds of applying the compound and lapping the valve, and rinsing it off with solvent in between times, letting it run out the bottom spark plug hole onto a shop towel.
It’s important to rinse the valve edge off each time in order to examine the progress. My biggest regret from this particular lapping job, is that I did not take incremental photos along the way. It was by far the best result I’ve ever seen. After the first round of lapping, there was a nice smooth even band most of the way around the valve, with a distinct darker uneven area for about 30 or 40 degrees of rotation… corresponding to the burning side of the valve. After the second round, the bad area was noticeably smaller, and after the third round, even smaller still. We did a fourth round of applying the coarse grit compound for good measure (the bad area was pretty much completely gone at this point,) and finished it off with one round of lapping with fine grit compound.
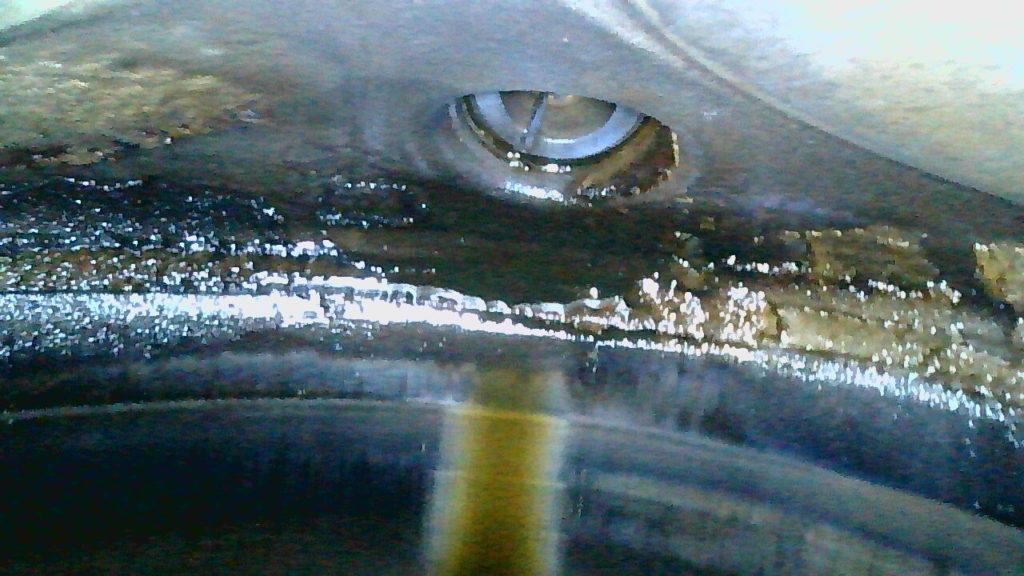
The result was nothing short of spectacular:

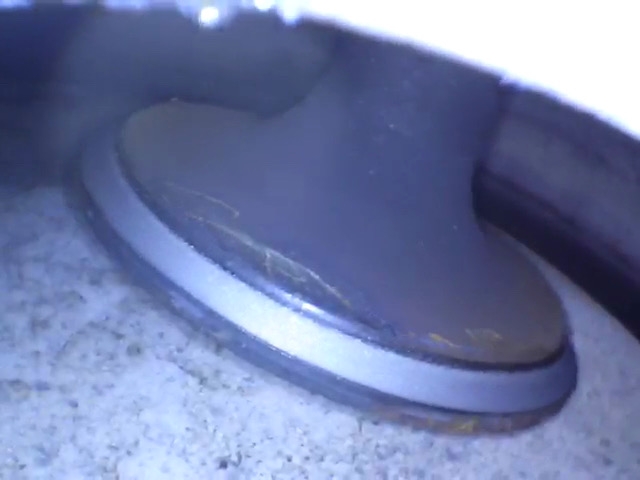
This is about as perfect of an exhaust valve edge as you could hope for! Needless to say we were thrilled.
We washed the cylinder out with some Av Gas in a squeeze bottle, blew it out with compressed air, and repeated that process a second time. Then we sprayed some LPS-2 in the cylinder for some lubrication so the cylinder walls would not be dry for starting.
We put everything back together and installed a new rotocoil assembly P/N SA629117-1 on the exhaust valve, and a new rocker cover gasket.
Spence did a short ground run so we could check for leaks, and then he did a test flight to check engine operation and get it hot so we could do another compression test.
While Spence was out flying, I cut the old rotocoil apart, and was SHOCKED at what I found: (I had heard of this happening, but had never seen it myself.)
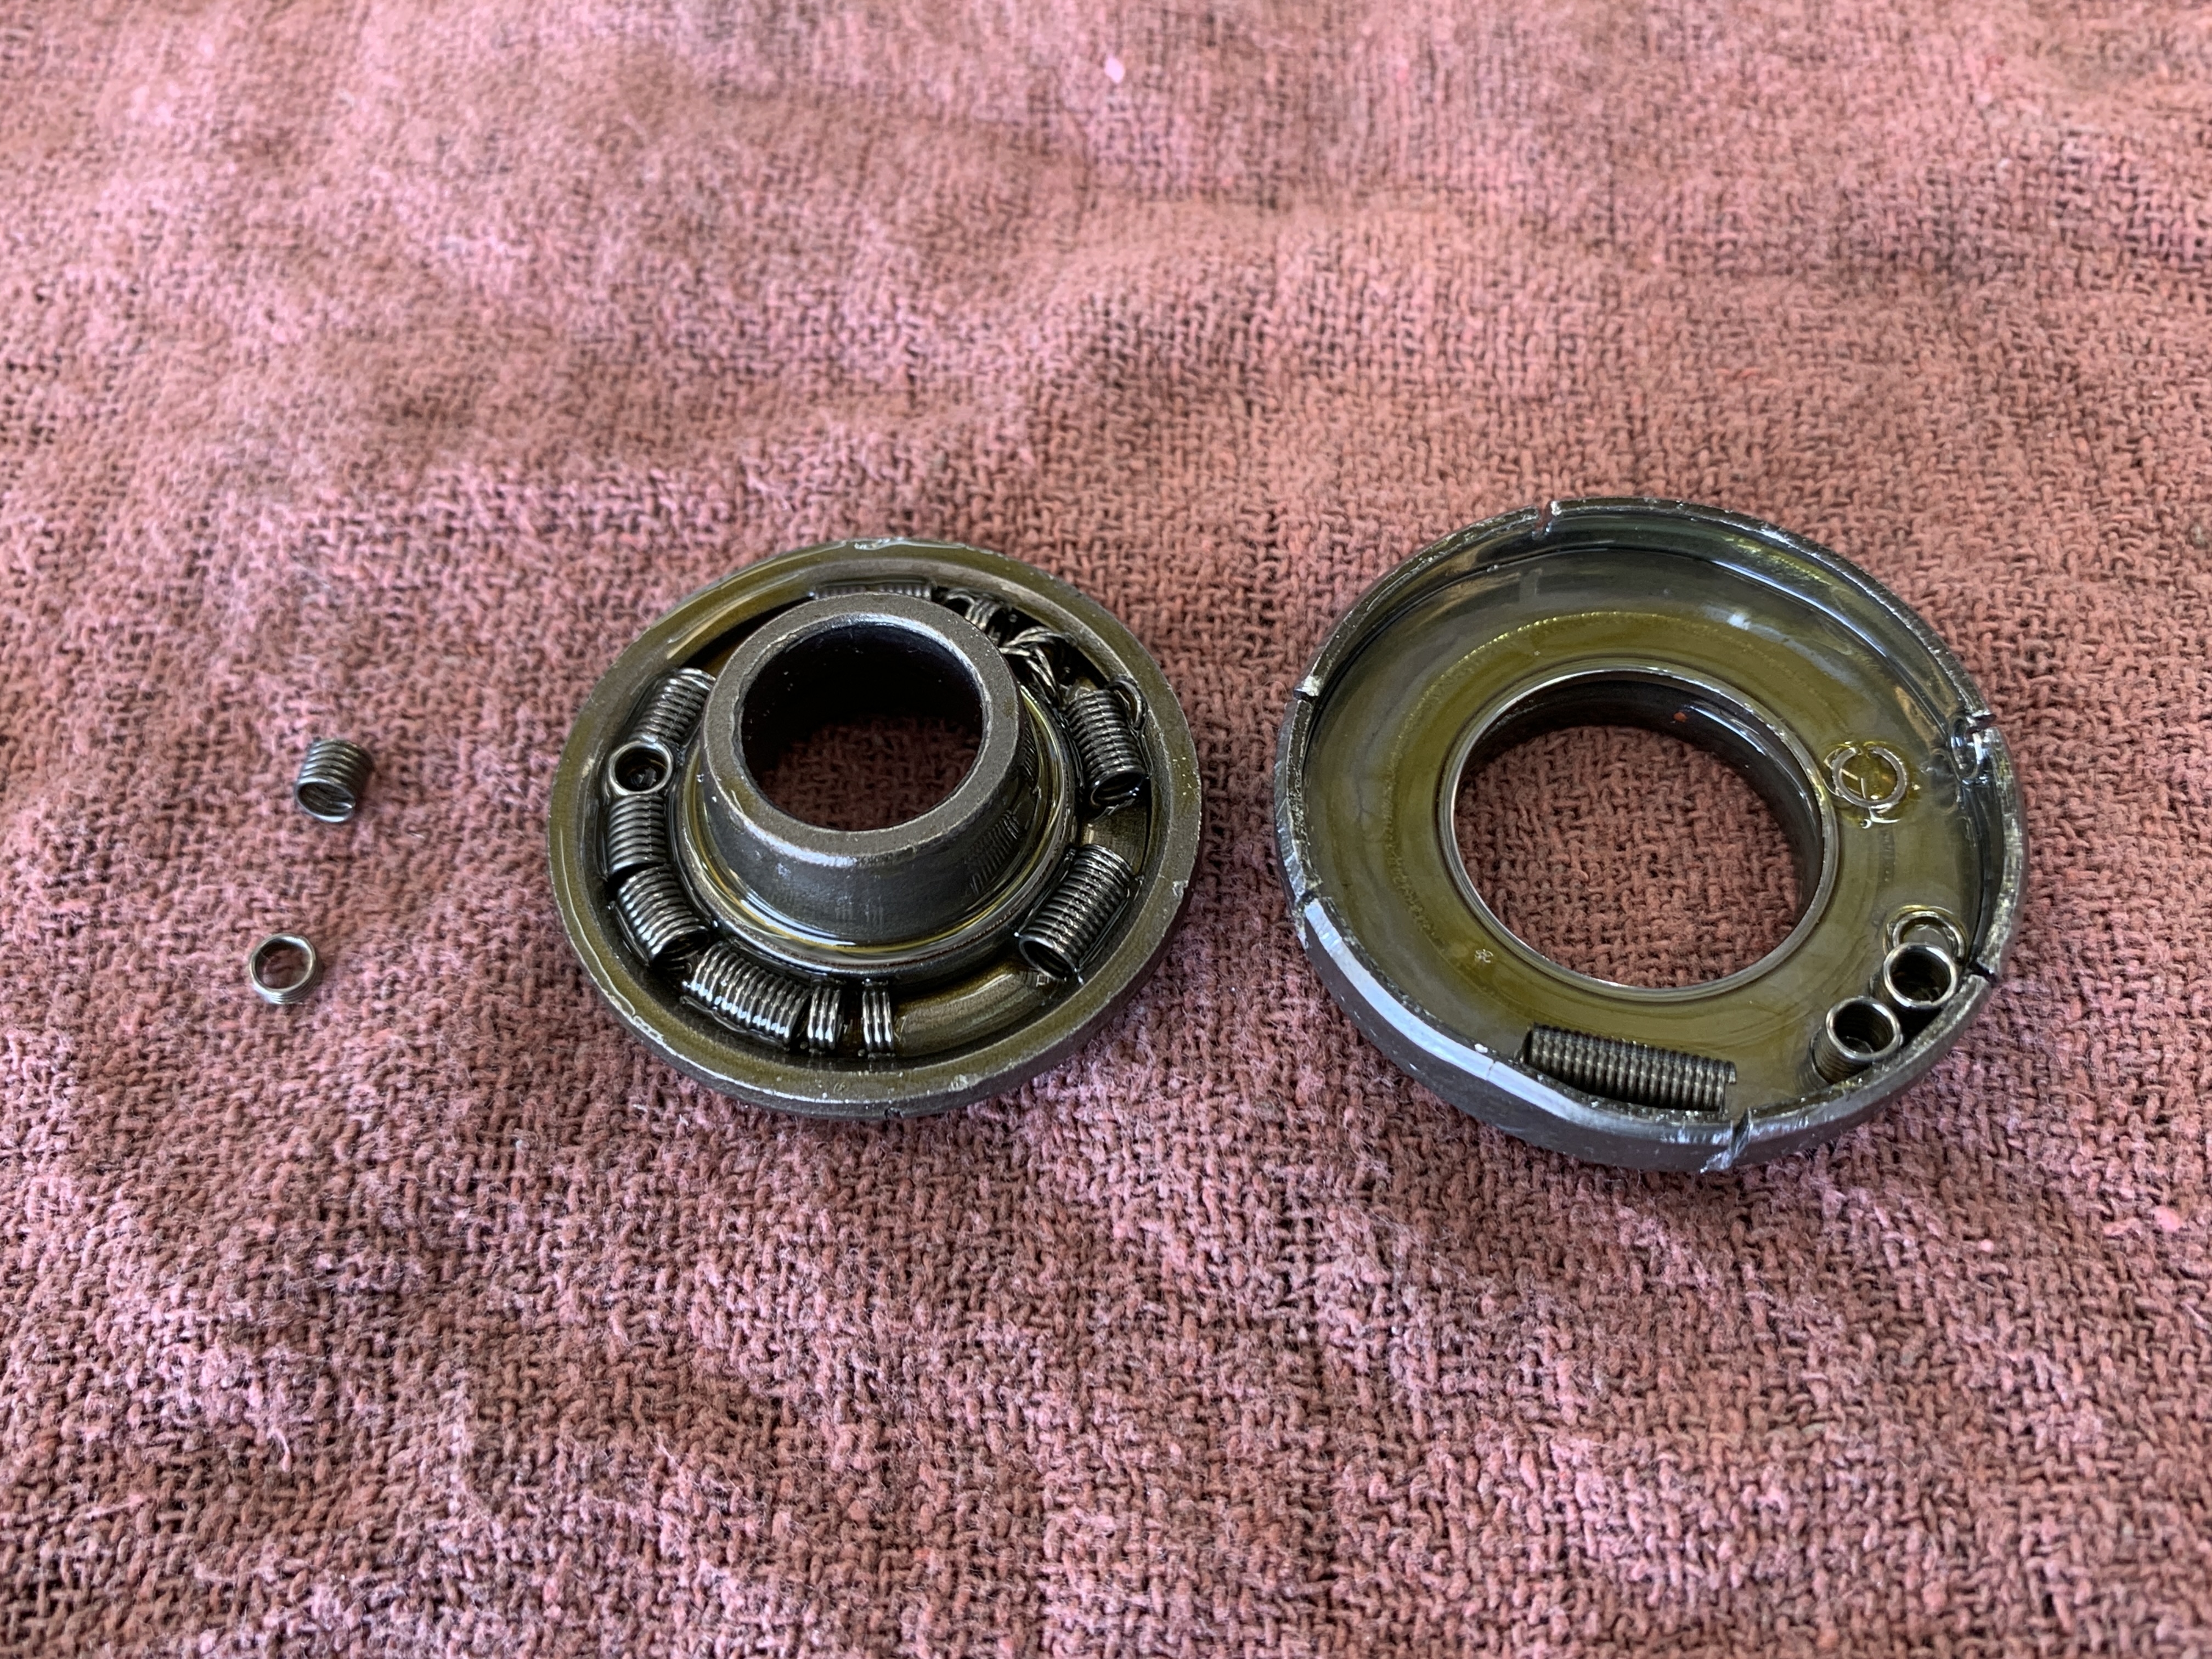
The spring inside the rotocoil should be one long continuous spring. This one was in many pieces, clearly making this part non-functional. The rotocoil serves a very important purpose. It causes a small and incremental rotation of the valve every time the rocker arm presses against the valve stem, and helps to maintain a good seal between the valve and valve seat. When an exhaust valve stops rotating, there is a much greater possibility for a hot spot to develop. It’s important to stop a hot spot as soon as possible. If not, cylinder removal may be inevitable.
We are very hopeful this cylinder has been rescued from premature removal. Not only did the lapping process restore an excellent seating area on the valve, but the compression came up dramatically as well… after the test flight, we got an amazing 70/80!
Thank you Spence, for the opportunity to work with you on your cylinder! Of all the valve lapping projects I’ve done, this one is a favorite for sure.
The result was absolutely amazing, and I have a few takeaways as I think about the whole valve lapping process:
- Even low-time cylinders can develop exhaust valve problems.
- ALWAYS do a borescope inspection along with every compression test (preferably with every oil change.)
- Take action immediately when you notice a burning exhaust valve (lapping is often a good solution if caught early.)
- ALWAYS install a new rotocoil assembly when lapping a Continental exhaust valve, to help ensure the valve will rotate properly and consistently.
- If you do remove a cylinder for repair, be sure a new rotocoil is installed as part of the repair process (sometimes they are reused unless you specify otherwise.)
If you’d like to see or hear more info on this topic, be sure to check out episode 109 of the Airplane Owner Maintenance Podcast. It’s called “Exhaust Valve Problems – Could Lapping Be A Good Option?” Apparently airplane owners want to learn about this topic… episode 109 is the 4th highest downloaded episode of all time, do date.
The post “174 – Turbo-Normalized Bonanza Exhaust Valve Rescue!” appeared first at AirplaneOwnerMaintenance.com


Recent Comments