In this podcast episode, we’re talking about alternator maintenance!
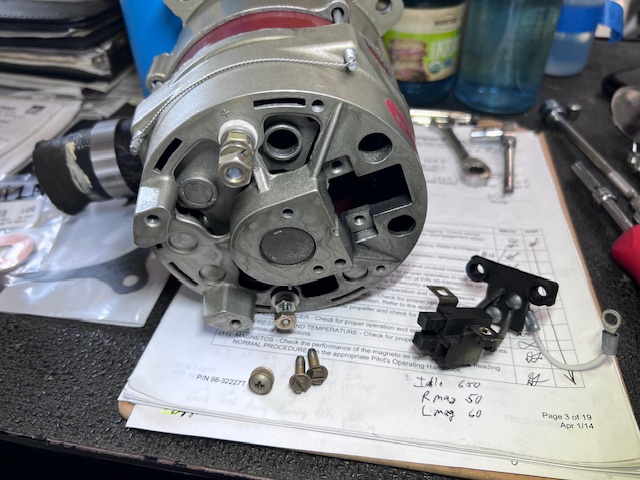
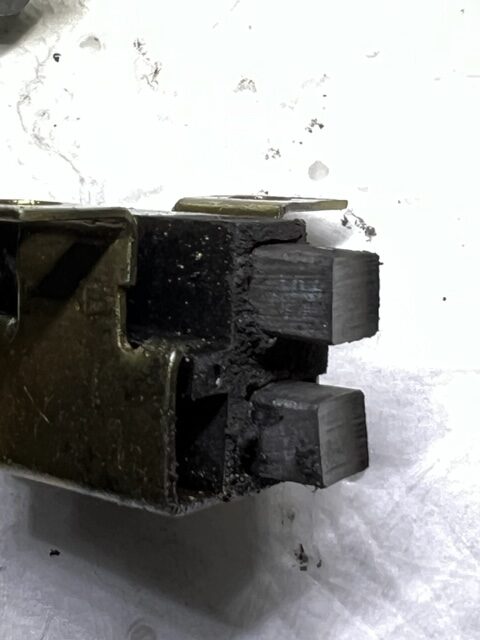
Here’s the alternator I removed from a Beechcraft Bonanza to inspect the drive coupling and the brushes… note the brush assembly in the lower right side of the photo:
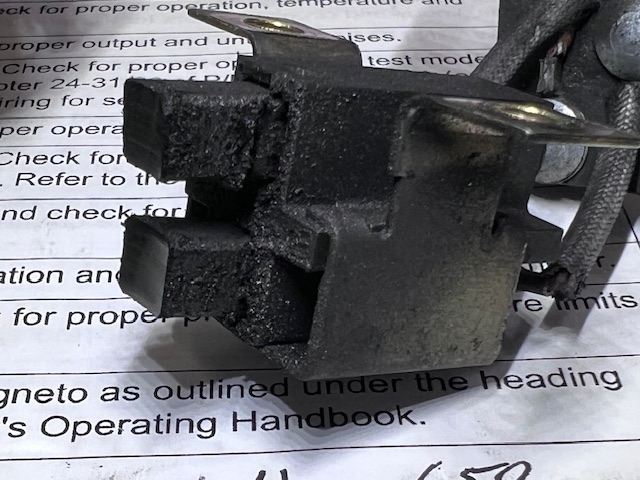
The brushes had plenty of length left, but they needed a good cleaning due to carbon dust that had collected from normal brush wear. Check it out:
After a good cleaning, the brushes looked great and were ready to reinstall.
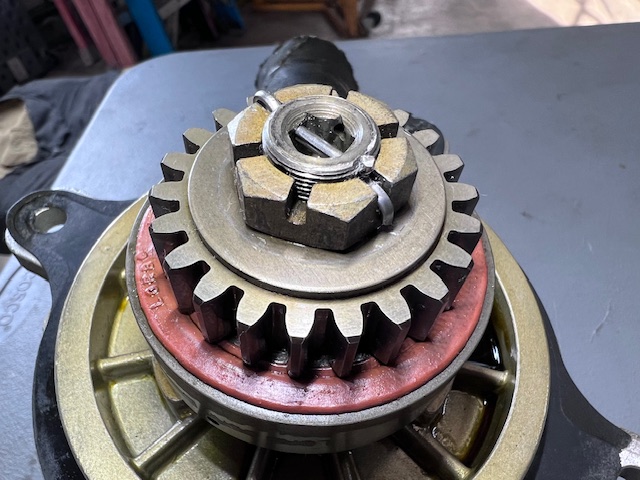
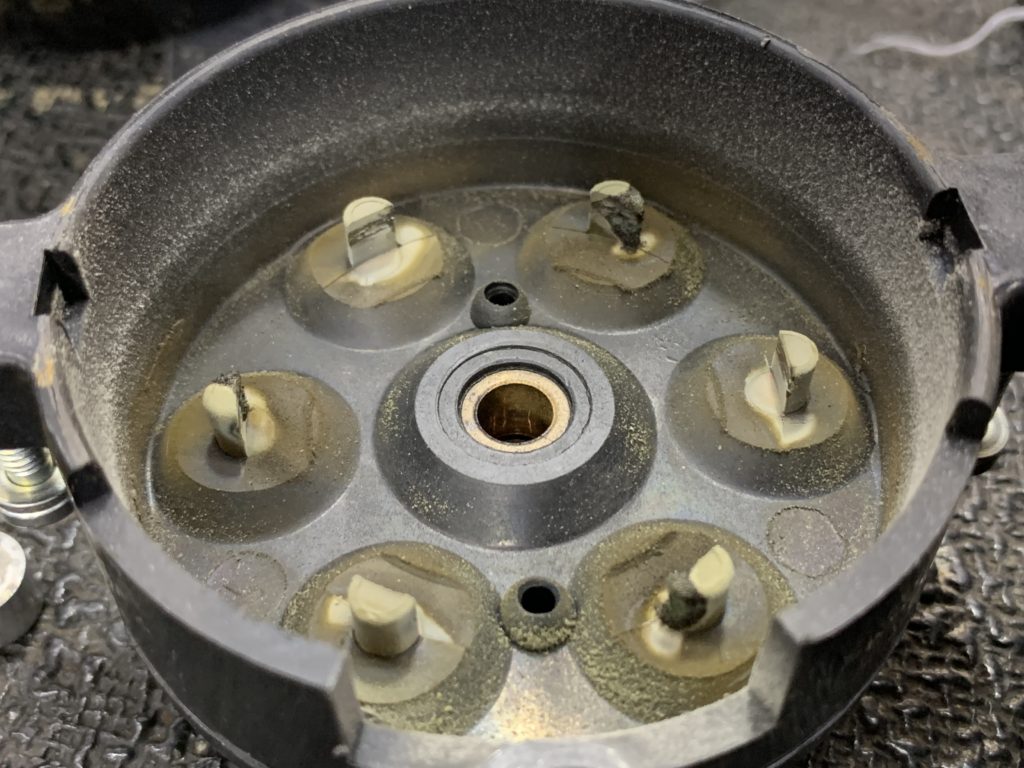
Another thing (and perhaps more important) I wanted to check on this alternator is the elastomer drive coupling:
There have been numerous cases where these drive couplings have come apart and caused serious engine damage and / or failure.
Since it had been nearly 500 hours since this alternator was removed and inspected, I wanted to verify the drive coupling’s condition.
I performed the following: (Reference Continental M-0 manual.)
Verified no slippage at 140 inch pounds.
Verified proper coupling attach nut torque.
Installed new cotter pin.
Cleaned off old gasket and installed alternator with new gasket.
If you have a belt driven alternator, it’s important to keep the belt tensioned properly and in good condition.
How about you?
Do you have a plan for proactive preventive maintenance on your airplane’s alternator?
If not, you may be interested in listening to the audio for this episode, and then make a plan that best fits your situation.
It’s certainly a good idea to check alternator brushes each 500 hours.
And for gear driven alternators, it’s probably wise to check the drive coupling at a shorter interval than that. There have been too many stories of these couplings coming loose and / or coming apart, and if we can prevent that, it’s always a good thing!
For some additional discussion on this topic, here’s some interesting info I found on the Pilots of America site:
There was normal voltage at the alternator field terminal.
The field circuit resistance seemed normal as well.
But the alternator was not producing the normal 28 volts during operation.
Occasionally, it would produce a small amount of output voltage, like 25 or 26 volts, and then drop back down to battery voltage.
Clearly there was a problem.
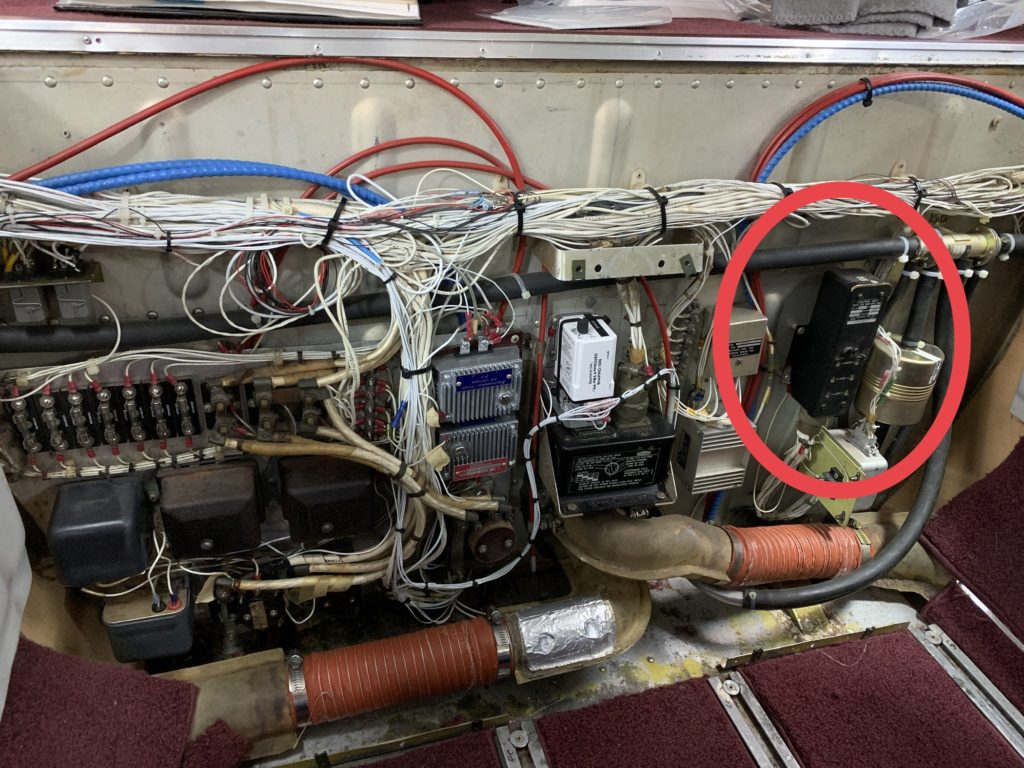
After troubleshooting and seeking advice from a Cessna service center, we replaced the battery contactor and the alternator contactor in the MCU (master control unit) on the firewall. (The MCU is the electrical control box for the airplane. It’s located on the forward left side of the firewall.)
Replacing the contactors did not fix the problem.
After more troubleshooting and some calls to Hartzell Engine Technologies to speak with two different people, and after talking things over with the owner, we decided to order an overhauled alternator and a new ACU (alternator control unit.)
They arrived the next day, I installed them, and the system worked perfectly.
The alternator was back to producing its normal 28 volts. (I just wish I had taken the old alternator apart to see if I could determine the problem… I’m guessing one or both of the brushes were severely worn.)
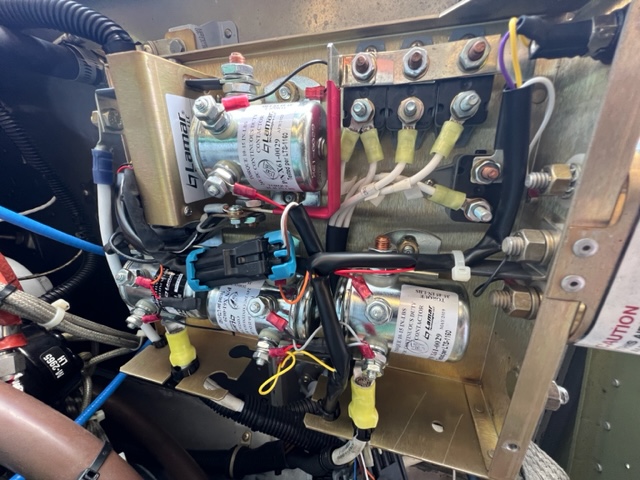
The following photo shows what’s inside the MCU. The alternator contactor is the one in the top of the photo, slightly left of center. And the alternator control unit the the device to the left of the contactor that says “Lamar” on the side.
When replacing anything in this box, it’s very helpful to take photos first in order to put everything back in its place during reassembly!
Listen to the audio podcast for this episode to get the full story.
This episode also includes some of the email responses I received after asking if listeners wanted to continue receiving stories about exhaust valves.
Thank you to all who responded!
In a nutshell, everyone wanted to continue hearing about exhaust valves and the stories about lapping them and saving them, especially the stories that are instructive and educational.
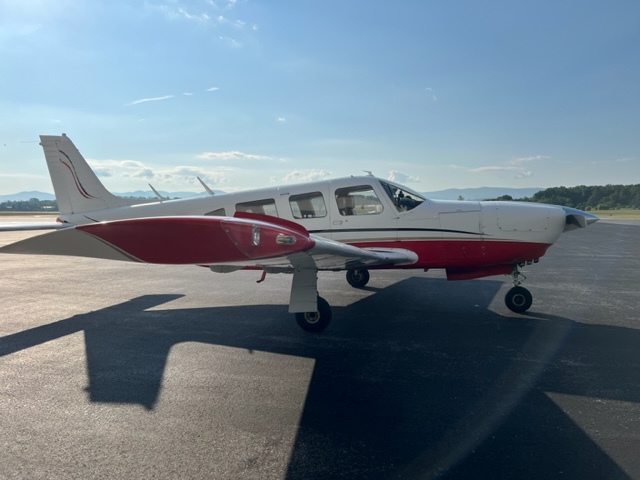
It was a beautiful Tuesday morning at KSHD, and we had the maintenance hangar door open with a good view of the runway. A nice, red and white Piper Lance made a perfect landing on runway 5. As the airplane taxied up to the ramp, I thought, “It would be nice to meet that guy, whoever he is.”
Momentarily, he was standing in our shop, asking if we could help with an electrical issue. It turned out Merle was a super nice gentleman, and he had flown in with his brother, Dave, and their colleague Ron. They were on their way to Pennsylvania that morning, but made a precautionary landing at Shenandoah Valley because of the electrical failure.
I was eager to help. I grabbed my multimeter and hopped in the airplane. When I tried to start the engine, all I got was a small and very feeble attempt to turn the engine and prop. The battery was too weak to run the engine.
I remove the cowling and got access to the alternator. After removing the field wire from the field terminal on the alternator, I turned the master and alternator switches on and verified there was battery voltage at the field wire. I was then satisfied the voltage regulator was working fine, and the problem was likely in the alternator or the wiring circuit.
I then measured the resistance between the alternator field terminal and ground, and at first I got a resistance reading, but when I moved the prop a bit, I had no continuity. There should be a resistance reading, maybe around 6 ohms, give or take a little, for a 12 volt alternator. At this point, I was 90% sure the alternator was bad.
We started searching, and found a local parts supplier had an overhauled alternator, and also one that was “as removed.” Merle opted for the overhauled one, and one of our guys made the short drive to pick it up.
Unfortunately, that alternator had a crack in the bolt hole for attaching the alternator belt tension arm.
We ended up overnighting another overhauled alternator in, and got them going the next day.
It was great meeting these guys! Merle, Ron, and Dave… if you’re ever passing through again, stop in and say hi, and maybe we can go grab a burger at the Old School Burger bus down at the Valley Pike Farm Market.
On a totally different subject, I also talked in this podcast episode about an Aerostar trip we made to Wisconsin this week… not much of an FBO at this little airport near Lake Geneva, WI.
Be sure to listen to the episode to find out about an interesting phenomenon I learned about on the return trip… a momentary harmonic vibration in the clouds.
That’s all for this episode!
The post “226 – Piper Lance Lands at SHD After In-Flight Electrical Failure” appeared first at AirplaneOwnerMaintenance.com
Here’s the short answer: Worn and contaminated brushes inside the alternator. Check it out:
My theory is that the excessive amount of carbon dust from brush wear was causing a short circuit situation between the brushes, and not allowing the field circuit in the alternator rotor to be properly energized for normal operation.
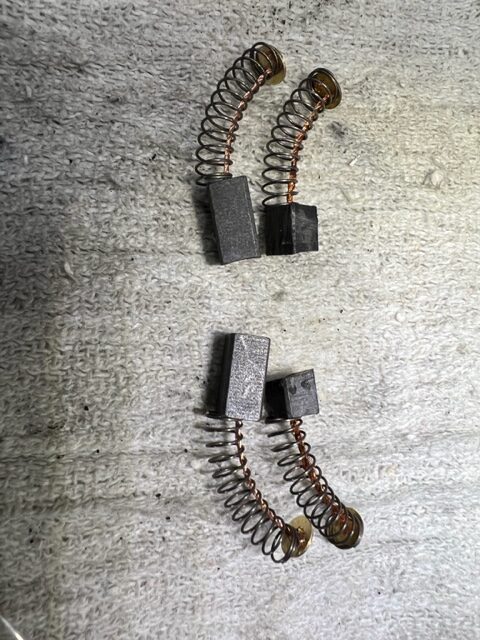
Here’s a comparison of the old and new brushes:
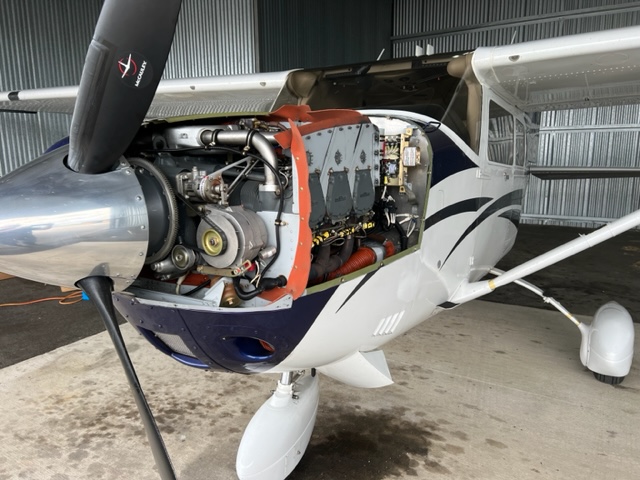
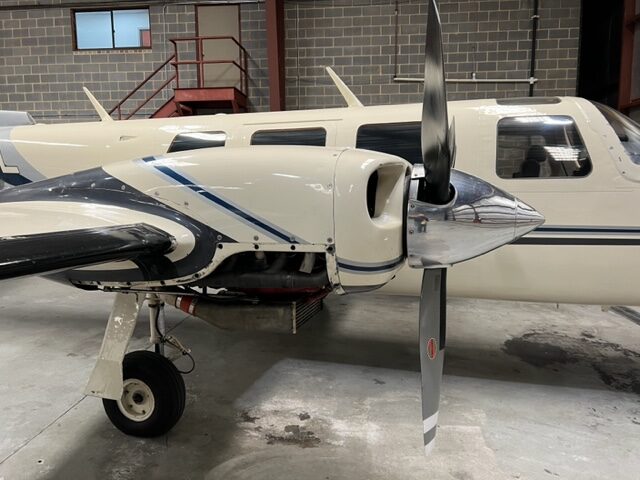
This story comes from a recent situation on the right engine of this Aerostar aircraft:
Since the alternator has externally removable brushes, it turned out to be a minimally invasive surgery to fix the problem. I cleaned the brush holder and also the slip rings inside the alternator, and after installing new brushes and reassembling everything, the alternator performed flawlessly.
Listen to the audio to hear the full story.
This episode also covers some of the email responses I received last week from some listeners, and here’s one of the highlights:
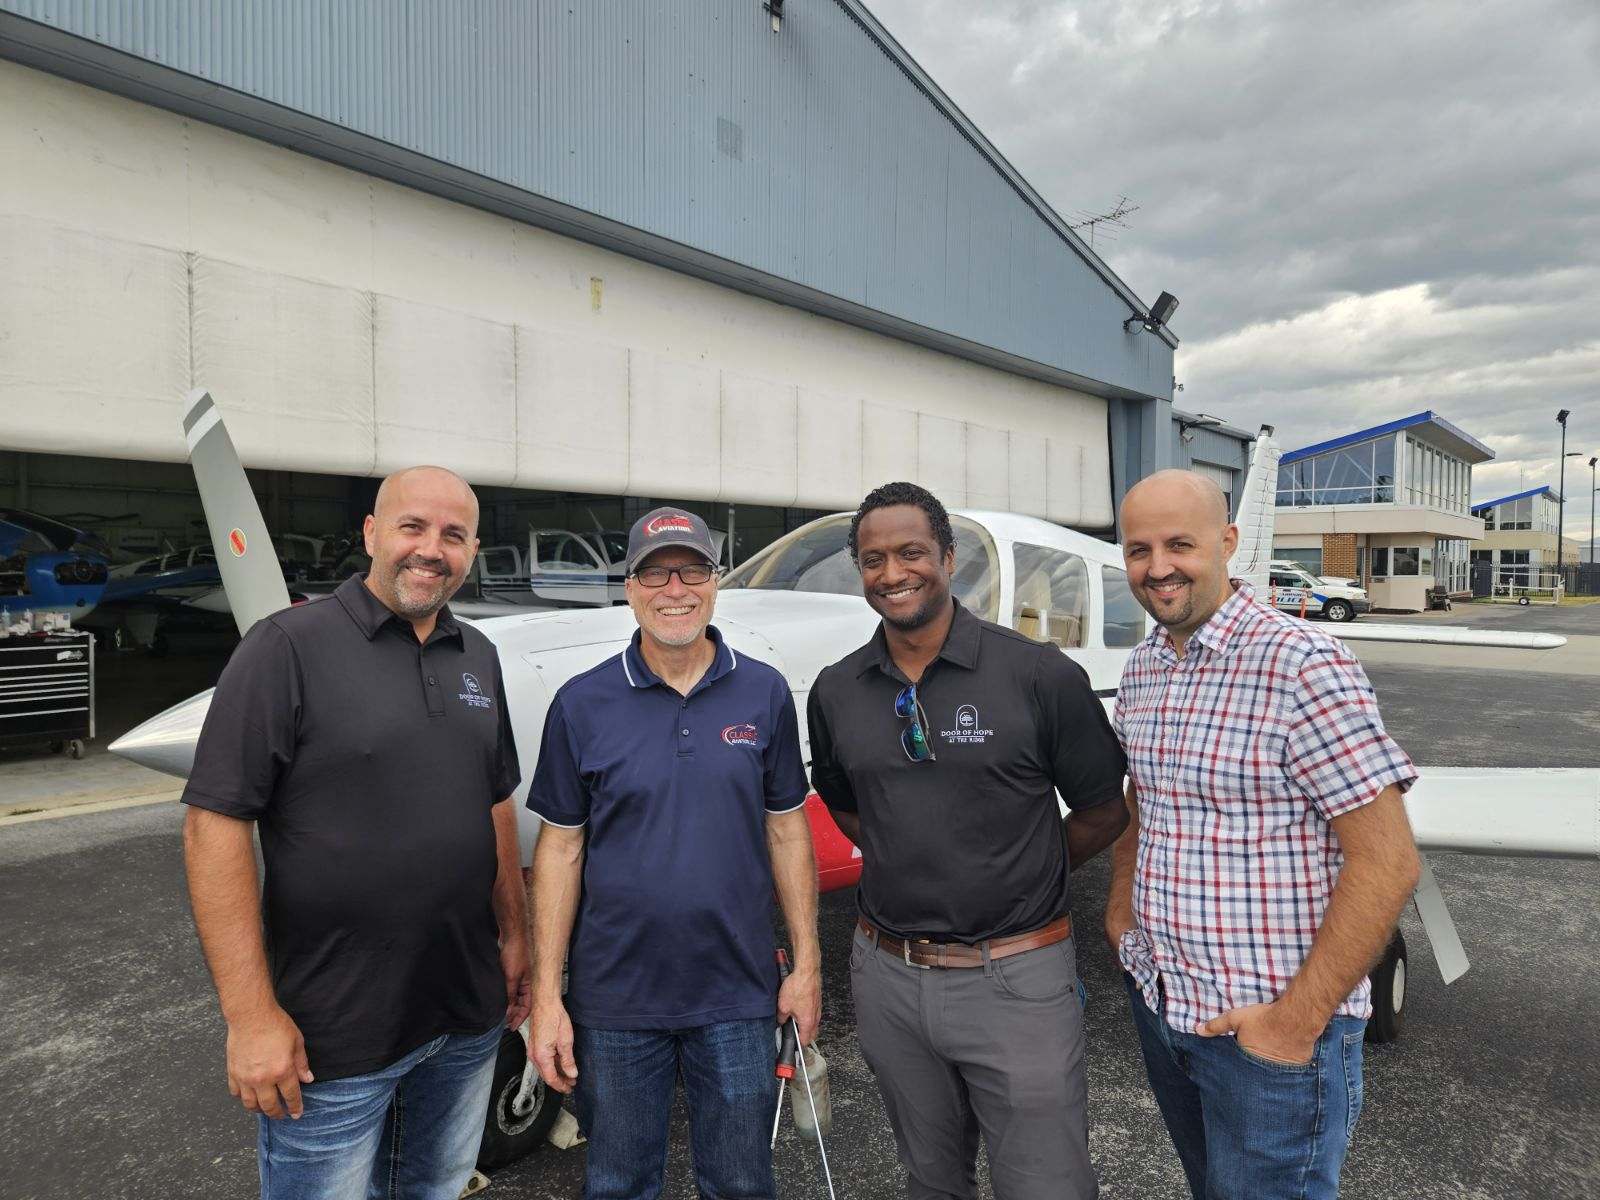
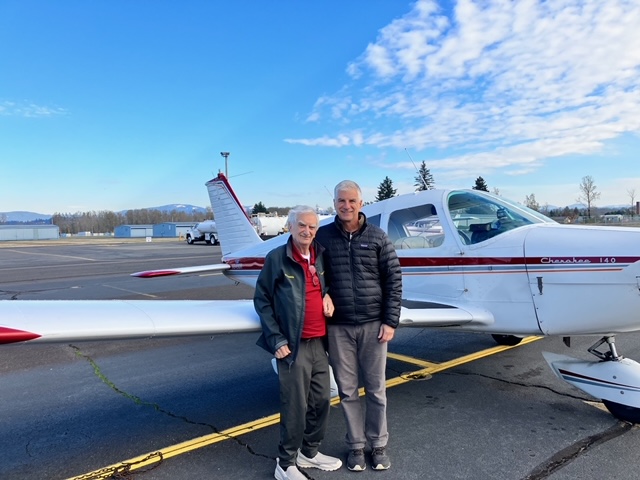
Glen sent me a photo of he and his dad in front of his Piper Cherokee… I love to see different generations enjoying aviation adventures together!
One more fun fact: Glen’s mom took her private pilot check ride years ago with Glen in the back seat of their Cessna 175 when he was 3 weeks old! What a great story!
Thanks Glen, for sharing some of your story with us!
This episode also covers a recent trip to Charlotte in another Aerostar, and the interesting routing we got from ATC on the way there… definitely some great IFR and ATC lessons to observe and learn from this one!
The Charlotte trip also sparked some conversation about twin engine charging systems, and paralleling issues that can happen… this situation is still in process, and I’ll try to give an update sometime in the future.
Finally, I had the privilege of joining Carl Valeri, Tom Frick, and Bill English on episode 301 “What is Your Most Challenging Approach” of the Stuck Mic AvCast. It was great fun talking about challenging approaches, both instrument and visual approaches.
This was what happened recently in a Piper Seneca… and in this episode, we discuss why the alternator quit… it was something I totally was not expecting.
After verifying the field connections (power and ground) were good, and the brushes were nearly perfect, I removed the alternator.
And here is what I found… watch this video:
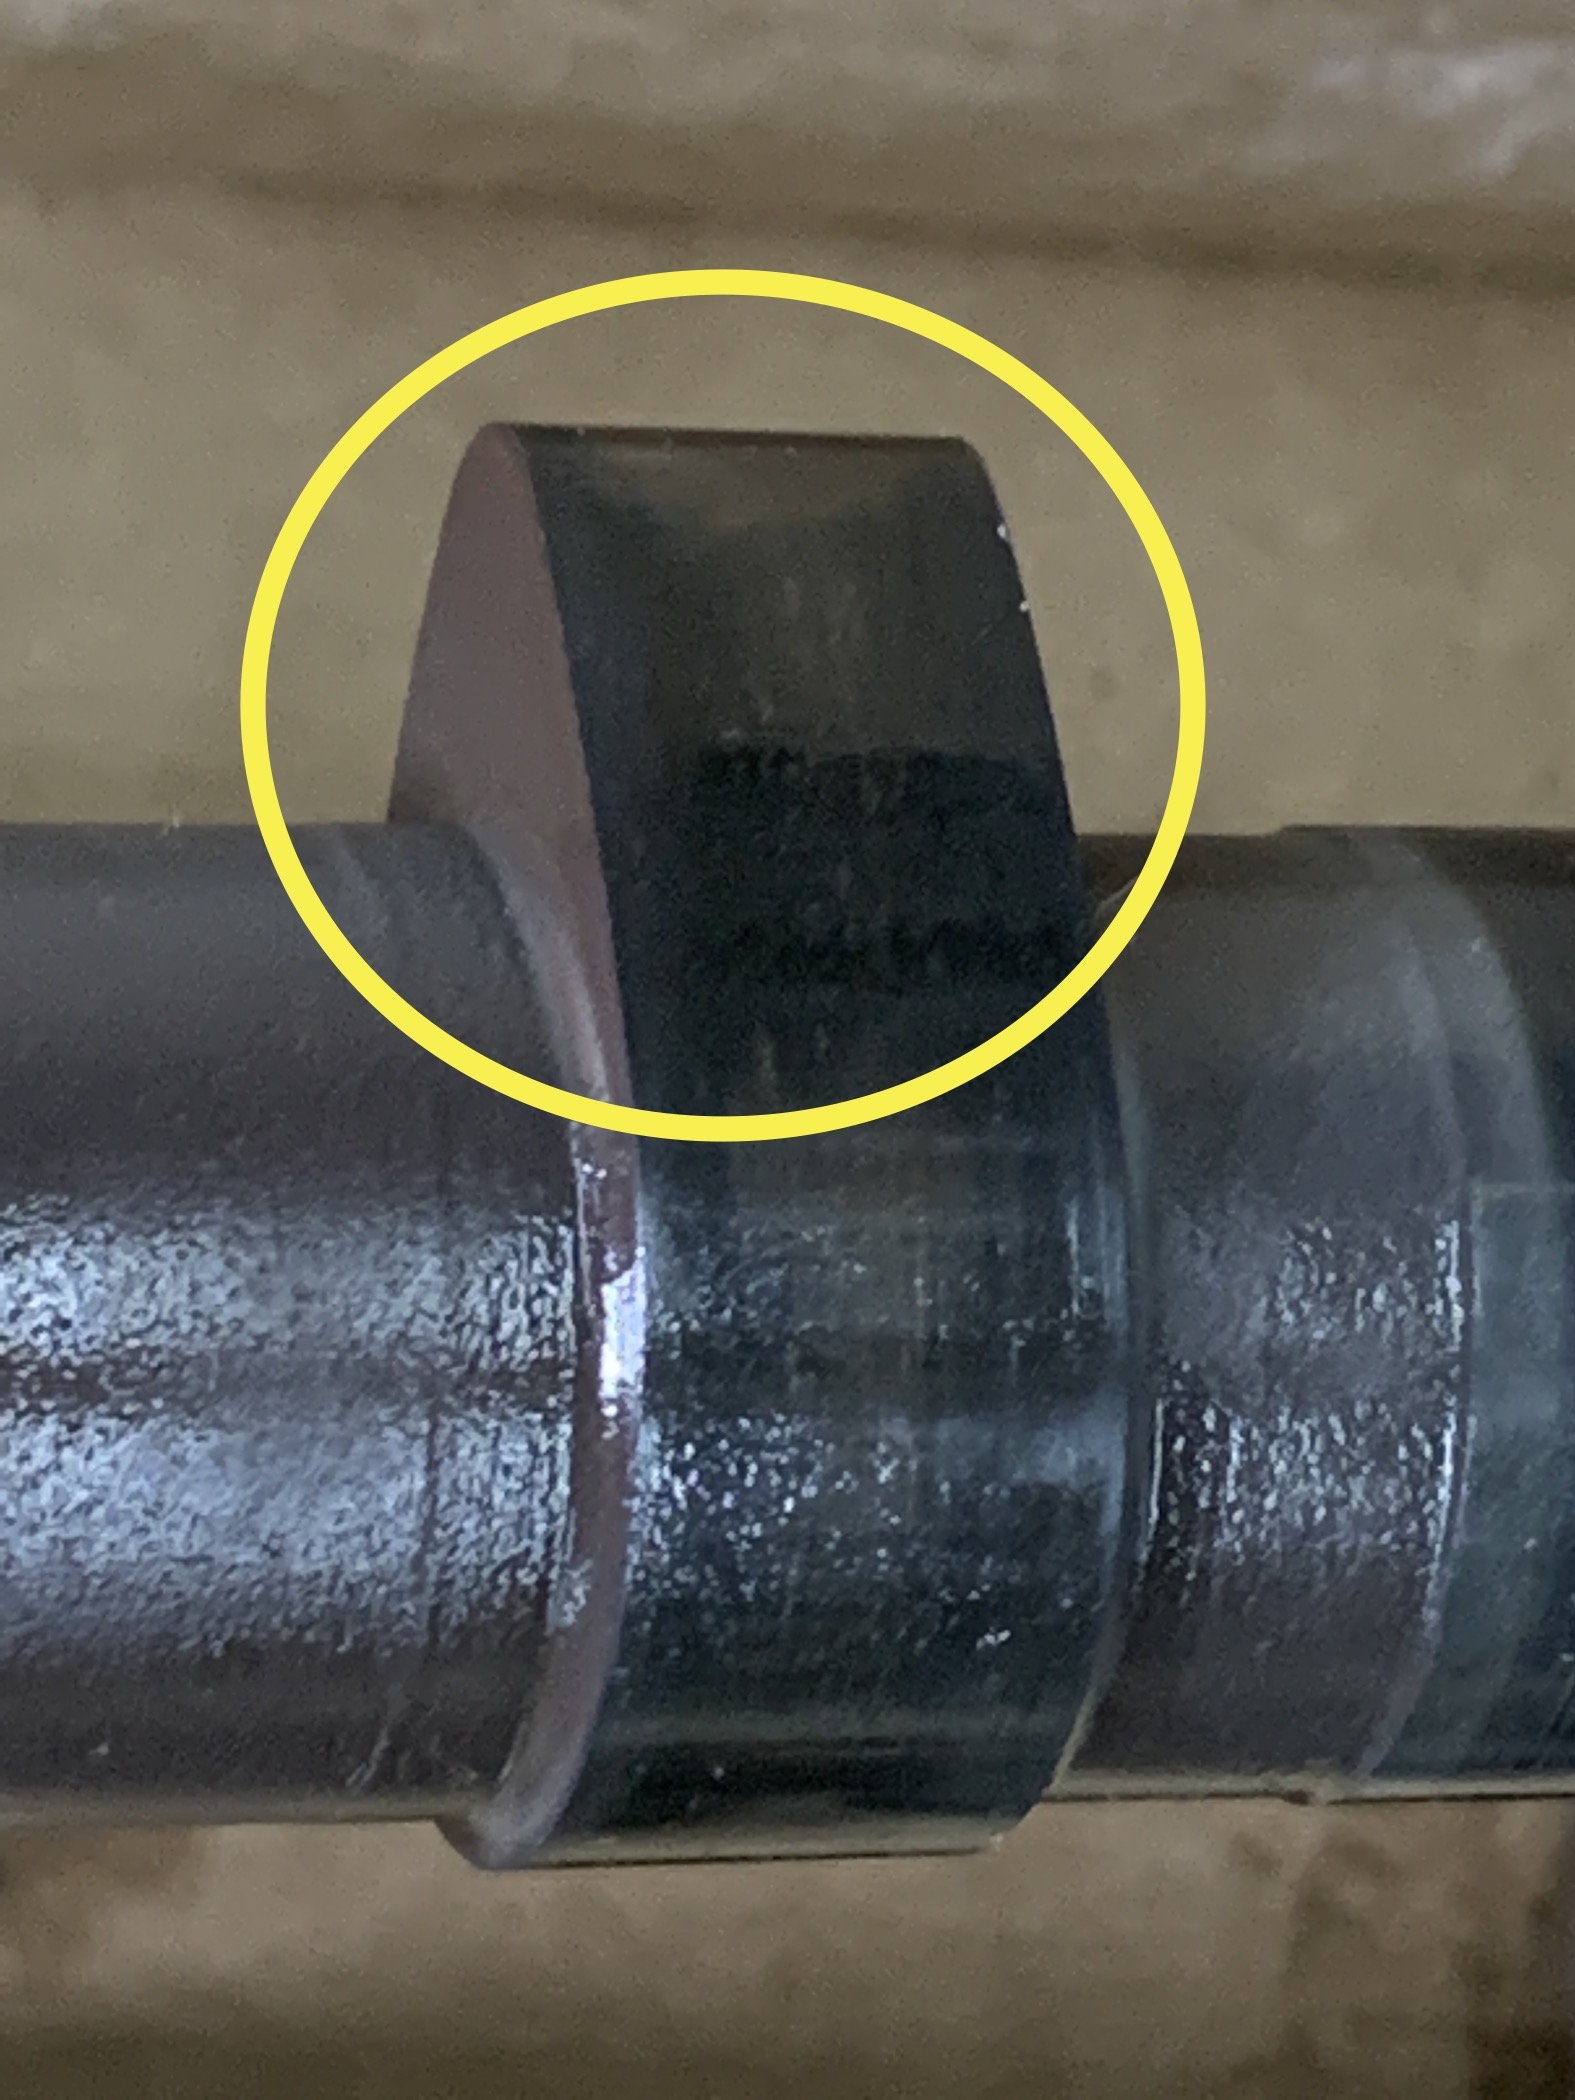
It was two things, really. First, the nut holding the drive coupling onto the alternator shaft was loose. And second, the drive gear was turning independently of the alternator shaft… not good! The drive coupling is like a clutch that is designed to slip at a preset high torque value in case the alternator seizes.
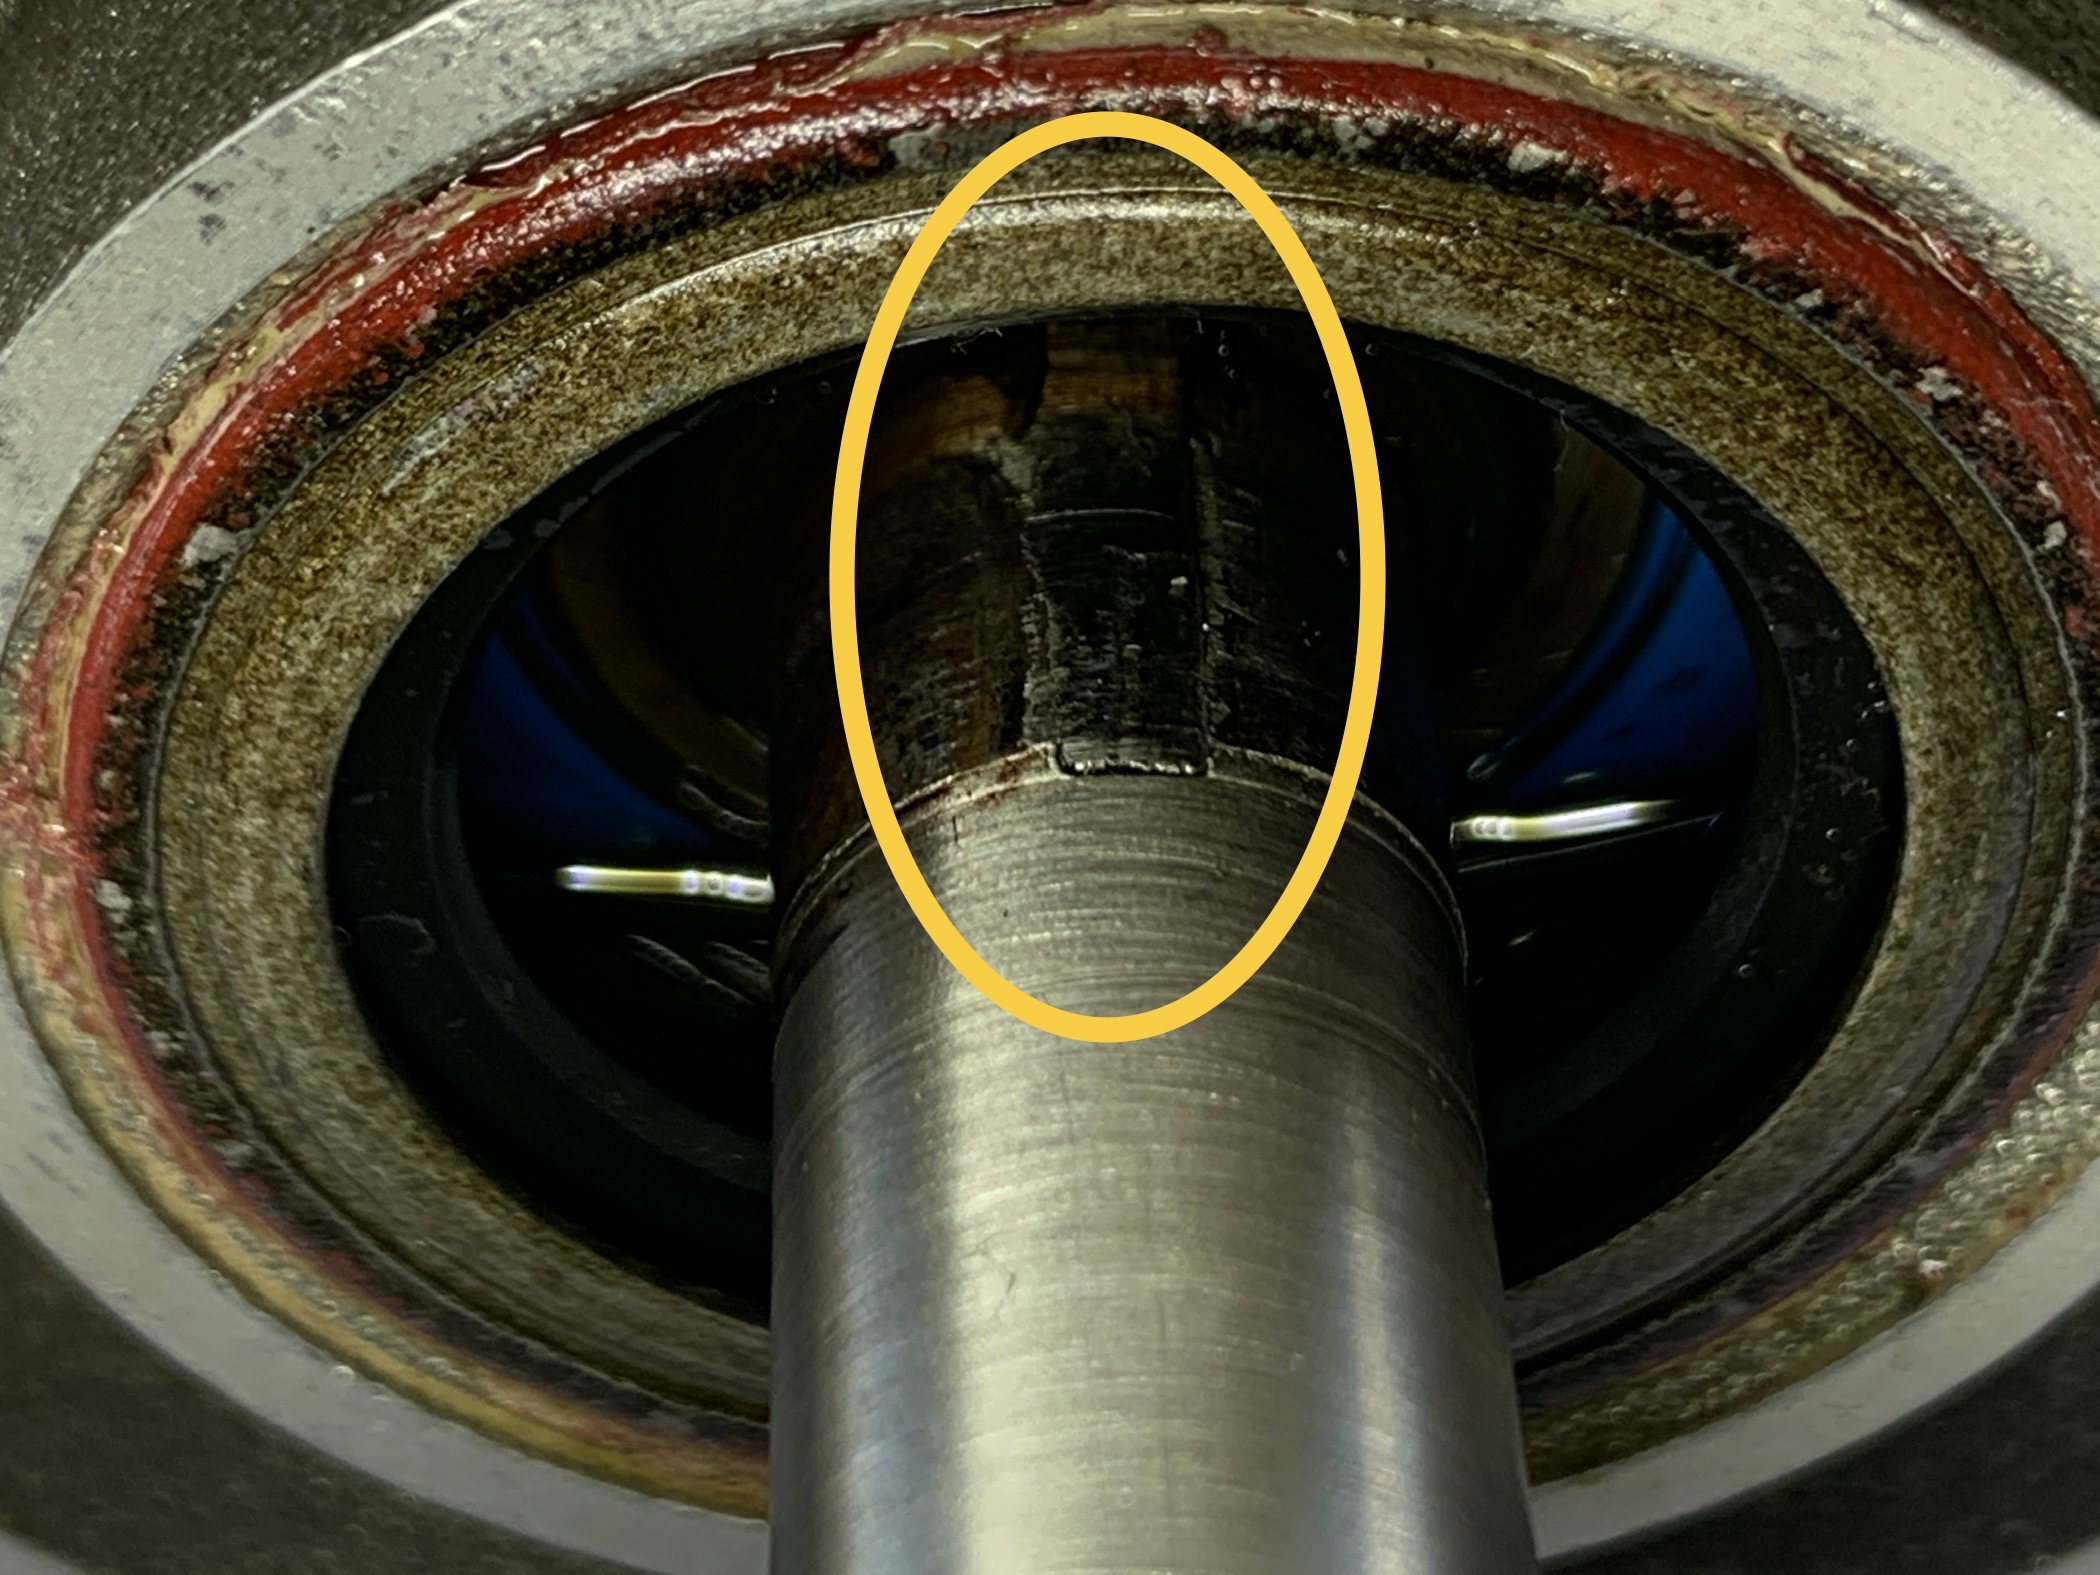
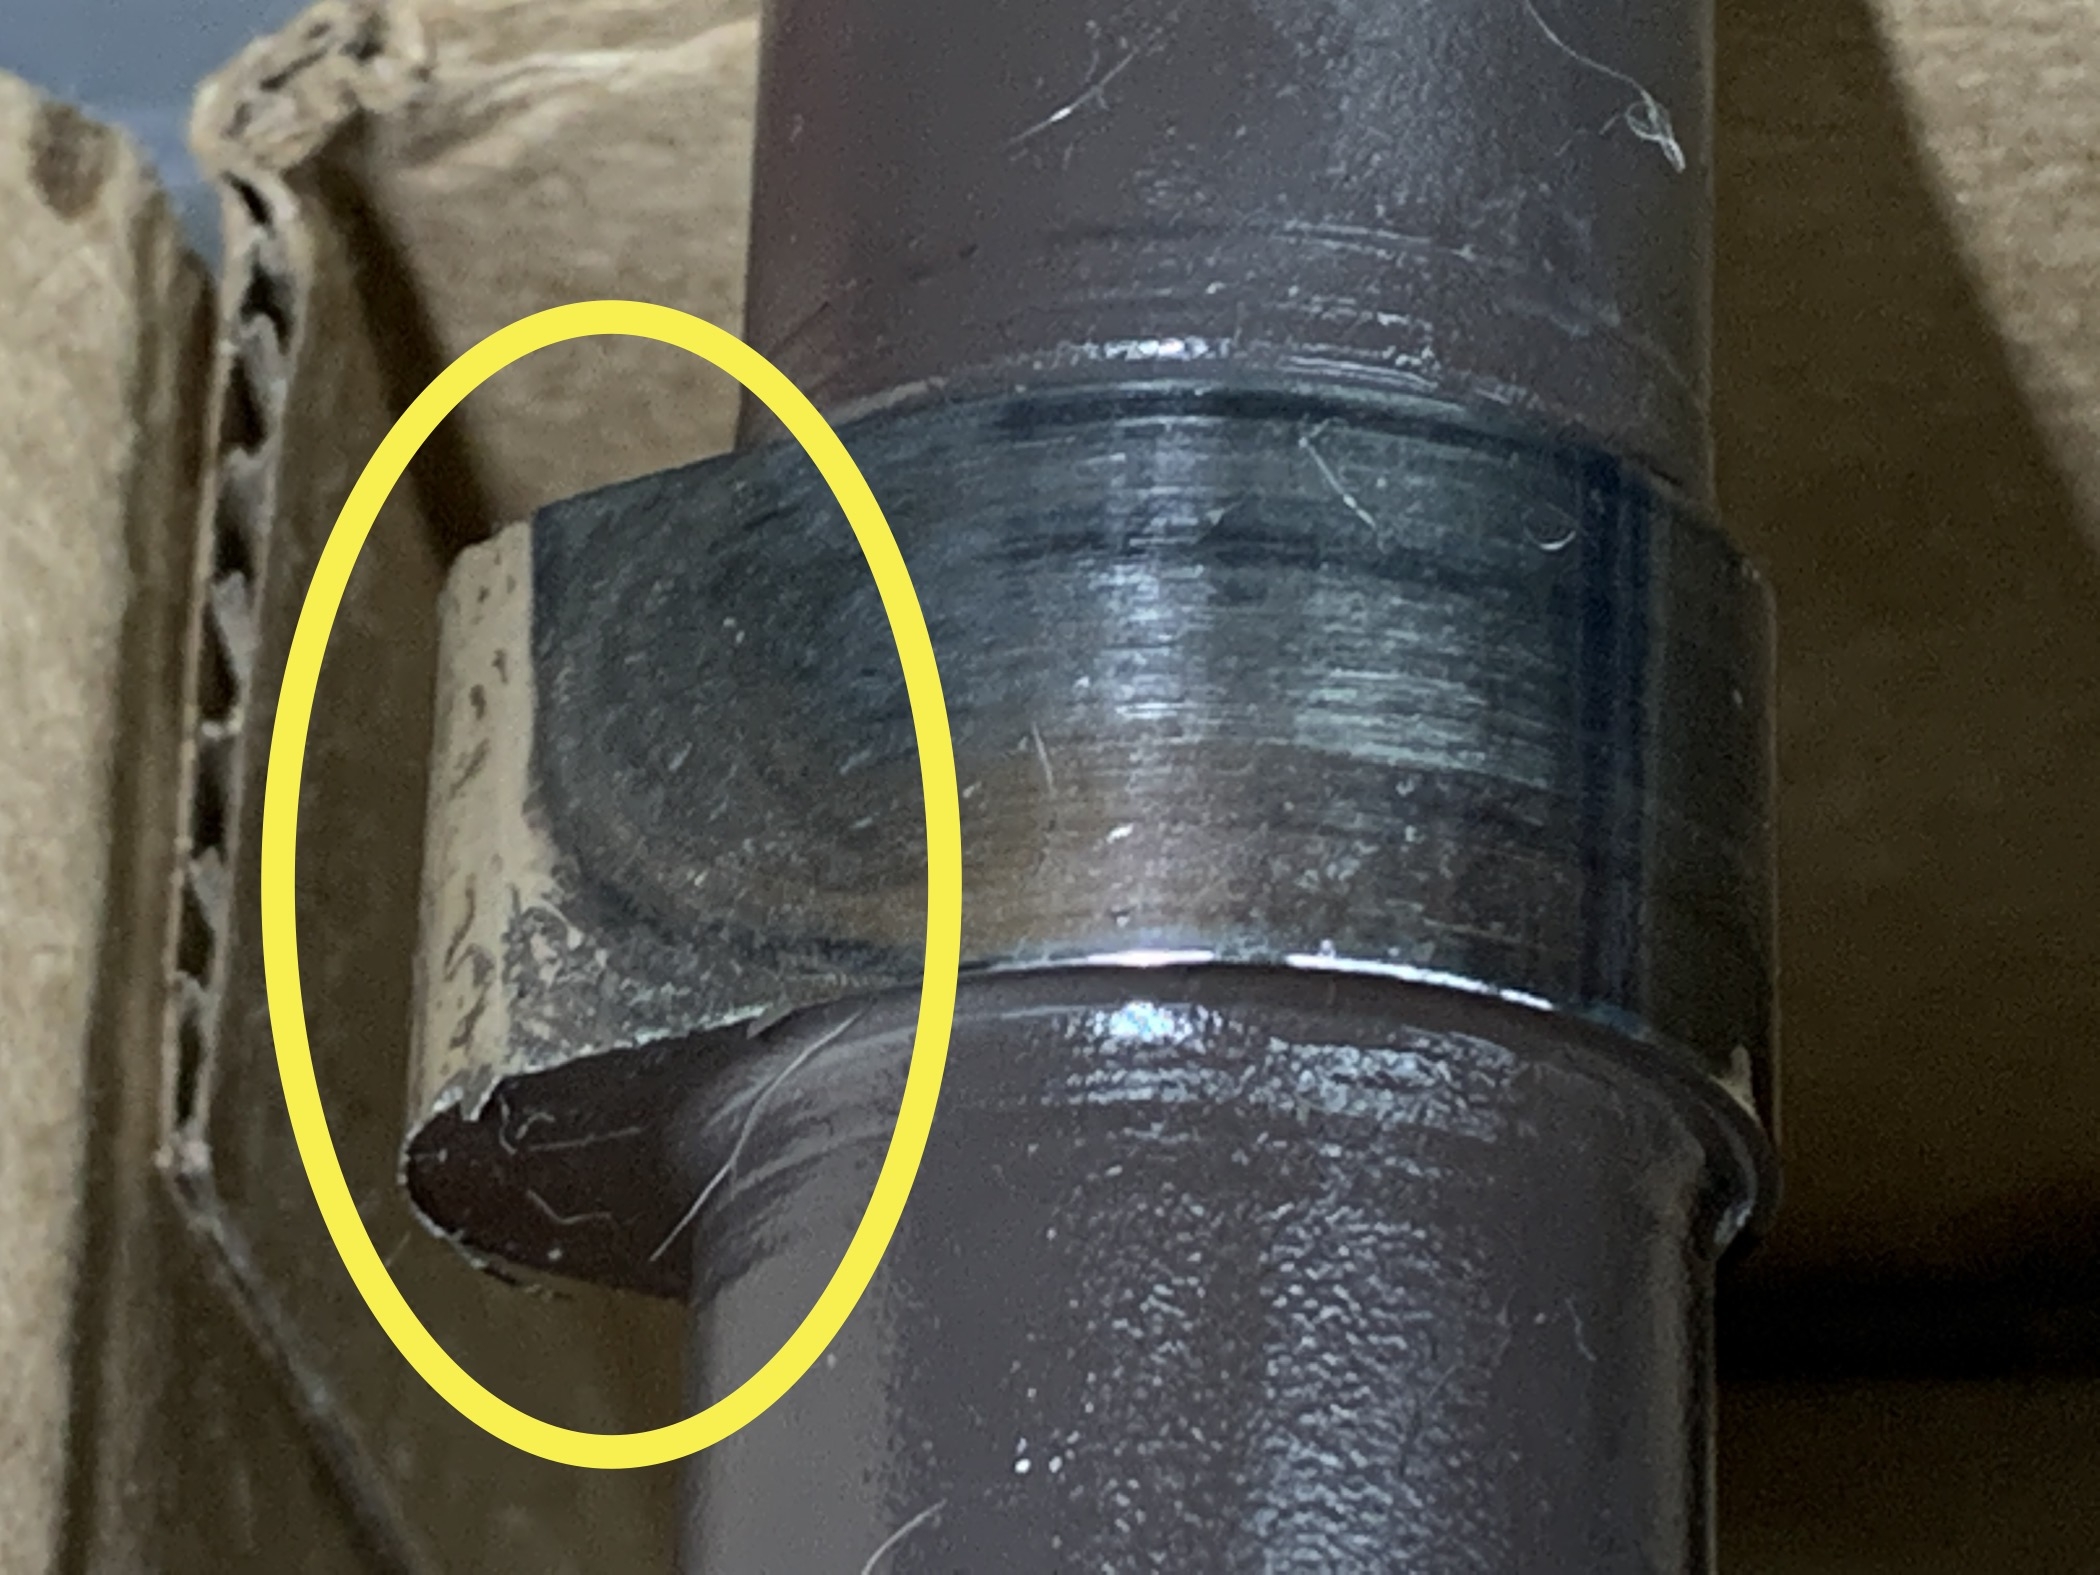
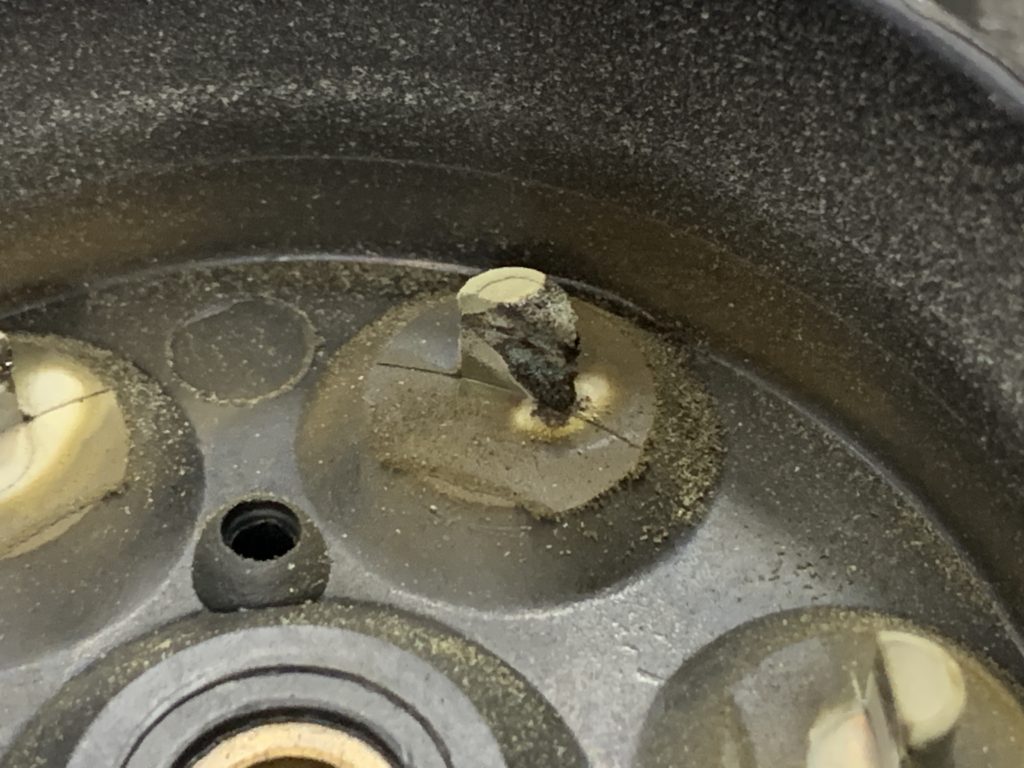
I had to look closely to really see what had happened… and I discovered the woodruff key that holds the drive coupling securely to the alternator shaft, had completely sheared off, and the remaining portion of the woodruff key was barely visible in the alternator shaft after I removed the drive coupling… check it out:
And, after the woodruff key sheared off, the drive coupling and gear kept turning while the alternator was not turning, and it wore the alternator shaft right down to the shiny surface you see here.
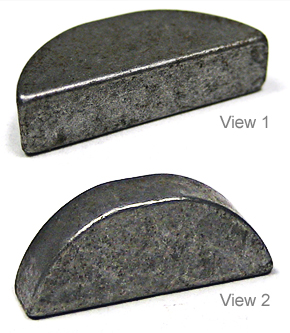
In case you’re not familiar with a woodruff key, here’s what they look like new, and you can buy them at Aircraft Spruce and other places:
The rounded part goes down into a slot in the alternator drive shaft, and the straight part sticks out of the shaft and engages with the drive coupling as you slide the drive coupling down onto the alternator shaft.
Continental has very specific instructions for installing the drive coupling onto the alternator, along with a specific torque value, and very specific instructions for installing the cotter pin.
In this case, we ordered an overhauled alternator (because the shaft was worn and the remaining woodruff key was stuck in the worn shaft,) an overhauled drive coupling (because the slot for the woodruff key was worn,) and a new special nut for the drive coupling (because the old one was worn due to spinning against the gear/drive coupling.)
So, why did this happen? I’m not sure, but I’m guessing the nut was not torqued properly way back when it was installed at engine overhaul about 400 hours ago.
And my next question is, “What about the left engine alternator?” And did the same person install that one? Perhaps we should remove and inspect that one as well.
Here’s another question I’ve been pondering that relates to the title of this episode: “Why did the alternator fail when he put the gear up?”
And here’s my guess: The drive coupling and woodruff key had been wearing over a long period of time, and was barely hanging on, and finally when it was very weak, at the moment the landing gear pump was activated, it caused a momentary surge of amperage draw, just enough to put an increased load on the alternator, and the small bit of remaining woodruff key sheared off completely and the drive gear was free-wheeling at that point, with the alternator shaft remaining still, making it impossible to produce any more electrical power output.
That’s my theory.
And you may wonder, how did the whole thing turn out?
While I would have liked to finish the repair, I was not able to be in the shop the next day, so another A&P installed everything, and the owner took off for a big trip to the South the next day.
If the alternator had to fail, it happened at the perfect time. It was just after a good long 1 hour plus flight to break in a freshly installed repaired cylinder on the left engine, but before the owner blasted off for a long trip in the airplane… amazing.
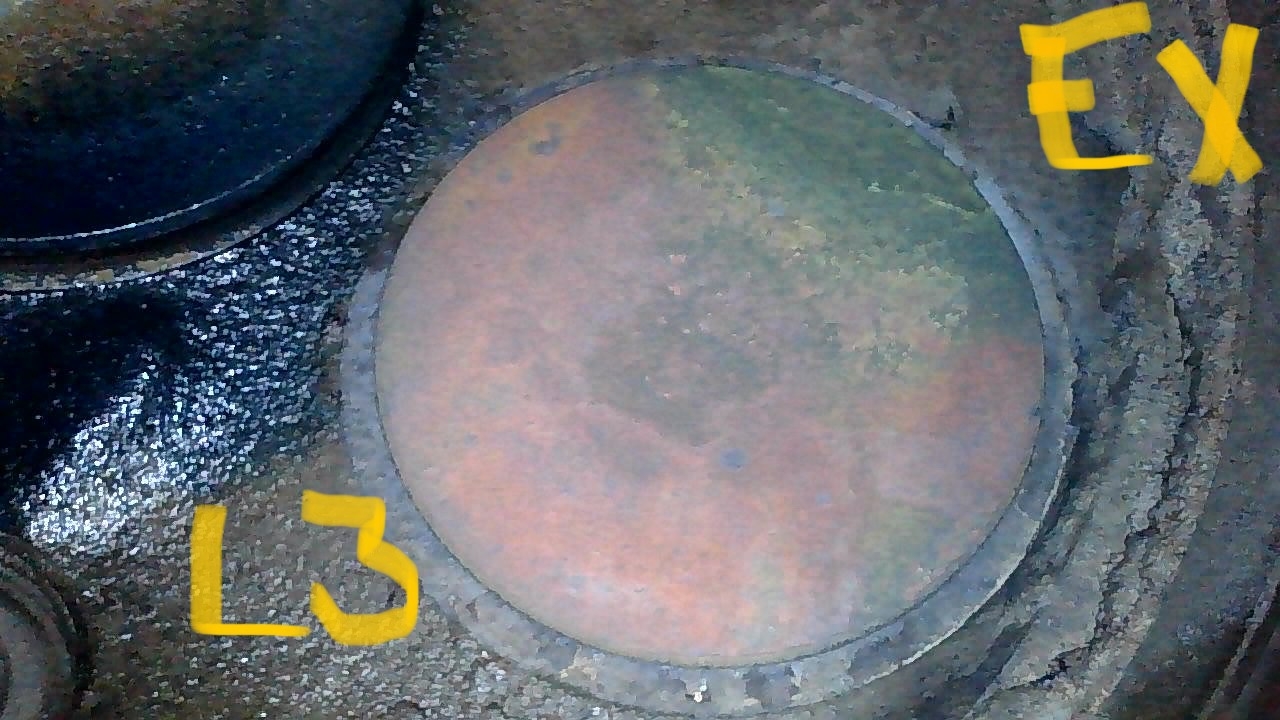
And that’s another story we covered in this episode… the left engine #3 cylinder had to be changed due to a burning exhaust valve. Check it out:
The compression in this cylinder was 11/80, and then we found the burning exhaust valve with the borescope. This photo was taken after removing the cylinder.
If this valve had been found earlier, perhaps it could have been saved by lapping and installing a new rotocoil, but since it was too far gone with a green edge due to severe burning and wear on the seating area, it had to be removed.
One more interesting thing about this whole scenario is the owner has had some concerning oil analysis reports from both engines recently, and he’s been trying to get to the bottom of it. Hopefully, after repairing the left engine cylinder #3, including a new exhaust valve and valve guide, and no longer having a woodruff key coming apart in the right engine, the oil analysis reports will be much better moving forward… we’ll see.
Here are a few other items we talked about in this episode:
The turbo Cessna 182 RG that’s ready to fly again after a big annual inspection and cam / lifter change in the engine.
A prebuy on a really nice Mooney M20C.
My good friend Dave Ovad and some fuel system work and landing gear work we did on his nice A36 Bonanza. And just to document this, here’s the P/N for the little thin special washers that go on either side of the middle rod end for the nose gear system, at the idler arm connection at the aft end of the nose gear well: 100951CR016YF If you have a Bonanza and you’re going to replace the 3 nose gear rod ends, go ahead and order a couple of these inexpensive washers, because sometimes, they are missing!
Another turbo-normalized Bonanza I’m currently doing an annual inspection on.
Well that’s all for this time… thanks for joining me!
The post “197 – When He Put the Gear Up the Right Alternator Quit” appeared first at AirplaneOwnerMaintenance.com
When an airplane engine is making a small amount of ferrous metal, but the evidence is not totally conclusive, the decision to tear it apart, or not, can be gut-wrenching.
Such was the case for the O-540 engine in a turbo Cessna 182RG I’ve been working on at Classic Aviation LLC.
But after the owners decided to have it torn apart, and I got to see the evidence, I’m convinced they made the right decision.
Take a look at the two worst lifters:
And the corresponding cam lobe for those two lifters:
Here’s a side view of the worn cam lobe:
Now compare to one of the other cam lobes that was NOT worn down:
After seeing the condition of the camshaft and the lifters, I was very pleased with the decision of the airplane’s owners to have the engine torn down and repaired.
This engine was mid-time, and all the cylinders were running fine with good compressions, so it made sense to do this repair as opposed to a full overhaul.
In this episode, we also discussed some squawks from a Cirrus SR22T. I’ve got some photos and even a video for some of these.
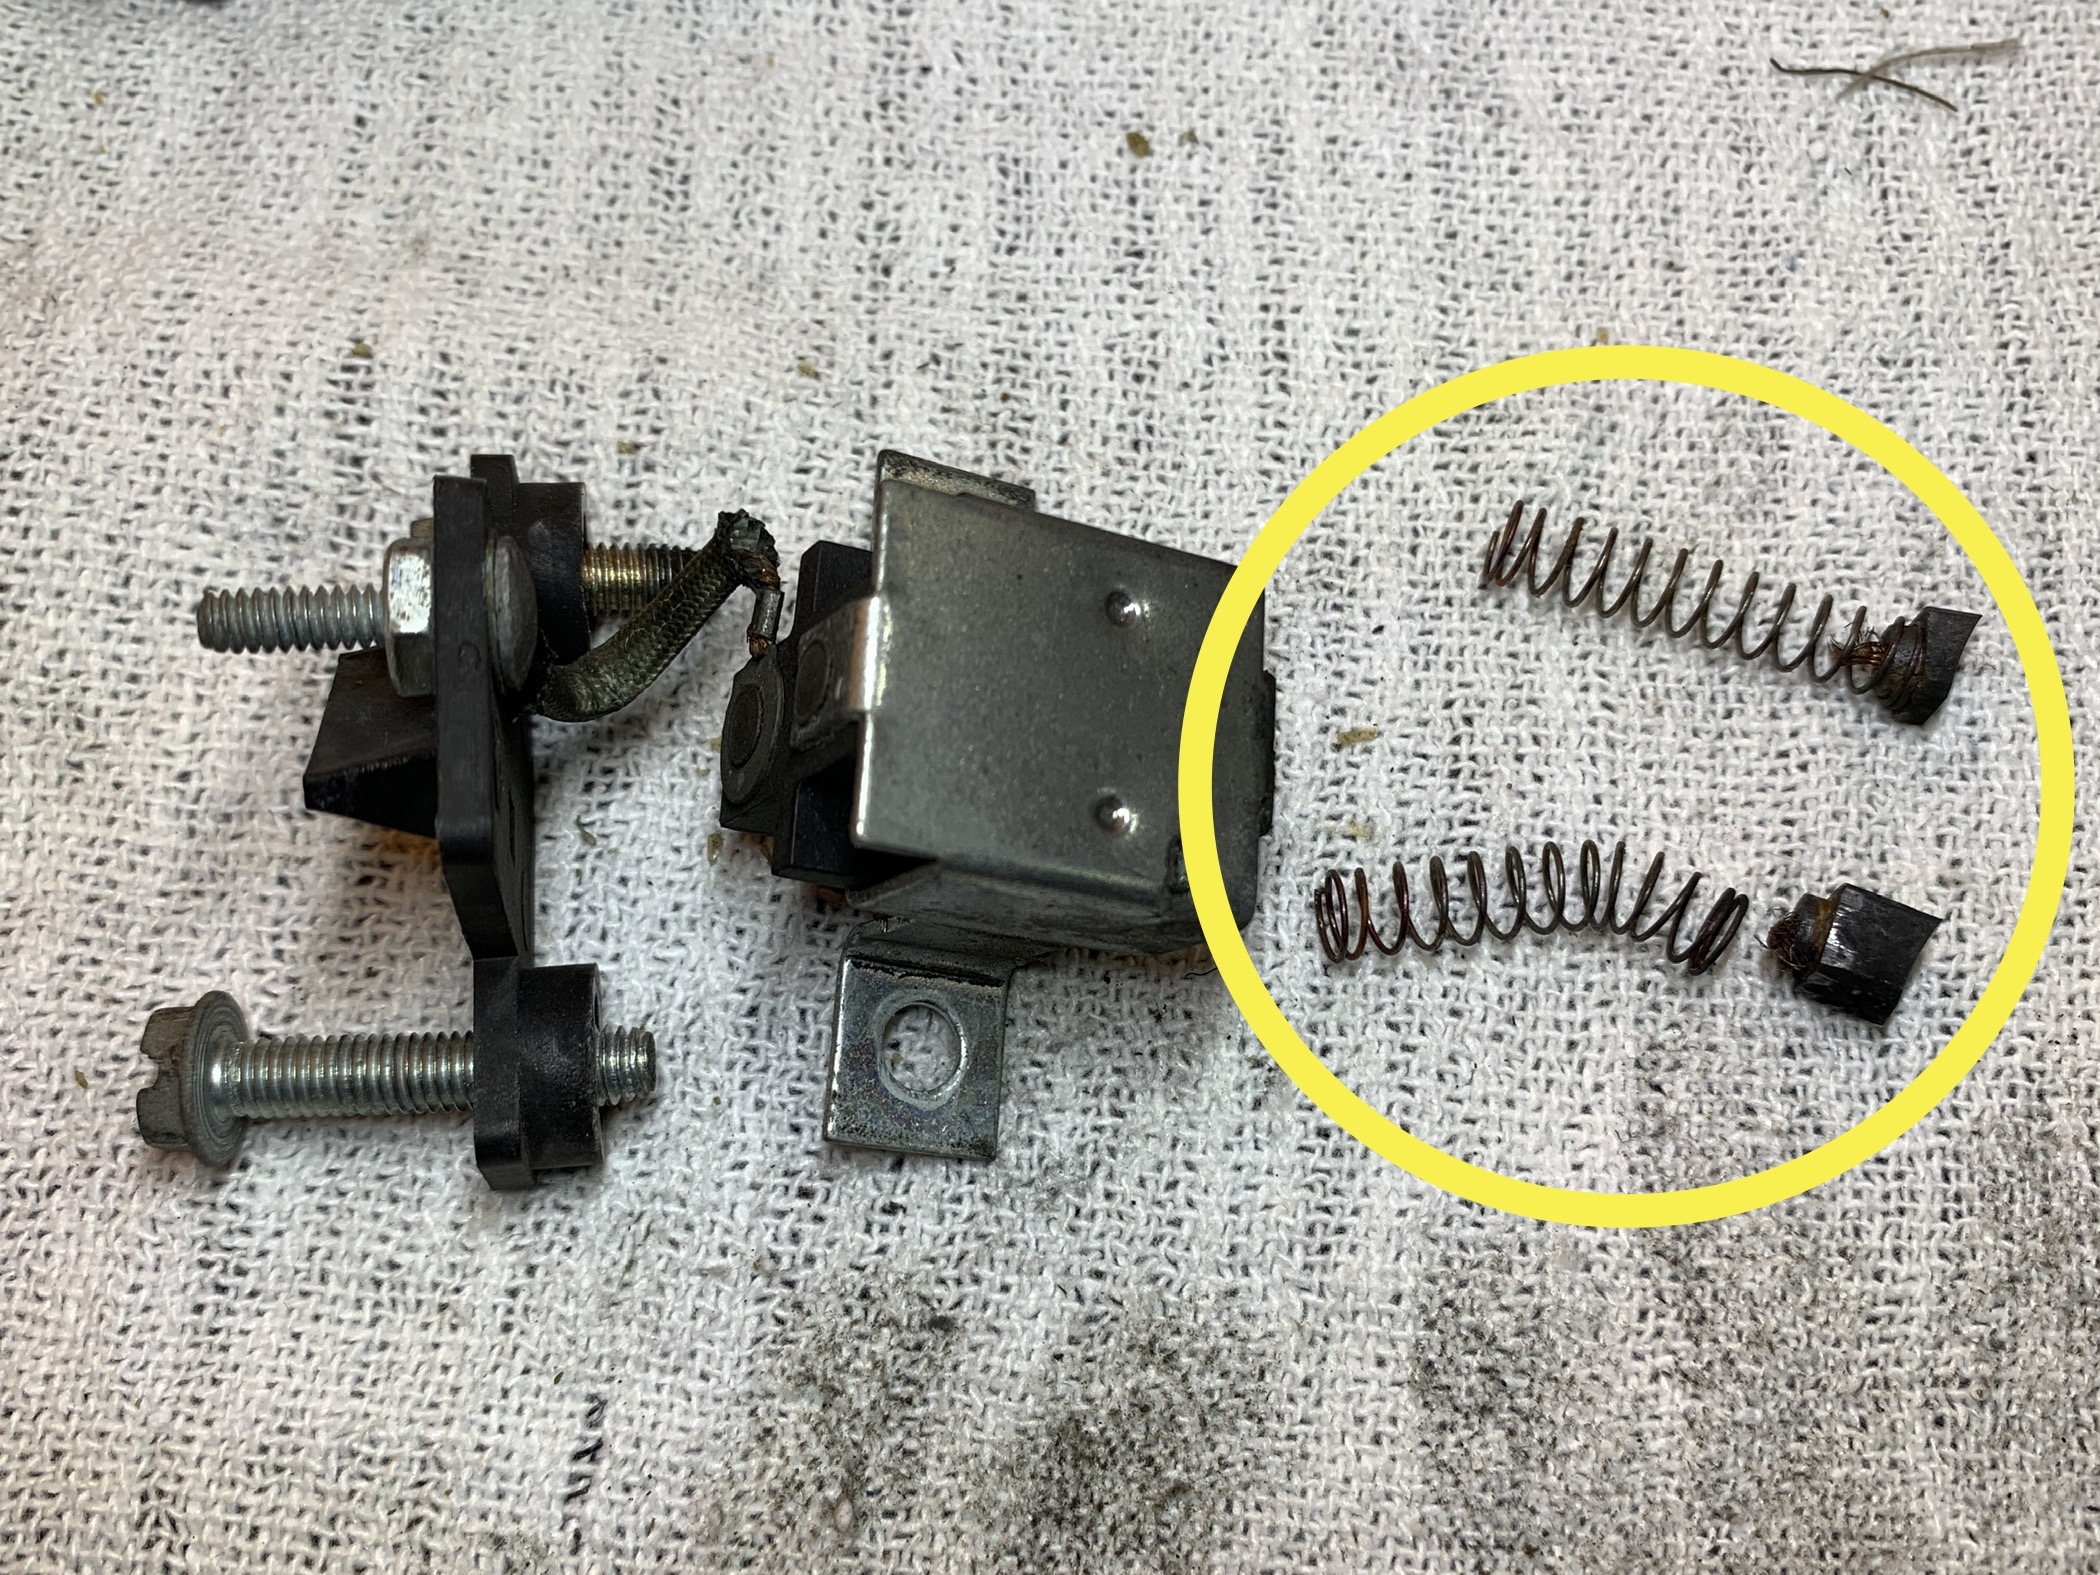
Alternator #1 needed to be removed due to brush wear, and the oil seal was leaking… check out the brushes that came out in pieces:
We also had to send the engine driven fuel pump for overhaul… watch a startling video of a BAD fuel leak:
We sent the fuel pump to Mike’s Aircraft Fuel Metering in Tulsa, Oklahoma for overhaul… they do excellent work on fuel system components.
Happy New Year everyone! May God bless you in 2022!
NOTICE: UNTIL THE END OF MAY 2020, USE CODE “CANARD” FOR A 20% DISCOUNT ON MY VIDEO COURSE “SAFETY WIRE LIKE A PRO!” (Listen to the podcast to hear the story behind the word “canard” and why I chose that for the code.)
Click the following link to learn about the course:
I received an email recently asking a question about an alternator that came apart due to a failed bearing… listen to today’s podcast episode for some thoughts on that.
Also, many older airplanes don’t have a digital voltage indicator on the instrument panel, so here’s a fantastic solution for plugging in to the cigarette lighter: (and the great thing is, it’s under $20!)
Here are some other items of interest from this past week: (All of these situations are described in today’s episode.)
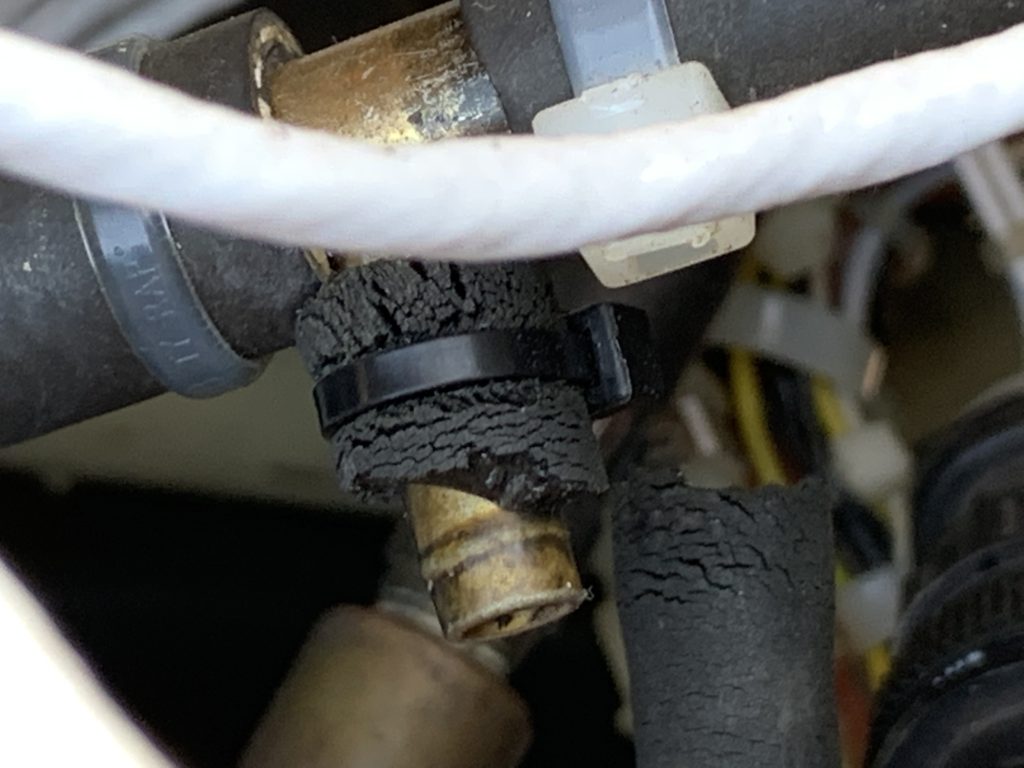
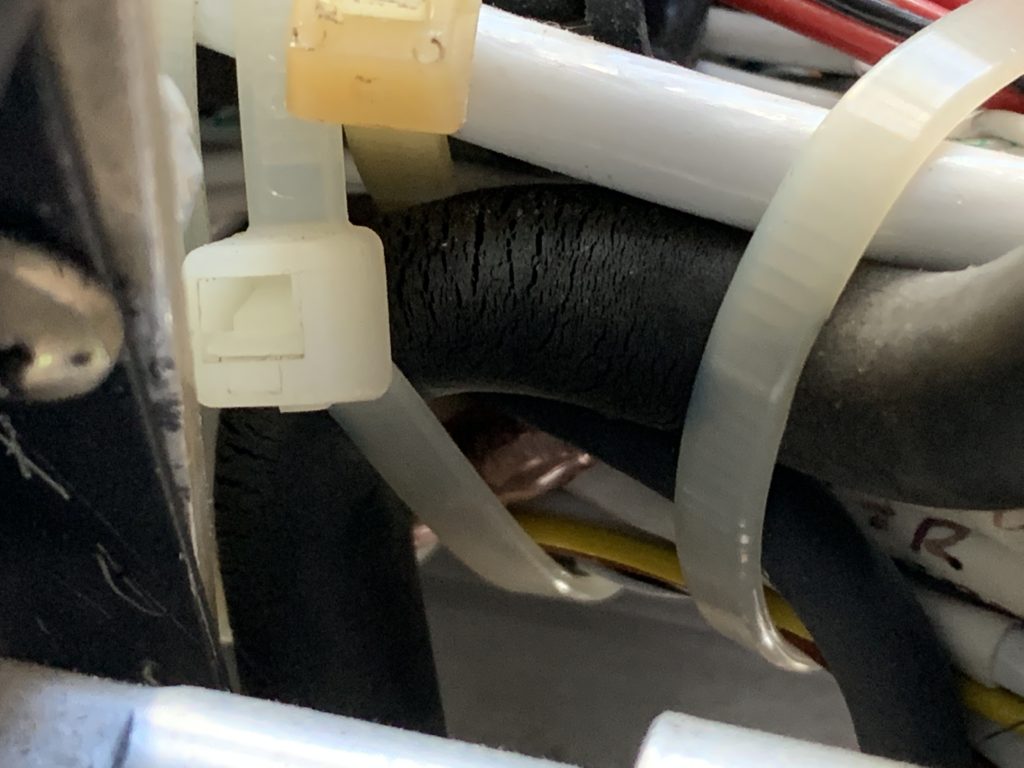
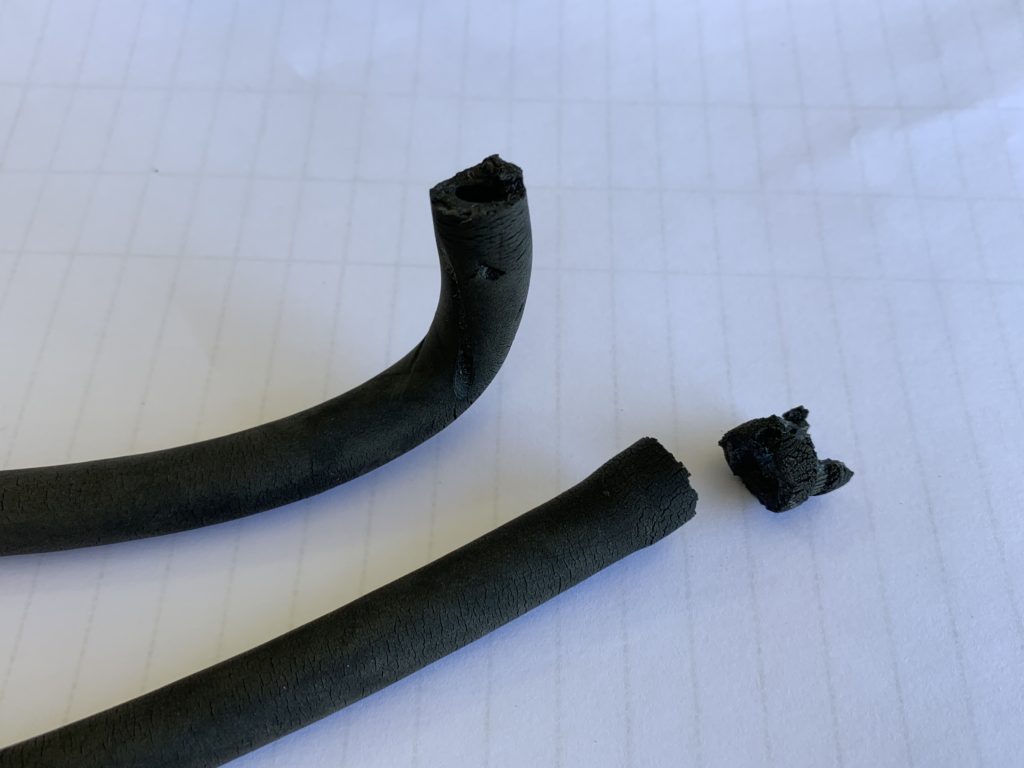
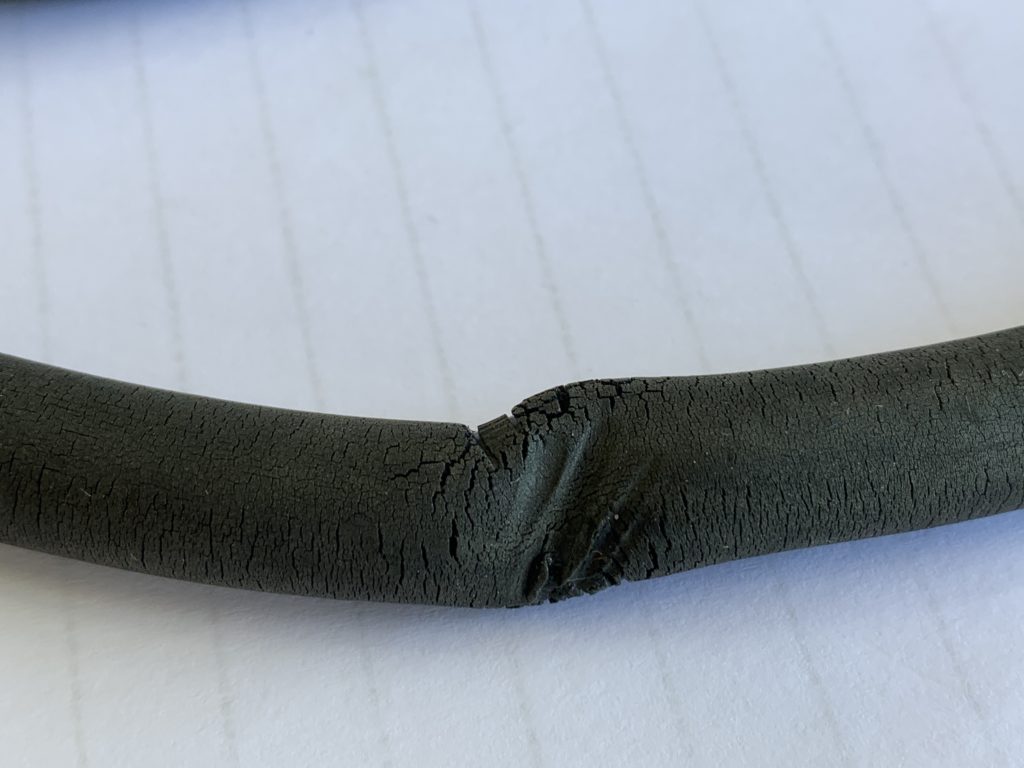
STRANGE VACUUM GAUGE INDICATIONS IN A MOONEY – CHECK OUT THE DETERIORATED HOSE THAT MAY HAVE BEEN CAUSING THIS:
EXHAUST SYSTEM PRESSURE TESTING ON AN AEROSTAR:
A SLICK MAGNETO THAT MADE IT TO ABOUT 1700 HOURS! (This one has gone to Kevin Herrington at Aircraft Ignition Services, LLC for repair.)
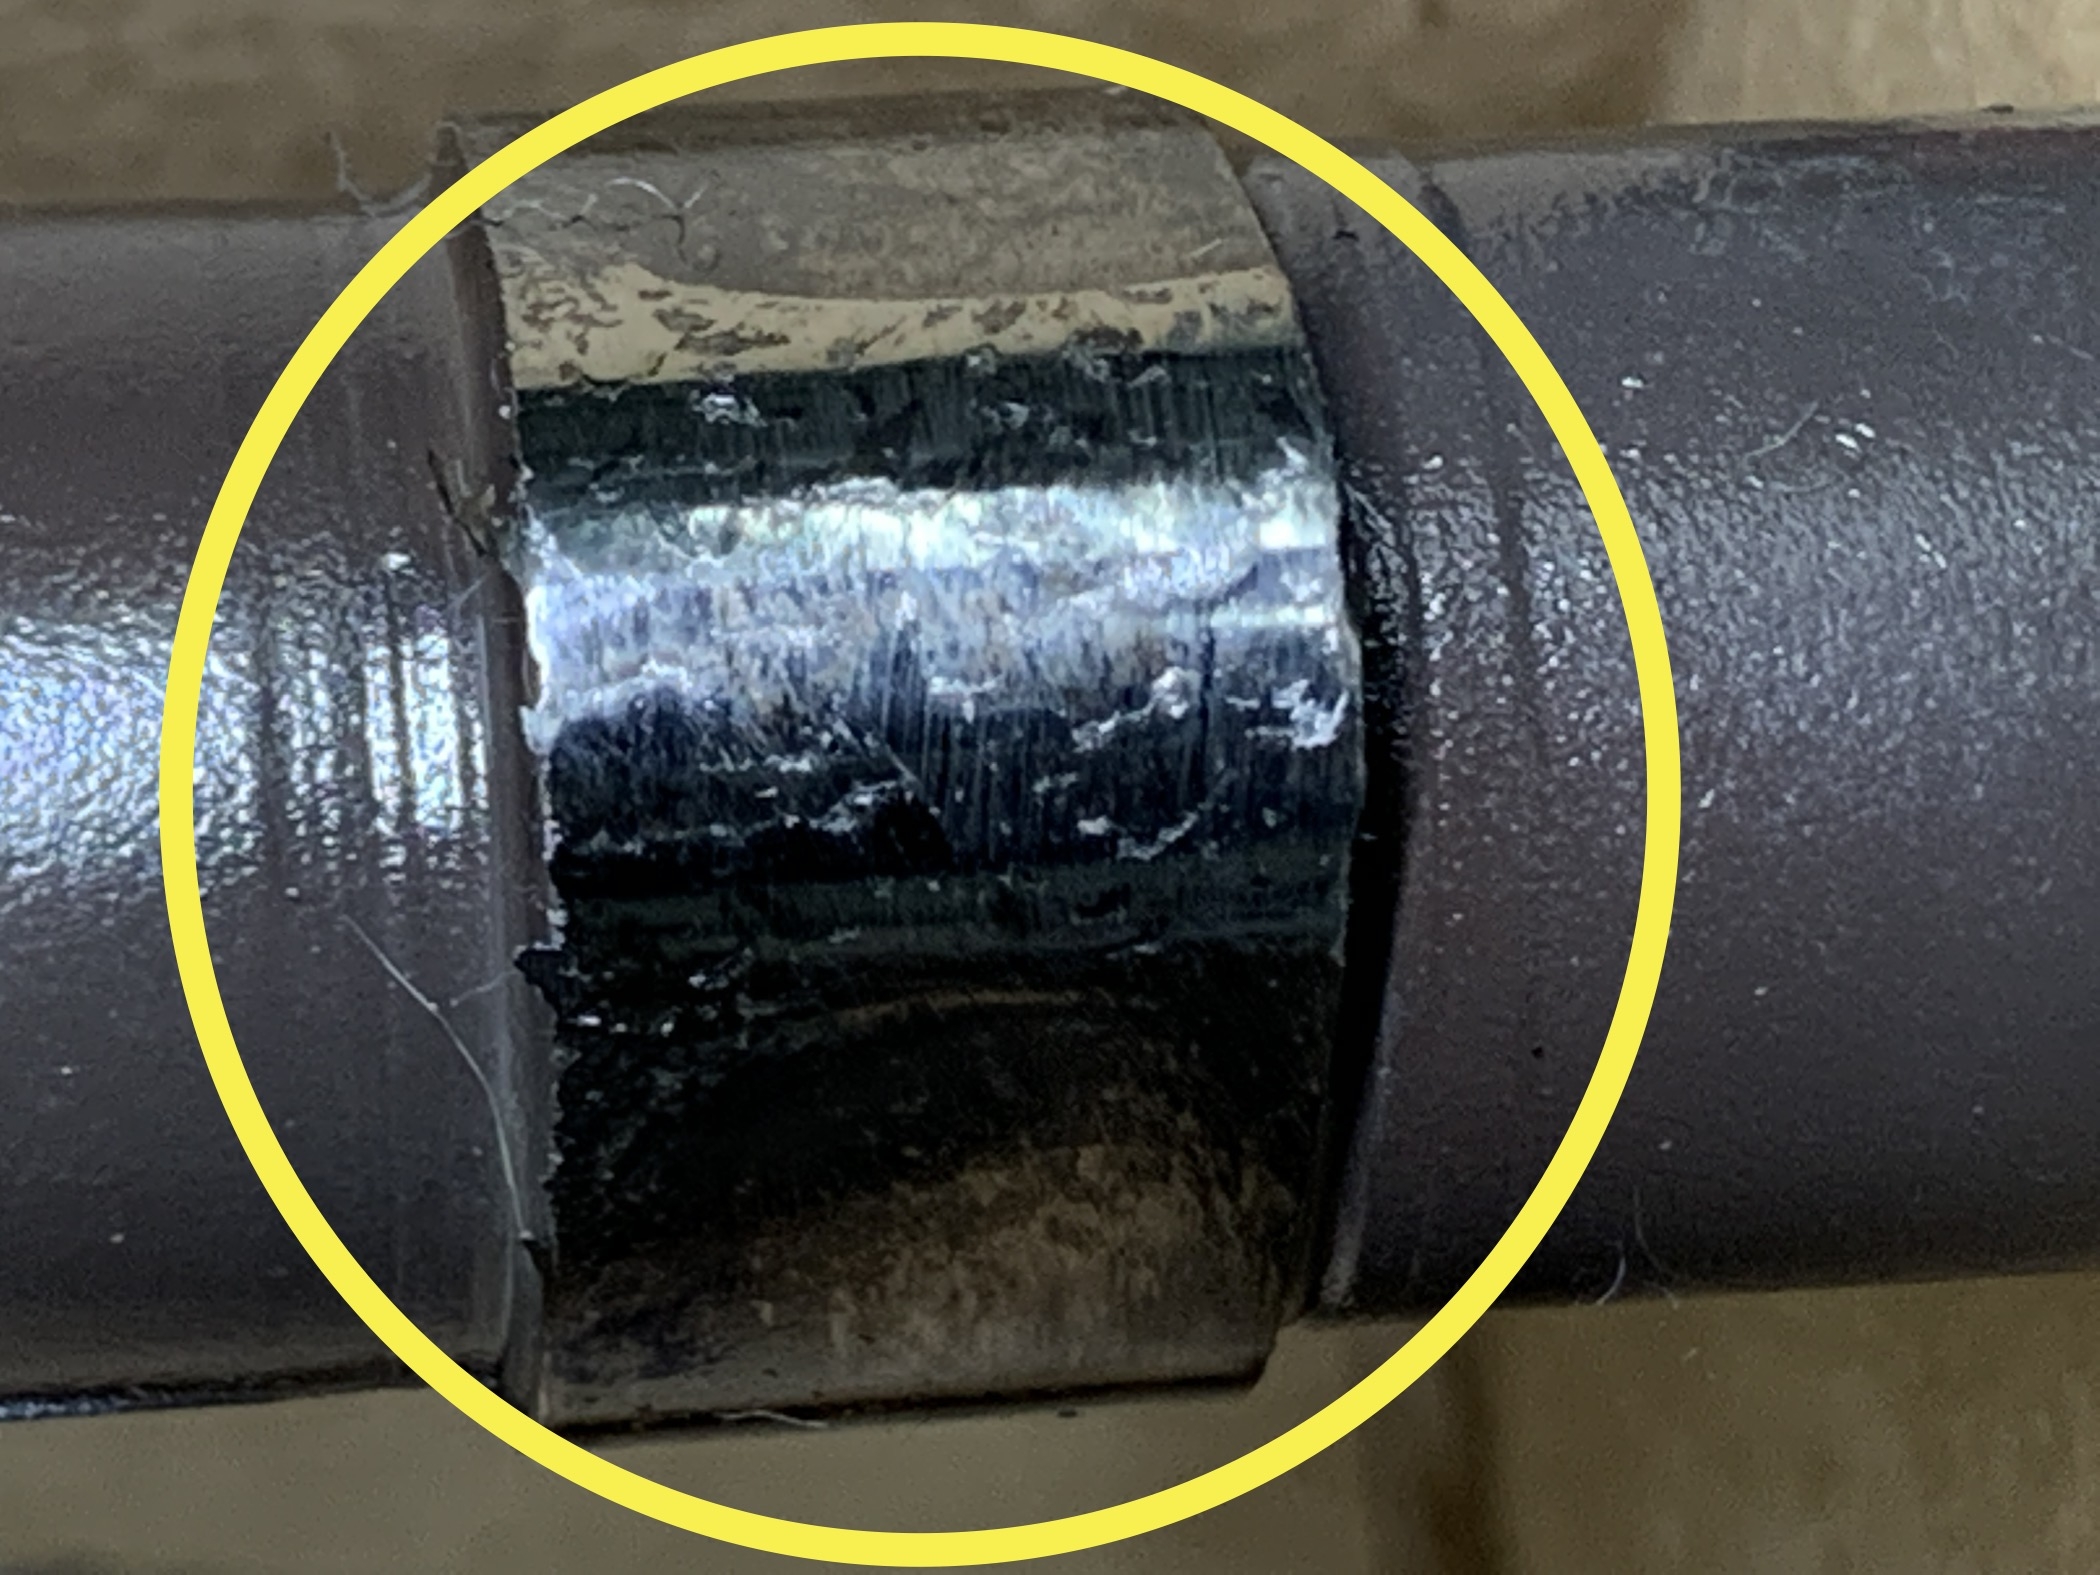
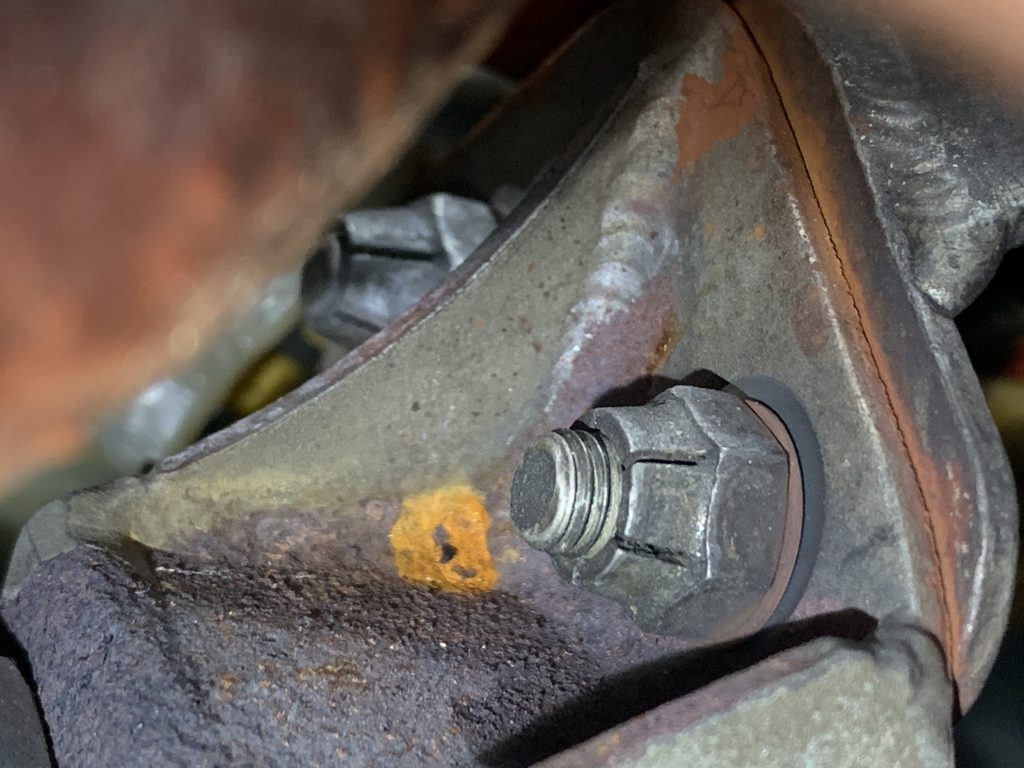
A LOOSE BOLT IN A TURBOCHARGER SUPPORT BRACE: (NOTICE THE RUSTY COLOR IN THE SEAM, WHICH INDICATES CHAFING. ALSO NOTICE THE WEAR MARK UNDER THE WASHER.)
For more information about noticing colors on an engine, check out podcast episode 036 – Tell-Tale Colors in an airplane’s engine compartment.
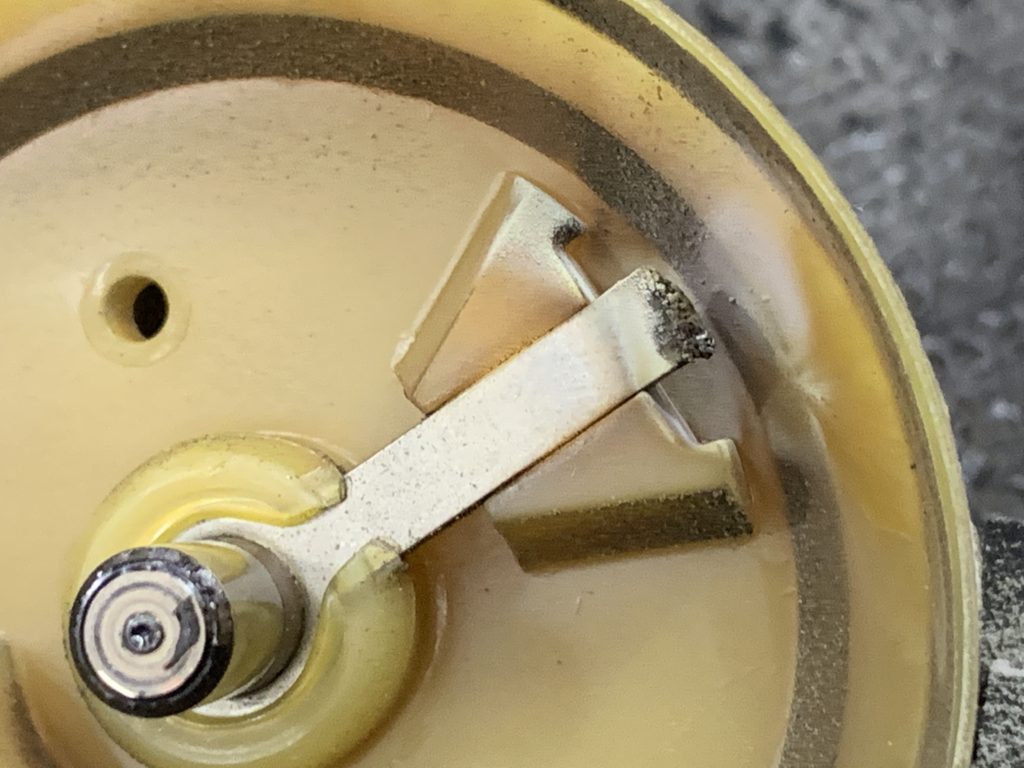
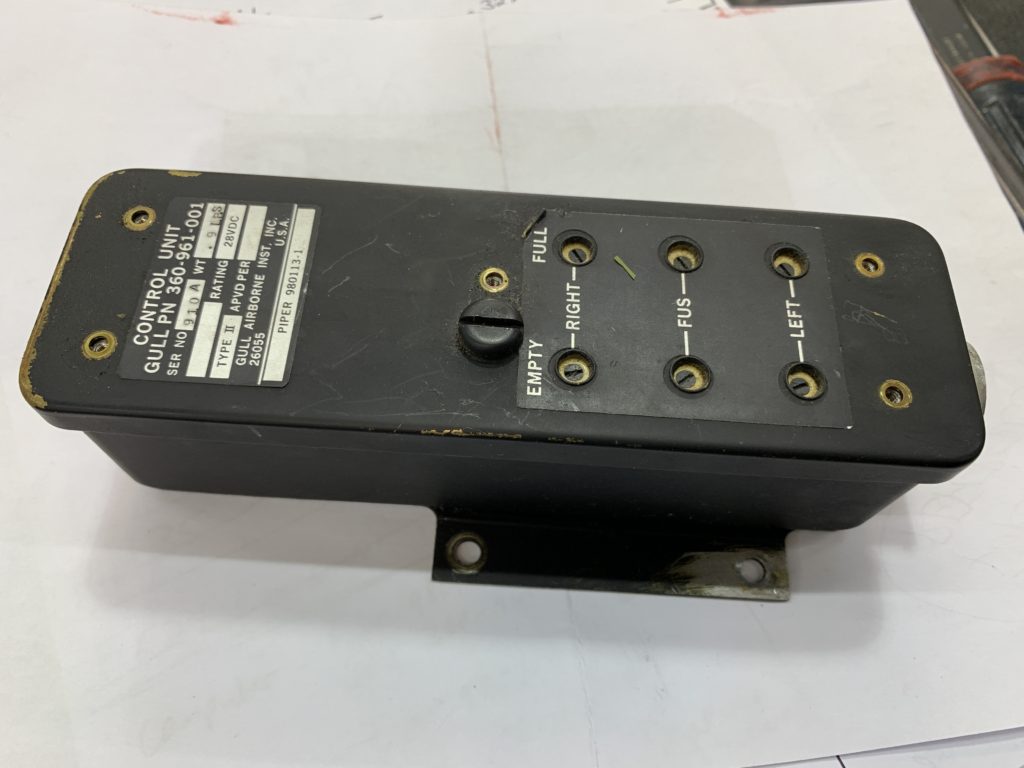
A FUEL QUANTITY COMPUTER IN AN AEROSTAR:
(We sent this component to Tech-Aire in Wichita, KS because the right fuel gauge was not indicating properly, and “Bill” advised the problem is usually in this box… so I’m hopeful this will fix it.)
PLEASE SEND ME A VOICE MESSAGE OR AN EMAIL:
Which one of these video training courses would you be most eager to learn from:
Servicing landing gear shock struts.
Basic electrical system operation and troubleshooting.
Exhaust valve borescoping and interpretation.
Another idea you have! (Let me know.)
I’d love to hear your thoughts, so click that tab over on the right side of the page and record a voice message, or, send me an email: dean@airplaneownermaintenance.com
Don’t forget, you can get my safety wiring video tutorial course for 20% off through the end of May 2020… click this link for more info:
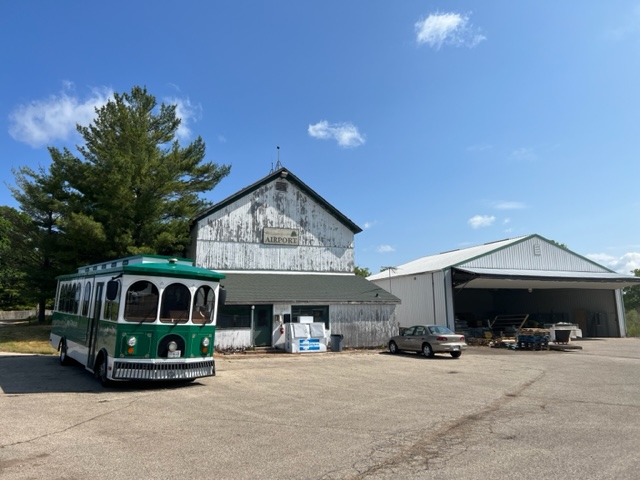
My friend Matt and I had a plan, and it was going to be an awesome adventure. The crisp, clear morning was as nice as we could hope for on a November day in Virginia. The half hour drive from my house to the small town New Market Airport was absolutely refreshing… exhilarating even.
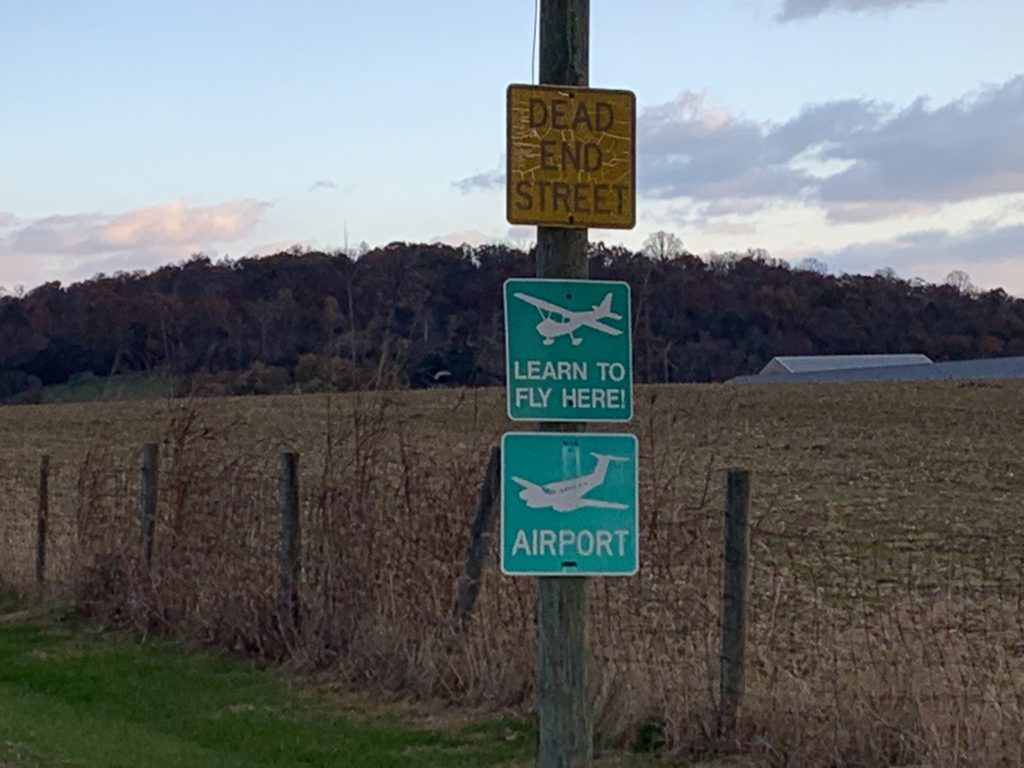
As I pulled onto the airport drive, I didn’t go far before I was compelled to back up and take a picture of the signs that arrested my attention. “DEAD END STREET” AND “LEARN TO FLY HERE” just did not seem to fit together in my mind. As I think about it, I wish I could replace that top sign with “PATHWAY TO POSSIBILITIES!”
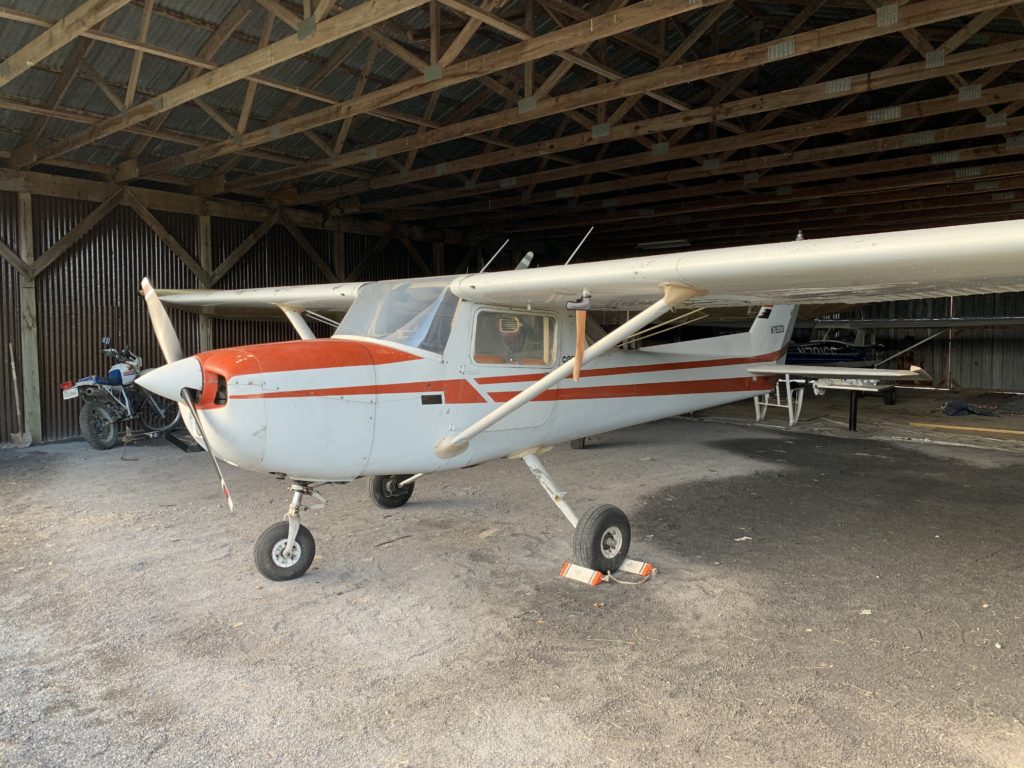
For me, and for my friend Matt, we had far more in mind that day than any dead end street. If our planned adventure came together, we would be flying a little Cessna 150 to Tangier Island (KTGI) and maybe having a crab cake sandwich for lunch. But first, we had to solve a problem… a report of “No oil pressure.”
We struggled to get the “barn doors” open in the old rustic hangar, and the site looked so familiar for these old airports, complete with gravel floor, a motorcycle off to the side, as well as a Cessna 120 and another Cessna 150. I was actually pleasantly surprised when I saw the good condition of the airplane we’d be working on.
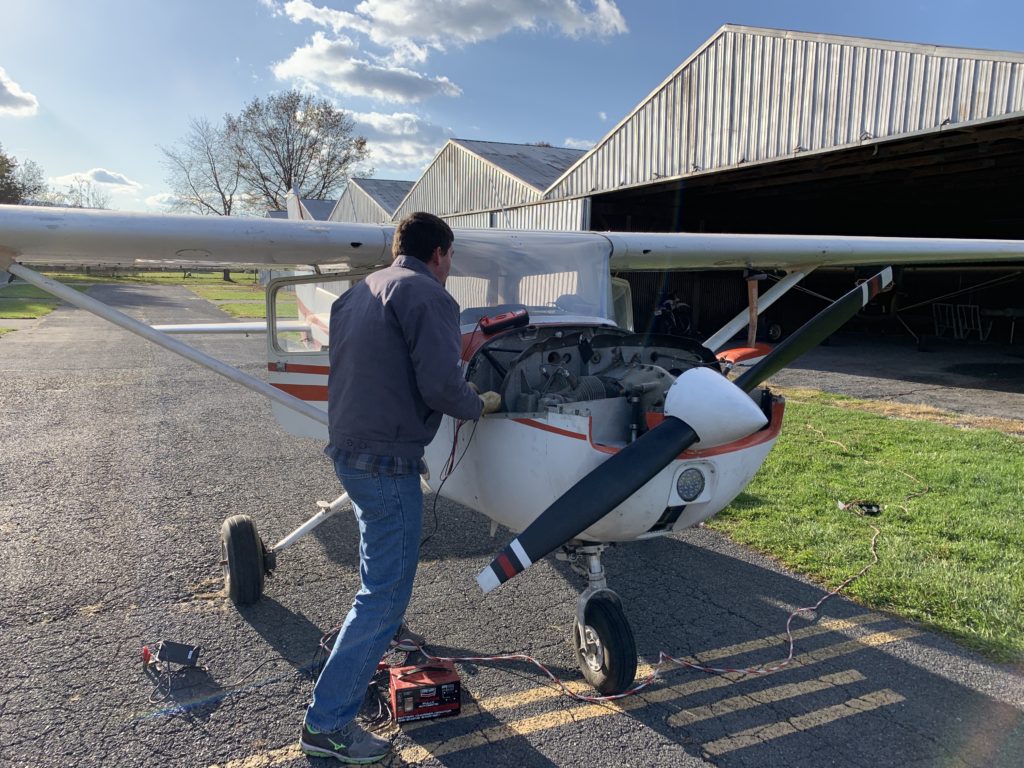
We decided to go ahead and start the engine and see if we got any oil pressure within 30 seconds. The engine started nicely and within seconds, we saw the oil pressure needle creeping up… good news indeed. However, after some warm-up time, we noticed the oil pressure needle went back down, and was approaching the red line at the bottom of the gauge. (It had never made it up to the green arc.)
So we shut down, and decided to see if the oil pressure line had any air in it. Thankfully, the gauge was very accessible at the bottom of the pilot instrument panel. After loosening the nut for the oil pressure line behind the gauge, there was not even a drop of oil there. So we attempted to motor the engine with the starter to get the air out of the line.
Now we had another problem… low battery power! The engine wouldn’t even turn over more than a turn or so. Back to troubleshooting, except now in the electrical system.
Matt suspected the alternator was not working, and this proved to be true when we discovered no voltage at the field terminal on the back of the alternator when we turned the master switch on.
Then something jumped out at me… I was standing over on the left side of the engine, and I noticed the whole wiring harness plug was disconnected from the voltage regulator at the firewall. Take a look.
Amazing how well things work when all the wiring is connected properly!
So after charging the battery, we tried again to purge the air out of the oil pressure line. Matt motored the engine with the starter for maybe 30 seconds, and just as he let off the starter, I saw oil seeping out at the gauge connection… success, finally!
This time, after starting, the oil pressure climbed up in the green arc, and stayed there during the runup.
Now, how about Tangier Island? Could we still go?
Nope… I noticed the maintenance records were in the back of the airplane, and the airplane was still in annual… sort of. The main thing is there was some lacking documentation that made it unwise to fly the airplane until it was resolved. Mechanically, I totally would have been confident to go flying in that airplane with Matt. But paperwork-wise, the issue needed to be resolved.
That’s ok… instead of lunch at Tangier Island, Matt and I had breakfast at Dunkin Donuts. And… we’re not giving up on the Tangier Island idea. In fact, after thinking about the whole thing, I did some research, and discovered a young man named Swayne Martin, who gave me even more motivation to visit Tangier Island. He and his brother flew their mom there in a Cessna 172 several years ago as a mother’s day gift! If you’re interested, his post is very interesting.
You may recognize Swayne from his involvement with the Boldmethod online flight training resources. He also has an excellent YouTube channel. I also found out he has gone on to become a first officer with one of the regional airlines. Well done Swayne!
Now back to Tangier Island… Matt and I are not giving up, and I’m confident we’ll still get there one of these days… very possibly in that very Cessna 150 we worked on. And when we do, you’ll hear about it, because it will no-doubt be an excellent adventure for another podcast episode!
It really was a great day, and the sunset view of my neighbor’s field from my back yard, was just as fantastic as the sunrise view on the way to the New Market Airport.
Days like this make me say, “Thank you Lord, it’s good to be alive!”


Recent Comments