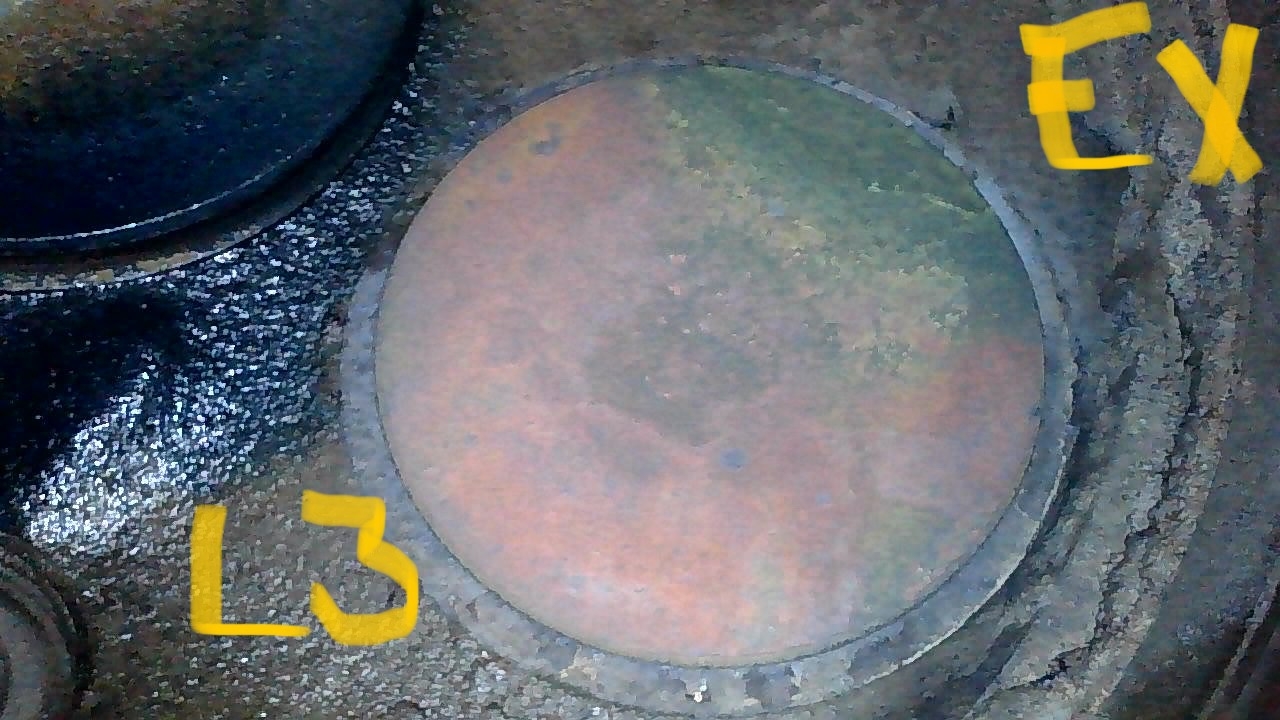
This exhaust valve in a turbo-normalized A36 Bonanza looks quite good. The appearance is mostly concentric and uniform. There’s just that one area at about the 10 to 11 o’clock position that looks slightly uneven.
If the compression test had been good, I likely would not have lapped the valve.
But since it was 44/80 when the required minimum was 46/80 according to the master orifice reading, I lapped the valve in place, installed a new rotocoil and new valve springs, and put it back together.
Amazingly, after doing this work, I got a good solid cold compression of 65/80!
I’ve found that lapping the exhaust valve and restoring a good seal between the edge of the valve and the seat is the most effective way to improve a low compression number, as long as everything else looks good in the cylinder.
Here are some additional photos of the seat area before lapping:
You can listen to the full story in the audio for this episode.
I’ve also included some email feedback from the last episode, including a story about an airplane that made a precautionary landing in a field!
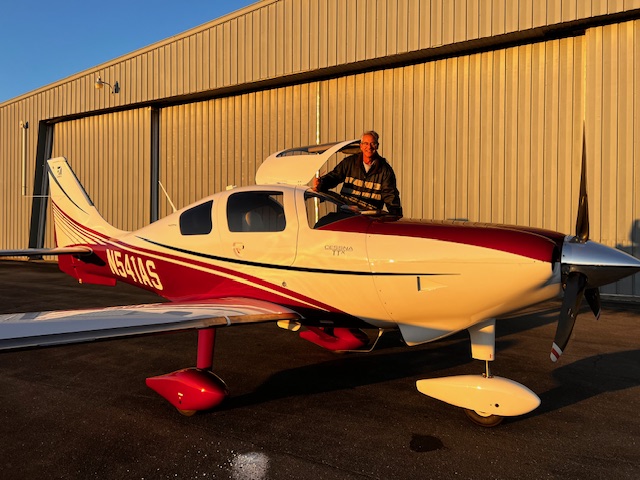
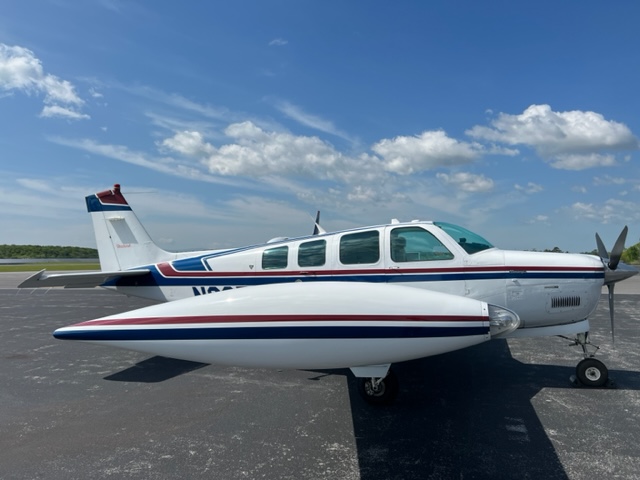
Here’s a totally separate photo of that same airplane from one of its scenic flights:
Thanks Justin, for agreeing to let me share your amazing story of landing this airplane in a field!
Bennett contacted me awhile back to see if I could lap an exhaust valve for him.
The #4 exhaust valve showed a very uneven appearance when viewed with his borescope.
Bennett flew in to KSHD one morning and we got started.
Before lapping, we checked the cylinder compression and it was 29/80… not good.
Here’s what the valve looked like:
We got to work and lapped the valve.
When we were happy with the progress, we reinstalled the exhaust valve in the valve guide and installed new valve springs and a new rotocoil, to help ensure the valve would rotate properly and provide the best possibility for a good seal between the valve and the seat.
After running the engine, we rechecked the compression, and were very pleased… it was 74/80!
Amazing!
But there’s more…
Several weeks later, Bennett emailed me, and here’s what he said:
“Dean, I am so excited I am emailing from my hangar… Looks like lapping worked great! After one flight down to Florida and back… about 3.5 hours each way, the #4 exhaust valve looks vastly improved. See before and after pics attached. Much thanks!”
And here are the before and after photos he sent:
BEFORE:
AFTER: (and keep in mind the following photo was after only about 7 hours of engine operation.)
I’m confident this exhaust valve has been rescued, and will quite possibly run normally for many more hours.
It’s always nice when we can solve these valve problems with “laparoscopic surgery” (lapping a valve in place) instead of “major surgery” (removing a cylinder.)
There’s more to this story, but I’m not going to type it out here… you can listen to the audio for this podcast and hear about the magneto issues we solved on Bennett’s engine as well.
(The magnetos on Bennett’s engine are challenging to work on due to their location and all the stuff around them, but with some persistence, it’s doable.)
Thanks Bennett, for flying down to SHD.
It was nice meeting you and working with you!
The post, “251 – Bennett’s Exhaust Valve Rescue on his Cessna TTx” appeared first at AirplaneOwnerMaintenance.com
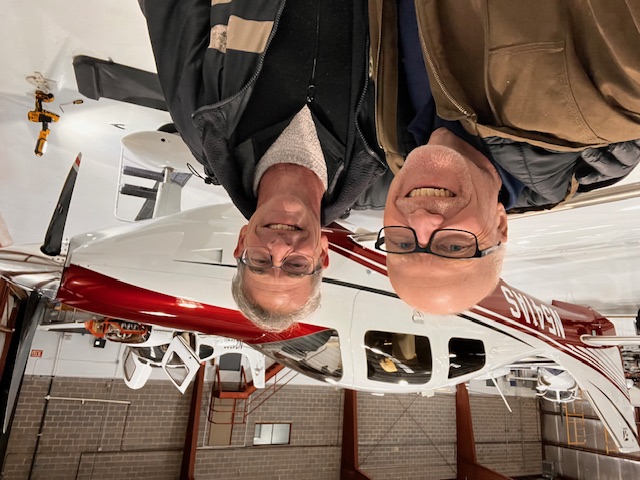
Last Monday, I lapped the #5 exhaust valve on a Continental engine.
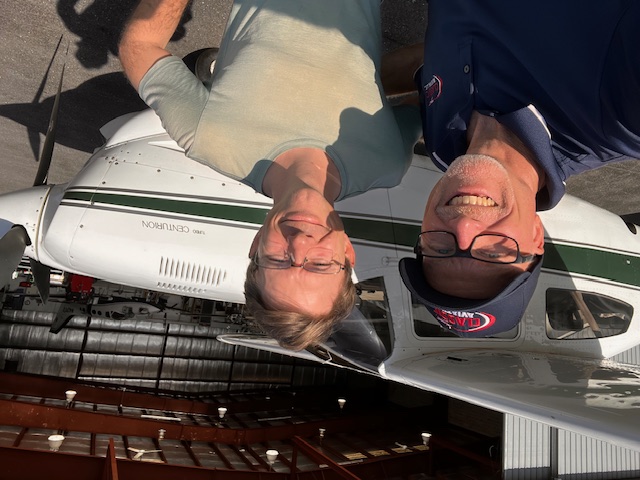
But more importantly, I met the owner / pilot of a Turbo Centurion, and now I’m happy to call him a good friend!
Thanks for flying all the way up here Mark!
Here’s the story:
Mark had been a little concerned about the #5 exhaust valve, not because he was having any particular trouble with it, but because the borescope photo showed a slightly irregular appearance.
And being proactive, Mark decided to do some research.
That’s when he found me, and some of the information I’ve published to help airplane owners understand borescoping, exhaust valve lapping, and other useful pieces of information you often won’t find in the “maintenance manual.”
Mark’s local shop had indicated it would be a good idea to keep an eye on the #5 exhaust valve, and if it continued to be a problem, the cylinder may need to be removed for a repair or replacement.
Some years ago, I would have had similar thoughts.
But not today.
In the past 5 years, I’ve rescued many cylinders from premature removal, especially on large bore Continentals… and I was hopeful we could remedy Mark’s situation as well.
Instead of removing cylinders in situations where the exhaust valve is showing beginning signs of burning, or the compression is dropping into the 50’s and 40’s and below, I now consider the first option of LAPPING THE EXHAUST VALVE WITHOUT REMOVING THE CYLINDER, AND INSTALLING A NEW ROTOCOIL.
Mark was interested to learn about this process, so we agreed on a plan for him to fly his airplane from North Carolina to the Shenandoah Valley of Virginia for some not-so-invasive surgery on his airplane engine.
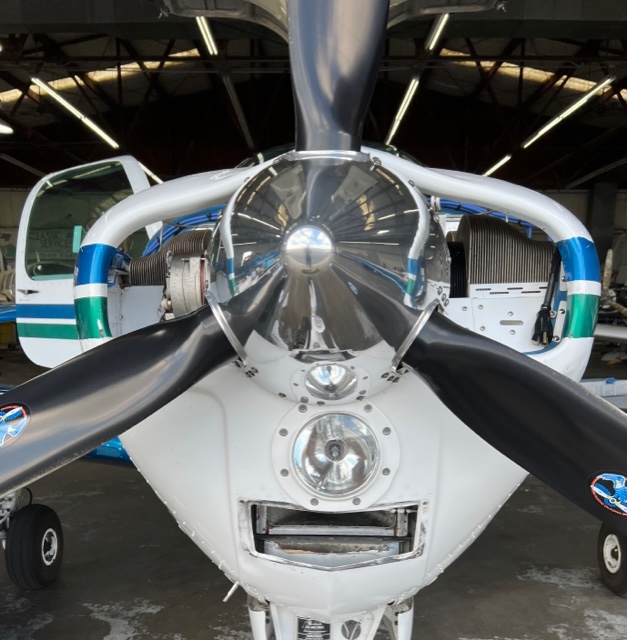
Soon after Mark landed, we rolled his Cessna T210 in the shop and got to work.
I won’t bore you in this post with all the details, but we lapped the exhaust valve and were both pleased with the progress along the way and with the end result.
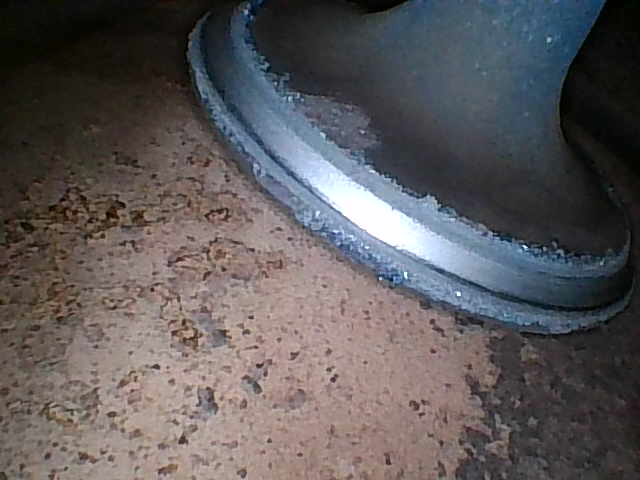
Take a look at some photos showing the lapping compound at work, and the nice, shiny sealing band that’s developing on the edge of the valve.
An excellent sealing surface, along with a new rotocoil on the valve, will help to ensure it rotates properly during operation, thus minimizing the chances for a burning exhaust valve which will shorten it’s lifespan if not remedied.
When the process was completed, we flushed the lapping compound out the bottom spark plug hole and sprayed some LPS-2 in the top spark plug hole and dispersed it with compressed air in an attempt to keep the cylinder wall lubricated during startup, after which the engine lubrication system would take over and do its job.
During reassembly, we installed a new rotocoil P/N 629117-1 on the exhaust valve and reassembled all the parts that had been removed.
You may ask, “Why do we need to install a new rotocoil?”
Great question.
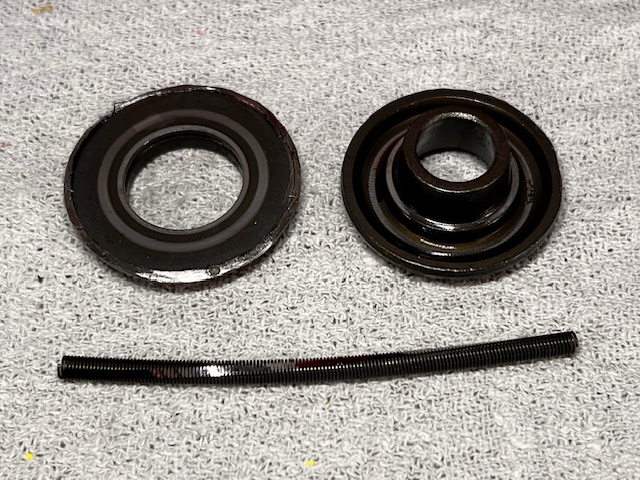
And to answer the question, some photos will help.
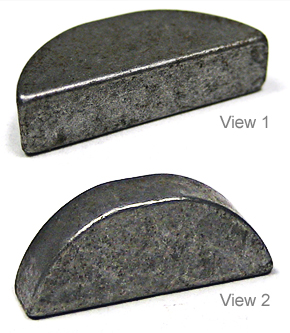
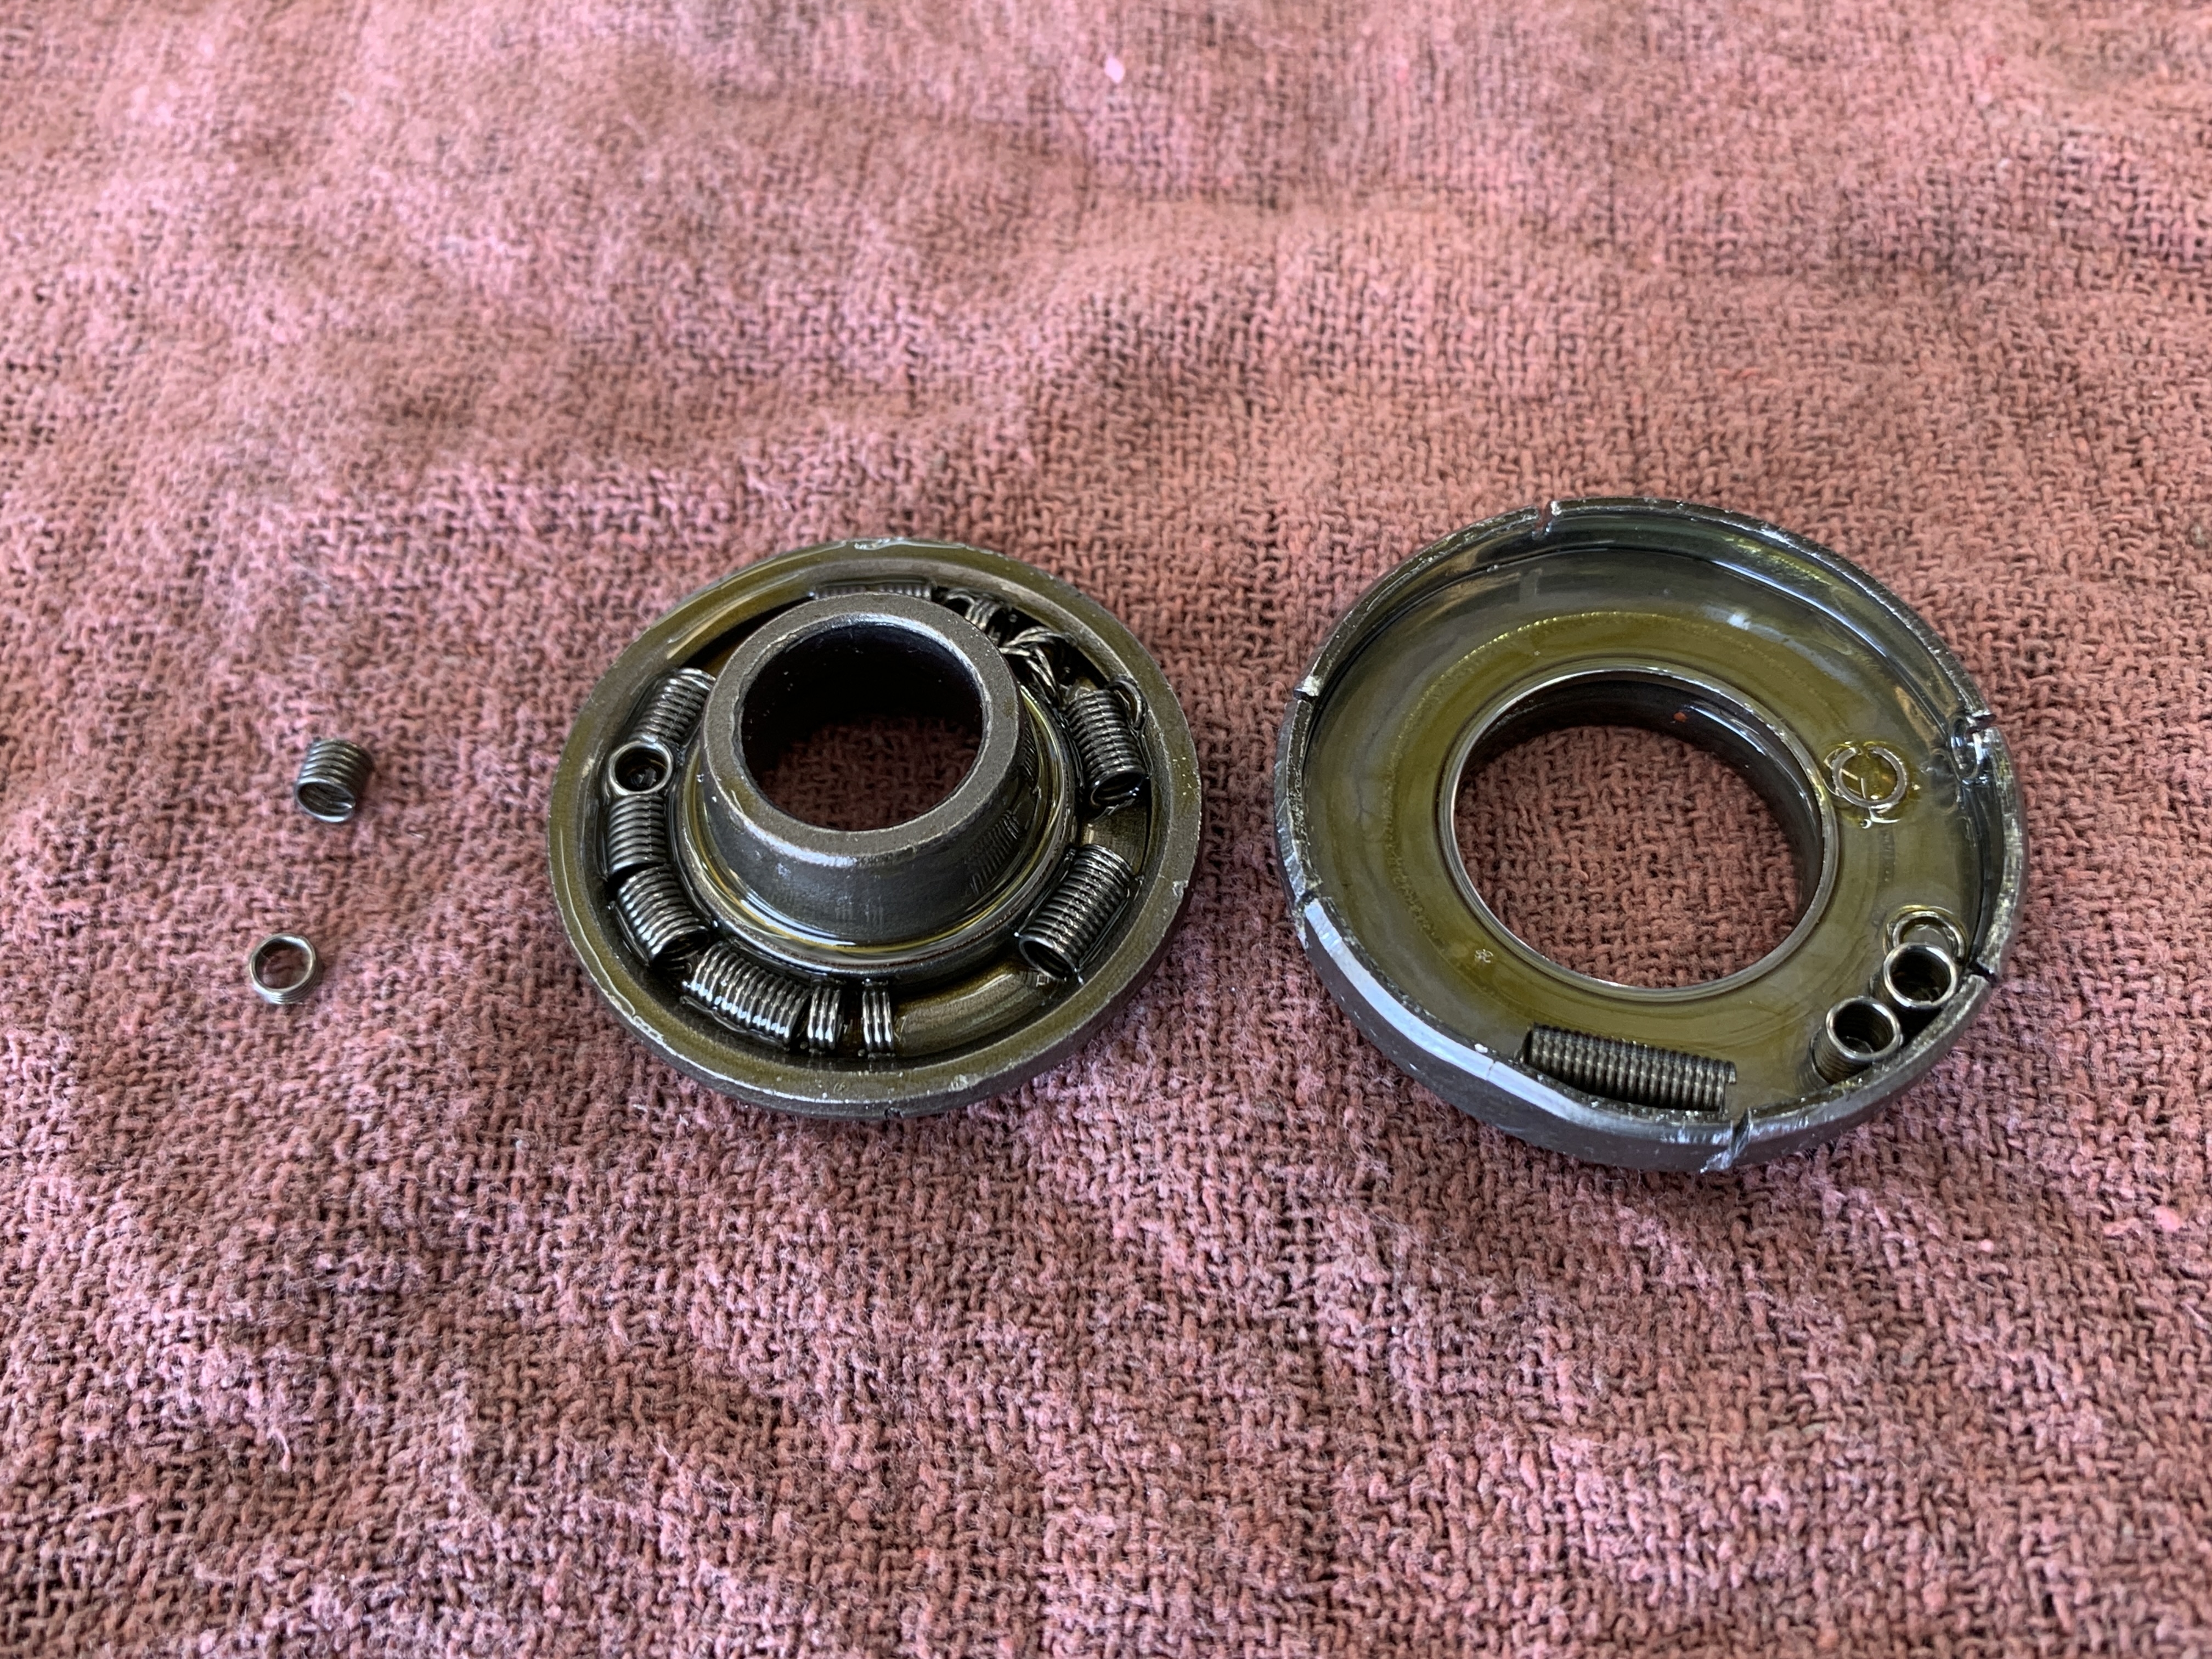
When you cut a rotocoil apart, here’s what you’ll find: two halves, a special washer, and a long spring laying on its side.
Every time the valve stem is pressed down by the rocker arm, the rotocoil makes the valve rotate just a little. This action helps prevent hot spots on the edge of the valve, and keeps the sealing surface in tact between the valve and the valve seat.
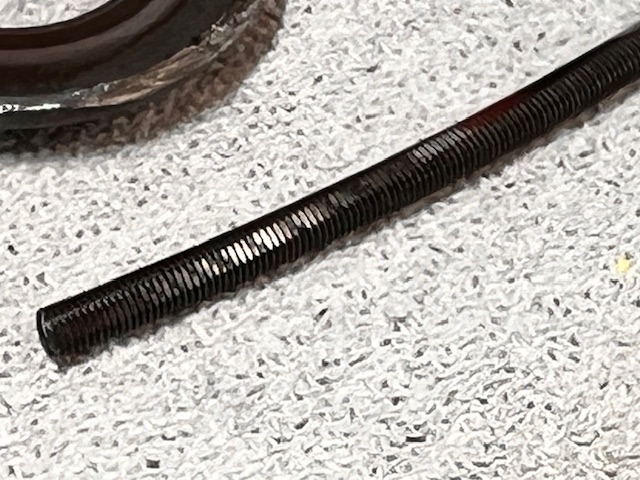
Over time, the spring gets a flat spot on it which decreases its ability to make the valve rotate.
Here’s a close-up photo of the flat spot on the spring:
Eventually, the spring can break into many pieces if the coils get too thin at the flat spot.
For this reason, and because rotocoils are very reasonably priced, I always install a new rotocoil when I lap a Continental exhaust valve.
We completed the project, Mark ran the engine, and we re-checked the compression. It was excellent at 75/80, a stellar number!
I’ve had very dramatic improvements in compression numbers after lapping valves (like from the 30’s or 40’s to the 60’s and 70’s.) This time was not as dramatic as Mark’s #5 compression was 71/80 before lapping. But it was still very worthwhile doing in order to prevent any further irregularity in the sealing capability and appearance of the valve.
Mark was being very proactive and planning ahead, and I applaud that!
Sometimes people let these valves go too far, and then there’s no choice but to remove the cylinder.
But if caught early, most exhaust valves can be saved from further burning.
Mark, it was great to work with you, and although I don’t wish for you to have any airplane troubles, I do hope we can work together on your airplane again sometime soon!
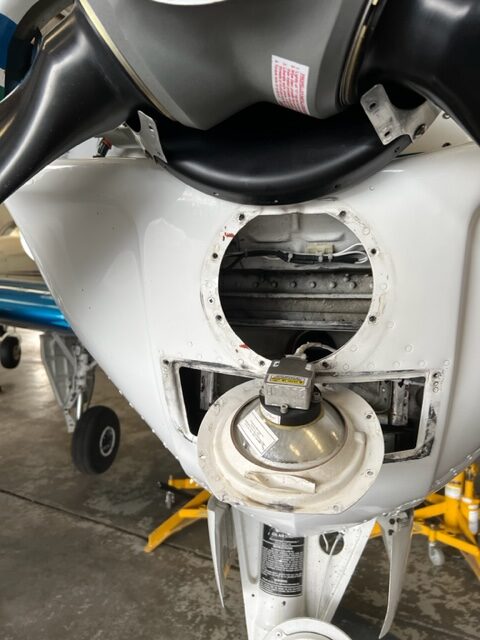
This Bonanza had a problem in the landing light wiring circuit. All kinds of weird things were happening when the light was turned on in flight. You can listen to the podcast audio for more details on this squawk.
I removed the induction filter cover and the landing light assembly and inspected the wiring.
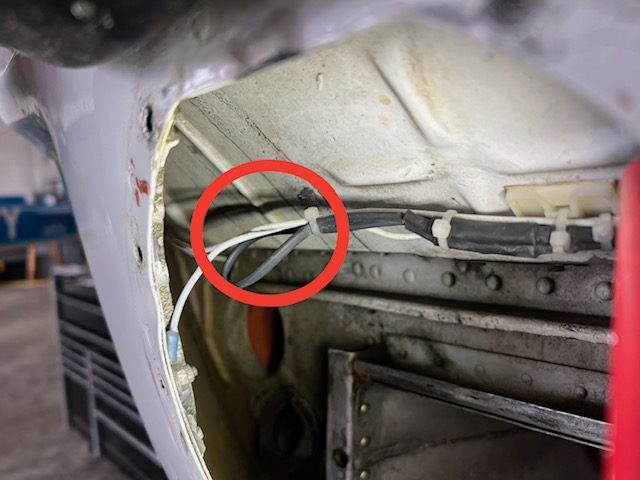
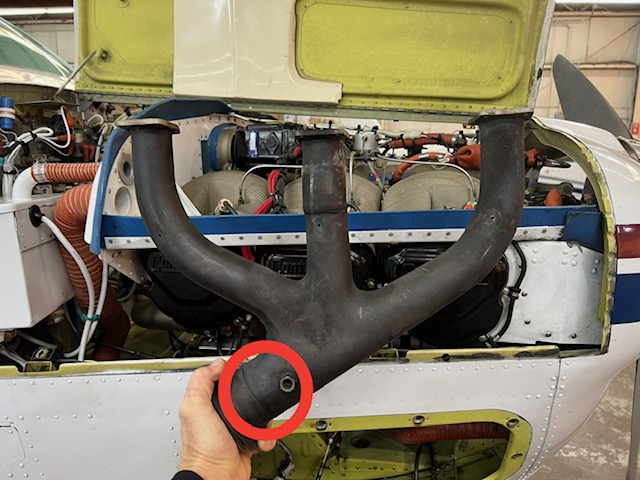
It turned out the landing light power and ground wires were chafing against each other… probably over a very long period of time. Take a look at the area of concern in the red circle on the following photo:
At first glance, it wasn’t visually obvious there was a problem.
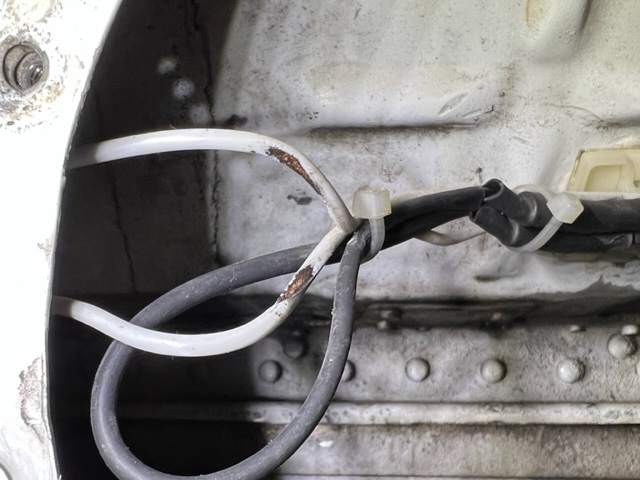
But after separating the power and ground wires, it became very clear what was happening. As the internal strands of the power and ground wires began to just barely make contact with each other, the short-to-ground situation started wreaking havoc in the electrical system. The following photo shows the areas where the insulation was worn all the way through to the internal wire:
Sometimes there was static over the comm radio, sometimes the TCAS and intercom would cycle power off and back on, and sometimes the landing light circuit breaker switch would flip off.
I repaired the wiring and secured it really well with ty-wraps and silicone to prevent further chafing. Now Brad will be able to use his landing light any time he wants and be confident it will perform normally.
Vibration from piston engines can create some bad situations! It’s always a good idea to take an extra minute or two to look around the engine compartment whenever you’re in there, like at the oil change, or some other maintenance event, like cleaning spark plugs.
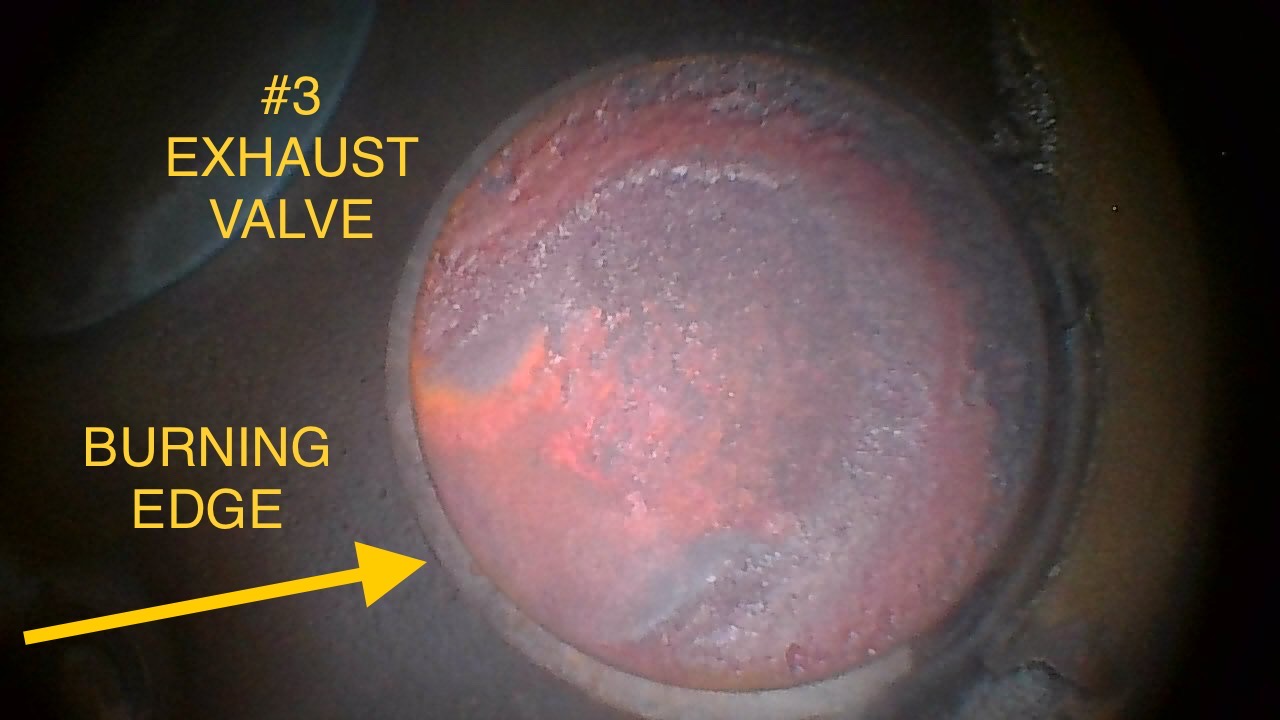
Another interesting squawk on this same Bonanza was a burning exhaust valve and corresponding low compression. The borescope revealed the classic appearance when the valve is not sealing well against the valve seat. Take a look:
I had lapped this valve at the last annual inspection and installed a new rotocoil to help ensure it would rotate properly, so when it still showed an appearance of a burning valve a year later, I figured we would likely need to remove the cylinder and send it for repair.
However, the Bonanza owner uses Savvy Aviation to manage his maintenance on the airplane, and the borescoping experts at Savvy thought it would be worth lapping the valve again to see if it could be saved.
I was happy to give it a second try. I lapped the valve heavily this time and finally, I was satisfied. I installed a new rotocoil again, and after running the engine, I rechecked the compression, and was super happy to see that it was 74/80!
I feel 90% confident that when the next annual inspection rolls around, this valve will have returned to a normal appearance. I’ll be curious to see how it turns out.
All in all, it was a good annual inspection, and Brad should be good to go for another year of flying!
The post “227 – Electrical Chaos When the Landing Light was Turned On” appeared first at AirplaneOwnerMaintenance.com
Recently, I received an email from Jim Janaitus, owner of a Cessna 182. He told me the story of lapping an exhaust valve on his engine because the valve showed signs of burning even though the compression was still in the high 60’s. Take a look at the appearance of the valve before lapping:
The area from about 12:00 to about 3:00 is the bad area, indicating the valve is not seating well in that area.
Jim lapped the valve and installed a new rotator. I was super happy when he said, “It went better than I imagined.”
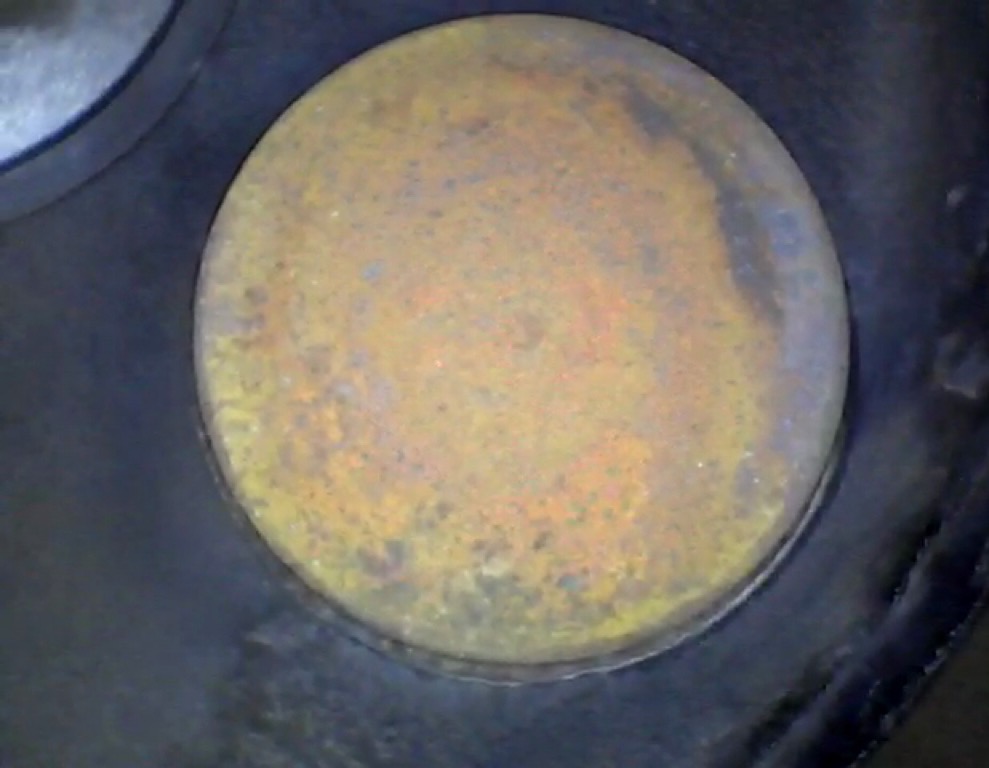
Here’s a follow up photo of the same valve about 12 flight hours later:
Isn’t the improvement remarkable?!
It’s not perfect, but it’s MUCH BETTER than before, and Jim has an excellent plan to monitor the condition of this valve every 20 hours or so.
Well done Jim!
Be sure to listen to the audio for this week’s podcast to hear this story, along with some other weird electrical issues I’ve been sorting out on a Bonanza and on a Cessna 210.
Have a great week!
The post “224 – Jim’s Exhaust Valve Rescue on his Cessna 182 Engine” appeared first at AirplaneOwnerMaintenance.com
I inspected another A36 Bonanza recently, and one of the cylinder compressions was too low… lower than the minimum prescribed by Continental using the master orifice tool.
I had two options:
Option One: Remove the cylinder for repair or replacement.
Option Two: Make the exhaust valve seal better and improve the compression result in hopes of saving the cylinder from premature amputation.
I chose Option Two.
It was at least worth a try…
… and the result was stunning!
After lapping the valve in place and installing a new rotocoil, I ran the engine again and rechecked the compression.
It was 75/80!
The lowest cylinder on the engine was now the highest cylinder.
I also lapped the exhaust valve in cylinder #2, and that one improved from 49/80 to 63/80.
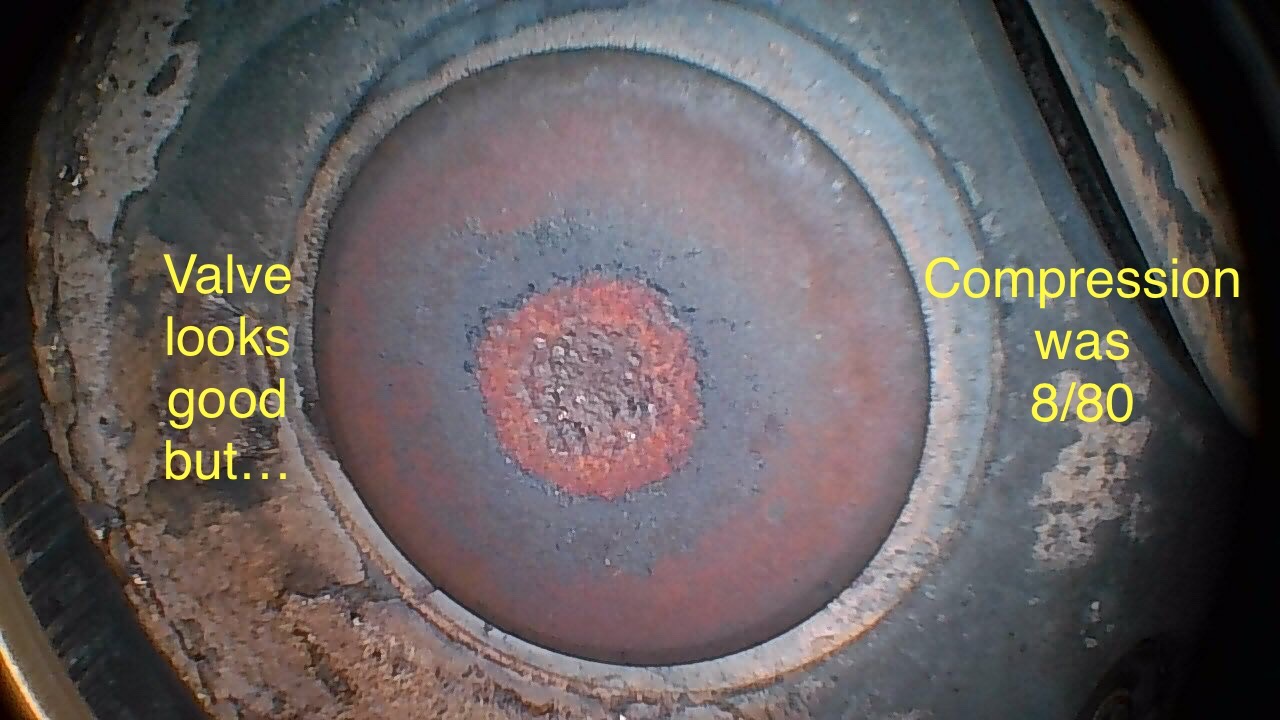
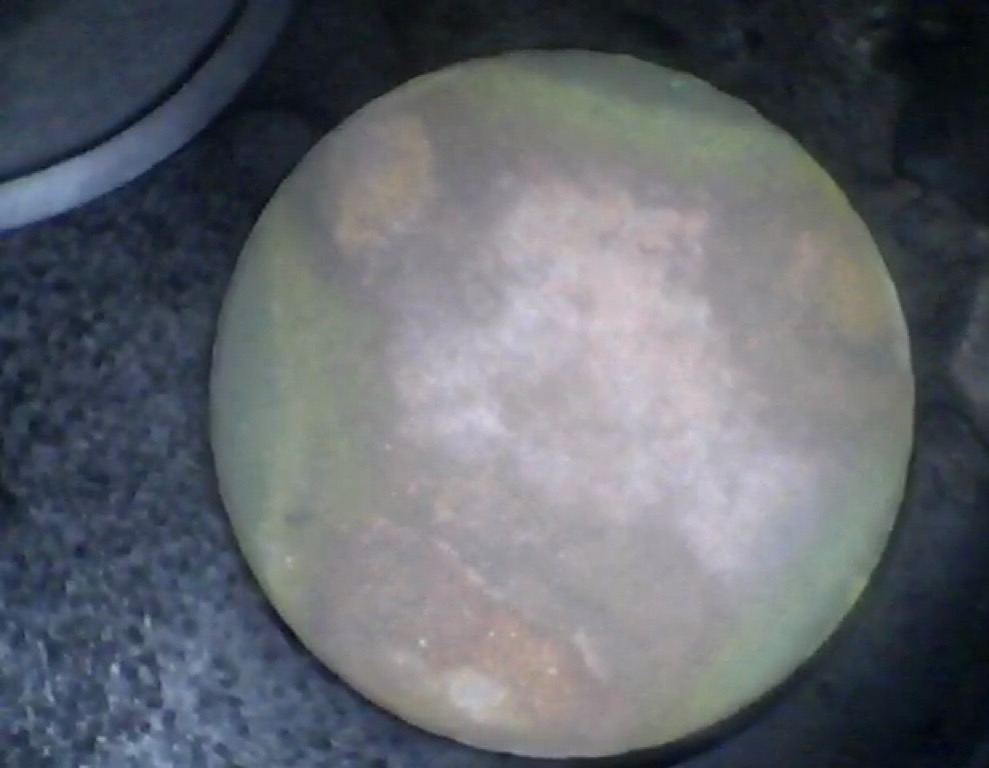
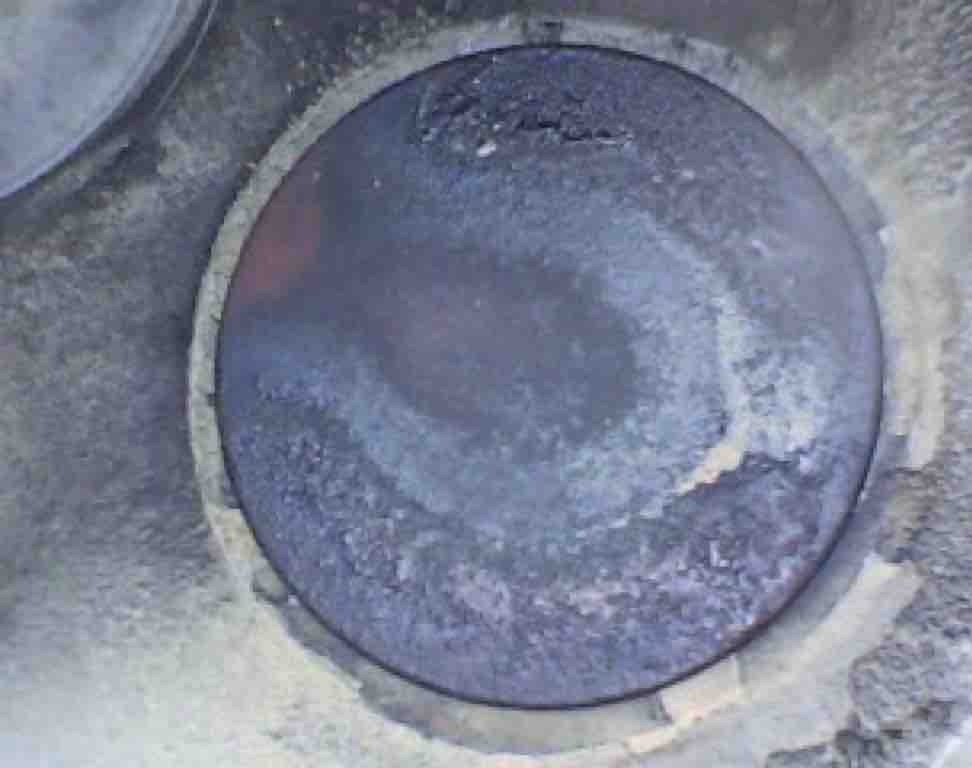
This is a good looking exhaust valve with a nice concentric appearance. However, the compression was very low at 8/80.
I lapped the valve, hoping it would improve the compression test result… it only came up to 10/80, and that was after running the engine again and getting it nice and hot.
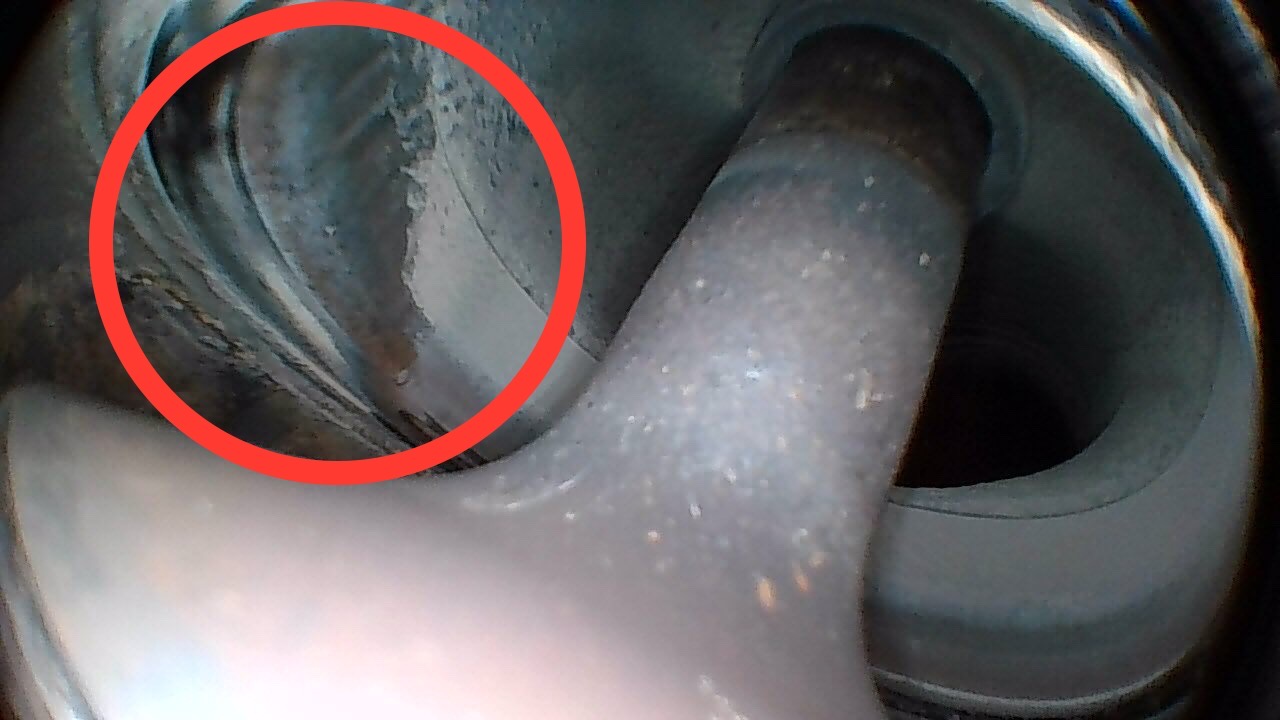
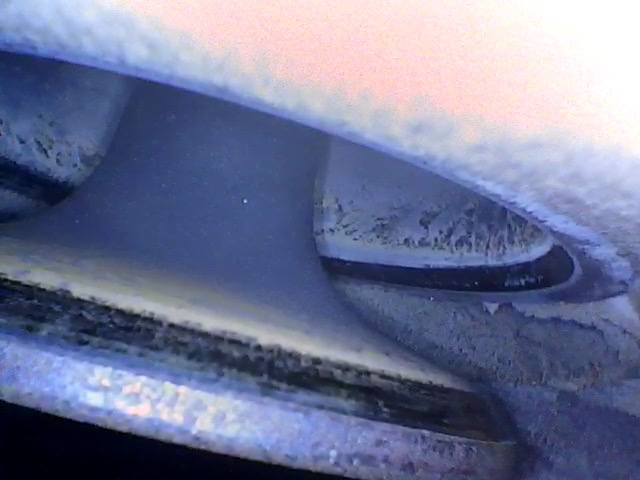
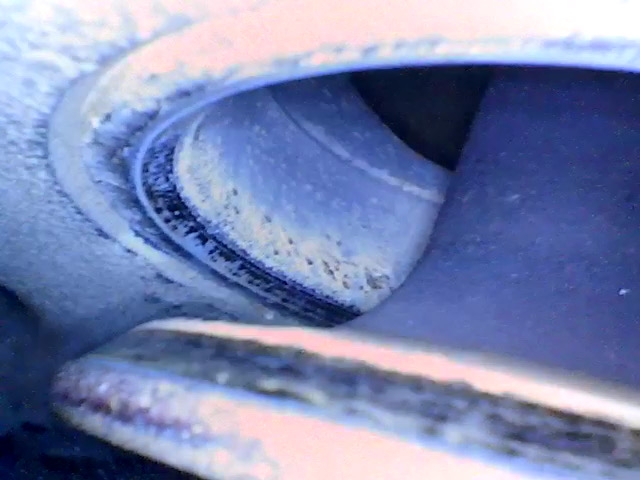
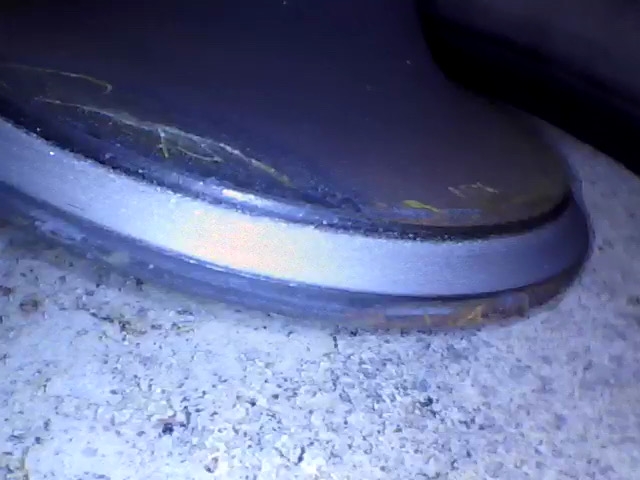
Although the valve face showed a healthy appearance, the seating area was telling a different story. Check out the following borescope photo of the seating area showing a possible leaking area:
It appeared there was abnormal wear on the valve seat, and the valve was not able to seal well, causing an unacceptably low compression result.
Listen to the audio for more details on this one.
I asked the question, “Borescope or compression tester… which one is better?”
Let me know what you think after listening. I’m curious to hear your thoughts.
Just click the button over to the right and record a brief audio message for me.
Thanks!
We ended up sending cylinder #5 out for repair, and then reinstalling it.
We did a test flight today, and everything went very well… ready to go for another year!
Here are some links to information on cylinder / engine break-in procedures:
This was what happened recently in a Piper Seneca… and in this episode, we discuss why the alternator quit… it was something I totally was not expecting.
After verifying the field connections (power and ground) were good, and the brushes were nearly perfect, I removed the alternator.
And here is what I found… watch this video:
It was two things, really. First, the nut holding the drive coupling onto the alternator shaft was loose. And second, the drive gear was turning independently of the alternator shaft… not good! The drive coupling is like a clutch that is designed to slip at a preset high torque value in case the alternator seizes.
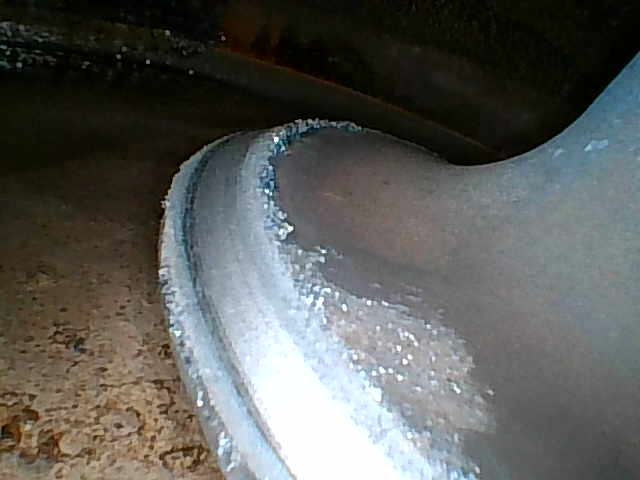
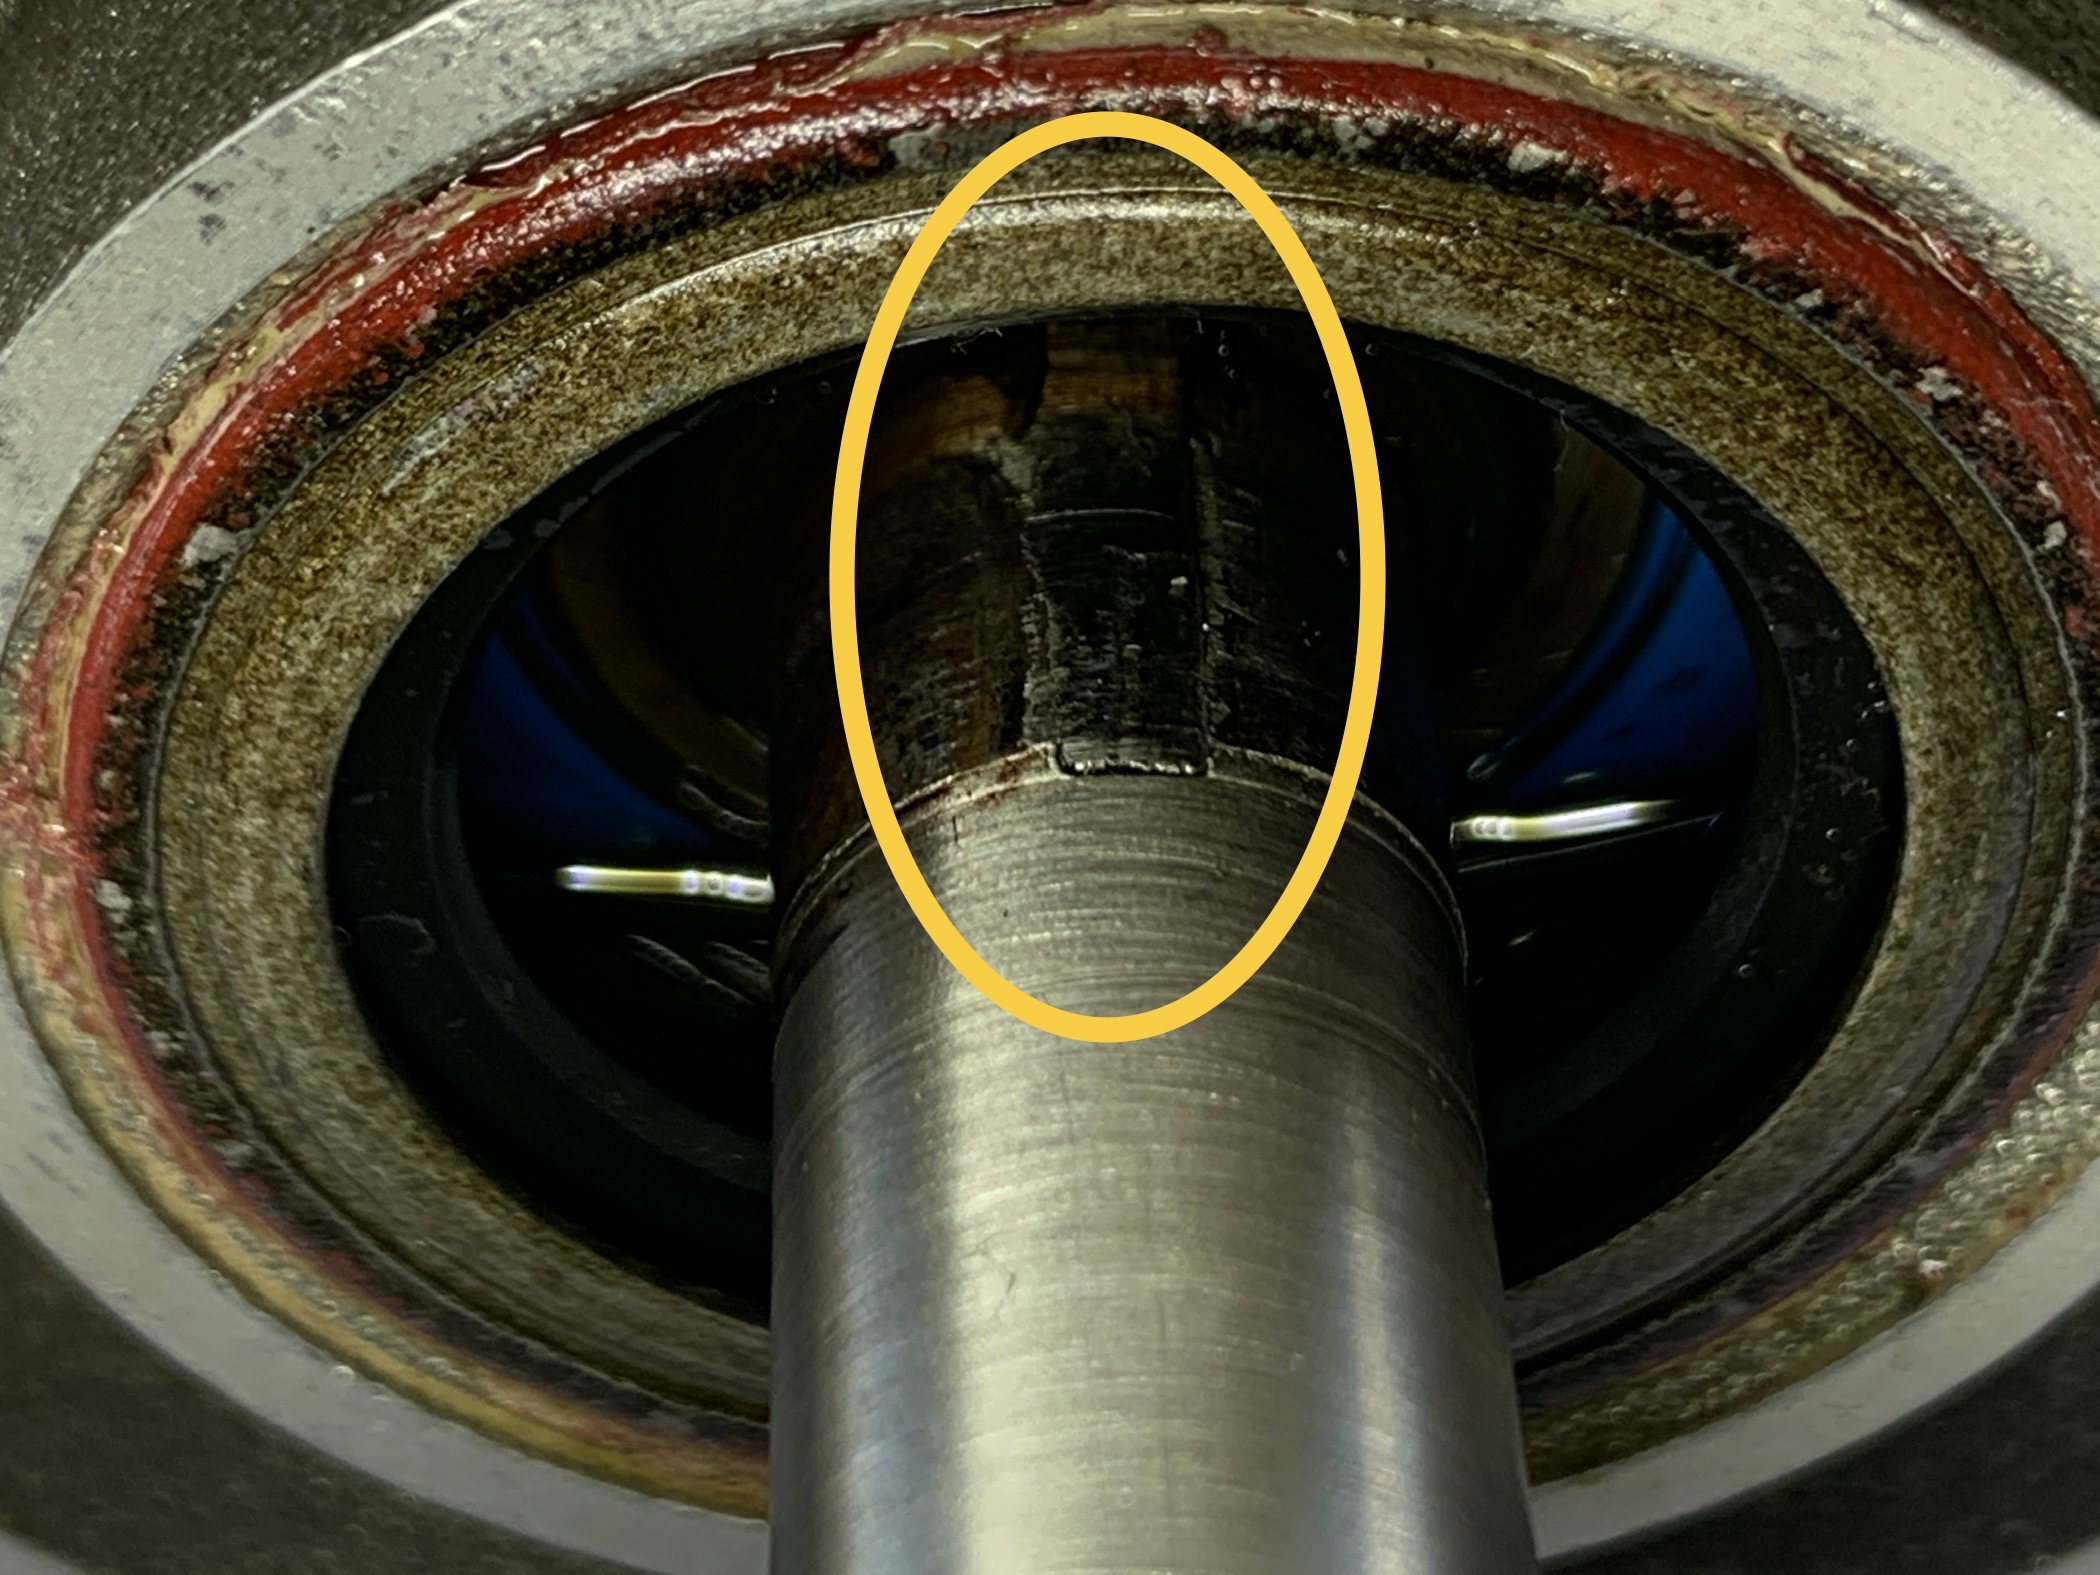
I had to look closely to really see what had happened… and I discovered the woodruff key that holds the drive coupling securely to the alternator shaft, had completely sheared off, and the remaining portion of the woodruff key was barely visible in the alternator shaft after I removed the drive coupling… check it out:
And, after the woodruff key sheared off, the drive coupling and gear kept turning while the alternator was not turning, and it wore the alternator shaft right down to the shiny surface you see here.
In case you’re not familiar with a woodruff key, here’s what they look like new, and you can buy them at Aircraft Spruce and other places:
The rounded part goes down into a slot in the alternator drive shaft, and the straight part sticks out of the shaft and engages with the drive coupling as you slide the drive coupling down onto the alternator shaft.
Continental has very specific instructions for installing the drive coupling onto the alternator, along with a specific torque value, and very specific instructions for installing the cotter pin.
In this case, we ordered an overhauled alternator (because the shaft was worn and the remaining woodruff key was stuck in the worn shaft,) an overhauled drive coupling (because the slot for the woodruff key was worn,) and a new special nut for the drive coupling (because the old one was worn due to spinning against the gear/drive coupling.)
So, why did this happen? I’m not sure, but I’m guessing the nut was not torqued properly way back when it was installed at engine overhaul about 400 hours ago.
And my next question is, “What about the left engine alternator?” And did the same person install that one? Perhaps we should remove and inspect that one as well.
Here’s another question I’ve been pondering that relates to the title of this episode: “Why did the alternator fail when he put the gear up?”
And here’s my guess: The drive coupling and woodruff key had been wearing over a long period of time, and was barely hanging on, and finally when it was very weak, at the moment the landing gear pump was activated, it caused a momentary surge of amperage draw, just enough to put an increased load on the alternator, and the small bit of remaining woodruff key sheared off completely and the drive gear was free-wheeling at that point, with the alternator shaft remaining still, making it impossible to produce any more electrical power output.
That’s my theory.
And you may wonder, how did the whole thing turn out?
While I would have liked to finish the repair, I was not able to be in the shop the next day, so another A&P installed everything, and the owner took off for a big trip to the South the next day.
If the alternator had to fail, it happened at the perfect time. It was just after a good long 1 hour plus flight to break in a freshly installed repaired cylinder on the left engine, but before the owner blasted off for a long trip in the airplane… amazing.
And that’s another story we covered in this episode… the left engine #3 cylinder had to be changed due to a burning exhaust valve. Check it out:
The compression in this cylinder was 11/80, and then we found the burning exhaust valve with the borescope. This photo was taken after removing the cylinder.
If this valve had been found earlier, perhaps it could have been saved by lapping and installing a new rotocoil, but since it was too far gone with a green edge due to severe burning and wear on the seating area, it had to be removed.
One more interesting thing about this whole scenario is the owner has had some concerning oil analysis reports from both engines recently, and he’s been trying to get to the bottom of it. Hopefully, after repairing the left engine cylinder #3, including a new exhaust valve and valve guide, and no longer having a woodruff key coming apart in the right engine, the oil analysis reports will be much better moving forward… we’ll see.
Here are a few other items we talked about in this episode:
The turbo Cessna 182 RG that’s ready to fly again after a big annual inspection and cam / lifter change in the engine.
A prebuy on a really nice Mooney M20C.
My good friend Dave Ovad and some fuel system work and landing gear work we did on his nice A36 Bonanza. And just to document this, here’s the P/N for the little thin special washers that go on either side of the middle rod end for the nose gear system, at the idler arm connection at the aft end of the nose gear well: 100951CR016YF If you have a Bonanza and you’re going to replace the 3 nose gear rod ends, go ahead and order a couple of these inexpensive washers, because sometimes, they are missing!
Another turbo-normalized Bonanza I’m currently doing an annual inspection on.
Well that’s all for this time… thanks for joining me!
The post “197 – When He Put the Gear Up the Right Alternator Quit” appeared first at AirplaneOwnerMaintenance.com
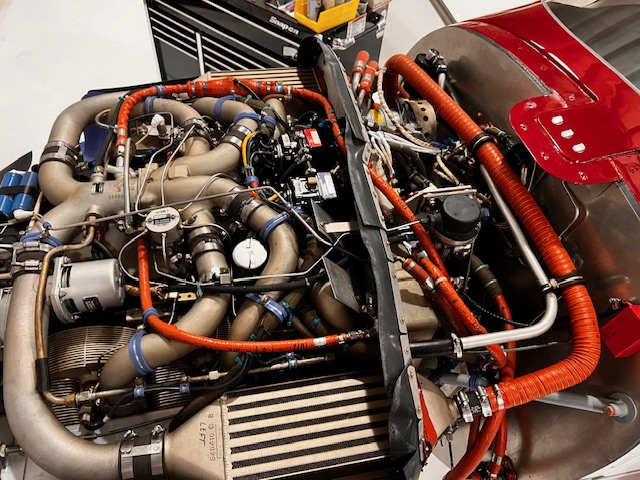
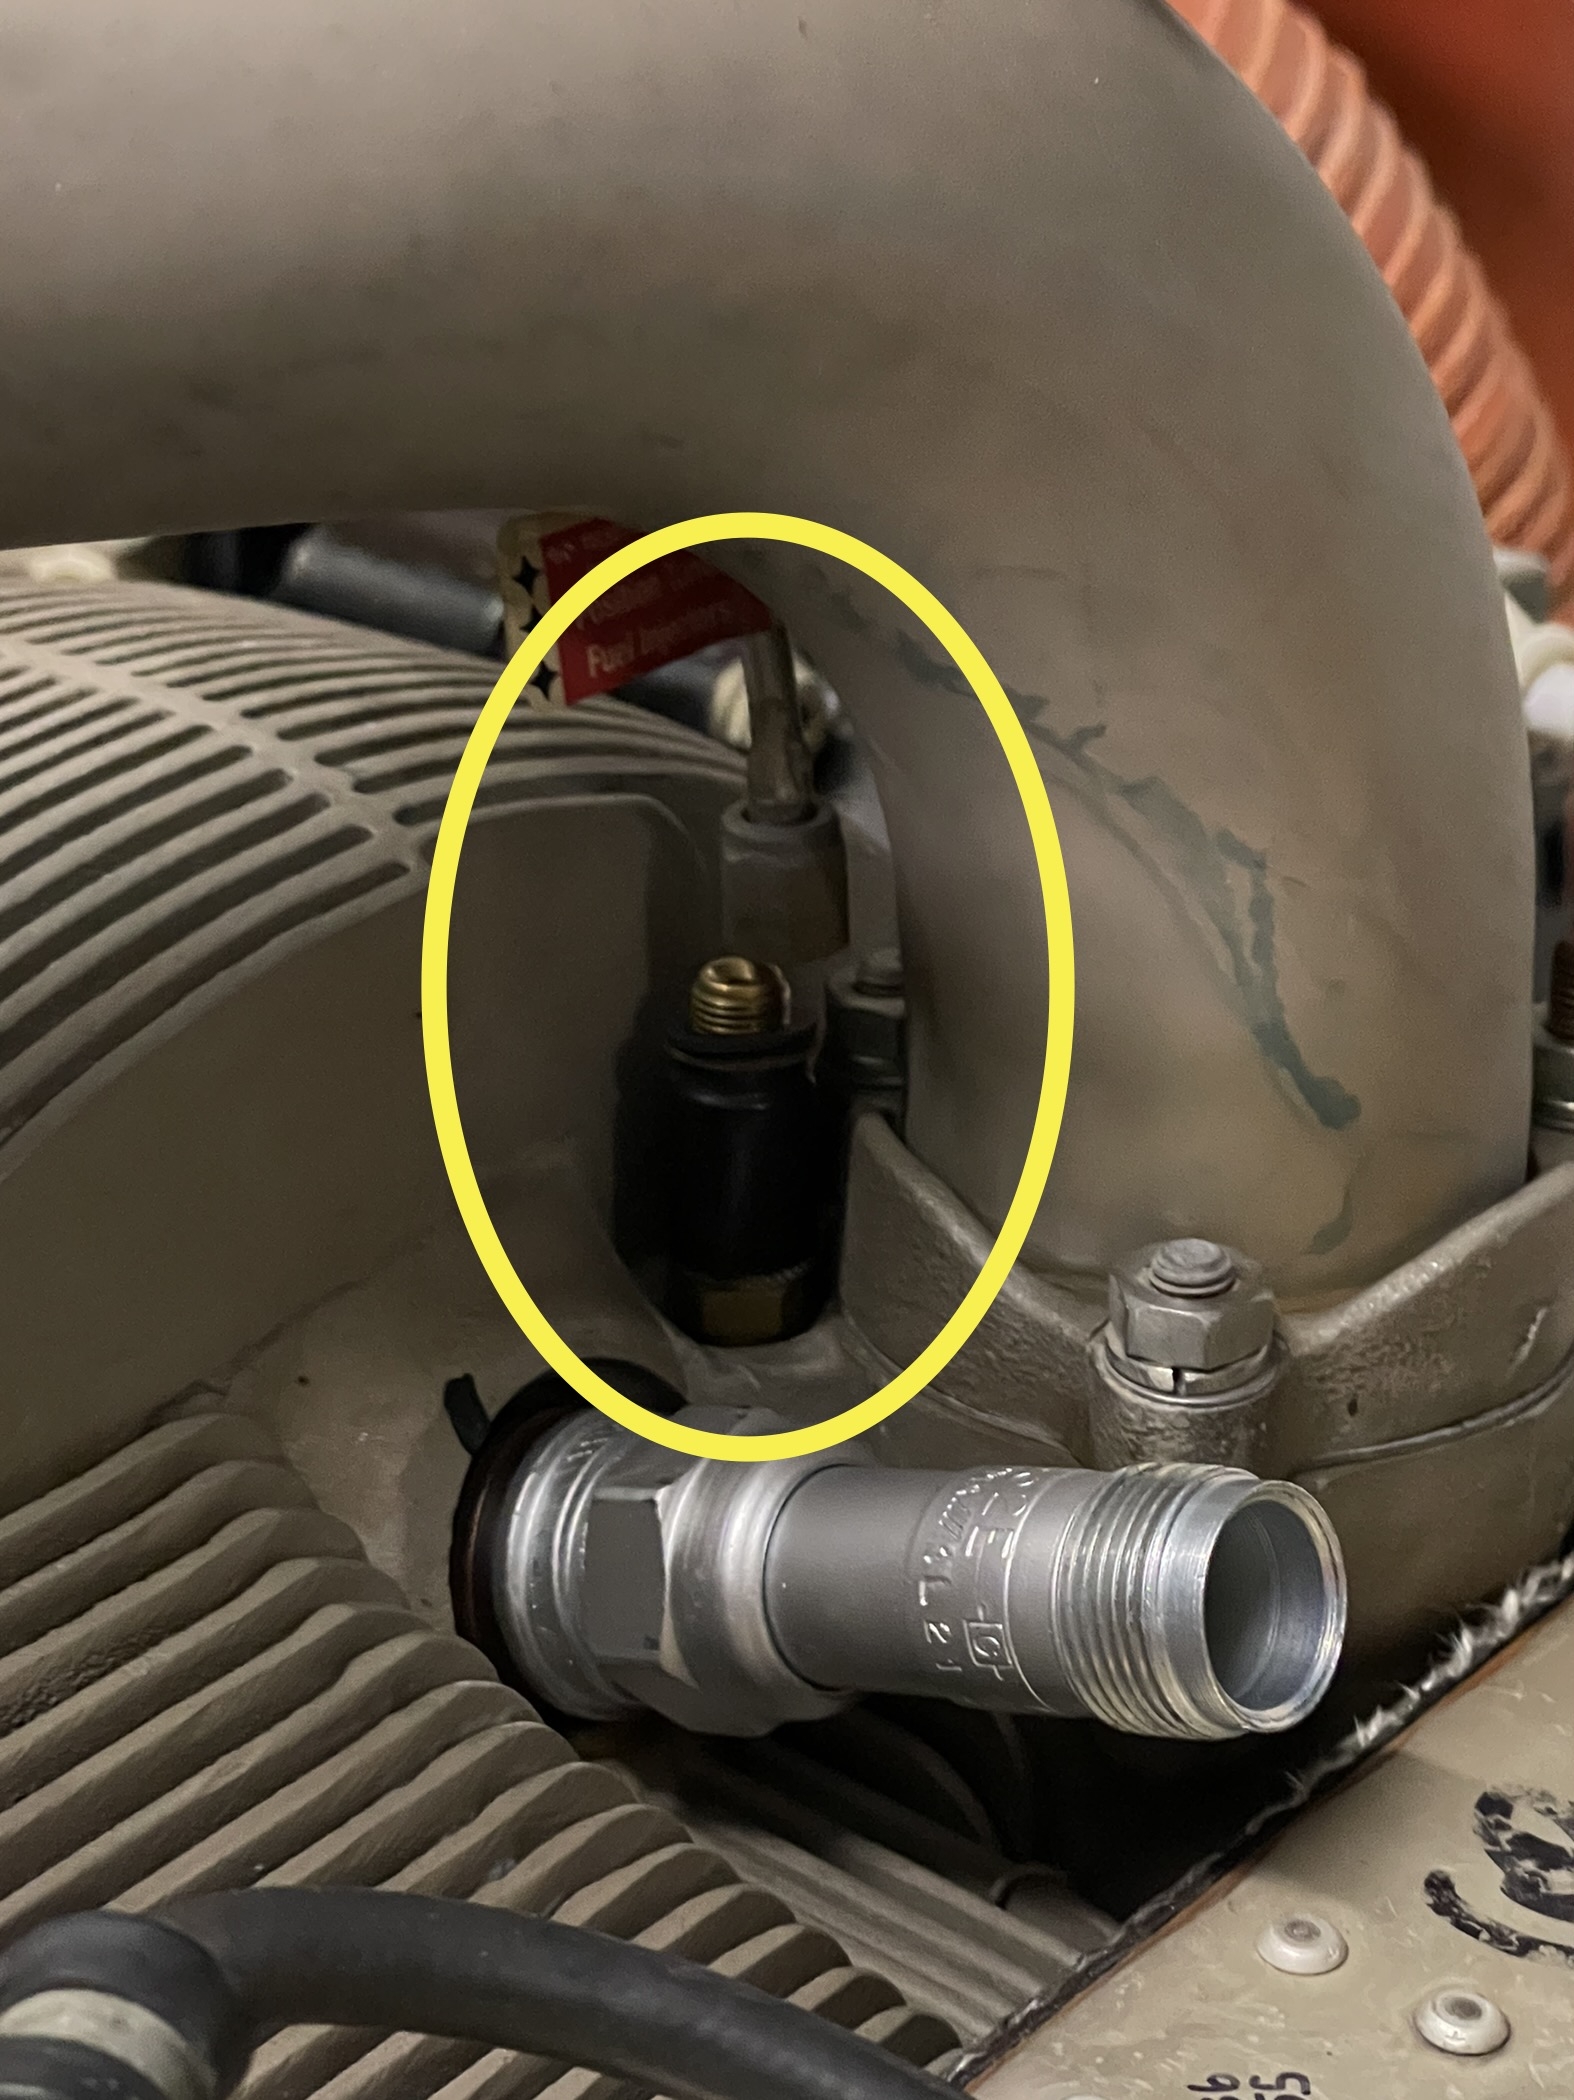
This fuel injector line must have only been attached finger tight when the fuel injectors were reinstalled after cleaning. The engine ran fine at first, but all of a sudden during one engine run, the #5 EGT took a nose dive, and the #5 CHT immediately started dropping off as well.
The above photo was taken AFTER we discovered what the problem was. I’m guessing the nut was not tight, and it worked itself loose, causing the cylinder to immediately cease firing, since the fuel was no longer being sprayed into the injector nozzle.
Joe hired me to help troubleshoot the situation. We got on a Face Time call, and I asked him to show me the #5 induction pipe and coupling area, and all of a sudden, he noticed the #5 fuel injector line was not attached…
I was sure this was the culprit, and we were both thrilled to have solved the mystery. In our minds, it would be a simple fix, and Joe would be back in the air again.
Not so fast… since the cowling was off, Joe decided to inspect all the cylinders with his borescope. And that’s when he noticed a bigger problem. Joe noticed the exhaust valve in cylinder #2 did not look good, and he sent me some photos.
That is a really bad looking exhaust valve, with three green edges… one at 1 o’clock, one at 4 o’clock and one at 9 o’clock. The edge at 1 o’clock even looks like it has a scalloped edge, a sure sign it is severely worn.
This valve is too far gone, and is not a candidate for lapping in place. The cylinder needs to come off.
Wow, maybe the issue Joe had with the #5 cylinder was a blessing in disguise, since it prompted him to borescope all his cylinders, and that’s when he found the burning exhaust valve in cylinder #2.
Well done Joe! I’m glad you found these issues before they became an inflight emergency.
A borescope is a necessary tool in maintaining piston engine cylinders, and they are surprisingly affordable these days. I recommend the Vividia VA-400 from Oasis Scientific. It’s the one I use. If you’re considering a borescope you may be asking, “Which borescope should I buy?” This is a great question, and I did a podcast episode about it a good while back. It’s episode 115, and you can find it here: “115 – Which Borescope Should I Buy?”
If you decide to buy a Vividia VA-400 (or another model by Oasis Scientific,) you can check it out here:
And remember to use the code “Dean” for a 10 % discount. (This code only works when purchasing from Oasis Scientific, and I appreciate you doing this, because it helps me out as well.)
Ways you can work with me:
Hire me to review your borescope photos.
Hire me to do maintenance records research.
Hire me for one-on-one consulting.
The details and pricing for these services are on the store page of my website:
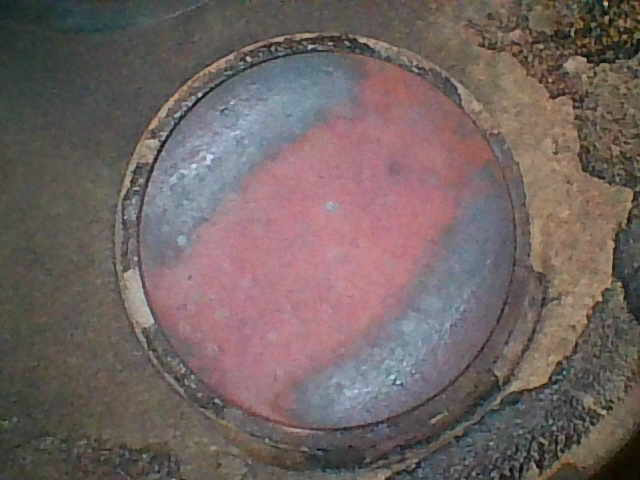
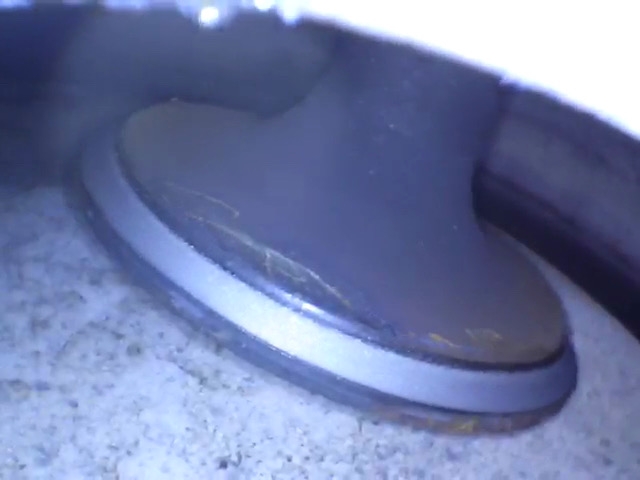
I received an email recently from Spence, the owner of an S35 Bonanza with a Turbo-Normalized IO-520 engine. He included a picture of his #2 cylinder exhaust valve. Here’s what it looked like:
At first glance, my reaction was something like, “Oooh, that’s ugly!”
The most concerning area is the spot at the 10 o’clock position. There’s also a little concerning area at the 2:30 position as well, but not as much as the 10 o’clock position. The normal deposits seen on the top and bottom edges of the valve have been burned away over at the 10 o’clock position. The small red spot is concerning, but not as concerning as if it was green. As it says in the excellent exhaust valve poster “Anatomy of a Valve Failure,” produced by AOPA, “Green means stop!” This is because the color green has been seen on valve edges that are imminently in danger of a piece breaking off.
For sure, Spence’s borescope photo is a classic visual presentation of a burning exhaust valve. Perhaps you’re wondering, “What does “burning” mean?” And that’s a great question. It means there’s an area that is not sealing well between the edge of the valve and the valve seat when the valve is closed. This condition allows very hot exhaust gases to rush through a small gap between the valve and seat at just the wrong time when those gases are the hottest, and over time if left uncorrected, the edge of the valve can suffer extreme heat damage and finally be in danger of a piece of the valve breaking off.
Not something you want to risk while you’re flying along in your Turbo-Normalized Bonanza! (Or any airplane for that matter.) But an airplane with a turbocharger is especially vulnerable because even a small piece of an exhaust valve would be enough to completely trash the turbocharger.
The next question might be, “How would you know if an exhaust valve was burning?” This is also a great question. You might see a drop in compression, but the best way by far to find a burning exhaust valve is with a borescope. With some training in what to look for, a burning exhaust valve is very noticeable, as in the photo above.
Spence did a great thing when he found this burning valve. Finding it was one thing, but deciding what to do about it was the next big question. In his email, Spence asked, “Do you believe this is a candidate for lapping in place and is it something you would be able to do for me?”
Spence was very interested in a less-invasive way to remedy his burning exhaust valve, especially since he has had other cylinders fail this way over the years, and this particular cylinder had only 368 hours on it (he actually paid a reputable engine shop to take the new Superior cylinder, check the exhaust valve tolerances, and perform a 3-angle cut before installing the cylinder.) He was understandably weary of changing cylinders.
I agreed to give the lapping procedure a try, with a couple conditions. One, we would not want the exhaust valve guide to be significantly worn. And two, the edge of the valve and valve seat must be in reasonably good condition.
On the agreed upon morning, Spence showed up at Classic Aviation at KSHD, and we got to work. We got things opened up and before removing the valve springs, we did a cold compression check and could not get more than 30/80 psi, with significant leakage past the exhaust valve. A healthy cylinder should be a lot more than 30/80, even with a cold compression check.
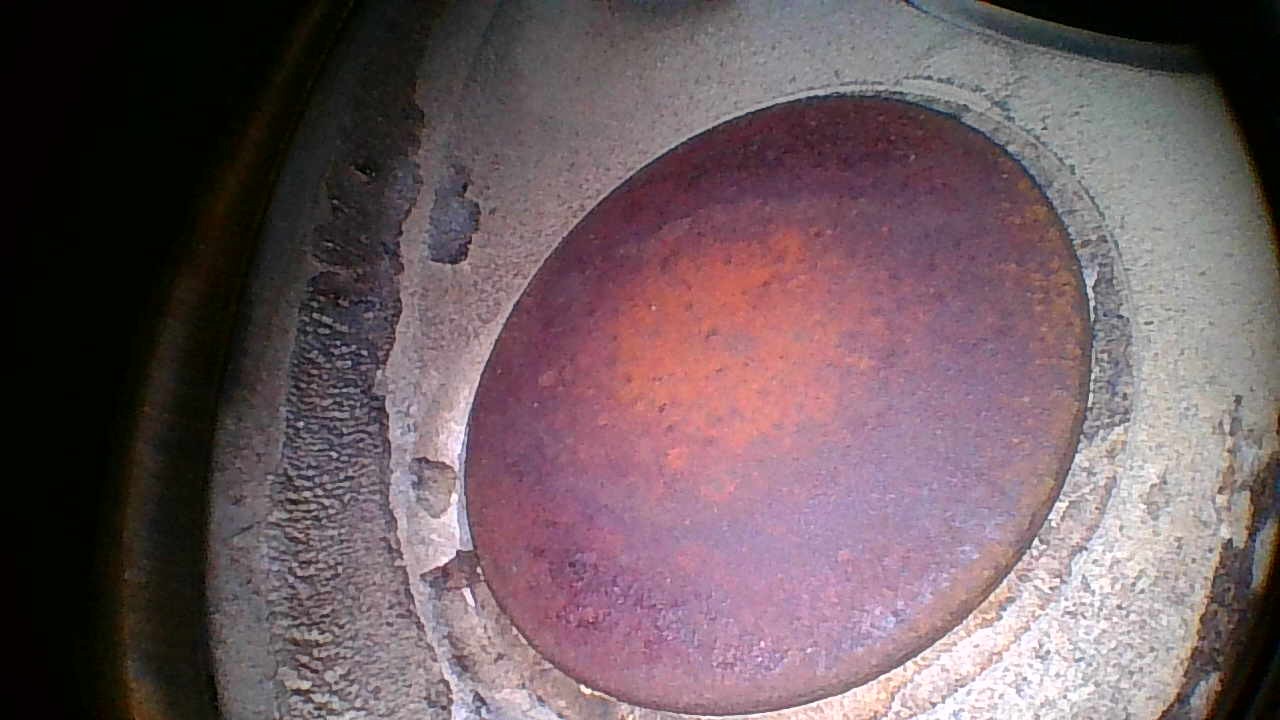
We got some borescope photos of the valve edge and seat, and aside from the normal spotty appearance, things looked quite good.
After removing the valve springs, our second condition was also met, in that the valve guide did not have a substantial amount of wear. I checked this by wiggling the valve stem up and down and side to side, in various positions.
Now it was time to perform the lapping procedure. “Lapping an exhaust valve” involves removing the rocker cover, exhaust rocker arm, and valve springs. This allows you to carefully push the valve into the cylinder far enough to see the edge down through the top spark plug hole. In this position, you can carefully apply valve grinding compound on the seating area of the valve, rotating the valve as needed to lightly coat the full 360 degrees of seating area. At this point, pull the valve back against the seat and rotate it back and forth using whatever method you decide, in order to restore a good smooth seal between the valve and the seat. I use a wood dowel rod chucked in a cordless drill, with a piece of thick vinyl tubing clamped between the dowel rod and the valve stem, which acts as a shock absorber and works very well. It may take several rounds of applying the compound and lapping the valve, and rinsing it off with solvent in between times, letting it run out the bottom spark plug hole onto a shop towel.
It’s important to rinse the valve edge off each time in order to examine the progress. My biggest regret from this particular lapping job, is that I did not take incremental photos along the way. It was by far the best result I’ve ever seen. After the first round of lapping, there was a nice smooth even band most of the way around the valve, with a distinct darker uneven area for about 30 or 40 degrees of rotation… corresponding to the burning side of the valve. After the second round, the bad area was noticeably smaller, and after the third round, even smaller still. We did a fourth round of applying the coarse grit compound for good measure (the bad area was pretty much completely gone at this point,) and finished it off with one round of lapping with fine grit compound.
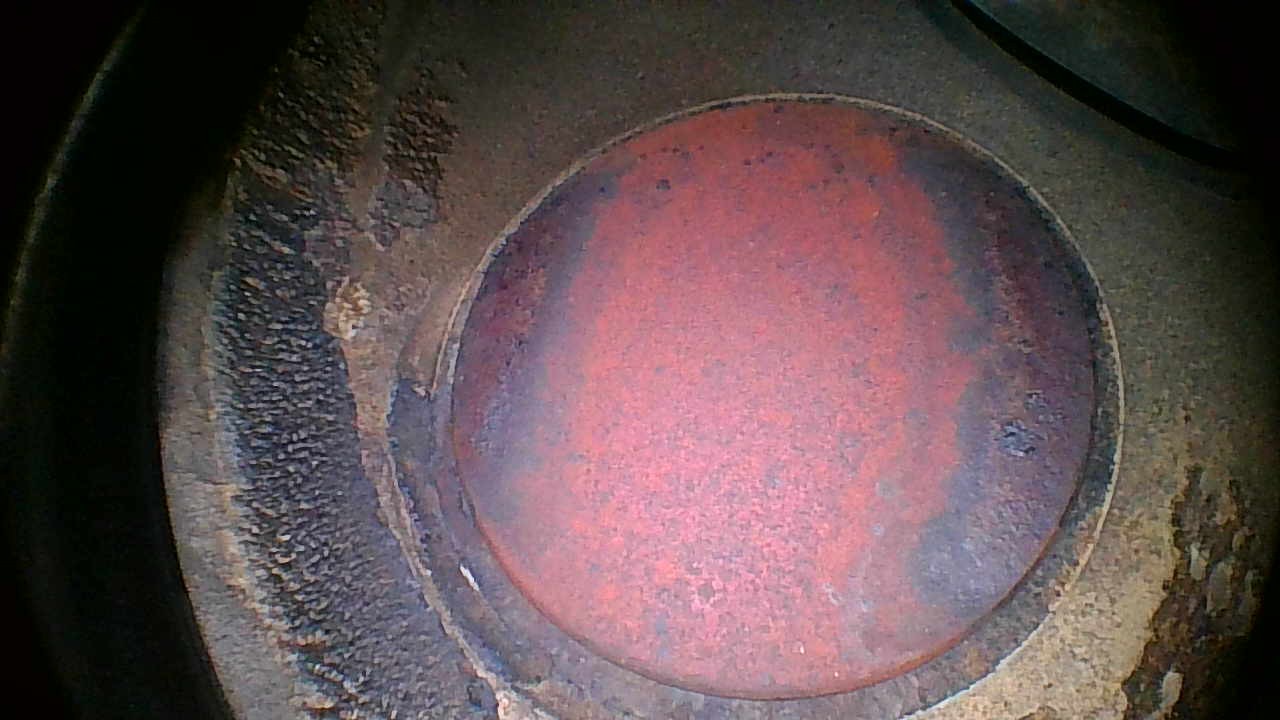
The result was nothing short of spectacular:
This is about as perfect of an exhaust valve edge as you could hope for! Needless to say we were thrilled.
We washed the cylinder out with some Av Gas in a squeeze bottle, blew it out with compressed air, and repeated that process a second time. Then we sprayed some LPS-2 in the cylinder for some lubrication so the cylinder walls would not be dry for starting.
We put everything back together and installed a new rotocoil assembly P/N SA629117-1 on the exhaust valve, and a new rocker cover gasket.
Spence did a short ground run so we could check for leaks, and then he did a test flight to check engine operation and get it hot so we could do another compression test.
While Spence was out flying, I cut the old rotocoil apart, and was SHOCKED at what I found: (I had heard of this happening, but had never seen it myself.)
The spring inside the rotocoil should be one long continuous spring. This one was in many pieces, clearly making this part non-functional. The rotocoil serves a very important purpose. It causes a small and incremental rotation of the valve every time the rocker arm presses against the valve stem, and helps to maintain a good seal between the valve and valve seat. When an exhaust valve stops rotating, there is a much greater possibility for a hot spot to develop. It’s important to stop a hot spot as soon as possible. If not, cylinder removal may be inevitable.
We are very hopeful this cylinder has been rescued from premature removal. Not only did the lapping process restore an excellent seating area on the valve, but the compression came up dramatically as well… after the test flight, we got an amazing 70/80!
Thank you Spence, for the opportunity to work with you on your cylinder! Of all the valve lapping projects I’ve done, this one is a favorite for sure.
The result was absolutely amazing, and I have a few takeaways as I think about the whole valve lapping process:
Even low-time cylinders can develop exhaust valve problems.
ALWAYS do a borescope inspection along with every compression test (preferably with every oil change.)
Take action immediately when you notice a burning exhaust valve (lapping is often a good solution if caught early.)
ALWAYS install a new rotocoil assembly when lapping a Continental exhaust valve, to help ensure the valve will rotate properly and consistently.
If you do remove a cylinder for repair, be sure a new rotocoil is installed as part of the repair process (sometimes they are reused unless you specify otherwise.)
If you’d like to see or hear more info on this topic, be sure to check out episode 109 of the Airplane Owner Maintenance Podcast. It’s called “Exhaust Valve Problems – Could Lapping Be A Good Option?” Apparently airplane owners want to learn about this topic… episode 109 is the 4th highest downloaded episode of all time, do date.


Recent Comments